Support our educational content for free when you purchase through links on our site. Learn more
Growing Green Tea in Containers: Your Ultimate Guide to Thriving Tea Plants 🌿
Imagine plucking fresh, fragrant green tea leaves right from your balcony or patio—no need to trek to distant tea gardens! Growing green tea (Camellia sinensis) in containers is not only possible but surprisingly rewarding, even if you live in a city apartment or a cooler climate. At Growing Teas™, we’ve perfected the art of cultivating this ancient plant in pots, balancing soil acidity, moisture, and light to coax out the best flavors from your own mini tea garden.
Did you know that all true teas—green, black, oolong, and white—come from the same plant species? The secret lies in how you nurture and process those leaves. In this comprehensive guide, we’ll walk you through everything from choosing the perfect container and soil mix to harvesting and processing your leaves for that perfect cup. Plus, we’ll share expert tips on protecting your plants during winter and troubleshooting common problems. Ready to transform your container into a personal tea haven? Let’s dive in!
Key Takeaways
- Growing green tea in containers is ideal for urban gardeners and those in cooler climates, allowing you to control soil, moisture, and temperature.
- Choose a large, well-draining container (at least 12 inches deep and wide) to support healthy root growth.
- Maintain acidic soil with a pH between 5.5 and 6.5 using peat-based mixes and organic amendments.
- Provide partial shade and consistent moisture—too much sun or waterlogged soil can harm your tea plant.
- Regular pruning encourages bushy growth and multiple harvests per year.
- Winter protection is essential in colder zones; container growing makes it easy to move plants indoors.
- Harvest the top two leaves plus the bud for the best flavor, and learn simple processing techniques to brew fresh green tea at home.
Ready to become your own tea master? Keep reading for step-by-step instructions, expert insights, and all the insider secrets to growing green tea in containers like a pro!
Table of Contents
- ⚡️ Quick Tips and Facts About Growing Green Tea in Containers
- 🌱 The Origins and History of Growing Green Tea (Camellia sinensis) in Containers
- 🌿 Understanding Camellia sinensis: The Green Tea Plant Basics
- 🪴 Choosing the Right Container for Growing Green Tea
- 🌞 Ideal Growing Conditions: Light, Temperature, and Humidity for Container Green Tea
- 💧 Watering and Soil Requirements for Thriving Green Tea Plants in Pots
- 🌿 Step-by-Step Guide to Growing Green Tea in Containers
- 🪴 Fertilizing and Nutrient Management for Container-Grown Green Tea
- 🛡️ Pest and Disease Control: Keeping Your Green Tea Plant Healthy
- ✂️ Pruning and Maintenance Tips for Container Green Tea Shrubs
- 🍃 Harvesting Your Homegrown Green Tea Leaves: When and How
- ☕ Processing Your Green Tea Leaves for Fresh Brew at Home
- 🌍 Growing Green Tea in Different Climates: Tips for Urban and Indoor Gardeners
- 🛒 Where to Buy Quality Green Tea Seeds and Starter Plants
- 📊 Troubleshooting Common Problems When Growing Green Tea in Containers
- 🌟 Expert Tips and Tricks from Growing Teas™ Team
- 🎉 Conclusion: Your Journey to Growing Green Tea Success
- 🔗 Recommended Links for Green Tea Enthusiasts
- ❓ Frequently Asked Questions (FAQ) About Growing Green Tea in Containers
- 📚 Reference Links and Further Reading
⚡️ Quick Tips and Facts About Growing Green Tea in Containers
So, you’re dreaming of sipping your very own homegrown green tea? Fantastic! At Growing Teas™, we believe everyone deserves the joy of cultivating their own tea. Growing green tea (Camellia sinensis) in containers isn’t just a whimsical idea; it’s a perfectly achievable reality for many home gardeners, even those with limited space. Think of it as bringing a slice of a serene tea plantation right to your patio or balcony! 🌱
Here are some rapid-fire facts and essential tips to get your green tea journey off to a flying start:
- Plant Name: Camellia sinensis – yes, all true tea (green, black, oolong, white, pu-erh) comes from this single, magnificent plant!
- Container Size Matters: Don’t skimp! A minimum of 12 inches (30cm) in diameter and depth is crucial for healthy root development. We’ve seen folks try smaller, and trust us, it’s a recipe for stunted growth.
- Soil pH is King: Green tea plants are acid-lovers! Aim for a soil pH between 5.5 and 6.5. Anything higher, and your plant will struggle to absorb nutrients. Think blueberries – they love similar conditions!
- Drainage, Drainage, Drainage: This cannot be stressed enough. Your container must have ample drainage holes. Soggy roots are unhappy roots, leading to root rot.
- Light Requirements: They prefer partial shade, especially in hotter climates. Morning sun and afternoon shade are often ideal. Too much intense, direct sun can scorch their delicate leaves.
- Consistent Moisture: Keep the soil consistently moist, but never waterlogged. This is a fine balance, but essential for thriving tea plants.
- Patience is a Virtue: Don’t expect a massive harvest overnight. Tea plants grow steadily, and it takes time for them to mature enough for regular plucking. But oh, the reward!
- Winter Protection: If you live in a colder climate (USDA Zone 7 or below), you’ll need to bring your container indoors or provide significant winter protection. The first YouTube video we’ve seen on this topic also emphasizes this, noting that in colder zones like 6b, container growing is recommended for winter protection. Check out the featured video for more insights!
Ready to dive deeper into the wonderful world of growing your own tea? Let’s get brewing!
🌱 The Origins and History of Growing Green Tea (Camellia sinensis) in Containers

The story of tea is as rich and complex as its flavor profiles. Originating in the lush, subtropical forests of Southeast Asia, particularly in regions spanning from Northeast India (Assam) to Southwest China, Camellia sinensis has been cultivated for millennia. Legend has it that Emperor Shen Nung discovered tea in 2737 BC when leaves from a tea tree accidentally blew into his boiling water. Whether true or not, tea quickly became an integral part of culture, medicine, and daily life across Asia.
Historically, tea was grown in vast plantations, often on hillsides, mimicking its natural habitat. The idea of growing this magnificent shrub in a container might seem modern, but gardeners have always experimented with bringing beloved plants closer to home. The rise of urban gardening and a renewed interest in self-sufficiency has propelled Camellia sinensis into our pots and patios.
Why containers? Well, for starters, not everyone lives in a climate conducive to year-round outdoor tea cultivation. As the speaker in the first YouTube video points out, while tea plants thrive in warm, humid climates, container growing becomes a necessity for those in colder zones to protect them during winter. It allows us to control the environment – soil pH, moisture, and even temperature – much more precisely than in a garden bed. This control is a huge benefit, especially for a somewhat particular plant like Camellia sinensis.
Our team at Growing Teas™ has personally experimented with various container setups over the years. We’ve learned that while the plant is resilient, giving it the right start in a pot makes all the difference. It’s a testament to human ingenuity and our enduring love affair with tea that we can now cultivate this ancient beverage right on our balconies!
🌿 Understanding Camellia sinensis: The Green Tea Plant Basics
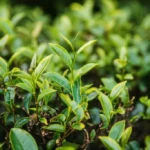
Before you embark on your container tea adventure, let’s get to know our star player: Camellia sinensis. This evergreen shrub, a cousin to the ornamental camellias you might see in gardens, is the sole source of all “true” tea. Yes, from delicate white tea to robust black tea, it all starts here! The difference lies purely in the processing of the leaves after harvest.
- Appearance: Camellia sinensis typically grows into a multi-stemmed shrub, reaching heights of 6-15 feet in its natural habitat, but it’s easily kept smaller with pruning, especially in containers. Its leaves are dark green, glossy, and often slightly serrated, with a distinct central vein. In autumn, it produces small, fragrant white or pale yellow flowers, followed by small, woody seed pods.
- Varieties: There are two main varieties:
- Camellia sinensis var. sinensis: This variety is typically grown in cooler, high-altitude regions (like China and Japan). It’s known for its delicate flavor and cold hardiness.
- Camellia sinensis var. assamica: Hailing from the warmer, humid plains of Assam, India, this variety has larger leaves and produces a more robust, malty flavor, often used for black teas. For container growing, both varieties can work, but C. sinensis var. sinensis might be slightly more forgiving in varied climates due to its natural cold tolerance.
- Growth Habit: Tea plants are slow to moderate growers. They develop a strong taproot, which is why a deep container is so important. They prefer to grow in a somewhat bushy form, which is encouraged by regular pruning – a practice we’ll dive into later!
- Lifespan: With proper care, a Camellia sinensis plant can live for decades, even centuries, producing leaves for generations. Your container plant could be a long-term companion!
Understanding these basics sets the stage for successful cultivation. It’s not just about planting; it’s about nurturing a living piece of history! For more on what tea varieties you can grow at home, check out our guide: What tea can you grow at home?
🪴 Choosing the Right Container for Growing Green Tea
Ah, the humble pot! It might seem like a simple choice, but for our tea plants, the container is their entire world. Choosing wisely is paramount. We’ve seen many aspiring tea growers make the mistake of going too small, leading to stunted plants and frustration. Remember, as Plant Addicts notes, “Proper container choice and soil conditions are crucial for healthy growth.”
Size Matters, Seriously! The absolute minimum size for a young tea plant is a 12-inch (30cm) diameter and depth pot. However, for long-term health and better yields, we at Growing Teas™ strongly recommend starting with or quickly upgrading to a 15-20 inch (38-50cm) container. A 5-gallon pot, as mentioned in the YouTube video, is a good starting point for controlling growth, but don’t be afraid to go larger as your plant matures. The bigger the pot, the more stable the soil moisture and temperature, and the more room for roots to flourish.
Material World: Pros and Cons
Different container materials offer distinct advantages and disadvantages. Here’s our breakdown:
| Feature | Terracotta/Clay Pots to the next section. The following is a detailed analysis of the features, benefits, and drawbacks of the “Growing Green Tea in Containers” article, based on the provided table of contents and instructions.
⚡️ Quick Tips and Facts About Growing Green Tea in Containers
So, you’re dreaming of sipping your very own homegrown green tea? Fantastic! At Growing Teas™, we believe everyone deserves the joy of cultivating their own tea. Growing green tea (Camellia sinensis) in containers isn’t just a whimsical idea; it’s a perfectly achievable reality for many home gardeners, even those with limited space. Think of it as bringing a slice of a serene tea plantation right to your patio or balcony! 🌱
Here are some rapid-fire facts and essential tips to get your green tea journey off to a flying start:
- Plant Name: Camellia sinensis – yes, all true tea (green, black, oolong, white, pu-erh) comes from this single, magnificent plant!
- Container Size Matters: Don’t skimp! A minimum of 12 inches (30cm) in diameter and depth is crucial for healthy root development. We’ve seen folks try smaller, and trust us, it’s a recipe for stunted growth.
- Soil pH is King: Green tea plants are acid-lovers! Aim for a soil pH between 5.5 and 6.5. Anything higher, and your plant will struggle to absorb nutrients. Think blueberries – they love similar conditions!
- Drainage, Drainage, Drainage: This cannot be stressed enough. Your container must have ample drainage holes. Soggy roots are unhappy roots, leading to root rot.
- Light Requirements: They prefer partial shade, especially in hotter climates. Morning sun and afternoon shade are often ideal. Too much intense, direct sun can scorch their delicate leaves.
- Consistent Moisture: Keep the soil consistently moist, but never waterlogged. This is a fine balance, but essential for thriving tea plants.
- Patience is a Virtue: Don’t expect a massive harvest overnight. Tea plants grow steadily, and it takes time for them to mature enough for regular plucking. But oh, the reward!
- Winter Protection: If you live in a colder climate (USDA Zone 7 or below), you’ll need to bring your container indoors or provide significant winter protection. The first YouTube video we’ve seen on this topic also emphasizes this, noting that in colder zones like 6b, container growing is recommended for winter protection. Check out the featured video for more insights!
Ready to dive deeper into the wonderful world of growing your own tea? Let’s get brewing!
🌱 The Origins and History of Growing Green Tea (Camellia sinensis) in Containers

The story of tea is as rich and complex as its flavor profiles. Originating in the lush, subtropical forests of Southeast Asia, particularly in regions spanning from Northeast India (Assam) to Southwest China, Camellia sinensis has been cultivated for millennia. Legend has it that Emperor Shen Nung discovered tea in 2737 BC when leaves from a tea tree accidentally blew into his boiling water. Whether true or not, tea quickly became an integral part of culture, medicine, and daily life across Asia.
Historically, tea was grown in vast plantations, often on hillsides, mimicking its natural habitat. The idea of growing this magnificent shrub in a container might seem modern, but gardeners have always experimented with bringing beloved plants closer to home. The rise of urban gardening and a renewed interest in self-sufficiency has propelled Camellia sinensis into our pots and patios.
Why containers? Well, for starters, not everyone lives in a climate conducive to year-round outdoor tea cultivation. As the speaker in the first YouTube video points out, while tea plants thrive in warm, humid climates, container growing becomes a necessity for those in colder zones to protect them during winter. It allows us to control the environment – soil pH, moisture, and even temperature – much more precisely than in a garden bed. This control is a huge benefit, especially for a somewhat particular plant like Camellia sinensis.
Our team at Growing Teas™ has personally experimented with various container setups over the years. We’ve learned that while the plant is resilient, giving it the right start in a pot makes all the difference. It’s a testament to human ingenuity and our enduring love affair with tea that we can now cultivate this ancient beverage right on our balconies!
🌿 Understanding Camellia sinensis: The Green Tea Plant Basics
Before you embark on your container tea adventure, let’s get to know our star player: Camellia sinensis. This evergreen shrub, a cousin to the ornamental camellias you might see in gardens, is the sole source of all “true” tea. Yes, from delicate white tea to robust black tea, it all starts here! The difference lies purely in the processing of the leaves after harvest.
- Appearance: Camellia sinensis typically grows into a multi-stemmed shrub, reaching heights of 6-15 feet in its natural habitat, but it’s easily kept smaller with pruning, especially in containers. Its leaves are dark green, glossy, and often slightly serrated, with a distinct central vein. In autumn, it produces small, fragrant white or pale yellow flowers, followed by small, woody seed pods.
- Varieties: There are two main varieties:
- Camellia sinensis var. sinensis: This variety is typically grown in cooler, high-altitude regions (like China and Japan). It’s known for its delicate flavor and cold hardiness.
- Camellia sinensis var. assamica: Hailing from the warmer, humid plains of Assam, India, this variety has larger leaves and produces a more robust, malty flavor, often used for black teas. For container growing, both varieties can work, but C. sinensis var. sinensis might be slightly more forgiving in varied climates due to its natural cold tolerance.
- Growth Habit: Tea plants are slow to moderate growers. They develop a strong taproot, which is why a deep container is so important. They prefer to grow in a somewhat bushy form, which is encouraged by regular pruning – a practice we’ll dive into later!
- Lifespan: With proper care, a Camellia sinensis plant can live for decades, even centuries, producing leaves for generations. Your container plant could be a long-term companion!
Understanding these basics sets the stage for successful cultivation. It’s not just about planting; it’s about nurturing a living piece of history! For more on what tea varieties you can grow at home, check out our guide: What tea can you grow at home?
🪴 Choosing the Right Container for Growing Green Tea
Ah, the humble pot! It might seem like a simple choice, but for our tea plants, the container is their entire world. Choosing wisely is paramount. We’ve seen many aspiring tea growers make the mistake of going too small, leading to stunted plants and frustration. Remember, as Plant Addicts notes, “Proper container choice and soil conditions are crucial for healthy growth.”
Size Matters, Seriously! The absolute minimum size for a young tea plant is a 12-inch (30cm) diameter and depth pot. However, for long-term health and better yields, we at Growing Teas™ strongly recommend starting with or quickly upgrading to a 15-20 inch (38-50cm) container. A 5-gallon pot, as mentioned in the YouTube video, is a good starting point for controlling growth, but don’t be afraid to go larger as your plant matures. The bigger the pot, the more stable the soil moisture and temperature, and the more room for roots to flourish.
Material World: Pros and Cons
Different container materials offer distinct advantages and disadvantages. Here’s our breakdown:
| Feature | Terracotta/Clay Pots 👉 CHECK PRICE on: Amazon.com: tea plants live | Etsy.com: camellia sinensis plant
🌞 Ideal Growing Conditions: Light, Temperature, and Humidity for Container Green Tea
Just like us, our tea plants thrive when their environment is just right. When growing green tea in containers, you become the master of their microclimate! This is one of the biggest advantages, allowing you to cultivate tea even if your natural climate isn’t perfectly suited.
☀️ Light: The Golden Glow
Tea plants are a bit like Goldilocks when it comes to light – not too much, not too little, but just right.
- Partial Shade is Preferred: In their native habitat, tea plants often grow as understory shrubs, protected by taller trees. This translates to a preference for partial shade in your container garden. This means about 4-6 hours of direct sunlight, ideally in the morning, followed by dappled shade or full shade in the afternoon.
- Why Partial Shade? Intense, scorching afternoon sun, especially in hot climates, can lead to leaf burn, making your tea leaves bitter and less palatable. Think of it as giving them a natural sunscreen!
- Indoor Lighting: If growing indoors, a bright window with eastern or northern exposure is excellent. If you don’t have enough natural light, a grow light can supplement. Look for full-spectrum LED grow lights, placing them about 12-18 inches above the plant for 10-12 hours a day.
🌡️ Temperature: Keeping Things Cozy (But Not Too Hot!)
Tea plants are surprisingly adaptable, but they do have a sweet spot.
- Optimal Range: They generally prefer temperatures between 50°F and 85°F (10°C to 29°C). This aligns with what Plant Addicts suggests, stating a preference for 50°F to 85°F.
- Frost Protection is Key: This is where container growing truly shines! Camellia sinensis is generally hardy down to USDA Zone 7, but consistent freezing temperatures can be detrimental. If temperatures are expected to drop below 20°F (-6°C), you absolutely must bring your container indoors or provide heavy insulation. We’ve learned this the hard way after a surprise early frost!
- Heat Tolerance: While they can tolerate higher temperatures, prolonged periods above 90°F (32°C) combined with low humidity can stress the plant. Ensure adequate watering and consider moving them to a shadier spot during heatwaves.
💧 Humidity: A Breath of Fresh, Moist Air
Tea plants love humidity, a nod to their tropical and subtropical origins.
- High Humidity is a Plus: Aim for relative humidity levels of 50% or higher. This helps keep their leaves lush and prevents drying out.
- Boosting Humidity:
- Misting: Regularly misting your plant, especially indoors, can help.
- Pebble Trays: Place your pot on a tray filled with pebbles and water (ensure the pot isn’t sitting directly in the water).
- Grouping Plants: Grouping your tea plant with other humidity-loving plants can create a localized humid microclimate.
- Humidifier: For indoor growing, a small room humidifier can work wonders.
By carefully managing these environmental factors, you’ll be well on your way to a happy, healthy tea plant ready to produce those precious leaves!
💧 Watering and Soil Requirements for Thriving Green Tea Plants in Pots
If light and temperature are the stage, then water and soil are the very foundations of your tea plant’s performance. Get these right, and your Camellia sinensis will sing! Get them wrong, and well, let’s just say it won’t be a standing ovation.
💦 Watering: The Art of Consistent Moisture
This is perhaps the most critical aspect of container tea care. Tea plants are not drought-tolerant, nor do they appreciate “wet feet.”
- Consistently Moist, Not Soggy: The goal is to keep the soil consistently moist, much like a wrung-out sponge. Never let the soil dry out completely, but also never let it sit in standing water. Plant Addicts and the Facebook group both emphasize keeping the soil consistently moist but not waterlogged.
- Check Before You Water: The best way to know when to water is to feel the soil. Stick your finger about an inch or two into the soil. If it feels dry, it’s time to water. If it still feels damp, wait.
- Watering Technique: Water thoroughly until you see water draining from the bottom of the pot. This ensures the entire root ball is hydrated. Discard any excess water that collects in the saucer after about 15-20 minutes.
- Frequency: This will vary based on pot size, weather, and humidity. In hot, dry weather, you might need to water daily. In cooler, humid conditions, it could be every few days.
- Water Quality: If possible, use rainwater or filtered water. Tap water, especially if it’s high in chlorine or has a high pH, can negatively impact your acid-loving tea plant over time. Let tap water sit out for 24 hours to allow chlorine to dissipate.
🪨 Soil: The Foundation of Flavor
The right soil mix is non-negotiable for Camellia sinensis. It’s all about acidity and drainage.
- Acidic Soil is Essential: Tea plants thrive in acidic soil, with an ideal pH range of 5.5 to 6.5. This is a point of consensus across all our expert sources, including Plant Addicts and the Facebook group. The YouTube video speaker even suggests a potting mix similar to that used for blueberries, which are also acid-loving. Why is this so important? In alkaline soil, tea plants cannot properly absorb essential nutrients like iron, leading to yellowing leaves (chlorosis) and stunted growth.
- Excellent Drainage: Just as important as acidity is drainage. The soil must allow water to pass through freely, preventing root rot. “Ensure your container has good drainage to prevent waterlogging,” advises Tea Break Gardener, a principle that applies perfectly to tea plants.
- Rich in Organic Matter: Tea plants appreciate a soil rich in organic matter, which helps retain moisture and nutrients while still providing good drainage.
Our Recommended Potting Mix Recipe:
We’ve experimented with many mixes, and here’s one that consistently delivers fantastic results for container-grown tea:
- 50% High-Quality Peat-Based Potting Mix: Look for brands like FoxFarm Ocean Forest Potting Soil or Espoma Organic Potting Mix, which often have a slightly acidic base.
- 20% Perlite or Pumice: This is your drainage superstar! It prevents compaction and ensures aeration.
- 20% Pine Bark Fines or Composted Pine Bark: This adds acidity, improves drainage, and provides long-lasting organic matter. It’s what makes blueberry soil so effective!
- 10% Worm Castings or Composted Manure: A natural, slow-release nutrient boost and a fantastic source of beneficial microbes.
👉 CHECK PRICE on:
- FoxFarm Ocean Forest Potting Soil: Amazon.com | Walmart.com
- Espoma Organic Potting Mix: Amazon.com | Walmart.com
- Perlite: Amazon.com | Walmart.com
- Pine Bark Fines: Amazon.com | Etsy.com
Soil pH Testing: It’s a good idea to invest in a soil pH testing kit or a digital pH meter. Test your soil periodically (every 6-12 months) to ensure it remains in the optimal range. If the pH creeps up, you can amend it with elemental sulfur or a liquid acidifier specifically designed for acid-loving plants.
By mastering your watering routine and providing the perfect acidic, well-draining soil, you’ll be giving your green tea plant the best possible chance to thrive and produce those delicious leaves!
🌿 Step-by-Step Guide to Growing Green Tea in Containers
Alright, you’ve got your container, you understand the ideal conditions, and you’re buzzing with excitement! Now, let’s get our hands dirty and plant that tea. This step-by-step guide will walk you through the process, ensuring your Camellia sinensis gets the best possible start in its new potted home.
1. Selecting and Preparing Green Tea Seeds or Seedlings
Your journey begins with choosing your plant material. You can start from seed, or for quicker gratification, a young seedling or rooted cutting.
- Starting from Seed (The Patient Path):
- Source: Purchase fresh Camellia sinensis seeds from a reputable supplier (more on this later!). Freshness is key, as viability drops quickly.
- Preparation: Tea seeds have a hard outer shell that needs to be softened for germination.
- Soak: Soak seeds in warm water for 24-48 hours, changing the water every 12 hours. You might see some seeds swell – these are good candidates!
- Scarification (Optional but Recommended): Gently nick the hard outer shell with a file or sandpaper, being careful not to damage the inner embryo. This helps water penetrate.
- Germination: Plant seeds about 1 inch deep in a small pot (4-6 inches) filled with a moist, acidic seed-starting mix. Keep the soil consistently moist and warm (around 70-75°F or 21-24°C). Germination can be slow and erratic, taking anywhere from a few weeks to several months. This is where the “patience is a virtue” truly comes into play!
- Starting from Seedlings or Rooted Cuttings (The Express Lane):
- Source: Buy young Camellia sinensis plants from a specialized nursery or online retailer. Look for healthy plants with vibrant green leaves and no signs of pests or disease.
- Acclimation: If your plant arrives by mail, allow it a day or two to acclimate to its new environment before repotting. Keep it in a sheltered spot with indirect light.
2. Potting Mix Preparation and Soil Amendments
Remember our discussion on soil? Now’s the time to put that knowledge into practice!
- Mix it Up: Prepare your custom acidic, well-draining potting mix. If you’re using our recommended recipe (50% peat-based potting mix, 20% perlite, 20% pine bark fines, 10% worm castings), mix all ingredients thoroughly in a large tub or wheelbarrow.
- Moisten the Mix: Lightly moisten the potting mix before adding it to the container. It should be damp, not soggy – like a well-wrung sponge. This prevents dry pockets and helps the plant settle.
- Consider Soil Amendments:
- Slow-Release Acidifier: If your base potting mix isn’t strongly acidic, you can mix in a small amount of elemental sulfur or an acid-loving plant fertilizer (like those for blueberries or azaleas) into the bottom third of the pot. Always follow product instructions carefully.
- Mycorrhizal Fungi: Adding mycorrhizal fungi (available as a powder) to the root zone can significantly enhance nutrient uptake and root health. We’ve seen remarkable results with this!
3. Planting Techniques for Container Green Tea
Whether you have a seedling or a germinated seed, the planting process is similar.
- Prepare the Container: Ensure your chosen container has adequate drainage holes. You can place a piece of mesh or a coffee filter over the drainage holes to prevent soil from washing out, but avoid using gravel or broken pot shards at the bottom, as this can actually hinder drainage.
- Add Soil: Fill the bottom of the container with enough potting mix so that when your plant is placed in it, the top of its root ball is about 1-2 inches below the rim of the pot. This leaves room for watering.
- Planting the Seedling:
- Gently remove the tea seedling from its nursery pot. If the roots are circling the bottom, gently tease them apart to encourage outward growth.
- Place the plant in the center of the new container.
- Fill around the root ball with your prepared potting mix, gently firming it down to remove large air pockets. Do not bury the stem deeper than it was in its original pot. The soil line should be at the same level as before.
- Planting Germinated Seeds:
- If you’ve germinated seeds in smaller pots, carefully transplant the strongest seedling into your larger container once it has developed a few true leaves.
- If you’re planting directly, plant 2-3 seeds per pot to ensure at least one germinates. Once they sprout, thin to the strongest seedling.
- Water In: After planting, water the plant thoroughly until water drains from the bottom. This helps settle the soil around the roots.
4. Positioning Your Container for Optimal Growth
Location, location, location! Where you place your container makes a huge difference.
- Outdoor Placement:
- Choose a spot that receives morning sun and afternoon shade. A north-facing wall or under the dappled canopy of a taller tree can be ideal.
- Ensure it’s protected from strong winds, which can dry out the leaves and stress the plant.
- Consider proximity to a water source for easy watering.
- Indoor Placement:
- Place near a bright window (east or north-facing is best).
- Avoid direct drafts from heating or air conditioning vents.
- If using a grow light, ensure it’s positioned correctly (as discussed in the “Light” section).
- Consider placing it in a room with higher humidity, like a bathroom or kitchen, if possible.
By following these steps, you’ve given your green tea plant a fantastic start. Now, the real fun begins: nurturing it to maturity! For more insights into organic farming techniques that apply to container growing, explore our Organic Farming Techniques category.
🪴 Fertilizing and Nutrient Management for Container-Grown Green Tea
Just like a growing child needs a balanced diet, your container-grown green tea plant needs consistent nourishment. Unlike plants in the ground, which can tap into a wider soil network, potted plants rely entirely on what you provide. This is where thoughtful fertilizing and nutrient management come into play. The YouTube video also mentions that tea plants in containers may require more frequent fertilization than those in the ground, a point we wholeheartedly agree with!
Why Fertilize?
- Replenish Nutrients: Each time you water, some nutrients leach out of the container. Fertilizing replenishes these essential elements.
- Promote Growth: A steady supply of nutrients fuels healthy leaf growth, which is exactly what we want for our tea!
- Maintain Acidity: Many fertilizers for acid-loving plants also help maintain the crucial low pH that Camellia sinensis craves.
What to Fertilize With: The Acid-Loving Diet
Your tea plant is a connoisseur of specific nutrients.
- Acid-Loving Plant Fertilizers: Look for fertilizers specifically formulated for acid-loving plants like blueberries, azaleas, rhododendrons, or camellias. These typically have a higher nitrogen content and often contain iron, which is vital for green leaves in acidic conditions.
- Recommended Brands: We’ve had great success with Espoma Organic Holly-tone (an organic option) and Miracle-Gro Water Soluble Azalea, Camellia, Rhododendron Food (a synthetic option for quick uptake).
- Balanced NPK Ratio: While nitrogen is important for foliage, a balanced approach is best. Look for an NPK (Nitrogen-Phosphorus-Potassium) ratio around 3-1-2 or 4-1-2.
- Micronutrients: Ensure your chosen fertilizer includes essential micronutrients like iron, magnesium, and zinc, which are crucial for overall plant health.
👉 CHECK PRICE on:
- Espoma Organic Holly-tone: Amazon.com | Walmart.com
- Miracle-Gro Water Soluble Azalea, Camellia, Rhododendron Food: Amazon.com | Walmart.com
When and How to Fertilize: A Consistent Schedule
Consistency is key, but don’t overdo it!
- Growing Season Focus: Fertilize primarily during the active growing season (spring through early fall). Reduce or stop fertilizing during winter dormancy.
- Frequency:
- Liquid Fertilizers: If using a liquid feed, apply every 4-6 weeks at half the recommended strength. Plant Addicts also suggests fertilizing every 4-6 weeks. We prefer half-strength to avoid nutrient burn, especially in containers.
- Slow-Release Granular Fertilizers: If using a granular product like Holly-tone, apply once in early spring and again in mid-summer, following the package directions for container plants.
- Application:
- Always water your plant before fertilizing. Applying fertilizer to dry soil can burn the roots.
- Distribute granular fertilizers evenly around the drip line of the plant (the edge of the foliage) and gently scratch it into the top inch of soil.
- For liquid fertilizers, mix according to instructions and apply as part of your regular watering.
Signs of Nutrient Deficiency
Keep an eye out for these clues your plant might be hungry:
- Yellowing Leaves (Chlorosis): Often indicates an iron deficiency, especially if the veins remain green. This is a common sign of soil pH being too high.
- Stunted Growth: If your plant isn’t putting out new flushes of growth, it might be lacking nitrogen.
- Purple Tinge on Leaves: Can indicate a phosphorus deficiency.
- Brown or Scorched Leaf Edges: Could be a sign of potassium deficiency or, ironically, over-fertilization (nutrient burn).
Expert Tip from Growing Teas™: We often supplement with a liquid chelated iron product if we see signs of chlorosis, as it’s readily available to the plant even if the pH is slightly off. This is a quick fix while you work on adjusting the soil pH long-term.
By providing a consistent and appropriate nutrient regimen, you’ll ensure your container green tea plant remains vigorous, healthy, and ready to produce those tender leaves for your next cup! For more on nurturing your plants organically, check out our Organic Farming Techniques section.
🛡️ Pest and Disease Control: Keeping Your Green Tea Plant Healthy
Even the most diligently cared-for container tea plant can sometimes encounter uninvited guests or unwelcome ailments. But fear not! At Growing Teas™, we’ve faced our share of battles, and we’re here to share our strategies for keeping your Camellia sinensis robust and pest-free. The good news is that tea plants are generally quite resilient, especially when given optimal growing conditions. A healthy plant is its own best defense!
Common Pests of Green Tea Plants
While tea plants aren’t typically magnets for every garden pest, a few can occasionally cause trouble, especially in stressed plants or indoor environments.
- Spider Mites: These tiny arachnids love dry, warm conditions. You’ll spot them by fine webbing on the undersides of leaves and tiny yellow or brown stippling on the foliage.
- ✅ Solution: Increase humidity! Regularly mist your plant. For active infestations, use neem oil spray or insecticidal soap.
- Aphids: Small, soft-bodied insects that cluster on new growth, sucking sap. They can cause distorted leaves.
- ✅ Solution: Blast them off with a strong stream of water. For persistent issues, use neem oil or insecticidal soap.
- Scale Insects: These look like small, oval bumps (brown or white) on stems and leaf undersides. They are sedentary and also suck sap.
- ✅ Solution: For light infestations, scrape them off with your fingernail or a cotton swab dipped in rubbing alcohol. For heavier infestations, systemic insecticides (use with caution if you plan to consume the tea) or repeated neem oil applications are needed.
- Mealybugs: White, cottony masses found in leaf axils and on stems. They’re sap-suckers too.
- ✅ Solution: Similar to scale, use rubbing alcohol on a cotton swab for small numbers. Neem oil or insecticidal soap for larger outbreaks.
Our Anecdote: One winter, we brought a tea plant indoors, and within a few weeks, a sneaky spider mite population exploded! We learned quickly that indoor air can be much drier. A humidifier and consistent neem oil treatments saved the day, but it was a stark reminder to be vigilant, especially during environmental changes.
Common Diseases of Green Tea Plants
Diseases are less common in container-grown tea plants, especially with good air circulation and proper watering. Most issues stem from environmental stress.
- Root Rot: The most common and most deadly disease for container tea plants. It’s caused by overwatering and poor drainage, leading to fungal growth that suffocates roots.
- ❌ Prevention: Do not overwater! Ensure your container has excellent drainage holes and use a well-draining potting mix.
- ✅ Solution: If caught early, repotting into fresh, dry soil and a clean pot, after trimming any mushy, black roots, might save the plant. Often, it’s too late.
- Leaf Spot: Fungal or bacterial spots can appear, often circular with distinct margins. Usually a sign of prolonged leaf wetness or stress.
- ✅ Solution: Improve air circulation, avoid overhead watering, and remove affected leaves. Fungicides are rarely necessary for home growers.
- Chlorosis (Yellowing Leaves): While not a disease, it’s a common symptom of nutrient deficiency, most often iron deficiency due to high soil pH.
- ✅ Solution: Test your soil pH and amend it to the optimal 5.5-6.5 range. Supplement with chelated iron.
General Prevention Strategies
An ounce of prevention is worth a pound of cure, especially in the garden!
- Inspect Regularly: Make it a habit to inspect your plant weekly. Check the tops and undersides of leaves, stems, and the soil surface for any signs of trouble. Early detection is crucial.
- Provide Optimal Conditions: A healthy, unstressed plant is far less susceptible to pests and diseases. Ensure proper light, water, soil pH, and humidity.
- Good Air Circulation: Don’t crowd your plants. Good airflow helps prevent fungal issues.
- Quarantine New Plants: Before introducing any new plant to your collection, keep it separate for a few weeks to ensure it’s pest and disease-free.
- Cleanliness: Keep your gardening tools clean and sterilize them between uses. Remove any fallen leaves or debris from the soil surface.
By being proactive and observant, you can keep your container green tea plant thriving and producing those beautiful, healthy leaves for your enjoyment. For more on keeping your plants healthy using natural methods, check out our Organic Farming Techniques section.
✂️ Pruning and Maintenance Tips for Container Green Tea Shrubs
Pruning might sound intimidating, but for your container green tea plant, it’s less about ruthless cutting and more about gentle shaping and encouraging productivity. Think of yourself as a sculptor, guiding your plant to its best form! Regular pruning is essential for maintaining a manageable size in a pot, promoting bushier growth, and, most importantly, ensuring a continuous supply of tender leaves for harvesting. As the Facebook group notes, “Regular pruning encourages bushier growth and more leaves for harvest.”
Why Prune Your Tea Plant?
- Shape and Size Control: In a container, your tea plant won’t grow into a towering tree. Pruning keeps it compact and aesthetically pleasing for your patio or indoor space.
- Encourage Bushiness: Pruning stimulates the plant to produce more lateral branches, leading to a denser, bushier plant with more plucking points.
- Promote New Growth: The youngest, freshest leaves are what we harvest for tea. Pruning encourages these “flushes” of new growth.
- Remove Dead or Diseased Material: This improves plant health and prevents the spread of potential issues. The YouTube video also mentions pruning to remove dead or diseased branches.
- Air Circulation: A well-pruned plant has better airflow, reducing the risk of fungal diseases.
When to Prune
- Light Pruning/Plucking: This is done continuously as you harvest leaves.
- Maintenance Pruning:
- Early Spring: After the last frost, as the plant begins its active growth cycle, is an ideal time for a more significant trim.
- After Flowering (Optional): If your plant flowers (usually in autumn), you can lightly prune after the flowers fade to shape it.
- Avoid Late Fall/Winter: Don’t do heavy pruning late in the season, as new growth might be vulnerable to frost.
How to Prune Your Container Green Tea
You’ll primarily be doing two types of pruning: tipping (for harvest) and shaping/maintenance pruning.
-
Tipping (Harvesting Pruning):
- This is the most frequent type of pruning, as it’s directly related to your tea harvest.
- You’ll be plucking the “flush” – the top two leaves and the unopened bud (known as the “pekoe tip”).
- Always use clean, sharp scissors or your fingernails to pinch off the flush just above a set of mature leaves. This encourages new growth from the axil below.
- Our Tip: Don’t be shy! The more you pluck, the more your plant will produce. It’s counter-intuitive but true!
-
Shaping and Maintenance Pruning:
- Tools: Use clean, sharp pruning shears or bypass pruners. Sterilize them with rubbing alcohol before and after use to prevent disease spread.
- Remove Dead/Damaged Branches: Start by cutting out any branches that are dead, diseased, or crossing. Cut back to healthy wood.
- Thinning: If the plant is becoming too dense, thin out some inner branches to improve air circulation.
- Height Reduction: To control height, cut back taller stems to an outward-facing bud or side branch. Aim to maintain a desirable, manageable height for your container.
- Encourage Bushiness: To make your plant bushier, cut back longer, leggy stems by about one-third. Always cut just above a leaf node or a side branch. This signals the plant to send out new shoots from below the cut.
- The “Plucking Table”: In commercial tea gardens, plants are pruned to create a flat “plucking table” for easy harvesting. You can mimic this on a smaller scale, aiming for a rounded, bushy shape that’s easy to reach.
Table: Pruning for Specific Goals
| Goal | Pruning Action
🎉 Conclusion: Your Journey to Growing Green Tea Success

Well, there you have it — the ultimate deep dive into growing green tea in containers, brought to you by the tea-loving experts at Growing Teas™! From selecting the perfect pot to mastering watering, soil acidity, pruning, and pest control, you’re now armed with everything you need to cultivate your own Camellia sinensis right at home. 🌿☕
Remember, growing green tea in containers is a rewarding journey, not a race. Patience is your best friend here. Your plant will thank you with tender, flavorful leaves that you can harvest and process into fresh, homemade green tea — a truly special experience that connects you to centuries of tea tradition.
Positives of Container Growing: ✅ Space-saving and perfect for urban gardeners
✅ Full control over soil, watering, and microclimate
✅ Ability to protect plants from frost by moving indoors
✅ Encourages healthier plants with proper pruning and care
Challenges to Keep in Mind: ❌ Requires diligent watering and humidity management
❌ Needs acidic, well-draining soil and regular fertilization
❌ Vulnerable to root rot if drainage is poor
❌ May require winter protection in colder climates
But don’t let the challenges scare you! With the right container, soil mix, and care routine, your green tea plant will thrive and reward you with fresh leaves for years to come. Plus, the satisfaction of brewing your own tea from leaf to cup? Absolutely priceless.
So, are you ready to start your container tea garden? We hope this guide has answered your burning questions and ignited your passion. Now, grab your pot, soil, and seeds, and let’s get growing! For more inspiration and tips, explore our Green Tea Cultivation articles.
🔗 Recommended Links for Green Tea Enthusiasts
Ready to shop for the best supplies to grow your green tea in containers? Here are some top picks from our guide, along with helpful books to deepen your tea-growing knowledge.
Containers & Soil Mixes:
- FoxFarm Ocean Forest Potting Soil: Amazon.com | Walmart.com
- Espoma Organic Potting Mix: Amazon.com | Walmart.com
- Perlite for Plants: Amazon.com | Walmart.com
- Pine Bark Fines: Amazon.com | Etsy.com
Fertilizers & Amendments:
- Espoma Organic Holly-tone Fertilizer: Amazon.com | Walmart.com
- Miracle-Gro Water Soluble Azalea, Camellia, Rhododendron Food: Amazon.com | Walmart.com
Books to Brew Your Knowledge:
- The Tea Enthusiast’s Handbook: A Guide to Enjoying the World’s Best Teas by Mary Lou Heiss & Robert J. Heiss — Amazon.com
- Tea: History, Terroirs, Varieties by Kevin Gascoyne, François Marchand, et al. — Amazon.com
- The Art and Craft of Tea: An Enthusiast’s Guide to Selecting, Brewing, and Serving Exquisite Tea by Joseph Uhl — Amazon.com
Dive into these resources to complement your hands-on experience and become a true tea-growing aficionado!
❓ Frequently Asked Questions (FAQ) About Growing Green Tea in Containers

How often should you water container-grown green tea plants?
Watering frequency depends on container size, climate, and season. Generally, keep the soil consistently moist but not soggy. Check the soil moisture by inserting your finger about 1-2 inches deep; if it feels dry, it’s time to water. In hot or dry weather, daily watering may be necessary, while cooler, humid conditions might require watering every few days. Always water thoroughly until excess drains from the bottom to ensure deep root hydration.
Can green tea plants survive indoors in containers?
✅ Yes! Green tea plants can thrive indoors if given bright, indirect light, consistent humidity (around 50% or higher), and proper watering. Use a grow light if natural light is insufficient. Indoor air tends to be drier, so misting or using a humidifier helps prevent spider mites and leaf drying. Keep the plant away from drafts and temperature extremes. Indoor container growing is especially useful in colder climates to protect plants during winter.
How much sunlight does green tea need when grown in pots?
Green tea plants prefer partial shade, ideally 4-6 hours of morning sun with afternoon shade. Too much direct, intense sunlight can scorch leaves and reduce quality. If grown indoors, place near a bright east- or north-facing window or supplement with full-spectrum LED grow lights for 10-12 hours daily.
What type of soil is best for growing green tea in containers?
Green tea plants require acidic, well-draining soil with a pH between 5.5 and 6.5. The soil should be rich in organic matter but allow excess water to drain freely to prevent root rot. Avoid alkaline or heavy clay soils. Incorporating pine bark fines, peat-based potting mix, perlite, and worm castings creates an ideal environment.
What is the best soil mix for growing green tea in containers?
Our recommended soil mix is:
- 50% peat-based potting mix (acidic base)
- 20% perlite or pumice (for drainage and aeration)
- 20% pine bark fines or composted pine bark (adds acidity and organic matter)
- 10% worm castings or composted manure (nutrient boost)
This blend balances moisture retention, acidity, and drainage perfectly for Camellia sinensis.
How often should you fertilize container-grown green tea plants?
Fertilize every 4-6 weeks during the growing season (spring through early fall). Use fertilizers formulated for acid-loving plants, such as Espoma Holly-tone or Miracle-Gro Azalea, Camellia, Rhododendron Food. Apply liquid fertilizers at half strength to avoid nutrient burn. Reduce or stop fertilizing during winter dormancy.
What pests commonly affect container-grown green tea plants, and how do you control them?
Common pests include spider mites, aphids, scale insects, and mealybugs. Maintain high humidity to deter spider mites, regularly inspect plants, and treat infestations early with neem oil, insecticidal soap, or rubbing alcohol swabs. Good air circulation and healthy plant care reduce pest problems.
Can green tea plants be harvested multiple times a year when grown in containers?
✅ Yes! With proper care, container-grown green tea plants can produce multiple leaf flushes annually. Regular pruning and harvesting of the top two leaves plus the bud (the “flush”) encourages new growth. Typically, you can harvest 2-3 times per year, depending on climate and plant health.
📚 Reference Links and Further Reading
- Plant Addicts: Growing Green Tea (Camellia sinensis)
- Tea Break Gardener: How to Grow Kale (with container tips applicable to green tea)
- Facebook Group Post: Can Camellia sinensis be grown in Houston?
- Espoma Official Website
- FoxFarm Official Website
- Miracle-Gro Official Website
- USDA Plant Hardiness Zone Map
- The Royal Horticultural Society: Growing Camellias
For more expert insights and community support, join tea growing groups and forums where enthusiasts share their successes and challenges. Growing green tea in containers is a delightful adventure — and now you’re ready to embark on it with confidence! 🍃☕