Support our educational content for free when you purchase through links on our site. Learn more
How Long Does It Take to Grow a Tea Plant? ⏳ (2026 Guide)
Ever wondered how long it takes to grow your very own tea plant and finally brew that first cup of homegrown tea? Spoiler alert: it’s a journey that rewards patience and care! At Growing Teas™, we’ve spent years nurturing Camellia sinensis from tiny seeds and cuttings to mature bushes bursting with flavorful leaves. In this guide, we’ll unravel the timeline—from seed germination to your first harvest—and share insider tips on how to speed up growth, avoid common pitfalls, and even process your leaves into delicious teas right at home.
Did you know that tea plants can live for over 50 years, producing leaves for decades? But before you get your scissors out, you’ll need to wait at least three years before harvesting those tender “two leaves and a bud.” Curious about how to care for your tea plant during those early years or how to transform fresh leaves into green, black, or white tea? Keep reading—we’ve got all that and more, including personal stories from our tea gardens that’ll inspire your green thumb!
Key Takeaways
- Growing a tea plant from seed takes patience: expect 3+ years before your first meaningful harvest.
- Starting with cuttings or young plants can shave off time and increase your success rate.
- Tea plants thrive in acidic, well-draining soil with consistent moisture and 6+ hours of sunlight.
- Proper pruning and pest management are essential for healthy growth and better yields.
- You can process your own tea leaves at home to craft green, black, white, or oolong teas.
- Tea plants can live and produce for decades, making them a long-term garden treasure.
Ready to dive into the fascinating world of tea cultivation? Let’s get growing!
Table of Contents
- ⚡️ Quick Tips and Facts
- 🌿 The Ancient Roots of Tea: A Brief History of Camellia Sinensis Cultivation
- 🌱 Unveiling the Tea Plant: What Exactly Are We Growing?
- ⏱️ The Great Race: How Long Does It Really Take to Grow a Tea Plant?
- 🚀 Getting Started: Your Tea Growing Journey Begins!
- 💚 Nurturing Your Tea Plant: The Essentials for Success
- 🏞️ Soil Secrets: Crafting the Ideal Growing Medium for Tea
- ☀️ Sunlight Symphony: How Much Light Does Your Tea Plant Crave?
- 💧 Water Wisdom: Quenching Your Tea Plant’s Thirst
- 🍎 Feeding Your Foliage: Fertilization for Robust Tea Plant Growth
- 📏 Spacing Out: Giving Your Tea Plants Room to Thrive
- ✂️ The Art of Pruning: Shaping Your Tea Bush for Better Yields and Health
- 🐞 Pest Patrol & Disease Defense: Keeping Your Tea Plant Healthy
- 🌟 Beyond the Basics: Advanced Tea Growing Insights
- ☕ From Leaf to Cup: Processing Your Homegrown Tea
- 📖 Our Growing Teas™ Tales: Personal Anecdotes and Lessons Learned from the Field
- 🚧 Common Hurdles & How We Overcame Them in Our Tea Gardens
- ✅ Conclusion: The Rewarding Journey of Growing Your Own Tea
- 🔗 Recommended Links: Dive Deeper into the World of Tea Cultivation
- ❓ FAQ: Your Burning Tea Plant Questions Answered
- 📚 Reference Links: Our Trusted Sources for Tea Growing Knowledge
⚡️ Quick Tips and Facts
So, you’re dreaming of sipping your own homegrown brew? Fantastic! Growing your own tea plant (Camellia sinensis) is an incredibly rewarding journey, but it definitely tests your patience. Here at Growing Teas™, we’ve got our hands dirty (literally!) for years, and we’re here to spill the tea on what you need to know right off the bat.
- Patience is Your Best Friend: From seed, expect at least 3 years before you can harvest enough leaves for a decent cup. If you start with a young plant, you might shave off a year or two. As the folks at Tea-Happiness.com wisely put it, “Patience is KEY!” [1]
- Lifespan: These beauties are in it for the long haul! With proper care, a tea plant can live for 50 years or more, becoming a cherished part of your garden. Imagine the stories it could tell!
- Size Matters (for harvesting): While a tea plant can grow into a small tree (up to 15-20 feet!), commercial farms and home growers often prune them to a manageable 3-5 feet tall. This “plucking table” height makes harvesting those tender new shoots much easier.
- Soil Sweet Spot: Think acidic! Tea plants thrive in acidic, well-draining soil with a pH between 4.5 and 6.0. If you can grow blueberries, you can likely grow tea.
- Sunlight & Shelter: They love the sun, but too much harsh afternoon sun can be a bit much, especially for young plants. A spot with full sun to partial shade (especially in hotter climates) and protection from strong winds is ideal.
- Water, Water Everywhere (but not too much): Tea plants need consistent moisture, often around 60 inches of water annually. This means regular watering, especially during dry spells, but absolutely no soggy feet!
- Harvesting: Don’t get too eager! Most experts, including Young Mountain Tea, recommend you “shouldn’t harvest leaves from your plant until it is at least three years old.” [2] This allows the plant to establish a strong root system and robust growth. When you do harvest, focus on the “two leaves and a bud” for the best quality tea. Learn more about the art of plucking in our guide: How to Harvest Tea Leaves Like a Pro: 10 Expert Tips for 2026 🌿.
- Hardiness: Camellia sinensis is surprisingly hardy, typically thriving in USDA zones 7B-10. If you’re in zone 7, a protected spot or container growing might be your best bet, as noted in the first YouTube video we’ve seen.
🌿 The Ancient Roots of Tea: A Brief History of Camellia Sinensis Cultivation

Before we dive into the nitty-gritty of growing, let’s take a moment to appreciate the incredible journey of the tea plant. Imagine a world without tea – unthinkable, right? This humble evergreen shrub, Camellia sinensis, has shaped cultures, economies, and daily rituals for millennia.
Its story begins, as many great stories do, in the misty, chilly foothills of the Himalayas, specifically in what is now southwestern China and northern Myanmar. Legend has it that Emperor Shen Nung, around 2737 BCE, accidentally discovered tea when leaves from a nearby tree drifted into his boiling water. Whether true or not, the fact remains that tea cultivation and consumption have been documented in China for over 2,000 years. As LoveTheGarden.com points out, “Growing tea in the UK may not be as crazy as you might think, as its origins are in the chilly foothills of the Himalayas.” [3] This resilience is a testament to its adaptability!
From its ancient origins, tea spread across Asia, becoming deeply ingrained in Japanese, Korean, and Indian cultures. The British, of course, played a massive role in globalizing tea, establishing vast plantations in India and Sri Lanka (then Ceylon) to fuel their insatiable demand. This expansion led to the development of different cultivation techniques and processing methods that we still see today.
Here at Growing Teas™, we often reflect on this rich history as we tend to our own plants. It’s a connection to something ancient, a living legacy that continues to bring comfort and joy to billions. It’s truly “the number two beverage in the world,” as the first YouTube video aptly describes it. Understanding this heritage isn’t just a fun fact; it helps us appreciate the plant’s natural tendencies and how best to care for it.
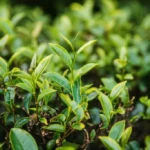
🌱 Unveiling the Tea Plant: What Exactly Are We Growing?
So, you’re ready to grow tea, but do you know what you’re growing? We’re talking about Camellia sinensis, the one and only true tea plant. Forget your herbal infusions (delicious as they are, they’re not “tea” in the botanical sense!). This “large growing evergreen shrub,” as the first YouTube video describes it, is the source of all black, green, white, oolong, and pu-erh teas. Pretty amazing, right?
Varieties of Camellia Sinensis: Assamica vs. Sinensis
Just like apples have different varieties, so does Camellia sinensis. The two main types you’ll encounter are:
-
Camellia sinensis var. sinensis (Chinese Variety):
- Characteristics: This variety is typically a smaller bush, with smaller leaves, and is more cold-hardy. It’s the traditional choice for green and white teas, and often for oolongs.
- Climate: Thrives in cooler climates, often found in mountainous regions.
- Growth: Slower growing, but incredibly resilient.
- Our Take: We’ve found this variety to be excellent for home growers, especially those in cooler USDA zones (like 7B with protection) or those growing in containers. Its compact size is a bonus!
-
Camellia sinensis var. assamica (Assam Variety):
- Characteristics: A larger plant, often growing into a small tree, with bigger leaves. This is the powerhouse behind most black teas.
- Climate: Prefers warmer, more tropical climates with high humidity.
- Growth: Faster growing and produces higher yields.
- Our Take: While assamica can be grown at home, it generally requires more space and a warmer climate. If you’re in a truly tropical or subtropical region, this could be a fantastic choice for a more robust tea.
Many nurseries, like Camellia Forest Nursery (https://www.camelliaforest.com/), will specify which variety they are selling, or even offer hybrids. For most home growers, especially beginners, the sinensis variety is often more forgiving and manageable.
Understanding the Tea Plant’s Life Cycle and Growth Stages
A tea plant’s life is a long and fascinating one, full of distinct stages:
- Seed/Cutting: The very beginning! Seeds can take weeks to germinate, while cuttings offer a faster start.
- Seedling/Young Plant: Fragile and small, these little guys need consistent care, protection from harsh elements, and a stable environment to establish their root system. This is where the “several months” of initial growth mentioned by Tea-Happiness.com comes into play.
- Juvenile Bush (Years 1-3): This is the growth spurt phase. The plant is focusing its energy on developing a strong structure, branching out, and increasing its leaf mass. This is the critical period where you resist the urge to harvest! As Young Mountain Tea states, “You shouldn’t harvest leaves from your plant until it is at least three years old.” [^2]
- Mature Bush (Year 3+): Congratulations! Your plant is now ready for regular harvesting. It will continue to grow, produce flowers, and with proper pruning, maintain a productive “plucking table” for decades.
- Flowering & Seed Production: In the fall, mature tea plants produce beautiful, fragrant white flowers. These can be left for decoration, or if pollinated, will develop into seeds, completing the cycle. We’ll talk more about these lovely blossoms later!
Understanding these stages helps you manage your expectations and provide the right care at the right time. It’s a marathon, not a sprint, but oh, what a delicious finish line!
⏱️ The Great Race: How Long Does It Really Take to Grow a Tea Plant?
This is the million-dollar question, isn’t it? You’re eager to brew your own tea, and we totally get that! But let’s be upfront: growing a tea plant isn’t an instant gratification kind of hobby. It’s a journey that requires patience, nurturing, and a good understanding of its timeline. So, how long does it really take? Let’s break it down.
From Seed to Sprout: The Patience Game 🌱
Starting from seed is perhaps the most rewarding, but also the slowest, path. It’s like watching paint dry, but with the added excitement of potential life!
- Soaking: First, you’ll want to soak your Camellia sinensis seeds in water for 24-48 hours. This helps to soften the tough outer shell and encourages germination. As Tea-Happiness.com notes, seeds that sink are generally more viable.
- Sowing: Plant your soaked seeds in a well-draining seed-starting mix, about an inch deep. Keep the soil consistently moist and in a warm, dark location. A mini-greenhouse or plastic dome can work wonders for maintaining humidity.
- Germination Time: This is where the waiting game truly begins. While some lucky growers might see a sprout in a few weeks, it can take up to 8 weeks for tea seeds to germinate. Tea-Happiness.com confirms this, stating, “Seeds can take up to 8 weeks to germinate.” [^1] We’ve had some stubborn seeds at Growing Teas™ that made us question everything, only to surprise us with a tiny green shoot weeks later!
- First Leaves: Once you see that little sprout, it will take a few more weeks for the first true leaves to develop. You’re looking for a “white root, and green shoot” as the initial signs of success.
Our Expert Tip: Don’t give up too soon! We’ve seen seeds that seemed dormant for ages suddenly spring to life. Consistent moisture and warmth are key.
From Cutting to Rooted Plant: A Head Start! ✂️
If you’re less keen on the seed-starting marathon, propagating from cuttings offers a faster route to a young plant.
- Taking Cuttings: Select a healthy, semi-hardwood stem from an established tea plant, about 4-6 inches long, with a few leaves. Remove the lower leaves.
- Rooting Hormone: Dip the cut end in a rooting hormone (like Garden Safe TakeRoot Rooting Hormone – Shop Garden Safe TakeRoot Rooting Hormone on: Amazon). This significantly increases your success rate.
- Planting: Insert the cutting into a well-draining, moist rooting medium (perlite or a sand/peat mix works well).
- Rooting Time: Keep the cuttings in a warm, humid environment. Rooting can take anywhere from 6-12 weeks. You’ll know it’s rooted when you see new leaf growth, indicating a successful connection to a new root system.
Comparison Table: Seed vs. Cutting
| Feature | Starting from Seed | Starting from Cutting |
|---|---|---|
| Initial Time | 8 weeks (germination) + several months (seedling) | 6-12 weeks (rooting) |
| Effort | More patience required, lower initial success rate | Requires access to an existing plant, higher success rate |
| Genetic Variety | Potential for genetic variation | Genetically identical to the parent plant |
| Cost | Generally cheaper for seeds | Can be more expensive for established cuttings |
| Learning Curve | Higher, but very educational | Moderate |
The First Flush: When Can You Harvest Your Own Tea Leaves? 🍵
This is the moment you’ve been waiting for! But hold your horses, eager tea master. The consensus among tea growers, including us at Growing Teas™, is clear: do not harvest leaves from your plant until it is at least three years old.
- Why the Wait? The first few years are crucial for the plant to develop a strong, extensive root system and robust foliage. Harvesting too early stresses the young plant, diverting energy from growth to leaf regeneration, which can stunt its development and even shorten its lifespan. Young Mountain Tea explicitly states, “You shouldn’t harvest leaves from your plant until it is at least three years old.” [^2] LoveTheGarden.com echoes this, noting that Camellia sinensis takes “about 3 years to reach maturity.” [^3]
- What to Look For: Once your plant is 3+ years old and healthy, you’ll be looking for the “two leaves and a bud” – the tender, new growth at the tips of the branches. This is where the best flavor and highest concentration of beneficial compounds are found.
- Yield: Don’t expect a commercial-sized harvest from a single plant. A mature home tea plant might yield enough for a few cups of tea per week during the growing season. Remember, “It takes lots of plants to actually make tea,” as the first YouTube video reminds us. But those few cups will be the most satisfying you’ve ever had!
Reaching Maturity: A Long-Term Commitment to Your Tea Bush
While you can start harvesting after three years, a tea plant truly reaches its stride and becomes a prolific producer around 5-7 years old. At this point, it will be well-established, with a strong root system and a dense canopy, especially if you’ve been pruning it correctly.
- Lifespan: This isn’t a fleeting relationship! With proper care, a tea plant can live for 50 years or more. Imagine passing down your tea bush through generations! Young Mountain Tea highlights this longevity, stating, “Lifespan: Can last 50+ years with proper care.” [^2]
- Ongoing Care: Reaching maturity doesn’t mean you can neglect it. Regular pruning, appropriate fertilization, and consistent watering will ensure your tea plant continues to thrive and produce delicious leaves for decades. It’s a long-term commitment, but one that offers continuous rewards.
So, while the initial wait for that first cup might feel long, the journey of growing a tea plant is a testament to patience and the enduring beauty of nature. Are you ready for the commitment? We certainly hope so!
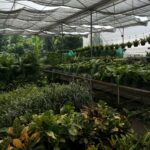
🚀 Getting Started: Your Tea Growing Journey Begins!
Alright, you’ve committed to the long haul, you understand the timelines, and now you’re buzzing with excitement to get your hands dirty. Excellent! The first steps are crucial for setting your tea plant up for a lifetime of success. Let’s talk about where to find your plant, where to put it, and what kind of pot it’ll love.
Where to Find Your Tea Plant: Seeds, Cuttings, or Young Plants?
You have a few options when it comes to acquiring your Camellia sinensis. Each has its pros and cons, largely revolving around time, effort, and cost.
-
Seeds:
- Pros: Most economical, offers the satisfaction of growing from scratch, potential for genetic variation (which can be interesting!).
- Cons: Longest wait time for germination and first harvest (up to 8 weeks for germination, then 3+ years for harvest). Lower germination success rate compared to established plants.
- Where to Buy:
- Great Mississippi Tea Company: Great Mississippi Tea Company Official Website (known for Camellia sinensis sinensis seeds, as mentioned by Tea-Happiness.com [^1]).
- Etsy: Search “Camellia sinensis seeds” on Etsy for various sellers.
- Our Experience: We’ve had mixed results with seeds. Some batches sprout like magic, others are duds. Always buy from reputable sources that specify fresh seeds!
-
Cuttings:
- Pros: Faster than seeds, genetically identical to the parent plant (so you know what you’re getting), often a higher success rate than seeds if done correctly.
- Cons: Requires access to an existing plant, or purchasing unrooted cuttings which still require rooting effort.
- Where to Buy: Less common to buy unrooted cuttings online, but sometimes available from specialty nurseries or local garden clubs.
-
Young Plants (Saplings/Starter Plants):
- Pros: The fastest way to get a thriving tea plant! You bypass the germination and early seedling stages, significantly reducing the time to first harvest (potentially 1-2 years faster than seeds). Higher survival rate.
- Cons: More expensive upfront. Limited variety compared to seeds.
- Where to Buy:
- Camellia Forest Nursery: Camellia Forest Nursery Official Website (a highly recommended source for tea plants).
- Fast Growing Trees: Fast Growing Trees Official Website
- Oregon Tea Traders: Oregon Tea Traders Official Website
- Minto Island Farm Stand: Minto Island Farm Stand Official Website (if you’re in the Pacific Northwest, as suggested by Young Mountain Tea [^2]).
- Amazon: Search “Camellia sinensis plant” on Amazon for various vendors.
- Walmart: Search “Camellia sinensis plant” on Walmart for live plant options.
- Our Recommendation: For beginners, starting with a young plant is often the least frustrating and most rewarding path. It gives you a head start and builds confidence!
Choosing the Right Home: Indoor vs. Outdoor Cultivation for Tea Plants
Where will your tea plant live? This largely depends on your climate and available space.
-
Outdoor Cultivation:
- Ideal Zones: USDA Hardiness Zones 7B-10 are generally suitable. The first YouTube video confirms this, noting “USDA hardiness zones 7B-10, with protected spaces recommended for zone 7.”
- Benefits: Allows the plant to grow larger, access natural rainfall, and benefit from a more stable environment.
- Considerations: Needs a sheltered spot with full sun to partial shade. Protection from harsh winds and extreme winter cold is crucial in borderline zones. Young Mountain Tea recommends full sun, but in very hot climates, partial afternoon shade can prevent leaf scorch.
- Our Anecdote: One of our growers, Maria, lives in Zone 8a. She planted her first Camellia sinensis directly in the ground, in a spot that gets morning sun and afternoon shade from a large oak. It thrived, growing much faster than her potted plants!
-
Indoor/Container Cultivation:
- Ideal for: Colder climates (below Zone 7B), small spaces, or those who want more control over environmental factors.
- Benefits: Portability (can move indoors for winter), easier to control soil conditions, protection from pests and extreme weather.
- Considerations: Requires a large pot (at least 15-20 gallons for a mature plant), excellent drainage, consistent watering, and sufficient light (a south-facing window or grow lights are often necessary). The first YouTube video mentions growing tea in a container.
- Our Take: Many of us at Growing Teas™ started with container plants. It’s a fantastic way to learn the ropes and enjoy fresh tea, even if you live in a frosty region. Just be prepared for regular repotting as the plant grows!
Potting Up: Selecting the Perfect Container for Your Tea Plant
If you’re going the container route, choosing the right pot is paramount.
- Size Matters:
- Young Plants: Start with a 1-gallon or 2-gallon pot.
- Growing Plants: As your plant grows, you’ll need to repot it into progressively larger containers. For a mature tea plant, we recommend a pot of at least 15-20 gallons (or even larger, like a half whiskey barrel). This provides ample space for root development and helps prevent the plant from becoming root-bound.
- Drainage is Non-Negotiable: Tea plants hate soggy feet. Your pot must have drainage holes. ✅ If it doesn’t, drill some yourself!
- Material:
- Terracotta: Looks great, allows for good airflow, but can dry out quickly.
- Plastic: Lighter, retains moisture better, but can overheat in direct sun.
- Fabric Grow Bags (e.g., Smart Pots): Excellent for aeration, prevents root circling, and promotes healthy root growth. We’re big fans of these for their breathability!
- 👉 Shop Smart Pots on: Amazon](https://www.amazon.com/Smart-Pot-Soft-Sided-Container-Aeration/dp/B017WWH7TK) | Walmart
- Our Recommendation: Start small, but plan for growth. Don’t be afraid to repot every 1-2 years as your plant matures. A good rule of thumb is to move up to a pot that’s 2-4 inches wider in diameter each time.
With your plant acquired and its new home chosen, you’re well on your way! Next, we’ll dive into the daily care that will make your tea plant flourish.
💚 Nurturing Your Tea Plant: The Essentials for Success
You’ve got your tea plant, whether it’s a tiny seedling or a robust young sapling. Now comes the truly rewarding part: nurturing it into a thriving, tea-producing bush! Think of yourself as a tea plant parent – providing the perfect environment, the right nourishment, and a little tough love (pruning!) to help it reach its full potential.
🏞️ Soil Secrets: Crafting the Ideal Growing Medium for Tea
If there’s one thing a tea plant is particular about, it’s its soil. Get this right, and you’re halfway to success!
- Acidity is Key: Camellia sinensis is an acid-loving plant. It thrives in soil with a pH between 4.5 and 6.0. This is similar to what blueberries, azaleas, and rhododendrons prefer. Young Mountain Tea confirms this, stating, “Prefers acidic soil (pH 4.5-6), similar to blueberry soil.” [^2]
- Excellent Drainage: This is absolutely critical. Tea plants hate sitting in soggy soil, which can quickly lead to root rot. ✅ Good drainage is essential; ❌ poor drainage is a death sentence.
- Rich in Organic Matter: While drainage is paramount, tea plants also appreciate a soil rich in organic matter, which helps retain moisture and nutrients without becoming waterlogged.
How to Achieve the Perfect Soil:
- Test Your Soil: If planting outdoors, grab a soil test kit (available at garden centers or online, like the Luster Leaf Rapitest Soil Test Kit – Shop Luster Leaf Rapitest Soil Test Kit on: Amazon) to determine your current pH.
- For Containers:
- Start with a high-quality acidic potting mix specifically formulated for acid-loving plants (e.g., Espoma Organic Acidifying Potting Mix – Shop Espoma Organic Acidifying Potting Mix on: Amazon).
- Amend with perlite or coarse sand (20-30% of the mix) to enhance drainage.
- Add compost or well-rotted pine bark fines to boost organic matter and maintain acidity.
- Our Recipe: We often use a mix of 50% acidic potting mix, 30% perlite, and 20% compost. This provides the perfect balance of drainage, acidity, and nutrients.
- For In-Ground Planting:
- Amend Generously: Dig a hole twice as wide as your root ball. Mix your native soil with plenty of compost, peat moss, or pine bark fines to lower pH and improve drainage.
- Raised Beds: If you have heavy clay soil or live in a very wet area, raised beds are an excellent solution to ensure superior drainage, as recommended by Young Mountain Tea. [^2]
- Mulch: Apply a thick layer (2-4 inches) of acidic mulch like pine needles, pine bark, or sawdust around the base of the plant. This helps retain moisture, suppress weeds, and slowly acidify the soil as it breaks down. Young Mountain Tea suggests mulching with “sawdust, leaves, or compost in early fall.” [^2]
👉 CHECK PRICE on:
☀️ Sunlight Symphony: How Much Light Does Your Tea Plant Crave?
Tea plants are sun-worshippers, but they’re not always fans of the scorching midday sun, especially in hotter climates.
- Full Sun to Partial Shade: This is the sweet spot. Aim for at least 6 hours of direct sunlight per day.
- Full Sun (6+ hours): Ideal in cooler climates or if you have the Camellia sinensis var. sinensis which is generally more tolerant. Young Mountain Tea advises “Best in full sun; avoid shaded areas.” [^2]
- Partial Shade (4-6 hours, with afternoon shade): Recommended in hotter regions (like USDA Zone 9-10) to protect the leaves from scorching. LoveTheGarden.com also suggests a “bright, sheltered spot with partial shade.” [^3]
- Indoor Lighting: If growing indoors, place your plant in your brightest window, ideally south-facing. If natural light is insufficient, a grow light is a fantastic investment. We’ve had great success with Barrina T5 LED Grow Lights ( Shop Barrina T5 LED Grow Lights on: Amazon ) during the darker winter months.
- Our Tip: Observe your plant! If leaves look bleached or scorched, it’s getting too much intense sun. If it’s leggy with pale leaves, it needs more light.
💧 Water Wisdom: Quenching Your Tea Plant’s Thirst
Consistent moisture is crucial, but overwatering is a common pitfall. It’s a delicate balance!
- Moist, Not Soggy: The goal is to keep the soil consistently moist, like a wrung-out sponge. Never let it dry out completely, but also never let it sit in standing water.
- Annual Rainfall: Tea plants need a significant amount of water, around 60 inches annually. Young Mountain Tea specifies this, noting “Water needs: at least 60 inches annually.” [^2]
- Watering Frequency:
- Young Plants: Water 2-3 times weekly during summer, especially if in containers.
- Established Plants: Water regularly during dry periods. In the ground, they’ll be more resilient, but still need supplemental watering during droughts.
- Indoor Plants: Check the soil moisture every few days. Stick your finger about an inch or two into the soil. If it feels dry, it’s time to water.
- Quality of Water: If your tap water is very hard or alkaline, consider using rainwater or filtered water, as this can affect soil pH over time.
- Our Anecdote: Our team member, David, once almost lost a prized Camellia sinensis because he was too diligent with watering, leading to root rot. He learned the hard way that “less is more” when the soil is already damp. Now, he always checks the soil before watering!
🍎 Feeding Your Foliage: Fertilization for Robust Tea Plant Growth
Tea plants are not heavy feeders, but they do benefit from regular, balanced fertilization, especially when grown in containers.
- Acid-Loving Fertilizer: Choose a fertilizer specifically designed for acid-loving plants (azaleas, camellias, rhododendrons). These fertilizers have a higher nitrogen content and often contain iron, which helps maintain leaf color and acidity.
- Miracle-Gro Azalea, Camellia, Rhododendron Plant Food: Shop Miracle-Gro Azalea, Camellia, Rhododendron Plant Food on: Amazon (LoveTheGarden.com mentions using this type of soluble plant food [^3]).
- Espoma Organic Holly-tone: Shop Espoma Organic Holly-tone on: Amazon (a great organic option).
- Slow-Release Options: For container plants, a slow-release granular fertilizer (like Osmocote Smart-Release Plant Food – Shop Osmocote Smart-Release Plant Food on: Amazon) can provide consistent nutrients over several months, as suggested in the first YouTube video.
- When to Fertilize:
- Spring: Apply fertilizer in early spring as new growth begins.
- Summer: A lighter application in mid-summer can be beneficial, especially for container plants.
- Avoid Fall/Winter: Do not fertilize in late fall or winter, as this can encourage tender new growth that is susceptible to frost damage.
- Important Note on Harvesting: If you use chemical fertilizers, LoveTheGarden.com advises avoiding harvesting for 12-20 days after fertilizing to prevent flavor contamination. [^3] For organic growers, this waiting period is less critical but still a good practice.
- Our Philosophy: We lean towards organic feeding methods, using compost tea and organic granular fertilizers. It builds healthier soil in the long run and ensures the purest tea flavor.
📏 Spacing Out: Giving Your Tea Plants Room to Thrive
If you’re planting multiple tea bushes, proper spacing is crucial for their health and your harvesting ease.
- For Production/Hedge: If you’re aiming for a “tea hedge” for more substantial harvests, plants can be spaced closer, around 1.5-3 feet apart. This encourages them to grow into a dense, manageable hedge.
- For Home Gardens/Individual Bushes: For individual plants in a home garden, give them more room to spread out naturally. Young Mountain Tea suggests “at least 5 feet for home gardens,” [^2] while LoveTheGarden.com recommends “1.5 meters apart” (about 5 feet) for airflow and bushiness. [^3]
- Why Space Matters:
- Airflow: Good spacing prevents fungal diseases by allowing air to circulate around the leaves.
- Root Competition: Adequate space reduces competition for water and nutrients.
- Harvesting Access: Makes it easier to reach all parts of the plant for pruning and plucking.
- Our Experience: We once planted a row too close together, and the plants struggled with powdery mildew. We learned our lesson! Give them room to breathe.
✂️ The Art of Pruning: Shaping Your Tea Bush for Better Yields and Health
Pruning is perhaps the most important maintenance task for a productive tea plant. It’s an art form that encourages new growth, maintains shape, and improves overall plant health.
- Why Prune?
- Encourages New Growth: Tea leaves are harvested from new, tender shoots. Pruning stimulates this fresh growth.
- Maintains “Plucking Table”: For easier harvesting, you want a flat, accessible top to your bush, typically 3-5 feet tall.
- Air Circulation: Removes dense interior growth, improving airflow and reducing disease risk.
- Removes Dead/Damaged Wood: Keeps the plant healthy.
- When to Prune:
- Light Pruning/Tipping: Throughout the growing season, as you harvest, you’re essentially doing light pruning.
- Maintenance Pruning: Annually, usually in late winter or early spring before new growth begins. Remove any dead, diseased, or crossing branches.
- Hard Pruning/Rejuvenation: Every few years (or if your plant is overgrown), you can do a harder prune to rejuvenate the bush. This involves cutting back more significantly, but never more than one-third of the plant at a time.
- How to Prune:
- “Plucking Table” Formation: Once your plant is mature enough for harvesting (3+ years), you’ll want to prune it to a flat-topped shape. This encourages lateral branching and makes harvesting easier. Young Mountain Tea notes that “Frequent pruning encourages growth and optimal leaf harvest.” [^2]
- Tools: Use sharp, clean pruning shears (like Fiskars Bypass Pruners – Shop Fiskars Bypass Pruners on: Amazon) to make clean cuts.
- Our Pruning Philosophy: Don’t be afraid to prune! It feels counterintuitive to cut off growth, but for tea, it’s essential for stimulating the very leaves you want to harvest. We’ve seen plants transform from leggy, unproductive specimens into lush, dense bushes with consistent pruning.
🐞 Pest Patrol & Disease Defense: Keeping Your Tea Plant Healthy
Even the hardiest plants can face challenges. Being vigilant is your best defense!
- Common Pests:
- Scale Insects: These tiny, armored pests can attach to stems and leaves, sucking sap. The first YouTube video specifically mentions tea plants can be “susceptible to scale insects.”
- Aphids: Small, soft-bodied insects that cluster on new growth.
- Spider Mites: Tiny arachnids that thrive in dry conditions, causing stippling on leaves and fine webbing.
- Common Diseases:
- Root Rot: The most common issue, caused by overwatering and poor drainage.
- Fungal Spots: Can appear on leaves, often due to high humidity and poor air circulation.
- Prevention & Treatment:
- Good Airflow: Proper spacing and pruning help prevent fungal issues.
- Inspect Regularly: Check your plants weekly for any signs of pests or disease. Early detection is key!
- Horticultural Oil/Neem Oil: For scale, aphids, and spider mites, an application of Bonide All Seasons Horticultural & Dormant Spray Oil ( Shop Bonide All Seasons Horticultural & Dormant Spray Oil on: Amazon ) or Neem oil ( Shop Neem Oil on: Amazon ) can be very effective. Always follow label instructions.
- Proper Watering: Avoid overwatering to prevent root rot. Ensure excellent drainage.
- Organic Farming Techniques: We at Growing Teas™ prioritize Organic Farming Techniques to maintain plant health naturally, minimizing the need for chemical interventions. This includes companion planting, encouraging beneficial insects, and building healthy soil.
- Our Motto: A healthy plant is a happy plant! By providing the right conditions and staying observant, you can keep your tea bush thriving and pest-free.
🌟 Beyond the Basics: Advanced Tea Growing Insights
You’ve mastered the fundamentals, and your tea plant is looking robust. Now, let’s delve into some of the more nuanced aspects of tea cultivation that can elevate your growing game and deepen your appreciation for this incredible plant.
🌸 Understanding Tea Flowers: More Than Just Pretty Petals
In the fall, mature Camellia sinensis plants grace us with beautiful, small, fragrant white flowers. They’re a delightful sight, especially when most other garden plants are winding down.
- Ornamental Value: These flowers are quite lovely and add a touch of elegance to your garden. Many growers simply enjoy them for their aesthetic appeal.
- Pollination & Seeds: If pollinated, these flowers will develop into small, round seed pods, completing the plant’s reproductive cycle. This is how new tea plants are naturally propagated.
- Brewing Potential: Did you know you can brew tea from the flowers themselves? Young Mountain Tea mentions that the flowers “can be left for decoration or brewed into a sweet, relaxing tea.” [^2]
- Flavor Profile: Tea flower tea (often called “camellia flower tea”) is typically light, sweet, and subtly aromatic, with a honey-like note. It’s naturally caffeine-free.
- How to Brew: Gently pluck fresh, open flowers. You can brew them fresh or dry them for later use. Use about 1-2 teaspoons of fresh flowers per 8 oz of hot water (around 175-195°F or 80-90°C) and steep for 3-5 minutes.
- Impact on Leaf Production: Some commercial growers will pinch off flowers to direct the plant’s energy solely into leaf production. However, for home growers, the impact on your overall leaf harvest is usually negligible, and the joy of the flowers often outweighs the slight reduction in leaf yield. We at Growing Teas™ usually let our plants flower freely; it’s a beautiful part of their natural cycle!
❄️ Winter Care: Protecting Your Tea Plant from the Cold
While Camellia sinensis is surprisingly hardy, winter can be a challenging time, especially in borderline zones.
- Hardiness Zones: Tea plants generally thrive in USDA Zones 7B-10. If you’re in Zone 7, extra protection is a must.
- Outdoor Winter Protection:
- Mulch, Mulch, Mulch: A thick layer (4-6 inches) of acidic mulch (pine needles, pine bark) around the base of the plant acts as insulation for the roots.
- Wind Protection: Cold, dry winds are particularly damaging. If your plant is exposed, consider erecting a temporary burlap screen or planting it in a sheltered location.
- Watering: Ensure the plant is well-watered before the first hard freeze. Dry roots are more susceptible to cold damage.
- Frost Cloth: For unexpected hard freezes, covering your plant with a frost cloth (like Agfabric Plant Cover – Shop Agfabric Plant Cover on: Amazon) can provide crucial protection.
- Indoor Winter Care (for Container Plants):
- Bring Indoors: If you’re in a zone colder than 7B, or if you prefer to be safe, bring your potted tea plant indoors before the first frost.
- Location: Place it in a cool, bright spot. An unheated garage with a window, a sunroom, or a bright basement corner can work. Avoid placing it near heat vents, which can dry out the air.
- Humidity: Indoor heating can drastically reduce humidity. Consider using a humidifier ( Shop LEVOIT Humidifiers on: Amazon ) or placing the pot on a pebble tray filled with water to increase ambient moisture.
- Reduced Watering: Plants grow slower in winter, so they need less water. Check the soil moisture carefully and water only when the top inch or two is dry.
- Our Winter Woes: One winter, we forgot to bring in a small sinensis variety, thinking it was hardy enough. A sudden deep freeze took it out. Lesson learned: when in doubt, bring it in! LoveTheGarden.com also advises protecting young plants from frost and bringing them indoors for their first two winters. [^3]
🌱 Propagation Prowess: Expanding Your Tea Garden
Once you have a healthy, mature tea plant, you might find yourself wanting more! Propagating your own plants is a rewarding way to expand your tea garden or share with fellow enthusiasts.
- From Seeds:
- Harvesting: Collect the ripe seeds from your tea plant’s flowers in the fall. They’ll be inside small, woody capsules.
- Preparation: Soak seeds as described in the “From Seed to Sprout” section.
- Germination: Plant in a warm, humid environment. Remember, patience is key here!
- From Cuttings:
- Timing: Late spring to early summer is generally the best time to take semi-hardwood cuttings.
- Selection: Choose healthy, non-flowering stems about 4-6 inches long with 2-3 leaves.
- Preparation: Remove the lower leaves, dip the cut end in rooting hormone (like Garden Safe TakeRoot Rooting Hormone – Shop Garden Safe TakeRoot Rooting Hormone on: Amazon), and insert into a well-draining rooting medium (e.g., perlite or a mix of peat and sand).
- Environment: Maintain high humidity with a plastic dome or bag, and keep the medium consistently moist.
- Rooting: Roots typically form in 6-12 weeks.
- Layering:
- Process: Select a low-hanging branch that can be bent to touch the ground. Make a small cut on the underside of the branch, apply rooting hormone, and bury the cut section in the soil, securing it with a U-shaped pin. Keep the soil moist.
- Time: This method can take several months to a year for roots to form, but it often has a high success rate as the branch remains attached to the parent plant.
- Our Propagation Success: We’ve had great fun experimenting with different propagation methods. Cuttings are our go-to for expanding our Camellia sinensis sinensis stock, especially when we want to ensure genetic consistency. It’s truly magical to see a new plant emerge from a tiny piece of an old friend!
☕ From Leaf to Cup: Processing Your Homegrown Tea
This is it! The culmination of your patience and hard work. Harvesting and processing your own tea leaves is an incredibly satisfying experience, transforming fresh foliage into a delicious brew. While commercial tea processing is a complex art, you can achieve fantastic results at home with simplified methods.
Harvesting Your Precious Leaves: The Plucking Process
Remember our golden rule: wait until your plant is at least three years old before harvesting! Once it’s ready, the actual plucking is a delicate dance.
- When to Harvest:
- Spring Flush: The first flush of new growth in spring is often considered the best quality, yielding the most delicate and flavorful teas.
- Throughout Growing Season: You can continue to harvest new growth from spring through late summer, depending on your climate and the plant’s vigor.
- Avoid Fertilizing Period: As LoveTheGarden.com advises, avoid harvesting for 12-20 days after applying chemical fertilizers to prevent flavor contamination. [^3]
- What to Pluck: The “Two Leaves and a Bud” Rule:
- This is the traditional method for high-quality tea. You’re looking for the very tip of a new shoot: the unopened leaf bud and the two youngest, most tender leaves directly below it.
- These young leaves are packed with flavor compounds and antioxidants.
- How to Pluck:
- Gentle Touch: Use your thumb and forefinger to gently snap off the “two leaves and a bud” at the stem.
- Clean Cuts: Alternatively, use small, sharp scissors to make a clean cut, being careful not to damage the remaining stem.
- Quantity: Don’t strip your plant bare! Harvest judiciously, taking only the new growth. Regular harvesting actually encourages more new shoots, making your plant bushier and more productive.
- Our Anecdote: Our founder, Sarah, remembers her first harvest. She was so excited she almost plucked too much! We quickly learned to take only a small portion at a time, ensuring the plant could continue to thrive and produce throughout the season. It’s a balance of eagerness and respect for the plant.
The Magic of Processing: Crafting Green, Black, Oolong, and White Teas at Home
The type of tea you make (green, black, oolong, white) isn’t determined by a different plant, but by how you process the leaves after harvesting! It’s all about controlling oxidation. Young Mountain Tea mentions that “Simple home methods available; resources include Tea Flower Gardens and Renegade Tea.” [^2]
Here’s a simplified overview of how you can make different teas at home:
-
White Tea (Least Processed):
- Harvest: Pluck only the unopened leaf buds (often called “silver tips”) or the very youngest, tenderest leaves.
- Wither: Gently spread the leaves on a tray in a cool, well-ventilated area for 12-72 hours until they are soft and pliable, losing about 70% of their moisture.
- Dry: Finish drying in a low oven (around 200°F / 93°C) for 10-20 minutes, or in a food dehydrator, until completely dry and brittle.
- Result: Delicate, sweet, and subtly floral tea.
-
Green Tea (No Oxidation):
- Harvest: “Two leaves and a bud.”
- Withering (Optional, Short): A very brief wither (1-2 hours) can make rolling easier, but some skip it.
- Fixing/Steaming (De-enzyming): This is the crucial step to prevent oxidation.
- Pan-Frying (Chinese style): Heat a large wok or pan to medium-high. Add leaves in small batches and stir-fry for 2-5 minutes until they soften and turn a dull green.
- Steaming (Japanese style): Steam leaves in a steamer basket for 1-2 minutes.
- Rolling: Roll the fixed leaves by hand or with a rolling pin on a clean surface to break cell walls and release juices. This shapes the tea and enhances flavor.
- Dry: Dry in a low oven (200-250°F / 93-120°C) or dehydrator until completely dry and brittle.
- Result: Fresh, grassy, sometimes nutty or vegetal flavor. Learn more about Green Tea Cultivation on our site!
-
Black Tea (Fully Oxidized):
- Harvest: “Two leaves and a bud.”
- Withering: Spread leaves thinly on trays in a cool, well-ventilated area for 12-24 hours until they are very pliable and have lost significant moisture, but are not dry. They should feel leathery.
- Rolling: Roll the withered leaves vigorously by hand, or using a rolling pin, to break cell walls. This releases enzymes that cause oxidation. You’ll notice a change in aroma.
- Oxidation: Spread the rolled leaves on a tray in a cool, humid environment (around 70-80°F / 21-27°C with high humidity). This is where the magic happens! The leaves will gradually turn coppery-brown and develop a fruity, malty aroma. This can take 1-3 hours. Taste and smell frequently to determine your desired level of oxidation.
- Drying (Fixing): Once oxidized to your liking, dry the leaves in a low oven (250-300°F / 120-150°C) or dehydrator until completely dry and brittle. This stops the oxidation process.
- Result: Robust, malty, sometimes fruity flavor.
-
Oolong Tea (Partially Oxidized):
- Harvest: Often slightly more mature leaves than green or black tea, but still young.
- Withering: Similar to black tea, but often longer, with periodic gentle bruising (shaking or tumbling) to initiate partial oxidation.
- Bruising/Tumbling: Gently bruise the edges of the leaves by shaking them in a basket or gently rolling them. This allows partial oxidation.
- Partial Oxidation: Allow leaves to oxidize for a shorter period than black tea (e.g., 30 minutes to 2 hours), checking frequently.
- Fixing: Pan-fry or steam to stop oxidation, similar to green tea.
- Rolling/Shaping: Roll or shape the leaves (some oolongs are tightly rolled into pearls).
- Drying: Dry completely.
- Result: A vast spectrum of flavors, from floral and green to roasted and fruity, depending on the level of oxidation.
Our Processing Tip: Start simple! Try making green tea first, as it’s the most straightforward. As you gain confidence, experiment with black and white teas. It’s a journey of discovery, and every batch will teach you something new.
Tools of the Trade: What You’ll Need for Home Tea Processing
You don’t need a factory, but a few basic tools will make your home processing much easier:
- Harvesting:
- Small, Sharp Scissors: For precise plucking.
- Basket or Tray: To collect your freshly plucked leaves without bruising them.
- Withering/Oxidation:
- Clean Trays or Screens: For spreading leaves thinly (e.g., baking sheets, window screens, or dedicated drying racks).
- Fan: For air circulation during withering.
- Hygrometer/Thermometer: To monitor temperature and humidity during oxidation (optional, but helpful).
- Fixing/Drying:
- Wok or Large Pan: For pan-frying green tea.
- Steamer Basket: For steaming green tea.
- Oven or Food Dehydrator: For final drying. A food dehydrator (like COSORI Food Dehydrator – Shop COSORI Food Dehydrator on: Amazon) offers more control over temperature.
- Rolling:
- Clean Cutting Board or Countertop: For hand-rolling.
- Rolling Pin: To help break down cell walls.
- Storage:
- Airtight Containers: To store your finished tea and preserve its freshness.
- Tea Tins: Shop Tea Tins on: Amazon
👉 CHECK PRICE on:
Processing your own tea is a fantastic way to connect with the plant and appreciate the nuances of different tea types. It’s a journey of experimentation, and every cup will be a testament to your dedication!
📖 Our Growing Teas™ Tales: Personal Anecdotes and Lessons Learned from the Field
Here at Growing Teas™, our passion isn’t just about the science of cultivation; it’s about the stories, the triumphs, and yes, the occasional blunders that come with getting our hands dirty. We’ve learned so much from our own tea gardens, and we love sharing these personal tales with you.
The Tale of “The Stubborn Seed” and the Power of Patience
One of our earliest and most memorable experiences involved a batch of Camellia sinensis sinensis seeds we ordered from a reputable online vendor (not the Great Mississippi Tea Company, but a similar specialty nursery). We followed all the instructions: soaking, planting in a warm, dark spot, keeping the soil moist. After three weeks, nothing. Four weeks, still nothing. Five weeks, and we were starting to lose hope. “Maybe these seeds just aren’t viable,” I remember thinking, ready to toss the tray.
Our lead grower, Elena, however, is a true believer in the “Patience is KEY!” mantra from Tea-Happiness.com [^1]. She insisted we give them the full eight weeks, maybe even a little longer. So, we kept the tray warm, kept the soil moist, and tried not to obsess. Then, in the seventh week, a tiny crack appeared in one seed. A few days later, a minuscule white root emerged. And by week eight, we had a handful of fragile, hopeful sprouts!
Lesson Learned: This experience profoundly taught us the importance of patience. Tea plants, especially from seed, operate on their own timeline. What seems like a failure might just be a slow start. It reinforced our belief that growing tea is as much about cultivating patience in ourselves as it is about cultivating the plant. It’s a quiet, meditative process that truly rewards those who wait.
The “Great Repotting Disaster” and the Value of Drainage
Another vivid memory comes from my own backyard setup. I had a beautiful young Camellia sinensis var. assamica that was outgrowing its 5-gallon pot. I decided to move it into a much larger, decorative ceramic pot – a real showpiece! I was so focused on the aesthetics that I overlooked one critical detail: the drainage hole was partially blocked by a piece of mesh I’d placed to prevent soil loss, and the potting mix I used was a bit too heavy.
Within a few weeks, the plant started looking droopy, its vibrant green leaves turning a sickly yellow. My first instinct was to water it more, thinking it was thirsty. Big mistake! The soil was waterlogged, and the roots were suffocating. I was inadvertently causing root rot, the very thing tea plants despise.
Lesson Learned: I quickly learned that drainage is non-negotiable for tea plants. I had to carefully unpot the struggling plant, prune away the damaged roots, and repot it into a fabric grow bag (like a Smart Pot – Shop Smart Pots on: Amazon) with a much lighter, well-draining acidic mix. The plant recovered, thankfully, but it was a stark reminder that even experienced growers can make fundamental errors. Now, whenever we talk about soil, we emphasize drainage with almost religious fervor! It’s why we champion Organic Farming Techniques that focus on building healthy, well-aerated soil structure.
The “First Flush Celebration” and the Taste of Success
Not all our stories are about overcoming challenges! One of our most cherished memories is the first time our team collectively harvested enough leaves from our oldest Camellia sinensis sinensis bushes to make a truly significant batch of tea. These plants were well over three years old, robust and healthy.
We spent a glorious spring morning carefully plucking “two leaves and a bud” from each bush. The air was filled with the fresh, slightly grassy scent of the leaves. We then brought them back to our small processing area, withered them, pan-fried them for green tea, rolled them, and finally dried them. The entire process, from plucking to drying, felt like a sacred ritual.
That evening, we gathered, brewed our homegrown green tea, and savored every sip. It wasn’t just tea; it was the taste of years of dedication, the culmination of learning, and the pure joy of connecting with nature. The flavor was delicate, fresh, and utterly unique – far superior to any store-bought tea we’d ever had.
Lesson Learned: The reward for patience and diligent care is immense. Growing your own tea isn’t just about the beverage; it’s about the journey, the connection, and the profound satisfaction of creating something beautiful and delicious from your own garden. It truly is a “rewarding experience that can last for decades,” as Young Mountain Tea beautifully puts it. [^2] These are the moments that fuel our passion at Growing Teas™ and inspire us to help you cultivate your own tea dreams.
🚧 Common Hurdles & How We Overcame Them in Our Tea Gardens
Even with the best intentions and meticulous care, growing tea plants can present a few head-scratchers. We’ve certainly faced our share of challenges at Growing Teas™, and through trial, error, and a lot of research, we’ve learned how to navigate them. Here are some common hurdles and our battle-tested solutions.
1. Yellowing Leaves (Chlorosis) 🍂
- The Problem: You notice your tea plant’s leaves turning yellow, often with the veins remaining green. This is a classic sign of chlorosis, usually indicating a nutrient deficiency, most commonly iron, which is often tied to soil pH. If your soil is too alkaline (pH too high), the plant can’t absorb iron, even if it’s present in the soil.
- Our Experience: We once had a batch of container-grown Camellia sinensis that started showing severe chlorosis. We were using a generic potting mix, thinking it would be fine. It wasn’t!
- The Fix:
- Test Soil pH: This is your first step. Use a reliable soil test kit (like the Luster Leaf Rapitest Soil Test Kit – Shop Luster Leaf Rapitest Soil Test Kit on: Amazon). If the pH is above 6.0, you need to acidify it.
- Acidify Soil: For containers, repot into an acidic potting mix (e.g., Espoma Organic Acidifying Potting Mix – Shop Espoma Organic Acidifying Potting Mix on: Amazon). For in-ground plants, incorporate elemental sulfur or peat moss.
- Iron Supplement: Apply a chelated iron supplement (like Southern Ag Chelated Liquid Iron – Shop Southern Ag Chelated Liquid Iron on: Amazon) as a foliar spray or soil drench for a quick boost while the soil pH adjusts.
- Acidic Fertilizers: Switch to fertilizers specifically for acid-loving plants (e.g., Espoma Organic Holly-tone – Shop Espoma Organic Holly-tone on: Amazon).
- Confidence Recommendation: Don’t guess with yellow leaves! Always test your soil pH first. Correcting the pH is a long-term solution; iron supplements are a temporary fix.
2. Leggy Growth and Sparse Leaves 📏
- The Problem: Your tea plant is growing tall and spindly, with long stems and few leaves, especially towards the bottom. This is often a sign of insufficient light or lack of proper pruning.
- Our Experience: Our indoor tea plants, before we invested in proper grow lights, often looked like they were stretching for the sun, desperate for more light.
- The Fix:
- Increase Light: Move outdoor plants to a sunnier location (at least 6 hours of direct sun). For indoor plants, relocate to a brighter window or supplement with grow lights (like Barrina T5 LED Grow Lights – Shop Barrina T5 LED Grow Lights on: Amazon).
- Prune Aggressively (but wisely): Don’t be afraid to prune back leggy stems. This encourages lateral branching and a bushier, more productive plant. Remember the “plucking table” concept – prune to shape! Young Mountain Tea emphasizes that “Frequent pruning encourages growth and optimal leaf harvest.” [^2]
- Confidence Recommendation: Pruning feels scary, but it’s essential for tea plants. They respond incredibly well to it, rewarding you with denser foliage and more harvestable shoots.
3. Pest Infestations (Especially Scale) 🐞
- The Problem: Small, immobile bumps on stems and leaves (scale), sticky residue (honeydew), or tiny webs (spider mites). The first YouTube video specifically highlights tea plants’ susceptibility to scale insects.
- Our Experience: Scale insects are notoriously persistent. We’ve battled them on several occasions, especially on plants brought indoors for winter.
- The Fix:
- Manual Removal: For light infestations, physically scrape off scale insects with your fingernail or a soft brush dipped in soapy water.
- Horticultural Oil/Neem Oil: For more widespread issues, apply Bonide All Seasons Horticultural & Dormant Spray Oil ( Shop Bonide All Seasons Horticultural & Dormant Spray Oil on: Amazon ) or Neem oil ( Shop Neem Oil on: Amazon ). These smother pests and disrupt their life cycle. Repeat applications are often necessary.
- Good Airflow: Ensure proper plant spacing and pruning to improve air circulation, which deters many pests and fungal diseases.
- Quarantine: When bringing plants indoors, always quarantine them for a few weeks to prevent introducing pests to your other houseplants.
- Confidence Recommendation: Early detection is your best friend. Inspect your plants regularly, especially the undersides of leaves. Consistent, organic pest management is key to long-term health. We advocate for Organic Farming Techniques to build a resilient ecosystem in your garden that naturally deters pests.
4. Slow Growth or Stunted Development 🐢
- The Problem: Your tea plant just isn’t growing as fast or as vigorously as you’d expect, even after the initial establishment phase.
- Our Experience: We’ve seen this when plants are in pots that are too small, or when they’re not getting enough consistent nutrients.
- The Fix:
- Check Pot Size: If in a container, ensure it’s not root-bound. Repot into a larger container if necessary.
- Fertilization: Ensure you’re providing consistent, balanced nutrition with an acid-loving fertilizer during the growing season. A slow-release fertilizer (like Osmocote Smart-Release Plant Food – Shop Osmocote Smart-Release Plant Food on: Amazon) can be very effective.
- Water Consistency: Irregular watering (too much or too little) stresses the plant and hinders growth. Maintain consistent moisture.
- Sunlight: Re-evaluate the amount of sunlight your plant is receiving.
- Soil Health: Ensure your soil is well-draining and has adequate organic matter.
- Confidence Recommendation: Think of your tea plant’s needs holistically. Stunted growth is often a symptom of multiple underlying issues. Address each factor systematically, and you’ll likely see a positive change.
By understanding these common hurdles and applying these solutions, you’ll be well-equipped to keep your tea plants happy, healthy, and on their way to producing delicious leaves for years to come. It’s all part of the rewarding journey of cultivating your own tea!
[^1]: Tea-Happiness.com. “How to Grow Tea (Part 1): Growing Camellia Sinensis at Home.” Tea-Happiness.com, 2019. http://www.tea-happiness.com/2019/01/how-to-grow-tea-pt-1-growing-camellia.html [^2]: Young Mountain Tea. “Grow Your Own Tea Plant.” Young Mountain Tea Blog, 2023. https://youngmountaintea.com/blogs/blog/grow-your-own-tea-plant [^3]: LoveTheGarden.com. “How to Grow Tea.” LoveTheGarden.com, 2023. https://www.lovethegarden.com/uk-en/article/how-grow-tea
✅ Conclusion: The Rewarding Journey of Growing Your Own Tea

Wow, what a journey we’ve taken together! From the ancient origins of Camellia sinensis to the delicate art of processing your very own tea leaves, growing tea plants is truly a labor of love—and patience. If you’ve been wondering, “How long does it take to grow a tea plant?”, the answer is clear: expect at least three years before your first meaningful harvest, with full maturity and peak production arriving around 5-7 years. But oh, is it worth the wait!
Whether you start from seed, cutting, or a young plant, each step is a rewarding lesson in patience, care, and connection to nature. You’ll face challenges—yellowing leaves, pests, and slow growth—but with the right soil, watering, pruning, and a sprinkle of love, your tea plant will thrive for decades, offering you fresh, homegrown tea that no store-bought blend can match.
Remember, growing tea is not just about the end product; it’s about the process, the stories, and the joy of nurturing a living legacy. As we shared from our own Growing Teas™ tales, the first sip of your own brewed tea is a moment of triumph, a celebration of your dedication and care.
So, are you ready to start your tea-growing adventure? We hope this guide has equipped you with the knowledge, inspiration, and confidence to cultivate your own tea plant and savor the fruits (or rather leaves!) of your labor.
🔗 Recommended Links: Dive Deeper into the World of Tea Cultivation
Ready to gear up or dive deeper? Here are some of our favorite products, tools, and books to help you cultivate your own tea garden like a pro:
Essential Products for Growing and Processing Tea
-
Luster Leaf Rapitest Soil Test Kit
Amazon -
Garden Safe TakeRoot Rooting Hormone
Amazon -
Fiskars Bypass Pruners
Amazon -
Bonide All Seasons Horticultural & Dormant Spray Oil
Amazon -
Neem Oil (Organic Cold-Pressed)
Amazon -
Smart Pots Fabric Grow Bags
Amazon -
COSORI Food Dehydrator
Amazon -
Barrina T5 LED Grow Lights
Amazon -
Miracle-Gro Azalea, Camellia, Rhododendron Plant Food
Amazon -
Espoma Organic Holly-tone Fertilizer
Amazon
Recommended Books on Tea Cultivation and Processing
-
The Tea Book: All Things Tea by Louise Cheadle & Nick Kilby
Amazon -
The Story of Tea: A Cultural History and Drinking Guide by Mary Lou Heiss & Robert J. Heiss
Amazon -
Tea: History, Terroirs, Varieties by Kevin Gascoyne, Francois Marchand, et al.
Amazon
❓ FAQ: Your Burning Tea Plant Questions Answered

How long before a tea plant produces leaves suitable for harvesting?
Answer: Typically, a tea plant grown from seed or cutting will take about 3 years before you can start harvesting leaves suitable for making tea. This waiting period allows the plant to establish a strong root system and develop healthy foliage. Harvesting too early can stress the plant and reduce its lifespan. After 3 years, you can begin harvesting the tender “two leaves and a bud” for the best quality. Full maturity and peak production often occur around 5-7 years.
Can you grow a tea plant indoors or does it need to be outside?
Answer: Yes, you can grow a tea plant indoors, especially if you live in a colder climate (below USDA Zone 7B). Indoor growing requires a large container with excellent drainage, consistent moisture, and bright light—ideally a south-facing window or supplemental grow lights. However, tea plants generally grow faster and larger outdoors where they receive natural sunlight and airflow. Indoor plants may grow more slowly and require more attentive care.
How often should you prune a tea plant for optimal growth?
Answer: Light pruning or “tipping” can be done throughout the growing season as you harvest new shoots. For maintenance, perform a more thorough pruning once a year in late winter or early spring before new growth begins. Every few years, a harder prune may be necessary to rejuvenate the plant. Regular pruning encourages bushier growth, improves airflow, and maintains the ideal “plucking table” height of 3-5 feet.
What are the signs that my tea plant is ready for its first harvest?
Answer: Your tea plant is ready for its first harvest when it is at least 3 years old and has developed a healthy, dense canopy with plenty of new shoots. Look for the tender “two leaves and a bud” at the tips of branches. The leaves should be vibrant green, healthy, and free from pests or disease. Avoid harvesting if the plant looks stressed or sparse.
How does climate affect the growth rate of tea plants?
Answer: Climate plays a significant role in tea plant growth. Tea plants thrive in USDA Zones 7B-10, with warm, humid conditions promoting faster growth. Cooler climates slow growth but can be mitigated with indoor growing or protective measures. Excessive heat or direct afternoon sun can stress plants, requiring partial shade. Consistent rainfall or irrigation (around 60 inches annually) is essential. Seasonal temperature fluctuations also influence dormancy and growth cycles.
What is the average yield of tea leaves from a single tea plant per year?
Answer: A mature tea plant (5+ years old) can yield approximately 0.5 to 1 pound (225-450 grams) of fresh leaves per year, depending on growing conditions and pruning. This translates to roughly 0.1 to 0.2 pounds (45-90 grams) of dried tea leaves, enough for several cups per week. Commercial plantations harvest much more due to scale and optimized conditions, but homegrown tea is about quality and connection, not quantity.
What conditions are needed to grow tea plants faster?
Answer: To encourage faster growth, provide:
- Acidic, well-draining soil (pH 4.5-6.0) rich in organic matter
- Consistent moisture without waterlogging
- Full sun to partial shade (at least 6 hours of light daily)
- Warm temperatures ideally between 65-85°F (18-29°C)
- Regular fertilization with acid-loving plant food
- Proper pruning to stimulate new shoots
- Good airflow to prevent disease
Avoid stressors such as drought, extreme cold, or poor soil.
What is the lifespan of a tea plant?
Answer: With proper care, tea plants can live for 50 years or more. They are long-lived perennials that can continue producing quality leaves for decades. Regular maintenance, including pruning, fertilization, and pest management, extends their productive lifespan.
What is the fastest growing tea?
Answer: Among the two main varieties, Camellia sinensis var. assamica (Assam variety) generally grows faster and larger than var. sinensis (Chinese variety). It thrives in warmer, tropical climates and produces higher yields. However, it requires more space and warmth. For home growers in temperate zones, var. sinensis is often preferred for its hardiness and manageable size despite slower growth.
📚 Reference Links: Our Trusted Sources for Tea Growing Knowledge
-
Tea-Happiness.com: How To Grow Tea, Pt. 1: Growing Camellia Sinensis
http://www.tea-happiness.com/2019/01/how-to-grow-tea-pt-1-growing-camellia.html -
Young Mountain Tea: Grow Your Own Tea Plant
https://youngmountaintea.com/blogs/blog/grow-your-own-tea-plant -
LoveTheGarden.com: How to Grow Tea
https://www.lovethegarden.com/uk-en/article/how-grow-tea -
Camellia Forest Nursery (Tea Plants)
https://www.camelliaforest.com/ -
Great Mississippi Tea Company (Seeds)
http://www.greatmsteacompany.com/ -
Oregon Tea Traders (Plants and Supplies)
https://oregonteatraders.com/ -
Fast Growing Trees (Tea Plants)
https://www.fast-growing-trees.com/ -
Minto Island Farm Stand (Pacific Northwest Tea Plants)
http://www.mintogrowers.com/ -
Espoma Organic Gardening
https://www.espoma.com/ -
Miracle-Gro Azalea, Camellia, Rhododendron Plant Food
https://www.miraclegro.com/
We hope this comprehensive guide has inspired you and equipped you with the knowledge to embark on your tea-growing adventure. Remember, every great cup of tea starts with a single leaf—and a little patience. Happy growing!