Support our educational content for free when you purchase through links on our site. Learn more
🌿 Growing Black Tea Indoors: The Ultimate 10-Step Guide (2026)

Imagine brewing a cup of rich, malty black tea made from leaves you nurtured right in your living room. Sounds like a dream? At Growing Teas™, we’ve turned that dream into reality—and now, we’re sharing our expert secrets with you! Growing black tea indoors isn’t just for tropical climates or sprawling plantations; with the right know-how, anyone can cultivate Camellia sinensis at home and savor truly fresh, homegrown tea.
In this comprehensive guide, we’ll walk you through every step—from selecting the perfect acidic soil mix to mastering the delicate oxidation process that transforms fresh leaves into the black tea you love. Curious about how to balance humidity, light, and pruning to coax your plant into producing multiple harvests a year? Or how to troubleshoot common indoor challenges like pests and nutrient deficiencies? We’ve got you covered. Plus, we’ll reveal insider tips on processing your leaves like a pro, turning your harvest into a flavorful cup that rivals any store-bought black tea.
Ready to embark on your tea-growing adventure? Let’s dive in!
Key Takeaways
- Growing black tea indoors is entirely possible with the right environment: bright light, warm temperatures, high humidity, and acidic, well-draining soil.
- Patience pays off: expect to wait at least three years before your first harvest of tender “two leaves and a bud” flushes.
- Pruning and training your tea plant encourages bushy growth and maximizes leaf production.
- Processing your leaves through withering, rolling, oxidation, and drying unlocks the rich flavors unique to black tea.
- Troubleshooting tips include managing pests like spider mites and aphids, correcting nutrient deficiencies, and maintaining proper watering schedules.
- For a deeper dive, explore our recommended tools, fertilizers, and seed sources to kickstart your indoor tea garden with confidence.
Ready to grow your own black tea? Keep reading to uncover all the expert tips and tricks!
Table of Contents
- ⚡️ Quick Tips and Facts for Growing Black Tea Indoors
- 🌱 The Fascinating Journey: History and Origins of Black Tea Cultivation
- 🏡 Creating the Perfect Indoor Environment for Your Black Tea Plant
- 🪴 Step 1: Selecting and Preparing Your Tea Shrub for Indoor Growth
- 🌞 Step 2: Mastering Light, Temperature, and Humidity for Thriving Tea Plants
- 💧 Step 3: Watering, Soil, and Fertilization Secrets for Lush Tea Leaves
- ✂️ Step 4: Pruning and Training Your Indoor Tea Plant for Maximum Yield
- 🌿 Step 5: Harvesting and Processing Black Tea Leaves Indoors Like a Pro
- 🍵 From Leaf to Cup: Understanding Black Tea Oxidation and Flavor Development
- 🧪 Troubleshooting Common Indoor Tea Growing Challenges and Pest Control
- 🌍 Exploring Varieties: How Different Black Tea Cultivars Perform Indoors
- 🎨 Creative Uses: Beyond Brewing – Culinary and DIY Ideas with Your Homegrown Black Tea
- 📅 Seasonal Care Guide: Year-Round Tips for Indoor Black Tea Cultivation
- 🛠️ Essential Tools and Supplies for Growing Black Tea Indoors
- 💡 Expert Insights: Our Team’s Personal Stories and Lessons from Growing Black Tea Indoors
- ✅ Conclusion: Your Path to Homegrown Black Tea Success
- 🔗 Recommended Links for Black Tea Enthusiasts and Growers
- ❓ FAQ: Your Burning Questions About Growing Black Tea Indoors Answered
- 📚 Reference Links and Further Reading
⚡️ Quick Tips and Facts for Growing Black Tea Indoors
Welcome, fellow tea enthusiasts! Ever dreamt of sipping a cup of black tea brewed from leaves you nurtured yourself? Well, you’re in the right place! Growing black tea indoors might sound like a grand adventure, and trust us, it is! But with a little know-how from us at Growing Teas™, you’ll be well on your way to becoming a home tea master. Here are some quick, essential facts to get your journey brewing:
- The Source: All true tea (black, green, oolong, white, pu-erh) comes from the same plant: Camellia sinensis. Yes, one plant, many magical brews! The difference lies in how you process the leaves.
- Patience is a Virtue (and a Necessity!): Don’t expect a harvest overnight. Your tea plant needs to mature. Most sources, including Young Mountain Tea, agree: “You shouldn’t harvest leaves from your plant until it is at least three years old.” So, settle in for the long haul – it’s worth it!
- Acid-Loving Plant: Camellia sinensis thrives in acidic soil, ideally with a pH between 4.5 and 6.0. Think blueberries, not neutral soil! This is a crucial point where some advice, like the “pH neutral potting soil” mentioned in some videos, can lead you astray. Trust us, your tea plant will thank you for the acidity!
- Light, Light, Light! These plants are sun worshippers. A south-facing window is your best friend, or consider supplemental grow lights. They need “nice strong sunlight” to produce those lush leaves.
- Humidity is Key: Originating from subtropical and tropical regions, tea plants love humidity. Your dry indoor air might need a boost from a humidifier or pebble tray.
- Water Wisely: Consistent moisture is vital, but never soggy soil. Good drainage is non-negotiable.
- Prune for Production: Regular pruning isn’t just for aesthetics; it encourages bushier growth and more tender leaves for harvesting.
- The Magic of Oxidation: What makes black tea black? It’s the oxidation process after harvesting. This is where the magic happens, transforming fresh green leaves into the rich, malty flavors we adore.
Ready to dive deeper? Let’s unfurl the secrets of growing your own black tea indoors!
🌱 The Fascinating Journey: History and Origins of Black Tea Cultivation

Before we get our hands dirty, let’s steep ourselves in a bit of history. The story of tea is as rich and complex as a perfectly brewed Darjeeling. All true tea, from the delicate white to the robust black, originates from a single species: Camellia sinensis. This evergreen shrub or small tree has its roots deep in the lush, mountainous regions of Southeast Asia, particularly around the borders of China, India, and Myanmar.
Legend has it that tea was discovered by Chinese Emperor Shen Nung in 2737 BCE when a few leaves from a Camellia sinensis tree drifted into his boiling water. While that might be a charming myth, archaeological evidence suggests tea consumption dates back much further, possibly to the Shang Dynasty (1600–1046 BCE) in Yunnan, China. You can explore more about tea’s ancient past on resources like the World History Encyclopedia’s article on the History of Tea https://www.worldhistory.org/Tea/.
For centuries, tea was primarily consumed in China, often as a medicinal tonic. It was during the Tang Dynasty (618–907 CE) that tea truly blossomed into a cultural phenomenon, evolving into an art form with elaborate ceremonies. The spread of tea to Japan, Korea, and eventually the rest of the world followed trade routes, most notably the Silk Road.
The Rise of Black Tea: While green tea dominated early Chinese consumption, black tea (known as “red tea” or hóngchá in China due to its liquor color) gained prominence later, especially for export. Why? Because the oxidation process that defines black tea also makes it more stable and less prone to spoilage during long journeys across continents. This made it ideal for trade with Europe, where it quickly became a staple. The British East India Company played a pivotal role in expanding tea cultivation, particularly in India, leading to the development of famous black teas like Assam and Darjeeling.
Today, Camellia sinensis is cultivated globally, from the misty hills of Sri Lanka (Ceylon) to the high altitudes of Kenya. But what if you don’t live in a subtropical paradise? That’s where indoor cultivation comes in! As Young Mountain Tea aptly puts it, “You can grow the tea plant indoors, or, provided you have a favorable climate, outdoors.” We’re here to show you how to bring a piece of that rich history right into your living room.
🏡 Creating the Perfect Indoor Environment for Your Black Tea Plant
So, you’ve decided to embark on the noble quest of growing your own black tea indoors. Fantastic! But before you grab a pot and some dirt, let’s talk about creating a little slice of tea heaven right inside your home. Think of it as designing a mini-ecosystem that mimics the subtropical conditions Camellia sinensis adores.
1. ☀️ The Sunshine Saga: Light Requirements
Tea plants are not fans of the dark. They crave bright, indirect light for most of the day, ideally 6-8 hours.
- Our Recommendation: A south-facing window is usually your best bet in the Northern Hemisphere, providing the most consistent light. East or west-facing windows can work, but you might need to supplement.
- The Spruce Eats advises keeping them in a “warm, bright spot,” and Young Mountain Tea emphasizes “full sun or bright light; mountain-like conditions preferred.”
- The YouTube video also stresses “nice strong sunlight” and suggests a south-facing window or patio during summer. We concur!
- ❌ Avoid: Deep shade. Your plant will become leggy, weak, and produce sparse, flavorless leaves.
- 💡 Grow Lights to the Rescue: If natural light is scarce, don’t despair! Full-spectrum LED grow lights are a game-changer. We’ve had great success with brands like Barrina or Monios-L LED grow light strips. Position them about 12-18 inches above your plant for 12-14 hours a day.
2. 🌡️ Temperature Tango: Keeping it Cozy
Camellia sinensis is a tropical and subtropical plant, meaning it’s not a fan of the cold.
- Ideal Range: Aim for daytime temperatures between 65-80°F (18-27°C). Nighttime temperatures can dip slightly, but generally stay above 60°F (15°C).
- Cold Sensitivity: A Day in Candiland warns that “cold weather below 15°F poses risks; below 0°F is highly risky.” The YouTube video notes they “do not tolerate cold temperatures well and will die if left outside in freezing conditions,” though they can handle “around 40 degrees Fahrenheit.”
- Our Take: While mature outdoor plants in USDA Zone 8 can tolerate some frost, your indoor plant is more vulnerable. Bring your plant indoors if temperatures consistently drop below 40-50°F (4-10°C).
- ✅ Tip: Keep your plant away from cold drafts from windows or air conditioning vents, and also from direct heat sources like radiators, which can dry out the air too much.
3. 💧 Humidity Haven: Misting and More
This is often the trickiest part of indoor tea cultivation, as our homes tend to be much drier than a tea plantation.
- Why it Matters: High humidity (around 60-80%) helps prevent leaf edges from browning, supports healthy growth, and deters certain pests.
- Solutions:
- Humidifier: This is the most effective method. A small room humidifier, like those from Levoit or Honeywell, placed near your plant can make a huge difference.
- Pebble Tray: Fill a shallow tray with pebbles and water, placing your potted plant on top (ensure the pot isn’t sitting in the water). As the water evaporates, it creates a microclimate of humidity around the plant.
- Misting: While satisfying, misting alone provides only temporary humidity. It’s a nice supplement but not a standalone solution.
- Grouping Plants: Plants release moisture through transpiration, so grouping several plants together can slightly increase local humidity.
By carefully managing these environmental factors, you’ll be well on your way to a happy, thriving tea plant ready to produce those precious leaves!
🪴 Step 1: Selecting and Preparing Your Tea Shrub for Indoor Growth
Alright, let’s get down to business! The first step in your indoor black tea adventure is choosing your plant. This isn’t just any houseplant; this is your future tea factory!
1. Choosing Your Tea Plant: Seeds vs. Saplings
You have a couple of options when starting your tea plant journey:
- Seeds:
- Pros: More economical, offers the satisfaction of growing from scratch, and you might find a wider genetic variety.
- Cons: Requires immense patience! Germination can be slow and erratic, and as A Day in Candiland notes, you’ll be waiting a while. “Seeds should be planted in compost or potting soil in a sunny spot. Keep soil moist until seedlings sprout (~2 weeks).” Then, remember the 3-year rule before harvesting!
- Where to Buy: You can often find Camellia sinensis seeds online. A Day in Candiland recommends Camellia sinensis Heirloom Seeds available on Amazon.
- 👉 CHECK PRICE on:
- Camellia sinensis Heirloom Seeds: Amazon
- 👉 CHECK PRICE on:
- Saplings/Young Plants:
- Pros: A significant head start! You’ll bypass the germination phase and reduce the waiting time until your first harvest.
- Cons: More expensive than seeds, and selection might be limited depending on your location.
- Where to Buy: Young Mountain Tea suggests reputable nurseries like Minto Island Tea Farm (if you’re near Portland, Oregon), Camellia Forest Nursery https://camelliaforest.com/, Fast Growing Trees https://www.fast-growing-trees.com/, and Oregon Tea Traders https://oregonteatraders.com/. We’ve personally had great experiences with Camellia Forest Nursery for their healthy, well-established plants.
Our Expert Tip: If you’re eager to get to harvesting sooner, start with a young plant. It’s a more reliable and less frustrating path for beginners. If you’re up for a challenge and love the process, seeds are a rewarding, albeit slower, option.
2. Potting Up: Choosing the Right Home
Your tea plant needs a comfortable, well-draining home.
- Pot Size: Start with a pot that’s appropriate for the size of your sapling – usually 6-8 inches in diameter. As the plant grows, you’ll need to repot it into larger containers, eventually reaching 10-15 gallons or even larger if you want a substantial bush. Remember, Camellia sinensis can grow into a “large shrub or small tree,” as Young Mountain Tea points out.
- Material: Terracotta pots are excellent as they promote airflow and help prevent overwatering, but any pot with ample drainage holes will do.
- Drainage is Non-Negotiable: We cannot stress this enough! Tea plants hate “wet feet.” If your pot doesn’t have drainage holes, drill some, or pick a different pot.
3. The Perfect Brew: Crafting Your Acidic Soil Mix
This is where many aspiring tea growers stumble, especially if they follow conflicting advice. Let’s clear the air: tea plants are acid-lovers!
- The Conflict: The Spruce Eats and Young Mountain Tea correctly state that tea plants prefer “acidic soil” with a pH of 4.5-6.0, similar to blueberry soil. However, the YouTube video suggests “pH neutral potting soil” and a “pH of around 7.”
- Our Expert Resolution: The YouTube video is incorrect on this point. Camellia sinensis absolutely thrives in acidic conditions. A pH of 7 (neutral) will lead to nutrient deficiencies and a struggling plant.
- Our Recommended Soil Mix:
- High-Quality Potting Mix: Start with a good base. We often use Black Gold Organic Potting Soil (as recommended by A Day in Candiland) or FoxFarm Ocean Forest Potting Soil https://foxfarm.com/product/ocean-forest-potting-soil, which is naturally slightly acidic.
- 👉 CHECK PRICE on:
- Black Gold Organic Potting Soil: Amazon
- 👉 CHECK PRICE on:
- Sphagnum Moss: This is your secret weapon for acidity and moisture retention. A Day in Candiland and The Spruce Eats both recommend adding it. Mix in about 20-30% long-fiber sphagnum moss or peat moss.
- 👉 CHECK PRICE on:
- Sphagnum Moss: Amazon
- 👉 CHECK PRICE on:
- Perlite or Coarse Sand: For excellent drainage, incorporate 10-20% perlite or coarse horticultural sand. This prevents compaction and ensures roots don’t sit in water.
- Optional: Acidifier: If your water or base soil is alkaline, you might need to add a soil acidifier like elemental sulfur or an organic option like Espoma Organic Soil Acidifier https://www.espoma.com/product/soil-acidifier/. Always test your soil pH with a simple soil test kit before adding.
- High-Quality Potting Mix: Start with a good base. We often use Black Gold Organic Potting Soil (as recommended by A Day in Candiland) or FoxFarm Ocean Forest Potting Soil https://foxfarm.com/product/ocean-forest-potting-soil, which is naturally slightly acidic.
The Planting Process:
- Gently remove your sapling from its nursery pot.
- Loosen any circling roots at the bottom.
- Add a layer of your custom acidic soil mix to the new pot.
- Center the plant, ensuring the top of the root ball is level with the pot’s rim.
- Fill the rest of the pot with soil, gently tamping it down to remove large air pockets.
- Water thoroughly until water drains from the bottom.
A quick note on separating plants: The YouTube video mentions that tea plants are often shipped “two to a pot” to save on shipping. If this is the case, “separate them from this pot” and plant each in its own container. This prevents competition for resources and allows both plants to thrive. We’ve seen firsthand how a crowded pot leads to stunted growth and fewer leaves – a sad sight for any aspiring tea grower!
🌞 Step 2: Mastering Light, Temperature, and Humidity for Thriving Tea Plants
You’ve got your tea plant nestled in its perfect acidic home. Now, let’s fine-tune the environment to ensure it doesn’t just survive, but truly thrives, producing those tender leaves you’re dreaming of. This is where the art and science of indoor gardening truly come alive!
1. The Light Fantastic: Optimizing Illumination
We’ve already touched on light, but let’s get granular. Your Camellia sinensis needs consistent, bright light to fuel photosynthesis, which is how it makes the energy to grow those delicious leaves.
- Natural Light:
- South-facing window: As mentioned, this is ideal. Rotate your pot every few weeks to ensure all sides of the plant get adequate exposure.
- East or West-facing window: These can work, but the light might be less intense or shorter in duration. You’ll likely need to supplement.
- North-facing window: Generally insufficient for a tea plant.
- Supplemental Lighting (Grow Lights):
- Why use them? Essential during darker winter months, in homes with limited natural light, or if you want to accelerate growth.
- Types: Full-spectrum LED grow lights are energy-efficient and effective. Look for lights that mimic natural sunlight.
- Placement: Position the grow light 12-18 inches above the plant canopy. Adjust as the plant grows.
- Duration: Aim for 12-14 hours of light per day. A simple timer, like the BN-LINK Digital Timer, can automate this for you.
- 👉 CHECK PRICE on:
- BN-LINK Digital Timer: Amazon
- 👉 CHECK PRICE on:
- Signs of Insufficient Light: Leggy growth, pale leaves, slow growth, and lack of new shoots. If you see these, crank up the light!
2. Temperature Control: Finding the Sweet Spot
Tea plants are quite particular about temperature. They love warmth but can be stressed by extremes.
- Daytime Ideal: Keep your indoor space between 65-80°F (18-27°C). This range encourages active growth.
- Nighttime Dip: A slight drop in temperature at night (e.g., 5-10°F cooler) is natural and can even be beneficial, mimicking their native environment. However, avoid anything below 50°F (10°C) for prolonged periods.
- Seasonal Movement: If you live in a climate with warm summers, you can move your tea plant outdoors to a sheltered, bright spot once all danger of frost has passed and night temperatures are consistently above 50°F (10°C). Just remember to gradually acclimate it to direct sunlight to prevent leaf scorch. Bring it back inside before the first frost.
- A Day in Candiland warns against cold climates, noting “risk of damage below 15°F.” Our team has seen plants suffer even at 40°F if exposed for too long. Err on the side of warmth!
3. Humidity Harmony: Creating a Moist Microclimate
This is often the most challenging aspect of indoor tea cultivation, but it’s critical for healthy, vibrant leaves.
- Why high humidity? Tea plants are native to misty, humid regions. Dry indoor air can lead to crispy leaf edges, stunted growth, and make your plant more susceptible to pests like spider mites. Aim for 60-80% relative humidity.
- Our Top Strategies:
- Humidifier: This is by far the most effective method. A cool-mist humidifier, like the LEVOIT Humidifiers for Bedroom Large Room, placed near your plant will provide consistent moisture.
- 👉 CHECK PRICE on:
- LEVOIT Humidifiers: Amazon
- 👉 CHECK PRICE on:
- Pebble Trays: Fill a shallow tray with pebbles and water, then place your plant’s pot on top. As the water evaporates, it increases humidity around the plant. Just ensure the bottom of the pot isn’t sitting directly in the water, which can lead to root rot.
- Grouping Plants: As plants transpire, they release moisture. Grouping several plants together can create a small, localized humid microclimate.
- Terrariums/Cloches (for young plants): For very young seedlings or small plants, a clear plastic dome or mini-greenhouse can effectively trap humidity. Just ensure good air circulation to prevent fungal issues.
- Humidifier: This is by far the most effective method. A cool-mist humidifier, like the LEVOIT Humidifiers for Bedroom Large Room, placed near your plant will provide consistent moisture.
- ❌ What NOT to do: Rely solely on misting. While a quick mist can temporarily refresh leaves, it doesn’t provide the sustained humidity a tea plant needs and can sometimes encourage fungal growth if leaves stay wet for too long.
By diligently managing these environmental factors, you’re setting your Camellia sinensis up for a long, productive life, ready to yield those precious leaves for your very own homegrown black tea!
💧 Step 3: Watering, Soil, and Fertilization Secrets for Lush Tea Leaves
You’ve got the perfect spot, the right light, and a cozy temperature. Now, let’s talk about the lifeblood of your tea plant: water, the very foundation of its growth, and the nutrients that will make those leaves plump and flavorful. This is where consistent care truly pays off!
1. The Art of Watering: Hydration Without Drowning
Tea plants love consistent moisture, but they absolutely despise sitting in soggy soil. It’s a delicate balance, much like brewing the perfect cup!
- Consistency is Key: Young Mountain Tea notes that tea plants need “at least 60 inches annually” of water in their natural habitat, and “young plants need weekly watering.” A Day in Candiland suggests “water twice weekly in summer; once monthly in winter.”
- Our Expert Approach:
- Feel the Soil: The golden rule for indoor plants! Stick your finger about 1-2 inches deep into the soil. If it feels dry, it’s time to water. If it’s still moist, wait.
- Thorough Watering: When you do water, do it thoroughly until water drains freely from the bottom of the pot. This ensures the entire root ball is hydrated.
- Empty Saucer: Always empty any excess water from the saucer after about 15-30 minutes. Leaving your plant sitting in water is a fast track to root rot.
- Water Quality: If your tap water is highly alkaline or heavily chlorinated, consider using filtered water or rainwater. Tea plants prefer slightly acidic water. Letting tap water sit out for 24 hours can help dissipate chlorine.
- Signs of Underwatering: Drooping, wilting leaves, and dry, brittle soil.
- Signs of Overwatering: Yellowing leaves, mushy stems, and a general look of distress. This is often more detrimental than slight underwatering.
- ❌ Avoid: Erratic watering schedules. Consistency helps the plant establish a healthy routine.
2. Soil Health: The Foundation of Growth
We’ve already discussed the importance of an acidic, well-draining soil mix. Let’s reiterate why it’s so critical.
- Acidic pH (4.5-6.0): This is non-negotiable. In acidic soil, nutrients like iron and manganese are more readily available for your tea plant to absorb. If the pH is too high (alkaline), these essential nutrients become “locked up,” leading to deficiencies even if they’re present in the soil.
- Excellent Drainage: Prevents waterlogging, which suffocates roots and leads to root rot. The perlite or coarse sand in your mix is vital here.
- Organic Matter: Sphagnum moss, peat moss, or compost not only contribute to acidity but also improve soil structure, water retention (without being soggy), and provide a slow release of nutrients.
- Repotting: As your plant grows, it will become root-bound. Repot every 1-2 years into a pot that’s 1-2 inches larger in diameter. Spring is generally the best time for repotting, just before the active growing season.
3. Fertilization Secrets: Feeding Your Future Brew
Tea plants are moderate feeders. They need nutrients to produce those lush, green leaves, but over-fertilization can be detrimental.
- When to Fertilize: During the active growing season (spring and summer). Reduce or stop fertilization during fall and winter when growth naturally slows.
- Type of Fertilizer:
- Acid-Loving Plant Fertilizer: Look for fertilizers specifically formulated for acid-loving plants like azaleas, rhododendrons, or blueberries. These often have a higher nitrogen content and contain micronutrients like iron.
- NPK Ratio: The YouTube video suggests an “all-purpose fertilizer” like a 7-7-7 NPK blend, or a higher nitrogen fertilizer (e.g., 10-7-7 or 10-5-5) to “encourage faster leaf growth.” We agree that nitrogen (N) is crucial for leafy growth.
- Our Recommendation: A balanced, slow-release granular fertilizer for acid-loving plants, or a liquid feed with a slightly higher nitrogen ratio (e.g., 3-1-2 or 4-2-2) applied at half strength every 2-4 weeks during the growing season. Brands like Espoma Holly-tone https://www.espoma.com/product/holly-tone/ or Miracle-Gro Water Soluble Azalea, Camellia, Rhododendron Food are good options.
- Application: Always follow the package instructions, and when in doubt, under-fertilize rather than over-fertilize. Too much fertilizer can burn the roots.
- Organic Options: For those leaning into Organic Farming Techniques, compost tea or worm castings can provide gentle, natural nutrients.
By mastering these fundamental care practices, you’re not just growing a plant; you’re cultivating a vibrant, productive tea bush that will reward your efforts with delicious, homegrown leaves!
✂️ Step 4: Pruning and Training Your Indoor Tea Plant for Maximum Yield
Think of pruning as giving your tea plant a stylish haircut – it’s not just about looking good, it’s about encouraging the kind of growth you want: bushy, productive, and full of tender new leaves! Without proper pruning, your Camellia sinensis will likely grow tall and leggy, putting its energy into woody stems rather than the flush of new growth we harvest for tea.
1. Why Prune Your Indoor Tea Plant?
- Encourages Bushiness: Instead of one tall stem, pruning forces the plant to branch out, creating a denser, more compact shrub. More branches mean more potential harvesting points!
- Promotes New Growth: Tea is made from the “flush” – the tender new leaves and a bud at the tip of a shoot. Pruning stimulates this fresh growth.
- Manages Size and Shape: Indoors, space is often limited. Pruning keeps your tea plant manageable and aesthetically pleasing. The Spruce Eats notes to “prune to keep shrub manageable.”
- Improves Air Circulation: A denser canopy can sometimes lead to stagnant air, increasing the risk of fungal issues. Strategic pruning improves airflow.
2. When to Prune
- Initial Pruning (for young plants): Once your young plant is established and about 6-8 inches tall, you can perform an initial “tipping” or “pinching.”
- Maintenance Pruning: During the active growing season (spring through late summer), you’ll be doing light pruning as part of your harvesting routine.
- Dormancy Pruning (optional): A more significant shaping or rejuvenation prune can be done in late winter/early spring, just before new growth begins, if your plant needs a major overhaul.
3. How to Prune Your Tea Plant: Step-by-Step
- Tools: Always use clean, sharp pruning shears or scissors. We recommend a lightweight gardening set like the MECHREVO Lightweight Gardening Set for precision.
- 👉 CHECK PRICE on:
- MECHREVO Lightweight Gardening Set: Amazon
- 👉 CHECK PRICE on:
- Initial Shaping (The “6-inch Rule”):
- A Day in Candiland suggests, “Prune at 6 inches to encourage bushiness.” When your young plant reaches about 6-8 inches in height, snip off the top 1-2 inches of the main stem, just above a leaf node (where a leaf attaches to the stem). This signals the plant to send out side shoots.
- Encouraging Branching:
- As your plant grows, continue to prune back longer stems. A Day in Candiland describes a method: “cut back stems in halves, leaving one side longer.” This can help create a more natural, tiered shape.
- Always cut just above a leaf or a dormant bud. New growth will emerge from that point.
- Harvest Pruning: This is where pruning and harvesting become one! When you harvest the “flush” (the top two leaves and a bud), you are effectively pruning. This encourages the plant to produce more flushes. We’ll dive deeper into this in the next section!
- Removing Dead or Damaged Growth: Regularly inspect your plant and remove any yellow, brown, or diseased leaves and stems. Cut these back to healthy tissue.
- Opening the Canopy: If your plant becomes very dense, selectively remove a few inner branches to improve air circulation and light penetration to the lower leaves.
4. Training for Structure
While “training” might sound like you’re teaching your plant tricks, it simply refers to guiding its growth.
- Central Leader vs. Bushy Shrub: For indoor growing, we almost always aim for a bushy shrub rather than a single-stemmed tree. This is achieved through consistent pruning, as described above.
- Staking (for taller plants): If your plant starts to get a bit top-heavy or leggy despite pruning, a simple bamboo stake can provide support. Gently tie the main stem to the stake with soft plant ties.
Our Anecdote: One of our team members, Sarah, initially let her first indoor tea plant grow wild. It shot up like a beanstalk, producing only a few leaves at the very top. After a drastic “haircut” (a bit scary at the time!), the plant exploded with new side shoots and became a beautiful, productive bush. Don’t be afraid to prune! Your plant is resilient, and it will reward your bravery with a bounty of leaves.
By consistently pruning and gently guiding your tea plant, you’re not just maintaining its shape; you’re actively encouraging it to produce the very leaves you’re so eager to harvest for your homemade black tea.
🌿 Step 5: Harvesting and Processing Black Tea Leaves Indoors Like a Pro
This is it! The moment you’ve been patiently waiting for. After months (or even years!) of nurturing your Camellia sinensis, it’s finally time to reap the rewards. Harvesting and processing your own black tea leaves indoors is a deeply satisfying experience, connecting you directly to the ancient art of tea making.
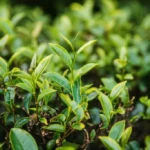
1. When to Harvest: The “Two Leaves and a Bud” Rule
- Patience, Young Padawan: As Young Mountain Tea and A Day in Candiland both emphasize, “You shouldn’t harvest leaves from your plant until it is at least three years old.” Harvesting too early can stress and stunt your young plant.
- The “Flush”: Once your plant is mature, you’ll be looking for the “flush” – the tender, new growth at the tip of a shoot. This consists of “the top two leaves and a bud” (often called the “pekoe tip”). These young leaves are packed with flavor precursors and are ideal for tea.
- Timing: You can typically harvest from spring through summer, and sometimes into early fall, as your plant continuously produces new flushes. Young Mountain Tea mentions that a mature plant can produce “multiple harvests annually.”
- Tools: Use clean, sharp scissors or your fingernails to gently pluck the flush.
2. Processing Black Tea: The Journey from Green to Black
This is where the magic happens, transforming fresh green leaves into the rich, complex flavors of black tea through a process called oxidation. The Spruce Eats and A Day in Candiland provide good outlines, and we’ll combine their wisdom with our own experience.
Step 5.1: 🌬️ Withering (Drying Out)
- Purpose: To reduce the moisture content of the leaves, making them pliable and ready for rolling, and to initiate enzymatic changes.
- Method:
- Spread your freshly harvested leaves in a single layer on a clean, dry cloth, a bamboo mat, or a baking sheet.
- Place them in a cool, dry, well-ventilated area away from direct sunlight. A Day in Candiland suggests an “indoor process, ~12 hours,” while The Spruce Eats says “2-3 days.”
- Our Experience: The duration depends heavily on your indoor humidity. In a drier environment, 12-24 hours might be enough. In humid conditions, it could take longer. The goal is for the leaves to become limp and pliable, like soft leather, but not crispy. They should lose about 30-50% of their moisture.
- Gently turn the leaves occasionally to ensure even withering.
Step 5.2: 🌀 Rolling (Bruising the Leaves)
- Purpose: To break the cell walls of the leaves, releasing enzymes and oils that are crucial for oxidation and flavor development.
- Method:
- Gather a small handful of withered leaves.
- Roll them firmly between your palms or on a clean surface (like a cutting board) until they are bruised, slightly sticky, and release some of their juices. You’ll notice them darkening and turning a reddish hue, as The Spruce Eats describes.
- The goal is to break the cells without tearing the leaves completely apart. A Day in Candiland highlights this step as releasing “enzymes and oils.”
Step 5.3: 🧪 Oxidation (The Flavor Development)
- Purpose: This is the defining step for black tea! The released enzymes react with oxygen, causing the leaves to turn coppery-brown and develop their characteristic aroma and flavor.
- Method:
- Spread the rolled leaves in a thin layer on a tray or clean cloth.
- Place them in a cool, humid environment (around 70-75°F / 21-24°C and 80-90% humidity is ideal). You can create this by placing the tray in a slightly damp, covered container or under a damp cloth.
- Monitor Closely: This is the most critical stage. Oxidation can take anywhere from 1 to 8 hours, depending on temperature, humidity, and the desired flavor profile. A Day in Candiland suggests “up to 8 hours.”
- Smell and Observe: The leaves will gradually darken and develop a fruity, malty, or floral aroma. This is where your senses become your guide! When the aroma is strong and pleasant, and the leaves have turned a deep coppery-brown, they are ready for drying. Over-oxidation can lead to flat, dull flavors.
Step 5.4: 🔥 Drying (Halting Oxidation)
- Purpose: To stop the oxidation process, remove remaining moisture, and lock in the developed flavors.
- Method:
- Preheat your oven to a low temperature, around 200-250°F (93-121°C). The Spruce Eats suggests 250°F for 20 minutes.
- Spread the oxidized leaves in a single layer on a baking sheet.
- Bake for 15-30 minutes, or until the leaves are completely dry, brittle, and dark brown/black. They should snap easily when bent.
- Our Tip: Keep a close eye on them to prevent burning! You might need to stir them occasionally.
- Alternatively, a food dehydrator set to a low temperature (around 100-115°F / 38-46°C) can also work, though it will take longer (several hours).
3. Storage
Once completely dry and cooled, store your homegrown black tea in an airtight container away from light, heat, and moisture. A glass jar with a tight-fitting lid is perfect. Properly stored, your tea can last for many months, allowing you to enjoy the fruits of your labor!
Harvesting and processing your own black tea is a journey of discovery. Each batch might be slightly different, a testament to your unique growing conditions and processing touch. Don’t be afraid to experiment with drying times for different flavors, as The Spruce Eats suggests. The next section will delve deeper into the fascinating science behind black tea oxidation!
🍵 From Leaf to Cup: Understanding Black Tea Oxidation and Flavor Development
You’ve just harvested and processed your first batch of black tea leaves. But what exactly happened during that magical transformation from fresh green leaf to dark, aromatic brew? The answer lies in a fascinating biochemical process called oxidation. This isn’t just a fancy word; it’s the very heart of black tea’s character!
The Science Behind the Magic: Enzymes and Oxygen
- The Key Players: Inside every Camellia sinensis leaf are compounds called polyphenols (specifically catechins) and a group of enzymes, primarily polyphenol oxidase.
- The Trigger: When you roll and bruise the tea leaves (Step 5.2), you intentionally break open the cell walls. This allows the polyphenols and enzymes, which are normally kept separate within the leaf cells, to mix and react with oxygen in the air.
- The Transformation: This enzymatic oxidation process causes a series of chemical reactions. The catechins are transformed into new compounds, primarily theaflavins and thearubigins.
- Theaflavins: These are responsible for the bright, brisk, and sometimes astringent notes in black tea, as well as its golden-orange hue.
- Thearubigins: These contribute to the deeper, reddish-brown color and the fuller body and malty notes characteristic of many black teas.
- Stopping the Reaction: The drying step (Step 5.4) is crucial because the heat deactivates these enzymes, halting the oxidation process. This locks in the flavor profile that has developed. If you don’t dry the leaves sufficiently, oxidation can continue, leading to over-oxidized, dull-tasting tea.
How Oxidation Shapes Flavor and Aroma
The degree and conditions of oxidation profoundly impact the final taste, aroma, and color of your black tea.
- Lightly Oxidized Black Teas: Think of some Darjeelings or certain Chinese black teas. They might retain some fresh, floral, or fruity notes, sometimes reminiscent of oolong tea, because their oxidation wasn’t pushed to the maximum.
- Fully Oxidized Black Teas: Most traditional black teas, like Assam or Ceylon, are fully oxidized. They develop robust, malty, sometimes chocolatey or honeyed notes, with a deep, reddish-brown liquor.
- Factors Influencing Oxidation:
- Temperature: Warmer temperatures generally speed up oxidation.
- Humidity: Higher humidity during oxidation can lead to a more even and controlled process.
- Time: The longer the oxidation, the darker and more robust the tea becomes. This is where your personal preference comes in!
- Leaf Quality: The age and condition of the leaves also play a role. Younger, tender leaves often yield more nuanced flavors.
Beyond Black: A Quick Look at Other Tea Types
Understanding oxidation also helps us appreciate other tea categories:
- Green Tea: The oxidation process is prevented almost immediately after harvesting by applying heat (steaming or pan-firing). This preserves the green color and fresh, grassy, or vegetal flavors. The Spruce Eats notes green tea is “blot dry, shade for hours, steam or roast, then oven-dry.” You can learn more about Green Tea Cultivation on our site!
- Oolong Tea: This is a semi-oxidized tea, falling between green and black. The oxidation is carefully controlled and stopped at a specific point, leading to a vast spectrum of flavors, from floral and light to roasted and fruity. The Spruce Eats describes oolong processing as “wilt under sun (~45 min), wither indoors, stir hourly, then oven-dry.”
- White Tea: Minimally processed, often just withered and dried. Very little to no oxidation occurs, preserving the delicate, subtle flavors of the young buds and leaves.
So, the next time you sip your homegrown black tea, remember the incredible journey those leaves took – from a tender flush on your indoor plant to a complex brew, all thanks to the fascinating dance of enzymes, polyphenols, and oxygen. It’s truly a marvel of nature and human ingenuity!
🧪 Troubleshooting Common Indoor Tea Growing Challenges and Pest Control
Even the most seasoned tea growers face a hiccup or two. Growing Camellia sinensis indoors presents its own unique set of challenges, from environmental quirks to unwelcome visitors. But don’t fret! With a little detective work and some expert advice, you can keep your tea plant happy and healthy.
Common Growing Challenges and Solutions
Here’s a table summarizing common issues and how to tackle them:
| Problem | Symptoms | Likely Cause(s) | Solution |
|---|---|---|---|
| Yellowing Leaves 🍂 | Leaves turn yellow, especially older ones. Can be accompanied by stunted growth. | Nutrient Deficiency (Iron Chlorosis): Often due to soil pH being too high (alkaline), preventing the plant from absorbing iron. | ✅ Check soil pH! If above 6.0, amend with elemental sulfur or an acid-loving plant fertilizer. Ensure your water isn’t too alkaline. Consider a chelated iron supplement. |
| Browning Leaf Edges 🍂 | Leaf margins turn brown and crispy. | Low Humidity: Indoor air is often too dry for tea plants. Underwatering: Plant isn’t getting enough moisture. Salt Buildup: Excess minerals in soil from hard water or over-fertilization. | ✅ Increase humidity with a humidifier or pebble tray. ✅ Check soil moisture and water thoroughly when dry. ✅ Flush soil with plain water every few months to remove salt buildup. |
| Wilting Leaves 💧 | Leaves droop, look limp, often accompanied by dry soil. | Underwatering: The most common cause. Root Rot: Less common, but can happen if overwatered for too long, leading to root damage and inability to absorb water. | ✅ Check soil moisture deeply. Water thoroughly if dry. ✅ If soil is constantly wet and plant is wilting, suspect root rot. Repot into fresh, well-draining soil, trimming any mushy, black roots. |
| Stunted Growth 🌳 | Plant is small for its age, not putting out new leaves. | Nutrient Deficiency: Lack of essential nutrients. Insufficient Light: Not enough energy for growth. Incorrect pH: Nutrients unavailable. Root Bound: Roots have filled the pot and can’t expand. | ✅ Fertilize regularly during growing season with appropriate fertilizer. ✅ Increase light exposure or add grow lights. ✅ Check and adjust soil pH. ✅ Repot into a larger container if root-bound. |
| Leggy Growth ⬆️ | Long, stretched stems with sparse leaves, often pale. | Insufficient Light: Plant is “reaching” for light. Lack of Pruning: Not encouraging bushiness. | ✅ Increase light intensity or duration with grow lights. ✅ Prune regularly to promote branching and a compact shape. |
| Small, Pale Leaves 🌿 | New growth is weak, light green or yellowish. | Nutrient Deficiency: Especially nitrogen. Insufficient Light: Plant lacks energy to produce healthy leaves. | ✅ Fertilize with a balanced or nitrogen-rich fertilizer during growing season. ✅ Ensure adequate light. |
| No New Growth 🌳 | Plant seems stuck, no new leaves or stems. | Dormancy: Natural slowdown in winter. Insufficient Light/Nutrients: Lack of resources. Root Bound: Plant can’t expand. | ✅ Ensure proper light and fertilization during growing season. ✅ Check for root-ound condition and repot if needed. |
| Brown/Crispy Leaves 🍂 | Leaves are dry, brittle, often starting from the tips or edges. | Underwatering: Not enough water. Low Humidity: Air is too dry. Over-fertilization: Salt burn. Excessive Heat/Sun: Plant is stressed. | ✅ Water consistently and thoroughly. ✅ Increase humidity. ✅ Flush soil. ✅ Move plant to slightly less intense light or cooler spot. |
✅ Conclusion: Your Path to Homegrown Black Tea Success

Well, dear tea adventurer, you’ve journeyed through the verdant world of Camellia sinensis cultivation—from selecting the perfect acidic soil to mastering the delicate art of oxidation. Growing black tea indoors is no mere hobby; it’s a rewarding blend of patience, science, and a little bit of magic.
Here’s the bottom line:
✅ With the right light, humidity, temperature, and soil conditions, your indoor tea plant can thrive and produce those coveted tender leaves.
✅ Pruning and harvesting the “two leaves and a bud” flush will keep your plant productive and healthy.
✅ Processing your leaves with care unlocks the rich, malty flavors that make black tea the world’s favorite brew.
Remember our earlier question: Can you really grow black tea indoors and enjoy a fresh cup? The answer is a resounding YES! It takes dedication, but the satisfaction of brewing tea from your own plant is unparalleled. Plus, you get to brag about it at your next tea party! ☕️
If you’ve been wondering about conflicting advice on soil pH or watering, now you know: acidic soil and consistent moisture with good drainage are non-negotiable. And don’t shy away from pruning—it’s your tea plant’s haircut for success!
So, roll up your sleeves, grab your pruning shears, and start your indoor tea garden. We at Growing Teas™ can’t wait to hear about your first harvest and the unique flavors you create. Happy growing!
🔗 Recommended Links for Black Tea Enthusiasts and Growers
Ready to get started or upgrade your tea-growing toolkit? Here are some of our top picks for seeds, soil, tools, and books to deepen your tea knowledge:
-
Camellia sinensis Heirloom Seeds:
Amazon -
Black Gold Organic Potting Soil:
Amazon -
Sphagnum Moss (approx. 17 QT):
Amazon -
MECHREVO Lightweight Gardening Set:
Amazon -
BN-LINK Digital Timer (for grow lights):
Amazon -
LEVOIT Cool Mist Humidifier:
Amazon -
Espoma Holly-tone Organic Fertilizer:
Amazon -
Miracle-Gro Azalea, Camellia, Rhododendron Food:
Amazon -
Books to Deepen Your Tea Knowledge:
❓ FAQ: Your Burning Questions About Growing Black Tea Indoors Answered

What are the common pests and diseases that can affect indoor black tea plants and how can I prevent them?
Common pests:
- Spider mites: Thrive in dry indoor air, causing stippling and webbing on leaves.
- Aphids: Small, soft-bodied insects that suck sap, causing leaf curl and sticky residue.
- Scale insects: Appear as small bumps on stems and leaves, weakening the plant.
Prevention and control:
- Maintain high humidity to deter spider mites.
- Regularly inspect your plant and wipe leaves with a damp cloth.
- Use insecticidal soap or neem oil sprays (organic and safe for indoor use).
- Quarantine new plants before introducing them to your tea garden.
- Avoid over-fertilizing, which can attract pests.
Diseases:
- Root rot: Caused by overwatering and poor drainage.
- Leaf spot: Fungal infections causing brown or black spots on leaves.
Prevention:
- Ensure well-draining soil and avoid waterlogging.
- Provide good air circulation around the plant.
- Remove and dispose of infected leaves promptly.
Can I grow black tea from tea bags or do I need to purchase a tea plant?
You cannot grow black tea from tea bags because the tea leaves inside are dried and processed, not viable seeds or live plants. To grow black tea, you need either seeds or a live tea plant (sapling) of Camellia sinensis. Seeds can be sourced online or from specialty nurseries, while saplings provide a head start.
How much light does a black tea plant need to thrive indoors?
Black tea plants require 6-8 hours of bright, indirect sunlight daily. A south-facing window is ideal. If natural light is insufficient, supplement with full-spectrum LED grow lights for 12-14 hours per day to mimic outdoor conditions.
What are the best conditions for growing black tea plants indoors?
- Temperature: 65-80°F (18-27°C) during the day, above 50°F (10°C) at night.
- Humidity: 60-80% relative humidity to prevent leaf browning and pest issues.
- Soil: Acidic (pH 4.5-6.0), well-draining mix with sphagnum moss and perlite.
- Watering: Consistent moisture without waterlogging; allow top 1-2 inches of soil to dry before watering again.
- Light: Bright, indirect sunlight or supplemental grow lights.
Is black tea good for indoor plants?
If you mean using black tea as a fertilizer or foliar spray, diluted black tea can provide mild nutrients and antioxidants beneficial to some plants. However, it should be used sparingly to avoid soil acidity imbalance or mold growth. For growing Camellia sinensis indoors, focus on proper soil and care rather than black tea applications.
Can you grow black tea indoors?
Absolutely! Growing black tea indoors is entirely possible with the right conditions. It requires patience, attention to light, humidity, temperature, and soil acidity. Many tea enthusiasts successfully cultivate Camellia sinensis indoors to enjoy fresh, homegrown tea leaves.
How do you care for a tea plant grown indoors?
- Provide bright light (natural or grow lights).
- Maintain consistent moisture with well-draining acidic soil.
- Keep humidity high using humidifiers or pebble trays.
- Prune regularly to encourage bushy growth.
- Fertilize during the growing season with acid-loving plant fertilizer.
- Monitor for pests and diseases, treating promptly.
Can black tea plants thrive in pots inside the home?
Yes! With proper pot size, drainage, and care, black tea plants can thrive in containers indoors. Repot every 1-2 years as the plant grows, and ensure the soil remains acidic and well-draining.
What is the ideal soil mix for indoor black tea cultivation?
An ideal soil mix includes:
- High-quality acidic potting soil (e.g., Black Gold Organic Potting Soil)
- Sphagnum moss or peat moss (20-30%) for acidity and moisture retention
- Perlite or coarse sand (10-20%) for drainage
- Optional: soil acidifier if pH needs adjustment
Additional FAQs
How long does it take to grow a tea plant ready for harvest?
Typically, 3 years before you can start harvesting leaves suitable for tea. Patience is key!
Can I process black tea leaves at home without special equipment?
Yes! Basic household items like baking sheets, clean cloths, and an oven or dehydrator suffice for small batches.
How often should I harvest black tea leaves indoors?
Once mature, you can harvest multiple flushes annually during the growing season, usually every 6-8 weeks.
📚 Reference Links and Further Reading
- How to Grow Black Tea – A Day In Candiland
- The Spruce Eats: Growing Tea at Home
- Young Mountain Tea: Grow Your Own Tea Plant
- World History Encyclopedia: History of Tea
- Camellia Forest Nursery
- Fast Growing Trees
- Oregon Tea Traders
- Espoma Organic Fertilizers
- FoxFarm Soil Products
For more on organic cultivation and tea blending, explore our Organic Farming Techniques and DIY Tea Blending categories at Growing Teas™.
Happy growing and even happier sipping! ☕🌿