Support our educational content for free when you purchase through links on our site. Learn more
🌱 Growing Tea from Seed: The Ultimate 2026 Guide (15+ Steps)

You can absolutely grow your own tea from seed, but you must be prepared for an 8-week germination wait and a 3-year journey to your first harvest. Growing tea from seed is a rewarding marathon that yields a unique, personalized cup, provided you have the patience to nurture the Camellia sinensis through its slow, magical transformation.
Most gardeners assume tea plants are too exotic for home cultivation, yet the secret lies in treating them like the acid-loving, slow-growing shrubs they are. We once watched a single seed sit dormant in our greenhouse for six weeks, only to burst forth with a vibrant green shoot that now feeds our entire family’s morning ritual.
Did you know that every cup of Green, Black, or Oolong tea comes from the exact same plant species? The difference isn’t in the seed, but in how you process the leaves after they mature.
Key Takeaways
- Patience is non-negotiable: Germination can take 2 to 8 weeks, and a harvestable bush takes 3 years to mature.
- Soil acidity is critical: You must use acidic soil (pH 4.5–6.0) or your plant will suffer from nutrient lockout.
- Variety matters: Choose Camellia sinensis var. sinensis for cold climates and var. assamica only for tropical zones.
- Genetic uniqueness: Seeds produce unique plants, meaning your tea flavor will be one-of-a-kind compared to store-bought varieties.
- Indoor winter care: If you live in Zone 7 or colder, your tea plant must be brought indoors to survive the winter.
Table of Contents
- ⚡️ Quick Tips and Facts
- 📜 From Ancient Seeds to Modern Gardens: A Brief History of Camellia Sinensis
- 🌱 The Reality Check: Is Growing Tea from Seed Right for You?
- 🛒 Sourcing Your Seeds: Finding Viable Camellia Sinensis Stock
- 🧪 Step-by-Step: The Ultimate Guide to Germinating Tea Seeds
- 🌿 Nurturing Your Seedlings: Soil, Light, and Water Requirements
- 🏡 Indoor vs. Outdoor Cultivation: Where Should Your Tea Bush Live?
- ✂️ Pruning and Training: Shaping Your Tea Plant for Maximum Yield
- 🍂 Harvesting and Processing: Turning Your Homegrown Leaves into Tea
- 🐛 Troubleshooting Common Pests, Diseases, and Growth Stalls
- ❓ Frequently Asked Questions About Growing Tea from Seed
- 🔗 Recommended Links and Resources
- 📚 Reference Links and Scientific Sources
- 🏁 Conclusion: Did We Grow the Perfect Cup?
⚡️ Quick Tips and Facts
Before we get our hands dirty with the soil and the seeds, let’s cut through the noise with some hard truths and golden nugets straight from the Growing Teas™ greenhouse. Growing Camellia sinensis from seed isn’t like popping a bean in a pot and waiting for a beanstalk; it’s a test of patience, a lesson in botany, and a journey that rewards the persistent.
Here is the TL;DR for the impatient among us (though we promise you’ll want to read the rest):
- The Wait Game: Germination is notoriously slow. You might see a sprout in 3 weeks, or you might be staring at a dormant seed for 8 weeks. Patience is your primary fertilizer.
- The Sink Test: Not all seeds are created equal. If you drop your seeds in water, the ones that sink are your golden tickets. The floaters? They might have a chance, but don’t bet the farm on them.
- Acid is King: Your tea plant hates alkaline soil. If your soil pH is above 6.5, your plant will turn yellow and sulk. We’re talking ericaceous (acidic) soil only.
- The “Tea” Reality Check: All true tea (Green, Black, Oolong, White) comes from the same plant. The difference is in the processing, not the seed.
- Climate Reality: If you live in Zone 7 or colder, your baby tea plant needs a winter vacation indoors. They are hardy, but not that hardy.
For a deep dive into the nitty-gritty of the entire process, you absolutely must check out our comprehensive guide: 🌱 Growing Teas from Seed: The Ultimate 2026 Guide to 15+ Steps.
📜 From Ancient Seeds to Modern Gardens: A Brief History of Camellia Sinensis
You might think growing tea is a modern hobbyist trend, but the story of Camellia sinensis stretches back thousands of years. Legend has it that in 2737 BC, the Chinese Emperor Shen Nung was boiling water under a wild tea tree when a few leaves drifted into his pot. The resulting brew was so refreshing he declared it the elixir of life. Whether it’s myth or fact, the cultivation of tea has been central to Asian culture for millennia.
But here is the twist that often trips up new growers: Variety matters.
While the world knows tea, there are two main varieties of the tea plant that matter to us:
- Camellia sinensis var. sinensis: The Chinese variety. Smaller leaves, hardier, cold-tolerant. This is the one you want if you are in the US, UK, or Europe.
- Camellia sinensis var. assamica: The Indian variety. Larger leaves, loves the heat, hates the cold. If you try to grow this in a temperate climate without a greenhouse, you’ll be growing a very sad, dead plant.
“People bought tea plants as curiosity plants and had them in their yards. So, we started collecting there since we knew they would grow.” — Jason McDonald, Co-founder of The Great Mississippi Tea Company.
Historically, tea was propagated by cutings to ensure genetic consistency. Growing from seed introduces genetic variability. This means your tea might taste slightly different than your neighbor’s, or the leaves might be a different size. It’s like having a litter of puppies; they are all dogs, but they all look and act a little different. This variability is part of the fun (and the challenge) of growing from seed!
🌱 The Reality Check: Is Growing Tea from Seed Right for You?
Before you order a bag of seeds, let’s have a heart-to-heart. Growing tea from seed is not a “set it and forget it” project. It requires a specific mindset.
The Pros ✅
- Cost-Effective: Seeds are significantly cheaper than buying established plants.
- Educational: You learn the entire lifecycle of a plant, from dormancy to harvest.
- Genetic Diversity: You might discover a unique flavor profile or a particularly hardy strain.
- Satisfaction: There is no feeling quite like brewing a cup of tea you grew, picked, and processed yourself.
The Cons ❌
- Time-Consuming: It can take 3 years for a seed-grown plant to produce enough leaves for a decent harvest.
- Unpredictability: You won’t know exactly what you’re getting regarding leaf size or flavor until the plant matures.
- Patience Required: Germination can take up to 8 weeks. If you need instant gratification, buy a plant.
- Climate Constraints: You need to be prepared to baby your plant through winter if you aren’t in a tropical zone.
Who is this for?
If you are a gardener who loves the process more than the result, and you have the patience of a saint (or at least a very calm monk), then yes, this is for you. If you want a cup of tea next week, keep scrolling to the grocery store section.
🛒 Sourcing Your Seeds: Finding Viable Camellia Sinensis Stock
You can’t just pick up “tea seeds” at any local hardware store. You need specific, viable Camellia sinensis seeds. Freshness is critical; old seeds have a germination rate that approaches zero.
Where to Look
- The Great Mississippi Tea Company: A fantastic domestic source for seeds collected from established bushes in the US. They specialize in the hardy sinensis variety.
- US League Of Tea Growers: A directory to find local growers who might share seeds. It’s a great way to get seeds adapted to your specific microclimate.
- Camellia Forest Nursery: While they are famous for established plants, they are a reliable source for high-quality stock.
- Logee’s: Known for exotic plants, they often carry tea plants or seeds and have excellent customer service.
⚠️ Warning: Avoid buying seeds from generic gardening sites that don’t specify the variety. If it doesn’t say Camellia sinensis var. sinensis, you might end up with an ornamental Camellia that produces pretty flowers but no drinkable tea!
👉 Shop for Tea Seeds on:
- Amazon: Search for Camellia Sinensis Seeds
- Etsy: Search for Tea Plant Seeds
- The Great Mississippi Tea Company: Visit Official Website
🧪 Step-by-Step: The Ultimate Guide to Germinating Tea Seeds
This is where the magic happens (or where the waiting begins). We’ve tested dozens of methods, and here is the wining formula based on our experience and the success stories of growers like those at Tea-Happiness.
1. The Soak and Sink Test
First, fill a bowl with room-temperature water. Drop your seeds in.
- Sinking seeds: These are your winners. They are dense and full of life.
- Floating seeds: These are likely hollow or dead. You can try them if you’re feeling lucky, but don’t get your hopes up.
Soak the sinking seeds for 24 to 48 hours. This softens the hard outer shell and kickstarts the germination process.
2. The Planting Orientation
Take your soaked seeds and plant them in your starter mix.
- Orientation: Plant the seed with the “eye” (the scar where it attached to the pod) facing sideways.
- Depth: Cover with about 1 inch of your soil mix.
- Environment: Keep them in a warm, dark place. Tea seeds hate light during germination.
3. The Waiting Game
Now, you wait.
- Week 1-2: Nothing. Don’t panic.
- Week 3-4: You might see the shell crack. This is a good sign!
- Week 5-8: A white root emerges, followed by a green shoot.
“Patience is key with germinating seeds! It can take up to 8 weeks for a seed to start growing, so don’t despair if you don’t see anything within a couple of weeks.” — Insight from Tea-Happiness
4. The First Transplant
Once the root is about 1 inch long, it’s time to move. Don’t wait for the leaves to appear. Move them to small containers (yogurt cups work great for this) to give the root room to grow without being root-bound.
Recommended Gear for Germination:
- Jiffy Seed Starter Greenhouse: We’ve found this to be the most effective tool. It maintains humidity and warmth perfectly.
- Alternative: A large zip-top bag with a damp paper towel works in a pinch, but the Jiffy system offers better control.
👉 Shop Germination Supplies:
- Jiffy Greenhouse: Check Price on Amazon | Jiffy Official Site
- Plant Mister: Check Price on Amazon
🌿 Nurturing Your Seedlings: Soil, Light, and Water Requirements
You’ve got a sprout! Now, the real work begins. Your seedling is fragile and has very specific needs.
The Soil Mix: Acid is Non-Negotiable
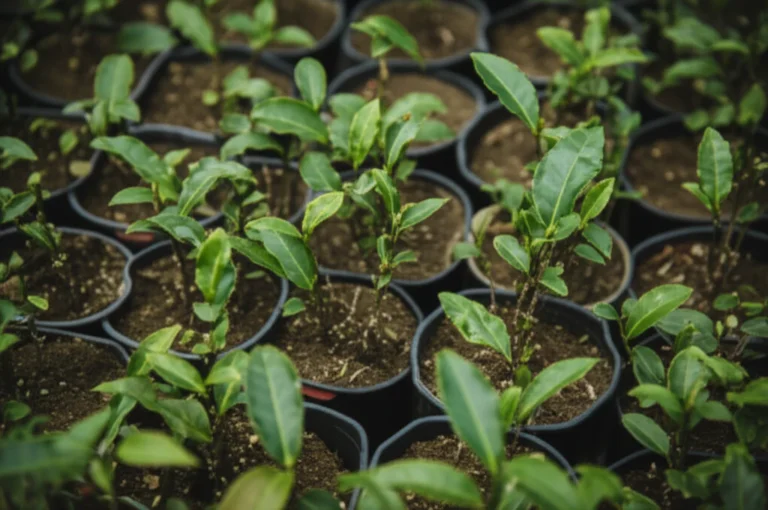
Tea plants are ericaceous, meaning they thrive in acidic soil. If you use standard poting mix, your plant will suffer from nutrient lockout and turn yellow.
- Primary Mix: Use a high-quality orchid mix or a specialized ericaceous compost.
- DIY Mix: If you can’t find orchid mix, a cactus and succulent mix works surprisingly well because of its drainage properties.
- pH Level: Aim for a pH between 4.5 and 6.0.
Recommended Soil Products:
- Levington Peat-Free Ericaceous Compost: A top choice for UK and European growers. Check Price on Amazon
- Miracle-Gro Acid Loving Plant Food: Essential for maintaining soil acidity. Check Price on Amazon
Light and Water
- Light: Once the shoot breaks the surface, move it to a bright, sunny spot. They need as much light as possible, but avoid scorching miday sun initially.
- Watering: Keep the soil moist but not sogy. Overwatering is the fastest way to kill a tea seedling.
- Humidity: Tea loves humidity. If you live in a dry climate (or a dry winter apartment), use a plant mister once a day.
Caution: Don’t over-mist! Too much moisture invites fungus gnats, which can decimate your seedlings.
Feding
- Winter: Do not fertilize during the winter. The plant is dormant.
- Spring/Summer: Once growth resumes, feed with an acid-loving plant food.
Pro Tip: Stop feeding 12–20 days before you plan to harvest leaves. The fertilizer can alter the taste of your tea!
🏡 Indoor vs. Outdoor Cultivation: Where Should Your Tea Bush Live?
This is the big question: Do I keep it inside or put it outside? The answer depends entirely on your hardiness zone and the season.
The General Rule
- Zone 7 and Warmer: You can keep your tea plant outdoors year-round, provided it has protection from harsh winds and extreme heat.
- Zone 6 and Colder: Your tea plant is a seasonal traveler. It lives outside in the summer and moves indoors (or into a greenhouse) for the winter.
Indoor Cultivation
If you are growing indoors:
- Location: A south-facing window is ideal.
- Temperature: Keep it between 60°F and 75°F (15°C – 24°C).
- Humidity: Indoor heating in winter dries out the air. Use a pebble tray with water or a humidifier.
- Light: If your window isn’t bright enough, consider a grow light.
Outdoor Cultivation
If you are growing outdoors:
- Hardening Off: Before moving a seedling outside, you must “harden it off.” Gradually expose it to outdoor conditions over 7-10 days.
- Aclimatization: Young plants need to reach about 1 meter in height before they can withstand a typical English or Northern US winter.
- Shade: Tea plants prefer partial shade. Direct, scorching sun can burn the leaves.
Check out our guide on Green Tea Cultivation for more specific tips on managing light exposure.
✂️ Pruning and Training: Shaping Your Tea Plant for Maximum Yield
You might be tempted to let your tea plant grow wild into a tall, legy bush. Don’t do it. Pruning is essential for two reasons:
- Encourages Bushiness: Pruning forces the plant to branch out, creating more leaves for harvest.
- Harvest Quality: You want a low, dense bush to make plucking easy.
When to Prune
- First Year: Let the plant grow tall to establish a strong root system. Only remove dead or damaged leaves.
- Second Year: Start pruning the top to encourage side shoots.
- Third Year: You can begin regular pruning to maintain the “tea bush” shape.
How to Prune
- The Cut: Use clean, sharp shears. Cut just above a leaf node (where a leaf meets the stem).
- The Shape: Aim for a flat top or a gentle dome. This maximizes sun exposure for all leaves.
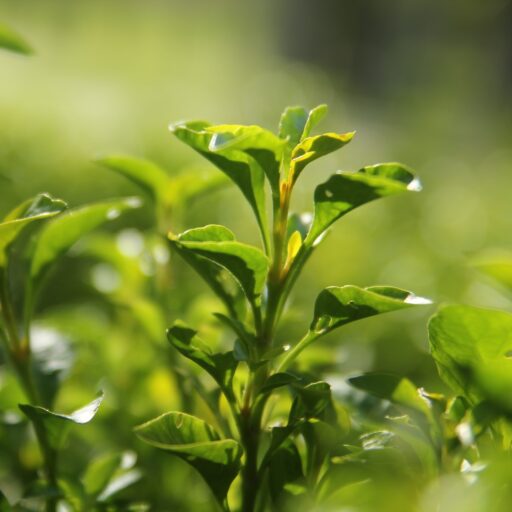
- The Harvest Cut: When you are ready to harvest, pluck the top two leaves and the bud. This is the “flush” that makes the best tea.
“Talk to your plants! Get to know them, chat with them, tell them your secrets. They are very good listeners.” — A favorite tip from the Tea-Happiness community
🍂 Harvesting and Processing: Turning Your Homegrown Leaves into Tea
So, you’ve waited three years, pruned your bush, and now you have a handful of tender leaves. What now? You can’t just toss them in hot water; that would be bitter and astringent. You need to process them.
The Basics of Processing
All true tea comes from the same plant. The difference between Green, Black, and Oolong tea is how you treat the leaves after picking.
| Tea Type | Processing Method | Key Step |
|---|---|---|
| Green Tea | Minimal Oxidation | Steaming or Pan-firing immediately after picking to stop enzymes. |
| Black Tea | Full Oxidation | Withering, Rolling, and Oxidizing until leaves turn dark brown/black. |
| Oolong Tea | Partial Oxidation | Bruising and partial oxidation (somewhere between green and black). |
| White Tea | Minimal Processing | Withering and drying only; no rolling or oxidation. |
Step-by-Step: Making Your First Cup of Green Tea
- Pick: Harvest the top two leaves and the bud.
- Wither: Lay leaves on a tray for 12-24 hours until they wilt.
- Kill Green: Heat the leaves in a pan (dry) or steam them for 1-2 minutes to stop oxidation.
- Roll: Gently roll the leaves to break cell walls and release oils.
- Dry: Bake at a low temperature (20°F / 95°C) until crisp.
- Brew: Step in water at 175°F (80°C) for 2-3 minutes.
For more on the health benefits of your homegrown brew, check out our article on Health Benefits of Tea.
🐛 Troubleshooting Common Pests, Diseases, and Growth Stalls
Even the best gardeners face challenges. Here are the most common issues we see at Growing Teas™ and how to fix them.
Fungus Gnats
- Cause: Overwatering or over-misting.
- Sign: Tiny black flies buzzing around the soil.
- Fix: Let the soil dry out between waterings. Use yellow sticky traps. In severe cases, you may need to repot the plant with fresh, sterile soil.
Root Rot
- Cause: Poor drainage or sogy soil.
- Sign: Yellowing leaves, wilting despite wet soil, black roots.
- Fix: Ensure your pot has drainage holes. Use a well-draining mix (orchid or cactus mix). If roots are black and mushy, trim them away and repot.
Leaf Scorch
- Cause: Too much direct sun or low humidity.
- Sign: Brown, crispy edges on leaves.
- Fix: Move to a spot with partial shade and increase humidity.
Slow Growth
- Cause: Lack of nutrients, wrong pH, or cold temperatures.
- Fix: Check your soil pH. Feed with an acid-loving fertilizer in spring. Ensure the plant isn’t in a drafty, cold spot.
Learn more about Organic Farming Techniques to keep your garden chemical-free and thriving.
🌟 Featured Video: A Visual Guide to Growing Tea
Sometimes, seeing is believing. We highly recommend checking out this video that walks through the entire process, from seed to cup. The host demonstrates pruning techniques and shares her personal journey of growing tea in colder climates.
Watch the video here: How to Grow Tea from Seed to Cup
Key takeaways from the video:
- Growing in Zone 6b requires bringing plants indoors for winter.
- Planting in the fall allows roots to establish before the cold.
- Pruning is essential for shaping the bush.
- The joy of gardening is therapeutic and rewarding.
Conclusion: Did We Grow the Perfect Cup?

So, did we grow the perfect cup? Well, that depends on your definition of “perfect.” If you’re looking for a commercial-grade, uniform leaf that tastes exactly like a bag of Lipton, you might be disappointed. But if you are looking for a unique, personal connection to your food, a story to tell at your dinner party, and a cup of tea that tastes like your garden, then absolutely, yes.
Growing tea from seed is a marathon, not a sprint. It requires patience, the right soil, and a willingness to learn from your mistakes. But the moment you brew that first cup of tea you grew, pruned, and processed yourself, you’ll realize it was worth every second of waiting.
Our Final Recommendation:
If you are ready for the challenge, start with fresh Camellia sinensis var. sinensis seeds from a reputable source like The Great Mississippi Tea Company. Use a Jiffy greenhouse for germination, stick to acidic soil, and be prepared to baby your plant through its first few winters.
Don’t let the 8-week wait scare you off. The journey is the reward. Now, go get your hands dirty!
🔗 Recommended Links and Resources
Ready to start your tea-growing adventure? Here are the tools and resources we trust:
- Tea Seeds:
The Great Mississippi Tea Company: Visit Official Website
Amazon: Search for Camellia Sinensis Seeds - Growing Supplies:
Jiffy Greenhouse: Check Price on Amazon
Levington Ericaceous Compost: Check Price on Amazon
Miracle-Gro Acid Plant Food: Check Price on Amazon - Books:
The Tea Garden: A Guide to Growing and Harvesting Tea (Available on Amazon)
Tea: A History of the Leaf (Available on Amazon)
❓ Frequently Asked Questions
How do you care for young tea seedlings after germination?
Once your seedlings have sprouted, move them to a bright location with indirect light initially, then gradually increase direct sun. Keep the soil moist but not waterlogged. Mist them daily if the air is dry, but watch out for fungus gnats. Transplant them into larger pots once the root system fills the starter container.
Can you grow tea plants indoors from seeds?
Yes! In fact, if you live in a cold climate, growing indoors is often necessary for the first few years. Ensure they get plenty of light (a south-facing window or grow lights) and maintain high humidity. Just remember to bring them inside before the first frost.
What are the best conditions for germinating tea seeds?
Tea seeds need warmth (70-80°F), darkness, and consistent moisture. A seed starter greenhouse is ideal for maintaining these conditions. Soaking the seeds for 24-48 hours before planting is crucial to soften the shell.
What are the common challenges when growing tea from seed?
The biggest challenges are patience (germination can take 8 weeks), overwatering (leading to root rot), and fungus gnats. Additionally, ensuring the correct soil pH (acidic) is critical for long-term health.
What is the best soil for growing tea from seed?
You must use acidic soil. A mix of orchid bark, peat moss, and perlite works well. Avoid standard poting mixes unless they are specifically labeled as “ericaceous” or “for acid-loving plants.”
How long does it take for tea plants to grow from seed?
From seed to a harvestable bush takes about 3 years. Germination itself can take 2 to 8 weeks.
How long does it take for tea seeds to germinate?
Typically 2 to 8 weeks. Some seeds may sprout in 3 weeks, while others take the full 8. Don’t give up too soon!
What is the best soil mix for growing tea plants from seed?
A well-draining, acidic mix is best. We recommend a blend of orchid mix and peat moss, or a specialized ericaceous compost.
Do tea seeds need stratification before planting?
Generally, no. Unlike many temperate seeds, Camellia sinensis seeds do not require a cold stratification period. They just need warmth and moisture. However, soaking them in water for 24-48 hours is highly recommended.
How often should I water tea seedlings grown from seed?
Water when the top inch of soil feels dry. This is usually once a week, but it depends on your environment. The goal is moist, not sogy.
📚 Reference Links and Scientific Sources
- LoveTheGarden: How to grow tea: a complete guide to growing tea at home
- The Great Mississippi Tea Company: Official Website
- Camellia Forest Nursery: Official Website
- US League Of Tea Growers: Directory
- Royal Horticultural Society: Camellia sinensis growing guide
- University of California Agriculture and Natural Resources: Camellia sinensis cultivation