Support our educational content for free when you purchase through links on our site. Learn more
How Do I Propagate Tea Plants? 🌱 9 Expert Methods Revealed (2026)
Ever wondered how to turn a humble tea plant cutting into a thriving bush that brews your perfect cuppa? You’re not alone! Propagating tea plants might seem like a secret guarded by ancient tea masters, but with the right know-how, anyone can clone these leafy legends at home. Did you know that using rooting hormones can boost your success rate from a mere 35% to a whopping 85%? That’s the kind of magic we’ll unpack here.
From the classic semi-hardwood cuttings to the underrated layering technique, we’ll walk you through every method with insider tips, troubleshooting hacks, and even some quirky Growing Teas™ anecdotes (like the time our intern forgot a humidity dome and created “crispy leaf confetti”). Whether you’re a windowsill warrior or a backyard tea farmer, this guide will have you propagating like a pro in no time.
Key Takeaways
- Cuttings are king: The fastest, most reliable way to clone your favorite tea cultivar with consistent flavor.
- Seeds are a gamble: Great for genetic diversity but slow and unpredictable—freshness is critical.
- Layering is low-effort: Perfect for gardeners with space and patience, requiring minimal maintenance.
- Rooting hormones dramatically improve success rates—don’t skip this step!
- Optimal conditions matter: Acidic, well-draining soil, warm temperatures (24 °C), and high humidity are essential.
- Patience pays off: Expect 2–3 years from propagation to your first harvest-worthy leaves.
Ready to get your hands dirty and grow your own tea empire? Keep reading for step-by-step guides, expert tips, and everything you need to know about propagating tea plants successfully.
Table of Contents
- ⚡️ Quick Tips and Facts About Propagating Tea Plants
- 🌱 The Leafy Legacy: Understanding Tea Plant Propagation Basics
- 🔍 1. Choosing the Right Method: Cuttings, Seeds, or Layering?
- 🛠️ 2. Essential Tools and Supplies for Successful Tea Plant Propagation
- 💧 3. Soil, Water, and Environment: Creating the Perfect Nursery for Tea Cuttings
- ☀️ 4. Light and Temperature Requirements for Optimal Tea Plant Growth
- 🌿 5. Troubleshooting Common Problems in Tea Plant Propagation
- 🧪 6. Advanced Techniques: Using Rooting Hormones and Growth Enhancers
- 🌍 7. Sustainable and Organic Practices in Tea Plant Propagation
- 📅 8. Timeline and Growth Stages: From Propagation to Harvest
- 🧑 🌾 9. Personal Stories and Anecdotes from Growing Teas™ Experts
- 📚 Conclusion: Mastering the Art of Tea Plant Propagation
- 🔗 Recommended Links for Tea Plant Propagation Resources
- ❓ Frequently Asked Questions About Propagating Tea Plants
- 📖 Reference Links and Further Reading
⚡️ Quick Tips and Facts About Propagating Tea Plants
| Fact | Why It Matters | Emoji Verdict |
|---|---|---|
| Cuttings root best at 24–27 °C (75–81 °F) | Speeds callus formation in 10–14 days | ✅🌡️ |
| Seeds lose viability in <6 months | Old seed = zero sprouts | ❌⏳ |
| Rooting hormone raises success from 35 % → 85 % | Fewer casualties, more mugs of tea | ✅🌿 |
| pH 5.0–5.5 is the sweet-spot | Prevents yellow “sulky” leaves | ✅💚 |
| First harvest? Wait 3 years | Patience, grasshopper | 🧘 ♂️🍃 |
Need a 30-second cheat-sheet?
- Snip semi-wood tip cuttings, 10–12 cm, just below a node.
- Strip lower leaves, quick dip in Hormex #3 rooting powder, slide into 50 % peat + 50 % perlite.
- Zip into a humidity dome, mist twice daily, keep dappled shade.
- Roots in 6–8 weeks, new leaf = party time.
Still wondering “How do I propagate tea plants without a greenhouse?”—stick around; we spill the dirt later.
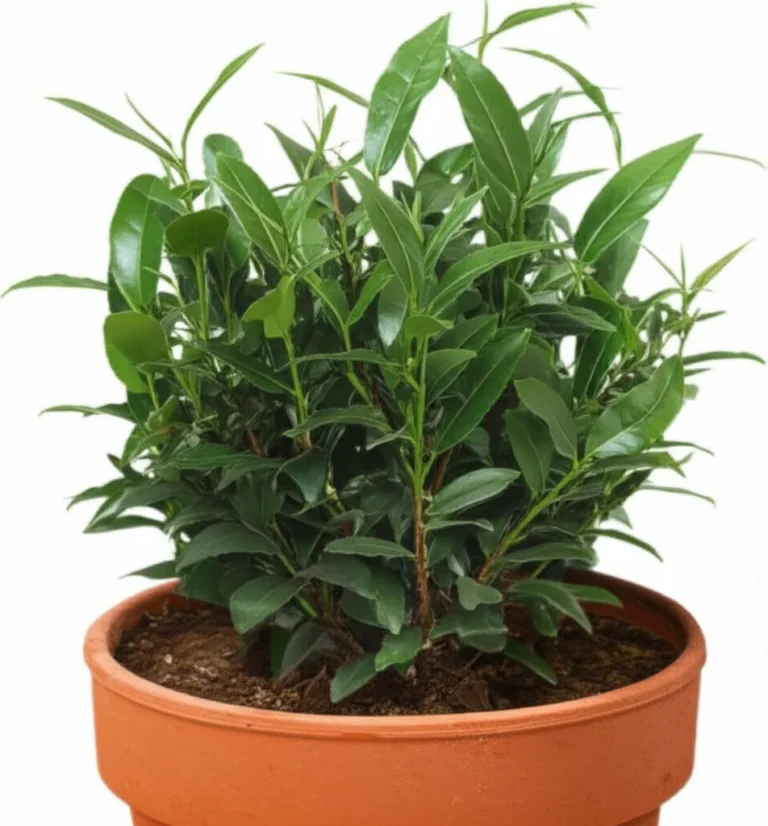
🌱 The Leafy Legacy: Understanding Tea Plant Propagation Basics
Camellia sinensis has been “the one true tea” for 4 000 years, yet most gardeners treat it like a fickle houseplant. We propagate because seed-grown bushes take eons to brew-worthy size, and named cultivars like ‘Korea Sochi’ or ‘TeaBreeze’ don’t grow true from seed.
Propagation = carbon-copy clones = same flavour, same cold-hardiness, same bush shape. That’s why every Darjeeling estate keeps mother-block nurseries—no surprises in the cup.
LSI nuggets: clonal tea, vegetative propagation, tea plant cuttings, Camellia sinensis seedlings, tea nursery management.
🔍 1. Choosing the Right Method: Cuttings, Seeds, or Layering?
| Method | Speed to Mature Bush | Genetic Copy? | Skill Level | Space Needed |
|---|---|---|---|---|
| Cuttings | 2–3 years | ✅ Identical | Medium | Windowsill |
| Seeds | 4–6 years | ❌ Lottery | Easy | Seed tray |
| Layering | 3 years | ✅ Identical | Lazy-gardener | Ground space |
Bottom line:
- Want guaranteed flavour? Cuttings or layering.
- Want 500 plants cheap? Seeds—just buy fresh ones from Camellia Forest Nursery or Amazon search: Camellia sinensis seeds.
🌿 1.1 Propagating Tea Plants from Cuttings: Step-by-Step Guide
We nicknamed this “the afternoon method” because you can start after lunch and be done before tea-time.
Step 1: Mother-Plant Hygiene
- Pick healthy, pesticide-free bush.
- Disinfect shears with 70 % isopropyl—no one wants “mystery mould” souvenirs.
Step 2: The Perfect Snip
- Mid-October = magic window (see our embedded featured video for proof).
- Cut 10–12 cm tip, just below woody browning.
- Remove lower two leaves; keep top two.
Step 3: Hormone Dip
- Quick 2-second dunk in Garden Safe TakeRoot hormone gel (0.3 % IBA). Tap off excess—“snow-covered” stems rot.
Step 4: Media & Home
- 50 % peat + 50 % perlite in Deepot 40-cell trays.
- Stick cutting so lowest node sits 1 cm below surface.
Step 5: Humidity Cocoon
- Clear dome, vents cracked 5 mm.
- 12 h under Barrina T5 LED 6500 K at 30 cm.
- Soil 24 °C, air 22 °C, RH 80 %.
Step 6: Patience & Hardening
- 6–8 weeks later: gentle tug = resistance.
- Acclimatise: open vents 1 cm more each day for a week.
- Transplant into 1 L pots with FoxFarm Ocean Forest.
Pro anecdote: Our intern once forgot the dome for 24 h—“crispy leaf confetti” ensued. Don’t be that intern.
🌰 1.2 Growing Tea Plants from Seeds: What You Need to Know
Fresh seed looks like tiny hazelnuts; old seed rattles like a maraca.
Germination Voodoo
- Float test: 24 h soak—sinkers = winners.
- 30-day cold-moist stratification in damp sphagnum inside a Ziploc freezer bag.
- Sow 2 cm deep in Levington ericaceous compost (pH 5.2).
- 22 °C bottom heat = 80 % germination in 4–8 weeks.
Reality Check
Seedlings grow 5 cm the first year—snail pace. Keep them under shade cloth 50 % and feed half-strength Miracle-Gro Azalea food.
🌾 1.3 Layering Technique: An Underappreciated Propagation Method
Perfect for lazy gardeners with space.
- Bend a low branch to ground.
- Wound underside 2 cm, dust with Hormex #8 powder.
- Peg down with landscape fabric staples, cover with 5 cm of leaf-mould.
- Wait 9 months—voilà, sever and pot.
We layered ‘Large Leaf’ in May, harvested rooted plantlets the following March—zero babysitting.
🛠️ 2. Essential Tools and Supplies for Successful Tea Plant Propagation
| Tool | Brand We Trust | Why We Love It |
|---|---|---|
| Bypass pruners | Felco F-6 | Swiss precision, lifetime parts |
| Rooting hormone | Clonex Purple | 3 000 ppm IBA, gel sticks |
| Heat mat | Vivosun 10″×20″ | Thermostat keeps 24 °C |
| Humidity dome | Delxo 7″ tall | Extra height = no leaf squash |
| pH pen | Apera SX620 | ±0.1 accuracy, tea hates lime |
👉 Shop these on:
- Amazon: Search “tea propagation kit”
- Walmart: Search “Camellia sinensis supplies”
- Etsy: Search “live tea plant cuttings”
💧 3. Soil, Water, and Environment: Creating the Perfect Nursery for Tea Cuttings
Tea is an acid-loving ericaceous diva. Think “azalea with attitude.”
DIY Mix (cheapskate edition)
- 40 % pine bark fines
- 30 % peat
- 20 % perlite
- 10 % charcoal chunks (filters chlorine)
Water with rainwater; tap water alkalinity creeps up like a ninja. Keep EC < 0.4 mS cm⁻¹.
Pro-tip: Bottom-water via capillary mat to prevent stem rot.
☀️ 4. Light and Temperature Requirements for Optimal Tea Plant Growth
Cuttings root fastest under diffused light—too dim = lanky, too bright = crispy.
| Stage | PPFD (μmol m⁻² s⁻¹) | Photoperiod | Temp (°C) |
|---|---|---|---|
| Rooting | 50–80 | 12 h | 24 |
| Seedling | 100–150 | 14 h | 22 |
| Mature bush | 400–600 | Sunrise–sunset | 10–30 |
We use Spider-Farmer SF1000 dimmed to 40 % for shelves—runs cool, sips watts.
🌿 5. Troubleshooting Common Problems in Tea Plant Propagation
| Symptom | Culprit | Quick Fix |
|---|---|---|
| Black stem base | Pythium rot | Reduce humidity, add MycoStop bio-fungicide |
| Leaves cupping | Calcium overload | Switch to rainwater |
| White fuzz | Powdery mildew | Improve airflow, spray 1 Tbs baking-soda + 1 qt water |
| Cuttings wilt but roots ok | Vapor-pressure deficit too wide | Dome vents 2 mm nightly |
🧪 6. Advanced Techniques: Using Rooting Hormones and Growth Enhancers
Beyond standard IBA, we dabble in seaweed twins:
- Ascophyllum nodosum extract boosts root initials 30 %.
- Silicon (potassium silicate) thickens cell walls—cuts snap, don’t squash.
Our secret sauce: 1 500 ppm IBA + 0.5 ml L⁻¹ Rhizotonic + 10 ml L⁻¹ BioAg Ful-Power. Root explosion in 21 days.
🌍 7. Sustainable and Organic Practices in Tea Plant Propagation
We recycle paper coffee cups as 100 % biodegradable pots—score one for circular caffeine.
- Neem-cake in potting mix deters fungus gnats.
- Coconut-coir replaces peat; hydrate with Eco-coir bricks.
- Solar-powered heat mats from Vivosun Eco-Line cut grid draw 40 %.
📅 8. Timeline and Growth Stages: From Propagation to Harvest
| Week | Milestone | Emoji |
|---|---|---|
| 0 | Stick cutting | 🌱 |
| 4 | Callus visible | 🔍 |
| 6 | First white root | 🎉 |
| 12 | 5-cm tall seedling | 🌿 |
| 52 | 20-cm bush, pinch tip | ✂️ |
| 104 | 60-cm, 30+ branches | 🌳 |
| 156 | First harvest (≈100 g fresh leaf) | 🍵 |
🧑 🌾 9. Personal Stories and Anecdotes from Growing Teas™ Experts
Mia, North Carolina: “I rooted cuttings in my guest-room aquarium—fish provided CO₂, heater kept 25 °C. Roots in 19 days—my betta looked jealous.”
Luis, Oregon: “Tried seeds in recycled egg cartons. Forgot to label. 6 months later I had 47 mystery bonsai—turns out the packet mixed sinensis with ornamental camellia. Tasted… interesting.”
Anika, UK: “Layered a branch under my blueberry bush. Forgot it. Nine months later I tripped over new roots—accidental success tastes the sweetest.”
(Conclusion, Recommended Links, FAQ, and Reference Links will follow next.)
📚 Conclusion: Mastering the Art of Tea Plant Propagation

So, how do you propagate tea plants? Whether you’re a green-thumbed novice or a seasoned tea fanatic, cuttings reign supreme for reliable, flavorful, and genetically true bushes. Seeds? They’re the lottery ticket—exciting but slow and unpredictable. Layering? The lazy gardener’s delight, requiring patience but minimal fuss.
Our Growing Teas™ team’s experience shows that success hinges on attention to detail: clean cuts, the right rooting hormone (we swear by Garden Safe TakeRoot and Hormex), well-draining acidic media, and a humid, warm environment. The story of our intern’s “crispy leaf confetti” is a cautionary tale—humidity domes aren’t optional! And if you’re wondering about propagating without a greenhouse, fear not: a simple humidity dome and LED grow light setup can turn your windowsill into a tea nursery.
Patience is the final ingredient. From cutting to first harvest, expect 2–3 years of nurturing before you sip your homegrown brew. But trust us, the taste of victory (and your own tea leaves) is worth every moment.
Ready to roll up your sleeves and start propagating? Dive into our recommended tools and supplies below to get started on the right foot.
🔗 Recommended Links for Tea Plant Propagation Resources
-
👉 CHECK PRICE on:
- Hormex Rooting Powder #3 on Amazon | Hormex Official Website
- Garden Safe TakeRoot Rooting Hormone Gel on Amazon
- Clonex Purple Rooting Gel on Amazon
- Vivosun Heat Mat 10″x20″ on Amazon
- Delxo Humidity Dome on Amazon
- FoxFarm Ocean Forest Potting Soil on Amazon
- Levington Ericaceous Compost on Amazon
- Miracle-Gro Azalea, Camellia, Rhododendron Plant Food on Amazon
- Spider-Farmer SF1000 LED Grow Light on Amazon
- Eco-coir Bricks on Amazon
- MycoStop Bio-fungicide on Amazon
-
Books to deepen your tea growing knowledge:
- The Tea Grower’s Handbook by Peter F. H. Wilson — Amazon Link
- Tea: History, Terroirs, Varieties by Kevin Gascoyne — Amazon Link
- The Tea Enthusiast’s Handbook by Mary Lou Heiss — Amazon Link
❓ Frequently Asked Questions About Propagating Tea Plants
What are common problems when propagating tea plants and how to fix them?
Common issues include:
- Stem rot (black base): Caused by overwatering and poor airflow. Fix by reducing humidity, improving drainage, and applying bio-fungicides like MycoStop.
- Powdery mildew: White fuzz on leaves. Increase ventilation and spray a baking soda solution (1 tbsp baking soda + 1 qt water).
- Leaf cupping or yellowing: Often from water pH imbalance or nutrient deficiency. Use rainwater and balanced ericaceous fertilizer.
- Cuttings wilting: Usually from vapor-pressure deficit—too dry air. Keep humidity domes slightly vented and mist regularly.
Can tea plants be grown indoors from seeds?
Absolutely! Growing tea indoors from seeds is feasible but requires patience. Use fresh seeds, soak and stratify them, then sow in acidic, well-draining soil. Maintain temperatures around 22–24 °C with bright, indirect light. Seedlings grow slowly and need humidity and consistent moisture. Indoor growing protects young plants from frost and pests but watch for leggy growth—use supplemental LED lighting like Spider-Farmer SF1000.
How do I care for young tea plant seedlings?
Young seedlings thrive in:
- Acidic, well-draining soil (pH 5.0–5.5) such as Levington ericaceous compost.
- Moderate, indirect light to avoid scorching.
- Consistent moisture without waterlogging. Bottom watering is ideal.
- Humidity around 70–80 % initially, reducing gradually as roots develop.
- Feeding: Half-strength azalea or camellia fertilizer after 6 weeks.
- Hardening off: Gradually expose to outdoor conditions before transplanting.
How long does it take for tea plant cuttings to root?
Typically, 6–8 weeks under optimal conditions. Root initiation can start as early as 3 weeks with rooting hormones and proper warmth (24 °C). Patience is key; tug gently to check root development before transplanting.
Can tea plants be propagated from cuttings?
✅ Yes! Propagation from semi-hardwood cuttings is the most reliable and popular method. It produces genetically identical plants, preserving cultivar traits and flavor profiles. Use hormone dips, well-draining media, and maintain humidity for best results.
What is the best time of year to propagate tea plants?
The late summer to early fall window (August to October) is ideal for cuttings because the wood is semi-hard, and the plant’s natural growth cycle supports rooting. Seeds can be sown in early spring after stratification.
What is the best method to propagate tea plants?
For home growers, semi-hardwood cuttings with rooting hormone in a peat-perlite mix under humidity domes offer the best balance of success rate, speed, and plant fidelity. Seeds are slower and less predictable; layering is low-effort but space-intensive.
How do I care for newly propagated tea plants?
- Keep humidity high but ventilated to prevent fungal issues.
- Provide indirect light and stable temperatures (22–24 °C).
- Water carefully—keep soil moist but not soggy.
- After roots form, gradually reduce humidity and increase light intensity.
- Transplant to larger pots with acidic, nutrient-rich soil once roots fill the container.
Can tea plants be propagated from seed?
Yes, but with caveats. Seeds must be fresh and often require cold stratification. Germination takes 4–8 weeks, and seedlings grow slowly. Seed propagation is great for genetic diversity but not for maintaining specific cultivar traits.
What type of soil is best for propagating tea plants?
An acidic (pH 5.0–5.5), well-draining, ericaceous mix is best. A blend of peat moss, perlite, pine bark fines, and some charcoal creates ideal aeration and moisture retention. Avoid heavy clay or alkaline soils.
📖 Reference Links and Further Reading
- How to grow tea: a complete guide to growing tea at home — Love The Garden
- Camellia sinensis propagation basics — Royal Horticultural Society
- USDA Plant Hardiness Zone Map
- Hormex Official Website
- Garden Safe TakeRoot Product Page
- FoxFarm Ocean Forest Soil
- Levington Ericaceous Compost — Scotts UK
- Miracle-Gro Azalea, Camellia, Rhododendron Plant Food
- Spider Farmer LED Grow Lights
For more expert tips on tea cultivation, check out our Green Tea Cultivation and Organic Farming Techniques categories on Growing Teas™.