Support our educational content for free when you purchase through links on our site. Learn more
What Tea Plants Are Easy to Grow? 12 Best Picks for Your Garden 🌿 (2026)
Ever wondered which tea plants you can effortlessly grow at home to brew your own fresh, flavorful cup? You’re not alone! From the unstoppable mint to the regal Camellia sinensis—the true tea plant—our expert team at Growing Teas™ has cultivated, tasted, and perfected a list of 12 easy-to-grow tea plants that will transform your garden (or windowsill) into a personal tea haven.
Did you know that freshly harvested herbs can contain up to 50% more antioxidants than store-bought dried leaves? Imagine sipping a cup bursting with vibrant flavor and potent health benefits, all from plants you nurtured yourself. Later in this article, we’ll reveal insider tips on growing, harvesting, and drying these plants, plus how to brew the perfect cup that will have your friends asking for your secret recipe!
Key Takeaways
- Mint and Lemon Balm are the easiest and fastest-growing herbs for beginner tea gardeners, perfect for containers and indoors.
- Camellia sinensis is the “true” tea plant, requiring acidic soil and patience but rewarding you with authentic green, black, or white tea leaves.
- Herbal favorites like German Chamomile, Lavender, and Holy Basil (Tulsi) offer unique flavors and health benefits with moderate care.
- Growing tea plants indoors is totally doable with the right light and humidity—perfect for small spaces.
- Proper harvesting and drying techniques preserve essential oils and maximize flavor, turning your garden bounty into delicious, shelf-stable teas.
- We share expert advice on soil, sun, watering, and winter care to keep your tea plants thriving year-round.
Ready to start your tea-growing adventure? Let’s dig in and discover which plants will make your garden—and your teapot—sing!
Welcome to the garden, fellow leaf-lovers! We are the team at Growing Teas™, and we’ve spent more time with our hands in the dirt and our faces in a steaming mug than we care to admit. If you’ve ever wondered why your store-bought chamomile tastes like dusty hay, or why your “fresh” mint tea lacks that zing, you’re in the right place.
Growing your own tea isn’t just for monks on misty mountains; it’s for anyone with a windowsill, a backyard, or even just a very determined pot on a fire escape. We’re going to show you exactly which plants will thrive under your care without demanding a degree in botany. Ready to turn your garden into a beverage station? Let’s spill the tea! ☕️
⚡️ Quick Tips and Facts
Before we dive into the dirt, here’s a “cheat sheet” for the aspiring tea gardener.
| Feature | Expert Advice |
|---|---|
| Easiest Overall | Mint (Warning: It’s a garden takeover artist! 🌿) |
| Best for Sleep | Chamomile or Lemon Balm |
| True Tea Plant | Camellia sinensis (Needs acidic soil, like blueberries) |
| Sun Requirements | Most tea herbs love 6-8 hours of full sun ☀️ |
| Watering Tip | Don’t drown them! Most herbs prefer “well-drained” soil. ✅ |
| Harvesting Rule | Pick in the morning after the dew dries for maximum oils. |
| Container Friendly? | Absolutely! Almost all herbal teas love pots. 🪴 |
Table of Contents
- ⚡️ Quick Tips and Facts
- 🌱 From Ancient Groves to Your Backyard: The Evolution of Tea Gardening
- 🍵 Why Grow Your Own? The Benefits of a Home Infusion
- 1. Camellia Sinensis: Growing the “True” Tea Plant
- 2. Mint: The Unstoppable Refreshment
- 3. Lemon Balm: The Stress-Buster
- 4. German Chamomile: The Apple-Scented Dreamer
- 5. Lavender: A Floral Hug in a Mug
- 6. Lemon Verbena: The Gourmet’s Choice
- 7. Holy Basil (Tulsi): The Yoga of Teas
- 8. Hibiscus: The Tart and Tangy Showstopper
- 9. Stevia: Nature’s Zero-Calorie Sweetener
- 10. Rose Hips: The Vitamin C Powerhouse
- 11. Rosemary: For Focus and Flavor
- 12. Calendula: The Golden Healer
- 🪴 Houseplants… Adaptive Gardening Pleasure For The Rest Of Your Life
- ❄️ Easy Tips to Keep Your Houseplants Happy & Healthy in Winter
- 🚜 Soil, Sun, and Sips: The Ultimate Growing Guide
- ✂️ Harvesting and Drying Your Leaves for the Perfect Cup
- ☕️ Ready to Enjoy a Homegrown Cup of Tea?
- ✨ Conclusion
- 🔗 Recommended Links
- ❓ FAQ
- 📚 Reference Links
🌱 From Ancient Groves to Your Backyard: The Evolution of Tea Gardening
The history of tea is steeped in legend. We’ve all heard the story of the Chinese Emperor Shen Nung, who supposedly discovered tea in 2737 BC when some wild leaves blew into his pot of boiling water. Talk about a lucky breeze! For centuries, Camellia sinensis was a closely guarded secret of the East.
However, “tea” (or more accurately, tisanes or herbal infusions) has been part of human history globally. From the mint-heavy traditions of Morocco to the chamomile-sipping grandmothers of Europe, humans have always looked to their gardens for a brew. Today, we are seeing a massive resurgence in homegrown tea gardens. Why? Because we’re tired of microplastics in tea bags and “natural flavors” that taste like chemicals. We want the real deal, and luckily, nature makes it pretty easy for us!
🍵 Why Grow Your Own? The Benefits of a Home Infusion
We often get asked, “Is it really worth the effort?” Our answer is always a resounding YES!
- Potency: Freshly picked herbs contain higher levels of essential oils and antioxidants.
- Purity: You control the soil and the sprays. No pesticides in your cup! ❌
- Sustainability: Zero packaging, zero shipping emissions. Just you and your pruners.
- Witty Bragging Rights: Nothing beats saying, “Oh, this? It’s a custom blend from my private estate (the balcony).”
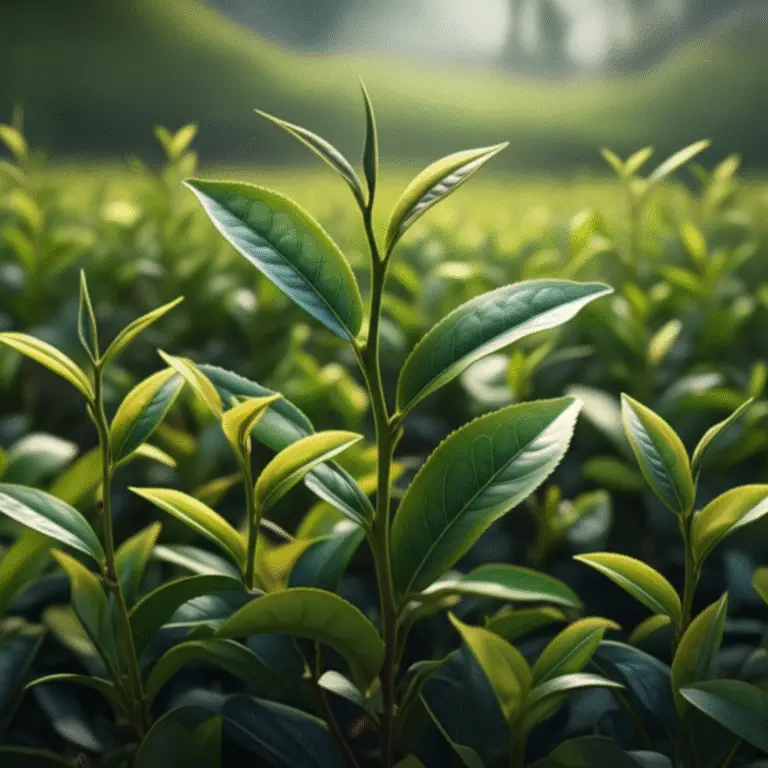
1. Camellia Sinensis: Growing the “True” Tea Plant
If you want to make Black, Green, Oolong, or White tea, you need this plant. It’s an evergreen shrub that loves acidic soil.
- Ease Factor: Moderate. It’s a slow grower but very hardy once established.
- Pro Tip: Use Espoma Organic Holly-Tone (https://www.amazon.com/Espoma-HT4-Holly-Tone-4-4-4-Food/dp/B000207Z0W?tag=bestbrands0a9-20) to keep the soil pH low.
- Hardiness: Zones 7-9, though some “Cold Hardy” varieties like ‘Sochi’ can handle Zone 6.
2. Mint: The Unstoppable Refreshment
Mint is the “gateway drug” of tea gardening. It is virtually unkillable.
- Ease Factor: 11/10.
- Warning: Always grow mint in a pot. If you plant it in the ground, it will own your house, your car, and your neighbor’s yard by next Tuesday. 🌿
- Variety: Try Chocolate Mint from Burpee Seeds (https://www.amazon.com/chocolate-mint-seeds/s?k=chocolate+mint+seeds) for a dessert-like brew.
3. Lemon Balm: The Stress-Buster
A member of the mint family, but with a gentle, citrusy soul. It’s famous for reducing anxiety.
- Ease Factor: Very Easy.
- Usage: We love mixing this with a little honey before bed. It’s like a liquid weighted blanket.
4. German Chamomile: The Apple-Scented Dreamer
These look like tiny daisies and smell like sweet apples.
- Ease Factor: Easy (Self-seeding).
- Note: Make sure you get German Chamomile (annual) for tea, rather than Roman Chamomile (perennial), as the German variety produces more flowers.
5. Lavender: A Floral Hug in a Mug
Not just for soap! Lavender tea is incredibly soothing, but a little goes a long way—don’t make it taste like perfume.
- Ease Factor: Moderate (Needs excellent drainage).
- Brand Recommendation: Look for Munstead or Hidcote varieties from Baker Creek Heirloom Seeds.
6. Lemon Verbena: The Gourmet’s Choice
In our expert opinion, this is the best-tasting lemon herb on the planet. It’s intense, clean, and sophisticated.
- Ease Factor: Easy in summer, but it’s a tender perennial. It needs to come inside for winter in most climates.
7. Holy Basil (Tulsi): The Yoga of Teas
In India, Tulsi is considered “The Queen of Herbs.” It’s an adaptogen, meaning it helps your body handle stress.
- Ease Factor: Easy (Grows like regular basil).
- Flavor: Spicy, clove-like, and deeply warming.
8. Hibiscus: The Tart and Tangy Showstopper
Specifically Hibiscus sabdariffa. The calyxes (the fleshy part at the base of the flower) make a brilliant red, Vitamin C-rich tea.
- Ease Factor: Easy in warm climates.
- Fun Fact: This is the main ingredient in “Red Zinger” teas!
9. Stevia: Nature’s Zero-Calorie Sweetener
Why buy processed white powder when you can grow the leaf?
- Ease Factor: Easy.
- Usage: Just drop one leaf into your tea pot with your other herbs. Warning: It is 200x sweeter than sugar, so don’t overdo it! ✅
10. Rose Hips: The Vitamin C Powerhouse
After your roses fade, they leave behind “hips.” These are tart and incredibly healthy.
- Ease Factor: Easy if you already grow roses.
- Tip: Use Rugosa Roses for the biggest, juiciest hips.
11. Rosemary: For Focus and Flavor
Rosemary tea is surprisingly delicious—savory, piney, and great for clearing brain fog.
- Ease Factor: Very Easy (Drought tolerant).
12. Calendula: The Golden Healer
Also known as Pot Marigold. The petals add a gorgeous golden hue to tea and are great for digestive health.
- Ease Factor: Super Easy. They grow in almost any soil.
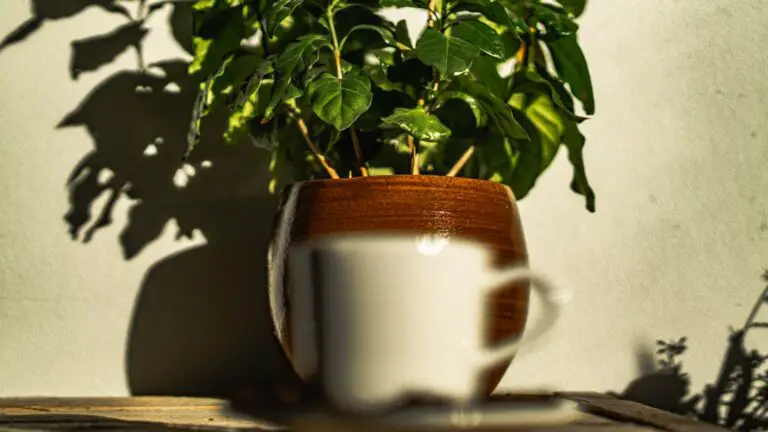
🪴 Houseplants… Adaptive Gardening Pleasure For The Rest Of Your Life
Don’t have a yard? No problem! Many of our favorite tea plants are perfectly happy living on your windowsill. This is what we call Adaptive Gardening.
- True Tea (Camellia sinensis) can be grown as a beautiful indoor shrub if you have a bright, sunny window.
- Lemongrass is another fantastic indoor option. Buy a stalk from the grocery store, root it in water, and plant it in a pot. It’s architectural and delicious!
- Scented Geraniums (like Rose or Lemon) make for an exotic, fragrant tea and thrive in indoor pots.
❄️ Easy Tips to Keep Your Houseplants Happy & Healthy in Winter
Winter is the “danger zone” for indoor tea plants. Here’s how we keep ours thriving:
- Humidity is Key: Indoor air is dry. Place your pots on a tray of pebbles and water to increase local humidity. ❌ Do not let the pot sit directly in the water (root rot is real!).
- Light Matters: Winter sun is weak. Consider a small LED grow light like the Sansi 15W LED Grow Light Bulb (https://www.amazon.com/SANSI-Daylight-Spectrum-Sunlight-Seedlings/dp/B07BRKT563?tag=bestbrands0a9-20).
- Watch the Drafts: Keep your plants away from heater vents and drafty windows. They like a steady temperature, just like you do.
- Water Less: Plants grow slower in winter. Stick your finger in the soil; if it’s dry an inch down, then water.
🚜 Soil, Sun, and Sips: The Ultimate Growing Guide
To get the best flavor, you need to treat your plants right.
- The Soil: Most herbs hate “wet feet.” Use a high-quality potting mix like FoxFarm Ocean Forest (https://www.amazon.com/FoxFarm-Ocean-Forest-Potting-Soil/dp/B007797622?tag=bestbrands0a9-20) for containers.
- The Sun: Most tea plants need at least 6 hours of direct sunlight. If they look “leggy” (long stems with few leaves), they are reaching for more light.
- The Food: Don’t over-fertilize! Too much nitrogen makes for big plants but weak flavor. Use an organic, slow-release fertilizer once in the spring.
✂️ Harvesting and Drying Your Leaves for the Perfect Cup
Harvesting is an art.
- When: Pick leaves in the morning after the dew has evaporated but before the sun gets too hot. This is when the essential oils are most concentrated.
- How: Never take more than 1/3 of the plant at a time.
- Drying: You can use a dehydrator, but we prefer the “hang and dry” method. Bundle your herbs with twine and hang them upside down in a cool, dark place.
- Storage: Once “crispy” dry, store in airtight glass jars away from light. Ball Mason Jars are a classic for a reason!
☕️ Ready to Enjoy a Homegrown Cup of Tea?
You’ve grown it, harvested it, and dried it. Now, how do you brew it?
- Fresh vs. Dried: Use 3 teaspoons of fresh herbs per cup, or 1 teaspoon of dried.
- Water Temp: Don’t use boiling water for delicate herbs like Green Tea or Lemon Balm—it can make them bitter. Aim for “just before boiling” (around 175°F-190°F).
- Steep Time: 5-10 minutes is usually the sweet spot for herbal infusions.
✨ Conclusion

So, what tea plants are easy to grow? As we’ve seen, the answer is “almost all of them!” Whether you start with a “unkillable” pot of mint or challenge yourself with a Camellia sinensis shrub, the reward is a cup of tea that tastes like sunshine and hard work.
Remember, gardening is a journey. Some plants might not make it, and that’s okay—it’s just more compost for the next one! So, grab a trowel, pick a plant, and start your journey toward the perfect homegrown brew. Your taste buds (and your stress levels) will thank you.
🔗 Recommended Links
- The Tea Association of the USA – For deep dives into tea history.
- Herb Society of America – Excellent resources on growing medicinal and culinary herbs.
- Royal Horticultural Society (RHS) – Growing Tea – Expert technical advice on Camellia sinensis.
❓ FAQ

Q: Can I grow tea from actual tea bags? A: ❌ No. Tea bags contain dried, processed leaves. You need seeds or live plants (cuttings) to start your garden.
Q: Is “Herbal Tea” actually tea? A: Technically, no. Only drinks made from Camellia sinensis are “Tea.” Everything else is a “Tisane” or “Infusion.” But we won’t tell the Tea Police if you don’t!
Q: Do I need a greenhouse? A: Not at all! Most of the plants on our list thrive outdoors in the summer or on a sunny windowsill year-round.
Q: Which plant is best for beginners? A: Mint or Lemon Balm. They are incredibly hardy and provide a huge harvest very quickly.
📚 Reference Links
- Portland Nursery: Growing Herbs for Tea
- University of Maryland Extension: Harvesting and Drying Herbs
- Missouri Botanical Garden: Camellia sinensis
⚡️ Quick Tips and Facts
Before we dive into the dirt, here’s a “cheat sheet” for the aspiring tea gardener. We’ve distilled years of muddy boots and countless cuppas into these essential nuggets. Think of it as your pre-flight checklist for a successful tea journey!
| Feature | Expert Advice |
|---|---|
| Easiest Overall | Mint (Warning: It’s a garden takeover artist! 🌿) |
| Best for Sleep | Chamomile or Lemon Balm |
| True Tea Plant | Camellia sinensis (Needs acidic soil, like blueberries) |
| Sun Requirements | Most tea herbs love 6-8 hours of full sun ☀️ |
| Watering Tip | Don’t drown them! Most herbs prefer “well-drained” soil. ✅ |
| Harvesting Rule | Pick in the morning after the dew dries for maximum oils. |
| Container Friendly? | Absolutely! Almost all herbal teas love pots. 🪴 |
🌱 From Ancient Groves to Your Backyard: The Evolution of Tea Gardening
The history of tea is steeped in legend, mystery, and a surprising amount of accidental discovery! We’ve all heard the story of the Chinese Emperor Shen Nung, who supposedly discovered tea in 2737 BC when some wild leaves blew into his pot of boiling water. Talk about a lucky breeze! For centuries, Camellia sinensis, the “true” tea plant, was a closely guarded secret of the East, a beverage reserved for royalty, monks, and the very wealthy. Its cultivation spread slowly, eventually reaching Japan, India, and beyond, shaping cultures and economies along the way.
However, “tea” as we often refer to it today—or more accurately, tisanes or herbal infusions—has been part of human history globally for far longer. From the mint-heavy traditions of Morocco to the chamomile-sipping grandmothers of Europe, humans have always looked to their gardens and wild spaces for a soothing, healing, or invigorating brew. Our ancestors were the original DIY tea blenders (https://www.growingteas.com/category/diy-tea-blending/), instinctively knowing which leaves, flowers, and roots offered comfort and flavor.
Today, we are seeing a massive resurgence in homegrown tea gardens. Why? Because we’re tired of microplastics in tea bags, “natural flavors” that taste anything but natural, and the sheer disconnect from our food sources. We want the real deal, the pure, unadulterated taste of nature, and luckily, nature makes it pretty easy for us to cultivate our own tea! As the team at Growing Teas™, we’ve seen firsthand the joy and satisfaction that comes from brewing a cup from leaves you’ve nurtured yourself. It’s a connection to the earth, a nod to ancient traditions, and a delicious act of self-sufficiency all rolled into one.
🍵 Why Grow Your Own? The Benefits of a Home Infusion
We often get asked, “Is it really worth the effort?” Our answer is always a resounding YES! And trust us, we’ve had our fair share of gardening mishaps – from rogue squirrels to unexpected blights. But the rewards of a homegrown tea garden far outweigh any minor setbacks. Here’s why we believe every tea lover should try their hand at cultivating their own tea:
- Unmatched Potency & Flavor: This is huge! Freshly picked herbs contain significantly higher levels of essential oils, antioxidants, and beneficial compounds compared to their dried, store-bought counterparts. Imagine the vibrant, crisp taste of mint picked minutes before brewing, or the intense citrus burst of lemon verbena. It’s a flavor explosion that simply can’t be replicated. As Chestnut Herbs aptly puts it, “Growing your own herbs enhances flavor and nutritional value compared to store-bought dried herbs.”
- Purity You Can Trust: When you grow your own, you control the entire process. No mystery pesticides, no questionable fertilizers, no “natural flavors” that are anything but. You know exactly what’s going into your cup, ensuring a truly organic (https://www.growingteas.com/category/organic-farming-techniques/) and clean brew. This peace of mind is, frankly, priceless.
- Sustainable Sips: Think about the journey of your average tea bag: cultivation, harvesting, processing, packaging, shipping across continents. Growing your own drastically reduces your carbon footprint. Zero packaging, zero shipping emissions. Just you and your pruners. It’s a small step that makes a big difference for our planet.
- Economic Savings: While there’s an initial investment in seeds or starter plants, over time, growing your own herbs can save you money, especially if you’re a frequent tea drinker. Many herbs are prolific growers and will provide abundant harvests for months, even years.
- Therapeutic Gardening: There’s something incredibly calming about tending to plants. The act of nurturing, watching them grow, and then enjoying the fruits (or leaves!) of your labor is a powerful stress reliever. It’s a form of mindfulness that nourishes the soul.
- Witty Bragging Rights: Let’s be honest, nothing beats saying, “Oh, this? It’s a custom blend from my private estate (the balcony).” It’s a conversation starter, a point of pride, and a testament to your green thumb.
We’ve personally experienced the transformation from a casual tea drinker to a passionate tea grower. The first time we brewed a cup of chamomile from flowers we’d picked that morning, the difference was astounding. It wasn’t just a drink; it was an experience, a connection. This is why we champion Cultivate Your Own Tea—it’s more than just a beverage; it’s a lifestyle. And for more on the amazing compounds found in your homegrown brews, check out our insights on the Health Benefits of Tea (https://www.growingteas.com/category/health-benefits-of-tea/).
1. Camellia Sinensis: Growing the “True” Tea Plant
Ah, Camellia sinensis! This is the grand dame of the tea world, the one responsible for every cup of Black, Green, Oolong, White, and Pu-erh tea you’ve ever enjoyed. If your dream is to brew your very own traditional tea, this is your plant. But how easy is it to grow? Let’s break it down.
🌿 Plant Profile & Ratings
| Aspect | Rating (1-10) | Notes |
|---|---|---|
| Ease of Growth | 6 | Moderate. Requires specific conditions but is hardy once established. |
| Flavor Potential | 10 | Unrivaled for true tea. |
| Yield | 7 | Slow to mature, but a mature plant yields consistently. |
| Aesthetic Appeal | 8 | Beautiful evergreen shrub, especially when flowering. |
| Container Suitability | 7 | Can thrive in large containers with proper care. |
The Nitty-Gritty of Growing True Tea
Camellia sinensis is an evergreen shrub native to Asia. It’s a cousin to the ornamental camellias you might see in gardens, but bred specifically for its leaves.
Soil & Sun Requirements: The Foundation of Flavor
The most critical factor for Camellia sinensis is acidic soil. Think blueberries or azaleas – they love the same conditions. A pH between 4.5 and 6.0 is ideal. If your soil is alkaline, you’ll need to amend it regularly.
- Our Pro Tip: We swear by Espoma Organic Holly-Tone (https://www.amazon.com/Espoma-HT4-Holly-Tone-4-4-4-Food/dp/B000207Z0W?tag=bestbrands0a9-20). It’s an organic fertilizer specifically designed for acid-loving plants and helps maintain that crucial low pH. We’ve seen plants struggle for years only to flourish once we started using this.
- Sunlight: While it can tolerate full sun in cooler climates, in warmer regions (like ours in the Southern US), it prefers partial shade, especially during the hottest part of the day. Too much intense sun can scorch the delicate leaves. Portland Nursery notes it prefers “partial shade” and grows 3-6′ tall.
Watering & Feeding: A Delicate Balance
- Watering: Consistent moisture is key, but excellent drainage is paramount. They hate “wet feet” (roots sitting in soggy soil). If growing in containers, ensure your pots have good drainage holes.
- Feeding: Beyond the Holly-Tone, a balanced, slow-release organic fertilizer in spring and mid-summer will keep your plant happy. Avoid over-fertilizing, as this can lead to lush growth but weaker flavor.
Hardiness & Varieties: Choosing Your Champion
- Hardiness: Most Camellia sinensis varieties are hardy in USDA Zones 7-9. However, there are “Cold Hardy” varieties, such as ‘Sochi’ or ‘Korean’, that can push the boundaries into Zone 6. If you’re in a colder climate, look specifically for these cultivars.
- Varieties: There are two main varieties:
- Camellia sinensis var. sinensis: Typically grown in China and Japan, known for smaller leaves and cold hardiness. Ideal for green and white teas.
- Camellia sinensis var. assamica: Originating in Assam, India, this variety has larger leaves and thrives in warmer, humid climates. It’s the primary source for black teas.
From Leaf to Cup: The Magic of Processing
This is where the real fun begins! The type of tea you get depends entirely on how you process the leaves.
- Green Tea: Minimal oxidation. Leaves are steamed or pan-fired shortly after harvest to prevent oxidation.
- Black Tea: Fully oxidized. Leaves are withered, rolled, allowed to fully oxidize, then dried.
- Oolong Tea: Partially oxidized. A complex process involving bruising and partial oxidation.
- White Tea: Least processed. Made from young, unopened buds and tender leaves, simply withered and dried.
For a deep dive into how to turn your harvest into a delicious green tea, explore our Green Tea Cultivation (https://www.growingteas.com/category/green-tea-cultivation/) section!
User Reviews & Our Take
“I started with a small Camellia sinensis plant from a local nursery,” says Sarah from Seattle. “It took a few years to get a decent harvest, but now I make my own green tea, and it’s incredibly rewarding. The flavor is so much fresher than anything I buy.” We agree, Sarah! The patience required for Camellia sinensis is truly a virtue, but the payoff is immense.
👉 CHECK PRICE on:
- Camellia Sinensis Plants: Amazon | Etsy | Logee’s Plants Official Website
- Espoma Organic Holly-Tone: Amazon | Walmart | Espoma Official Website
2. Mint: The Unstoppable Refreshment
If Camellia sinensis is the grand dame, then mint is the boisterous, over-enthusiastic cousin who shows up uninvited but always brings the party. Mint is, without a doubt, the “gateway drug” of tea gardening. It’s virtually unkillable, incredibly prolific, and offers an instant reward.
🌿 Plant Profile & Ratings
| Aspect | Rating (1-10) | Notes |
|---|---|---|
| Ease of Growth | 10+ | Seriously, it’s almost impossible to fail. |
| Flavor Potential | 9 | Refreshing, versatile, but can be overwhelming if not managed. |
| Yield | 10+ | You’ll have more mint than you know what to do with! |
| Aesthetic Appeal | 6 | Lush green foliage, but can look messy if not pruned. |
| Container Suitability | 10 | Essential for containing its spread. |
Why Mint is Your New Best Friend (and Biggest Challenge)
Mint (Mentha species) is a perennial herb known for its invigorating aroma and flavor. It’s a staple in many cultures for both culinary and medicinal purposes, and it makes an absolutely fantastic tea.
The “Unkillable” Factor: A Double-Edged Sword
- Ease of Growth: Mint thrives in almost any condition. Full sun to partial shade, average soil, consistent moisture – it’s not picky. It spreads rapidly via underground runners (rhizomes), quickly forming dense patches. This is fantastic for abundant harvests but can be a nightmare for garden beds.
- Our Warning: Always, always, ALWAYS grow mint in a pot. We cannot stress this enough. If you plant it directly in the ground, it will own your house, your car, and your neighbor’s yard by next Tuesday. We once planted a small peppermint plant in a raised bed, thinking the wood would contain it. Within a year, it had breached the wood, colonized the path, and was making a break for the lawn. Learn from our mistakes! ❌
- Chestnut Herbs echoes this sentiment: “Plant peppermint in a pot or in a spot where you truly don’t mind it spreading.”
A World of Minty Wonders: Varieties Galore!
Beyond common peppermint (Mentha piperita) and spearmint (Mentha spicata), there’s a whole universe of mints to explore, each with its own unique twist:
- Chocolate Mint: A personal favorite! It has a subtle cocoa aroma, perfect for a dessert-like brew. We love growing this one from Burpee Seeds (https://www.amazon.com/chocolate-mint-seeds/s?k=chocolate+mint+seeds).
- Apple Mint (Mentha suaveolens): As Portland Nursery notes, this one grows up to 3′ and tolerates dry conditions. It has fuzzy leaves and a milder, fruitier flavor.
- Orange Mint: A delightful citrusy note.
- Ginger Mint: A hint of spice.
- Pennyroyal Mint: Caution! While historically used, Pennyroyal is toxic in large doses and should not be consumed as tea. Stick to the culinary mints. ✅
Harvesting & Usage: Your Daily Refreshment
- Harvesting: You can harvest mint leaves throughout the growing season. Simply snip off stems as needed. The more you harvest, the bushier the plant becomes.
- Usage: Mint tea is incredibly refreshing, hot or iced. It’s also fantastic for digestion. We often add a few fresh leaves to our water bottle for a natural flavor boost. For more ideas on how to use your bounty, check out our DIY Tea Blending (https://www.growingteas.com/category/diy-tea-blending/) guide.
User Reviews & Our Take
“I started with a tiny mint plant, and now I have enough for my entire neighborhood!” exclaims Mark from Ohio. “It’s so easy, but definitely keep it in a pot!” We hear you, Mark! Mint is a fantastic starting point for anyone interested in Herbal Tea Planting (https://www.growingteas.com/category/herbal-tea-planting/) because it builds confidence. Just remember that pot!
👉 CHECK PRICE on:
- Mint Seeds/Plants: Amazon | Burpee Official Website | Etsy
- Large Planters for Mint: Amazon | Walmart
3. Lemon Balm: The Stress-Buster
If mint is the life of the party, then lemon balm is the calm, reassuring friend who offers you a soothing cup of tea after a long day. A member of the mint family (Melissa officinalis), but with a much gentler, citrusy soul, lemon balm is famous for its anxiety-reducing and sleep-promoting properties. It’s a truly delightful herb to grow.
🌿 Plant Profile & Ratings
| Aspect | Rating (1-10) | Notes |
|---|---|---|
| Ease of Growth | 9 | Very easy, spreads readily but less aggressively than mint. |
| Flavor Potential | 8 | Bright, fresh lemon flavor, not overpowering. |
| Yield | 9 | Prolific, especially if harvested regularly. |
| Aesthetic Appeal | 7 | Lush green foliage, small white flowers attractive to pollinators. |
| Container Suitability | 8 | Great in pots, though it can self-seed. |
The Gentle Giant of the Herb Garden
Lemon balm is a perennial herb that forms bushy clumps of bright green, crinkled leaves. When you brush against it, or crush a leaf, you’re met with an unmistakable, uplifting lemon scent.
Growing Lemon Balm: A Low-Maintenance Ally
- Sun & Soil: Lemon balm is quite adaptable. It prefers full sun to partial shade and well-drained soil. We’ve seen it thrive in less-than-ideal conditions, though it will be bushier and more fragrant with good care. Chestnut Herbs confirms its preference for “full sun to part shade.”
- Watering: Keep the soil consistently moist, especially during dry spells, but avoid waterlogging.
- Spread: Like its minty cousins, lemon balm can spread, but it’s generally less aggressive than peppermint. It primarily spreads through self-seeding and by forming new clumps from its root system. We recommend giving it plenty of space or growing it in a large container to keep it in check.
- Hardiness: It’s a hardy perennial in USDA Zones 4-9, often returning year after year with minimal fuss.
The Calming Brew: Benefits & Usage
Lemon balm has been used for centuries as a calming agent. It contains compounds like rosmarinic acid, which are believed to contribute to its soothing effects.
- Anxiety & Sleep: We often recommend lemon balm tea for unwinding after a stressful day or for promoting restful sleep. It’s like a liquid weighted blanket, gently easing you into relaxation.
- Digestion: It can also help soothe an upset stomach and reduce bloating.
- Our Favorite Use: We love mixing fresh lemon balm leaves with a little honey and a slice of ginger for a truly comforting evening brew. It’s simple, effective, and tastes divine. For more on how this and other herbs can benefit you, explore our Health Benefits of Tea (https://www.growingteas.com/category/health-benefits-of-tea/) section.
Harvesting & Storage: Keeping the Calm on Hand
- Harvesting: Snip off leaves and stems throughout the growing season. The plant will produce new growth, giving you a continuous supply.
- Drying: Lemon balm dries beautifully. Hang bundles of stems upside down in a cool, dark, well-ventilated area, or use a dehydrator on a low setting. Once dry, store the leaves in an airtight container.
User Reviews & Our Take
“Lemon balm is my secret weapon against a busy day,” shares David from California. “I grow it in a big pot on my patio, and just smelling it makes me feel calmer. The tea is fantastic.” We couldn’t agree more, David! Chestnut Herbs calls it a “cheerful ally that brings both honeybees and fairies to your garden,” and we think that perfectly captures its gentle charm. It’s an essential for any Herbal Tea Planting (https://www.growingteas.com/category/herbal-tea-planting/) enthusiast.
👉 CHECK PRICE on:
- Lemon Balm Seeds/Plants: Amazon | Burpee Official Website | Etsy
4. German Chamomile: The Apple-Scented Dreamer
If you’ve ever reached for a calming cup of tea before bed, chances are you’ve encountered chamomile. But there’s a world of difference between store-bought dust and the fragrant, apple-scented flowers you can grow yourself. We’re talking about German Chamomile (Matricaria chamomilla or Chamomilla recutita), the true star for tea.
🌿 Plant Profile & Ratings
| Aspect | Rating (1-10) | Notes |
|---|---|---|
| Ease of Growth | 8 | Easy from seed, self-seeds readily. |
| Flavor Potential | 9 | Sweet, apple-like, deeply calming. |
| Yield | 7 | Abundant small flowers, but requires frequent harvesting. |
| Aesthetic Appeal | 8 | Delicate, daisy-like flowers, cheerful appearance. |
| Container Suitability | 7 | Grows well in pots, but can get leggy if not enough light. |
The Daisy That Dreams Are Made Of
German Chamomile is an annual herb that produces a profusion of small, white, daisy-like flowers with bright yellow centers. Its delicate appearance belies its robust nature and powerful calming properties.
Growing Chamomile: From Seed to Sleep
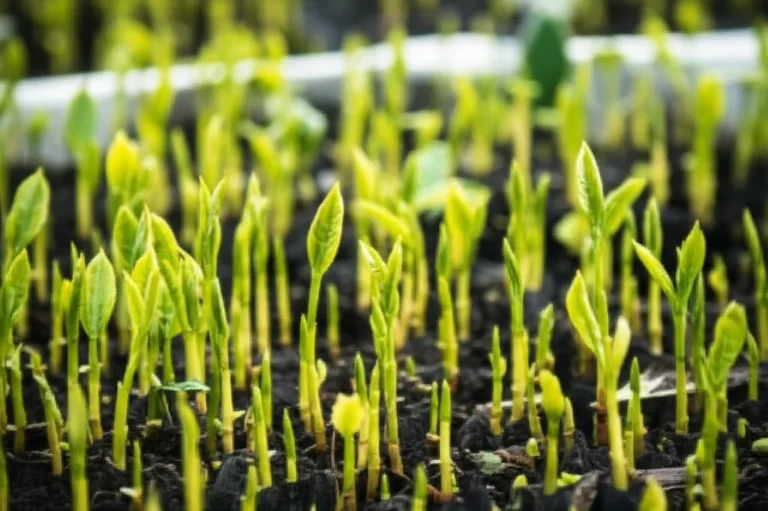
- Starting from Seed: Chamomile is incredibly easy to grow from seed. You can direct sow it in your garden after the last frost, or start seeds indoors a few weeks before. We’ve found that simply scattering the tiny seeds on top of the soil and lightly pressing them in works best, as they need light to germinate.
- Sun & Soil: It thrives in full sun and well-drained soil. While it’s not overly picky, good soil will yield more abundant blooms. Chestnut Herbs notes it “needs full sun; slow to flower but worth the wait.”
- Self-Seeding: One of the best things about German Chamomile is its tendency to self-seed. Once you have it established, it will often pop up year after year, giving you a continuous supply with minimal effort. This makes it a fantastic choice for a low-maintenance Herbal Tea Planting (https://www.growingteas.com/category/herbal-tea-planting/) garden.
- Distinguishing German vs. Roman: It’s important to note the difference between German Chamomile (an annual, Matricaria chamomilla) and Roman Chamomile (a perennial, Chamaemelum nobile). While both have similar properties, German Chamomile is generally preferred for tea due to its higher concentration of beneficial compounds and more prolific flowering. Portland Nursery also highlights this distinction.
Harvesting the Dreamy Blooms
- When to Harvest: The key to potent chamomile tea is harvesting the flowers when they are “ripe.” This means when the petals are fully open and slightly reflexed (curled back).
- How to Harvest: Pinch off the flower heads just below the base. This can be a bit tedious, but it’s a meditative process! We often sit with a basket and just enjoy the scent as we pick.
- Drying: Spread the flowers in a single layer on a screen or clean cloth in a cool, dark, well-ventilated area. They dry relatively quickly. Once completely dry, store them in an airtight jar.
The Calming Cup: Benefits & Usage
Chamomile tea is renowned for its ability to promote relaxation and aid sleep. It contains an antioxidant called apigenin, which is thought to bind to specific receptors in the brain that decrease anxiety and initiate sleep.
- Sleep Aid: A warm cup of chamomile tea before bed is a classic remedy for insomnia and restlessness.
- Digestive Soother: It can also help calm an upset stomach and reduce inflammation.
- Our Anecdote: One of our team members, a self-proclaimed insomniac, swears by a nightly cup of homegrown chamomile. “It’s not a knockout punch,” she says, “but it gently guides me to sleep, and I wake up feeling refreshed, not groggy.”
User Reviews & Our Take
“I love watching my chamomile patch grow,” says Emily from Vermont. “The little flowers are so cheerful, and the tea is divine. It really does smell like apples!” We agree, Emily! The subtle apple notes are a hallmark of fresh German Chamomile. It’s a must-have for anyone seeking natural relaxation and a beautiful addition to the garden.
👉 CHECK PRICE on:
- German Chamomile Seeds: Amazon | Burpee Official Website | Etsy
5. Lavender: A Floral Hug in a Mug
When you think of lavender, you might first picture fragrant sachets, essential oils, or beautiful purple fields in Provence. But this versatile herb also makes a wonderfully soothing tea! Just a word of caution from us: a little goes a long way. You want a floral hug, not a perfume bath!
🌿 Plant Profile & Ratings
| Aspect | Rating (1-10) | Notes |
|---|---|---|
| Ease of Growth | 7 | Easy once established, but needs specific conditions. |
| Flavor Potential | 8 | Unique floral, slightly sweet, can be overpowering. |
| Yield | 7 | Abundant flowers, but careful with quantity for tea. |
| Aesthetic Appeal | 10 | Stunning purple blooms, iconic fragrance. |
| Container Suitability | 8 | Excellent in pots with good drainage. |
More Than Just a Pretty Face: The Tea Potential of Lavender
Lavender (Lavandula species) is a perennial shrub known for its distinctive purple flowers and intoxicating aroma. While all lavender is fragrant, not all varieties are equally suited for culinary or tea use.
Growing Lavender: The Sun-Loving Mediterranean Beauty
- Sun & Soil: Lavender absolutely adores full sun (at least 6-8 hours a day) and, crucially, excellent drainage. It hails from the Mediterranean, so it thrives in hot, dry conditions and poor, sandy, or gravelly soil. If your soil is heavy clay, amend it heavily with sand or grit, or better yet, grow lavender in raised beds or containers. “Most of these plants require full sun and good drainage, making them easy to grow in containers,” as Portland Nursery highlights.
- Watering: Once established, lavender is remarkably drought-tolerant. Overwatering is the quickest way to kill it. Let the soil dry out completely between waterings.
- Pruning: Prune your lavender in late winter or early spring to maintain its shape and encourage bushier growth and more flowers. Portland Nursery advises pruning “shrubby herbs (lavender, rosemary, tea) in late winter/early spring to maintain shape.”
Best Varieties for Tea: Not All Lavenders Are Created Equal
For culinary and tea purposes, you want varieties with a sweeter, less camphoraceous (medicinal) flavor.
- English Lavender (Lavandula angustifolia): This is your go-to for tea. Varieties like ‘Munstead’ and ‘Hidcote’ are excellent choices, known for their sweet, floral notes. NGB.org and Portland Nursery both recommend these varieties for their ease of growth and benefits.
- French Lavender (Lavandula dentata) and Lavandin (Lavandula x intermedia): These tend to have a higher camphor content and can taste more medicinal in tea. Best avoided for drinking.
Harvesting & Brewing: The Art of Subtlety
- Harvesting: Pick the flower spikes just as the buds are opening, before the flowers are fully bloomed. This is when their fragrance and flavor are most concentrated.
- Drying: Hang bundles of lavender upside down in a cool, dark, well-ventilated area. They dry beautifully and retain their color and scent.
- Brewing for Tea: This is where the “less is more” rule truly applies. Use only a small pinch (1/2 to 1 teaspoon) of dried lavender buds per cup. Steep for 5-10 minutes. Too much, or too long, and your tea will taste like potpourri! We often blend lavender with other herbs like chamomile or lemon balm for a more balanced flavor. For blending inspiration, check out our DIY Tea Blending (https://www.growingteas.com/category/diy-tea-blending/) guide.
- Benefits: Lavender tea is renowned for its calming and mood-boosting properties. NGB.org notes it “aids sleep, boosts mood.” It can help reduce anxiety, promote relaxation, and even alleviate headaches.
User Reviews & Our Take
“I love the smell of lavender, but I was nervous about drinking it,” says Chloe from Oregon. “I started with just a few buds, and now it’s my favorite calming tea. It’s so easy to grow, too!” We totally get it, Chloe. The key is moderation. Lavender is a stunning and beneficial addition to any garden, especially for those interested in Herbal Tea Planting (https://www.growingteas.com/category/herbal-tea-planting/).
👉 CHECK PRICE on:
- Lavender ‘Munstead’ Seeds/Plants: Amazon | Burpee Official Website | Etsy
- Lavender ‘Hidcote’ Seeds/Plants: Amazon | Burpee Official Website | Etsy
6. Lemon Verbena: The Gourmet’s Choice
If you’re looking for a lemon flavor that’s bright, clean, and intensely aromatic without any of the grassy undertones sometimes found in lemongrass or lemon balm, then Lemon Verbena (Aloysia citrodora) is your plant. In our expert opinion, this is the best-tasting lemon herb on the planet. It’s the gourmet’s secret weapon for a truly sophisticated lemon tea.
🌿 Plant Profile & Ratings
| Aspect | Rating (1-10) | Notes |
|---|---|---|
| Ease of Growth | 7 | Easy in summer, but a tender perennial; needs winter protection. |
| Flavor Potential | 10 | Pure, intense lemon, without bitterness. |
| Yield | 8 | Prolific leaf production during warm months. |
| Aesthetic Appeal | 7 | Elegant, slender leaves, delicate white flowers. |
| Container Suitability | 9 | Excellent for pots, making wintering over easier. |
The Purest Lemon Essence for Your Cup
Lemon verbena is a deciduous shrub that can grow quite large in warm climates, but it’s often grown as an annual or overwintered indoors in cooler regions. Its long, slender, bright green leaves are packed with a powerful, sweet lemon scent.
Growing Lemon Verbena: A Sun-Lover with a Soft Spot
- Sun & Soil: Lemon verbena absolutely thrives in full sun (at least 6 hours) and well-drained soil. It’s not particularly fussy about soil type, as long as it doesn’t stay waterlogged.
- Watering: Keep it consistently moist, especially when it’s actively growing in summer. However, once established, it can tolerate some drought.
- Tender Perennial: This is the main “catch” with lemon verbena. It’s only hardy in USDA Zones 8-10. In colder climates, you’ll need to treat it as an annual or, as we prefer, bring it indoors for the winter. We’ve had great success keeping it alive in a sunny window, though it will likely drop its leaves and go dormant. Don’t panic if it looks dead; it will usually leaf out again in spring!
- Pruning: Regular harvesting encourages bushier growth. You can also prune it back hard in late winter or early spring before new growth begins. Portland Nursery mentions it can grow 2-10′ tall and you harvest leaves for lemon tea.
Harvesting & Brewing: Unlocking the Zest
- Harvesting: Snip off stems and leaves throughout the growing season. The more you pick, the more it produces!
- Drying: Lemon verbena leaves dry beautifully, retaining much of their vibrant lemon scent and flavor. Spread them on a screen or hang small bundles. Once dry, store in an airtight container.
- Brewing: Use fresh or dried leaves. For fresh, bruise a few leaves to release their oils. For dried, use about 1 teaspoon per cup. Steep for 5-7 minutes. The resulting tea is clear, bright, and intensely lemony – perfect on its own or as a base for other blends.
- Our Anecdote: One summer, we had an abundance of lemon verbena. We made a huge batch of iced tea with it, adding a few slices of cucumber. It was the most refreshing drink we’d ever tasted, perfect for those sweltering days in the garden. It quickly became a team favorite for its pure, clean flavor.
User Reviews & Our Take
“I tried lemon verbena on a whim, and it’s now my absolute favorite tea herb,” raves Jessica from New York. “It smells incredible, and the tea is just pure lemon sunshine. I bring it inside every winter, and it’s worth the effort!” We couldn’t agree more, Jessica. Lemon verbena is a shining example of how a little extra care for a tender perennial can yield extraordinary flavor. It’s a fantastic choice for anyone looking to elevate their Herbal Tea Planting (https://www.growingteas.com/category/herbal-tea-planting/) game.
👉 CHECK PRICE on:
- Lemon Verbena Plants: Amazon | Etsy | Richters Herbs Official Website
7. Holy Basil (Tulsi): The Yoga of Teas
In India, Holy Basil, or Tulsi (Ocimum tenuiflorum), is revered as “The Queen of Herbs” and is considered sacred. It’s not your typical pesto basil; this is an adaptogen, meaning it helps your body adapt to stress and promotes balance. Drinking Tulsi tea is like doing yoga for your insides – calming, centering, and incredibly beneficial.
🌿 Plant Profile & Ratings
| Aspect | Rating (1-10) | Notes |
|---|---|---|
| Ease of Growth | 9 | Very easy, grows like regular basil, loves warmth. |
| Flavor Potential | 8 | Spicy, clove-like, slightly peppery, deeply warming. |
| Yield | 9 | Prolific leaf production, especially with regular harvesting. |
| Aesthetic Appeal | 7 | Bushy green or purple foliage, delicate flower spikes. |
| Container Suitability | 9 | Excellent in pots, can be brought indoors for winter. |
The Sacred Herb: Cultivating Wellness in Your Garden
Tulsi is an annual herb (though it can be a short-lived perennial in very warm climates) that grows into a bushy plant with fragrant leaves and delicate flower spikes. Its aroma is distinct from culinary basil, often described as a mix of clove, mint, and licorice.
Growing Tulsi: A Warm-Weather Enthusiast
- Sun & Soil: Tulsi absolutely loves full sun (6-8 hours daily) and well-drained, fertile soil. It thrives in warm temperatures, so wait until all danger of frost has passed and the soil has warmed up before planting outdoors.
- Starting from Seed: It’s “super easy to germinate from seed,” as Chestnut Herbs notes. You can direct sow seeds after the last frost or start them indoors 4-6 weeks prior.
- Watering: Keep the soil consistently moist, especially during hot, dry periods.
- Pinching & Pruning: To encourage a bushy plant and prevent it from going to seed too quickly (which can reduce leaf production), pinch off the top sets of leaves regularly. You can also snip off flower spikes as they appear, unless you want to save seeds.
- Varieties: There are several common types of Tulsi, each with slightly different flavors and appearances:
- Rama Tulsi (Ocimum tenuiflorum ‘Rama’): Green leaves, mildest flavor, sweet and cooling.
- Krishna Tulsi (Ocimum tenuiflorum ‘Krishna’): Purple-tinged leaves, spicier, peppery flavor.
- Vana Tulsi (Ocimum gratissimum): Wild forest basil, green leaves, more robust and pungent.
- Chestnut Herbs mentions these varieties and confirms that “Holy basil, aka tulsi, is so easy to grow, you won’t be let down!”
Harvesting & Brewing: The Adaptogenic Elixir
- Harvesting: You can harvest leaves and small stems throughout the growing season. The more you harvest, the more the plant will produce.
- Drying: Tulsi dries very well. Hang bundles of stems or spread leaves on a screen in a cool, dark, well-ventilated area. Once crispy dry, store in an airtight container.
- Brewing: Use 1-2 teaspoons of dried leaves (or 3-4 fresh leaves) per cup. Steep for 5-10 minutes. The tea has a unique, warming, slightly spicy flavor that is incredibly comforting.
- Benefits: Tulsi is a powerful adaptogen, meaning it helps the body cope with various stressors. It’s known for:
- Stress Reduction: Calming the nervous system and promoting mental clarity.
- Immune Support: Boosting the body’s natural defenses.
- Anti-inflammatory Properties: Helping to reduce inflammation throughout the body.
- Antioxidant Power: Protecting cells from damage. For a deeper dive into these amazing properties, check out our Health Benefits of Tea (https://www.growingteas.com/category/health-benefits-of-tea/) section.
User Reviews & Our Take
“Growing Tulsi has been a game-changer for my stress levels,” says Anya from Colorado. “It’s so easy to grow, and the tea makes me feel so grounded. It’s truly my ‘yoga in a cup’!” We couldn’t agree more, Anya. Tulsi is a powerhouse of wellness, and its ease of growth makes it an essential for any Herbal Tea Planting (https://www.growingteas.com/category/herbal-tea-planting/) enthusiast.
👉 CHECK PRICE on:
- Holy Basil (Tulsi) Seeds: Amazon | Etsy | Strictly Medicinal Seeds Official Website
8. Hibiscus: The Tart and Tangy Showstopper
If you’ve ever enjoyed a vibrant red, tangy iced tea, chances are you’ve tasted Hibiscus! Specifically, we’re talking about Hibiscus sabdariffa, also known as Roselle or Florida Cranberry. This isn’t your ornamental garden hibiscus; this variety is grown for its fleshy, tart calyxes (the part that holds the flower) which are a powerhouse of flavor and Vitamin C. It’s a showstopper in the garden and in your cup!
🌿 Plant Profile & Ratings
| Aspect | Rating (1-10) | Notes |
|---|---|---|
| Ease of Growth | 7 | Easy in warm climates, can be grown as an annual elsewhere. |
| Flavor Potential | 9 | Distinctive tart, cranberry-like flavor. |
| Yield | 8 | Abundant calyxes in late summer/fall. |
| Aesthetic Appeal | 8 | Beautiful, large yellow flowers, striking red calyxes. |
| Container Suitability | 7 | Can be grown in large containers, but needs space. |
The Ruby Red Jewel of the Tea Garden
Hibiscus sabdariffa is a bushy annual plant (or perennial in tropical climates) that can grow quite large, up to 7 feet tall! It produces beautiful, pale yellow flowers with a dark red eye, which then give way to the star of the show: the bright red, fleshy calyxes.
Growing Hibiscus: A Lover of Warmth
- Sun & Soil: Hibiscus loves full sun (at least 6-8 hours) and well-drained, fertile soil. It’s a warm-weather plant, so it thrives in hot, humid conditions.
- Starting from Seed: You can direct sow seeds after the last frost, or start them indoors 4-6 weeks prior to get a head start.
- Watering: Keep the soil consistently moist, especially during flowering and calyx development.
- Space: Give this plant plenty of room! It can get quite large and bushy. If growing in a container, choose a very large pot (at least 15-20 gallons).
- Climate Considerations: In most temperate climates, Hibiscus sabdariffa is grown as an annual. It needs a long, warm growing season to produce a good harvest of calyxes. If you have short summers, start seeds early indoors.
Harvesting & Brewing: The Tangy Delight
- When to Harvest: The calyxes are ready for harvest about 2-3 weeks after the flower has bloomed and faded. They will be plump, firm, and a vibrant red.
- How to Harvest: Snip the calyxes off the plant, then carefully remove the seed pod from the center. This can be a bit sticky, so gloves are helpful!
- Drying: Spread the calyxes in a single layer on a screen or dehydrator (low heat). They dry well and retain their color. Once completely dry, store in an airtight container.
- Brewing: Use 1-2 teaspoons of dried calyxes (or a handful of fresh) per cup. Steep for 5-10 minutes. The tea will be a stunning ruby red with a tart, cranberry-like flavor. It’s delicious hot, but truly shines as an iced tea.
- Fun Fact: This is the main ingredient in many commercial “Red Zinger” type teas! We love blending it with a little stevia for sweetness and a slice of orange for extra zing.
- Benefits: Hibiscus is packed with Vitamin C and antioxidants. It’s known for:
- Immune Support: Thanks to its high Vitamin C content.
- Blood Pressure Support: Studies suggest it may help lower blood pressure.
- Antioxidant Power: Protecting cells from oxidative stress. For more on these amazing benefits, visit our Health Benefits of Tea (https://www.growingteas.com/category/health-benefits-of-tea/) section.
User Reviews & Our Take
“I was amazed at how much hibiscus I got from just a few plants,” shares Maria from Florida. “The tea is so refreshing, and the color is just gorgeous. It’s become a summer staple!” We agree, Maria! Hibiscus is a fantastic choice for adding a vibrant, tangy element to your Herbal Tea Planting (https://www.growingteas.com/category/herbal-tea-planting/) collection, especially if you love a good iced tea.
👉 CHECK PRICE on:
- Hibiscus Sabdariffa (Roselle) Seeds: Amazon | Etsy | Baker Creek Heirloom Seeds Official Website
9. Stevia: Nature’s Zero-Calorie Sweetener
Why buy processed white powder when you can grow your own zero-calorie sweetener right in your garden? Stevia (Stevia rebaudiana) is a fantastic plant that provides natural sweetness without the calories or artificial aftertaste of some commercial sweeteners. It’s incredibly easy to grow and a game-changer for your homegrown teas.
🌿 Plant Profile & Ratings
| Aspect | Rating (1-10) | Notes |
|---|---|---|
| Ease of Growth | 8 | Easy, but needs warmth and consistent moisture. |
| Flavor Potential | 9 | Intense sweetness, can have a slight licorice aftertaste for some. |
| Yield | 8 | Abundant leaves throughout the growing season. |
| Aesthetic Appeal | 6 | Bushy green foliage, small white flowers. |
| Container Suitability | 9 | Excellent for pots, making wintering over easier. |
The Sweetest Secret in Your Garden
Stevia is a tender perennial herb native to Paraguay, typically grown as an annual in most temperate climates. It’s the leaves that hold the magic, containing compounds called steviol glycosides, which are responsible for its intense sweetness.
Growing Stevia: A Sun-Loving Sweetheart
- Sun & Soil: Stevia thrives in full sun (6-8 hours daily) and well-drained, fertile soil. It prefers slightly acidic to neutral soil.
- Starting from Seed or Plant: While you can grow stevia from seed, germination can be a bit tricky. We often recommend starting with a small plant from a nursery for quicker results.
- Watering: Keep the soil consistently moist, especially during hot weather. Stevia doesn’t like to dry out completely.
- Pinching: To encourage a bushier plant with more leaves (and therefore more sweetness!), pinch back the growing tips regularly.
- Tender Perennial: Like lemon verbena, stevia is a tender perennial (hardy in USDA Zones 9-11). In colder climates, you’ll need to bring it indoors for the winter or treat it as an annual. It does well in a sunny window during the colder months.
- Sweetness Varies: NGB.org notes that “sweetness varies; stronger before flowering in autumn.” This is a great tip for maximizing your harvest!
Harvesting & Usage: A Little Goes a Long Way!
- When to Harvest: You can harvest stevia leaves throughout the growing season. The leaves are sweetest just before the plant starts to flower in the autumn.
- How to Harvest: Snip off individual leaves or entire stems.
- Drying: Stevia leaves dry beautifully. Spread them in a single layer on a screen or use a dehydrator on a low setting. Once crispy dry, store in an airtight container.
- Brewing & Sweetening: This is where the warning comes in: Stevia is approximately 200-300 times sweeter than sugar! ✅ So, a little goes a very, very long way.
- Fresh: Just drop one or two fresh leaves into your teapot or cup with your other herbs. Let it steep.
- Dried: Use a tiny pinch of dried, crushed leaves. Start with a very small amount and add more to taste. Overdoing it can result in a slightly bitter or licorice-like aftertaste for some people.
- NGB.org suggests steeping “5-6 leaves for 3-4 minutes,” which is a good starting point, but we’d still advise caution and tasting as you go!
- Our Anecdote: One of our team members, new to growing stevia, once made a cup of mint tea and tossed in a generous handful of fresh stevia leaves, thinking “more is better!” The resulting brew was so intensely sweet it was almost undrinkable, with a strong licorice kick. Lesson learned: respect the power of stevia!
User Reviews & Our Take
“I’ve been trying to cut down on sugar, and growing my own stevia has been amazing,” says Chris from Texas. “It’s so easy, and I love knowing exactly what’s sweetening my tea.” We wholeheartedly agree, Chris! As NGB.org says, “Growing your own will make it that much sweeter.” Stevia is a must-have for anyone looking for a natural, calorie-free sweetener in their Herbal Tea Planting (https://www.growingteas.com/category/herbal-tea-planting/) efforts.
👉 CHECK PRICE on:
- Stevia Seeds/Plants: Amazon | Burpee Official Website | Etsy
10. Rose Hips: The Vitamin C Powerhouse
After your beautiful roses have faded and dropped their petals, don’t despair! They leave behind a hidden treasure: rose hips. These small, often reddish-orange fruits are not only visually appealing but are also an incredible source of Vitamin C and make a wonderfully tart, fruity tea. It’s a fantastic way to extend the life and utility of your rose garden.
🌿 Plant Profile & Ratings
| Aspect | Rating (1-10) | Notes |
|---|---|---|
| Ease of Growth | 8 | Easy if you already grow roses, especially certain varieties. |
| Flavor Potential | 8 | Tart, fruity, slightly sweet. |
| Yield | 7 | Varies by rose type, but can be abundant. |
| Aesthetic Appeal | 7 | Brightly colored hips add interest to the winter garden. |
| Container Suitability | 6 | Possible with large roses, but best in ground. |
The Hidden Gem of the Rose Bush
Rose hips are the accessory fruits of the rose plant. They form after successful pollination of the flowers. While all roses produce hips, some varieties are much better for harvesting than others, yielding larger, fleshier, and more flavorful hips.
Growing for Hips: Choosing the Right Rose
- Rose Type Matters: For the biggest, juiciest, and most abundant hips, we highly recommend Rugosa Roses (Rosa rugosa). These are incredibly hardy, disease-resistant, and produce large, plump, bright red or orange hips. They also have beautiful, fragrant flowers. Other good choices include Dog Roses (Rosa canina) and many old-fashioned or wild rose varieties.
- Avoid Hybrid Teas: Most modern hybrid tea roses are bred for large, continuous blooms, and their hips are often small, woody, and not worth the effort for tea.
- Sun & Soil: Roses generally prefer full sun (at least 6 hours) and well-drained, fertile soil.
- Watering & Care: Follow standard rose care practices. Avoid using systemic pesticides on roses if you intend to consume the hips, as these chemicals can remain in the plant tissue. Opt for organic pest control methods.
Harvesting & Brewing: A Burst of Vitamin C
- When to Harvest: Rose hips are best harvested after the first light frost, but before they become too soft or shriveled. The frost helps to sweeten them slightly. They will be firm and brightly colored.
- How to Harvest: Snip the hips off the plant.
- Preparation: This is the most important step! Rose hips contain tiny, irritating hairs and seeds inside. You must remove these before drying or brewing.
- Cut the hips in half or quarters.
- Carefully scoop out the seeds and hairs with a small spoon or knife.
- Rinse the cleaned hip shells.
- Drying: Spread the cleaned hip shells in a single layer on a screen or use a dehydrator on a low setting. They can take a while to dry completely. Once crispy, store in an airtight container.
- Portland Nursery advises that rose hips are “dried for later use; boil 2 Tbsp per pint.”
- Brewing: Use 1-2 tablespoons of dried, cleaned rose hip pieces per cup. Simmer them in water for 10-15 minutes (rather than just steeping) to extract all the goodness. The tea will be a lovely reddish-orange with a tart, fruity flavor. You can sweeten it with honey or stevia.
- Benefits: Rose hips are a true superfood, especially for their incredibly high Vitamin C content – often much higher than oranges! They also contain antioxidants and anti-inflammatory compounds.
- Immune Boost: Perfect for cold and flu season.
- Skin Health: Vitamin C is crucial for collagen production.
- Antioxidant Power: Fighting free radicals. For more on the incredible benefits of this and other ingredients, check out our Health Benefits of Tea (https://www.growingteas.com/category/health-benefits-of-tea/) section.
User Reviews & Our Take
“I never knew my roses could give me so much more than just flowers!” exclaims Sarah from Michigan. “Harvesting rose hips is a bit of work, but the tea is so delicious and I feel great knowing I’m getting so much Vitamin C.” We agree, Sarah! While the preparation can be a bit fiddly, the health benefits and unique flavor make rose hips a truly rewarding addition to your Herbal Tea Planting (https://www.growingteas.com/category/herbal-tea-planting/) efforts.
👉 CHECK PRICE on:
- Rugosa Rose Plants: Amazon | Etsy | Stark Bro’s Nurseries Official Website
11. Rosemary: For Focus and Flavor
You probably know Rosemary (Rosmarinus officinalis) as a culinary herb, a fragrant companion to roasted potatoes or chicken. But have you ever considered it for tea? Rosemary tea is surprisingly delicious—savory, piney, and incredibly invigorating. It’s like a brisk walk in a pine forest, perfect for clearing brain fog and boosting focus.
🌿 Plant Profile & Ratings
| Aspect | Rating (1-10) | Notes |
|---|---|---|
| Ease of Growth | 9 | Very easy, drought tolerant, hardy in many zones. |
| Flavor Potential | 7 | Distinctive, savory, can be strong; best in moderation. |
| Yield | 9 | Abundant woody stems and leaves. |
| Aesthetic Appeal | 8 | Beautiful evergreen shrub, often with delicate blue flowers. |
| Container Suitability | 9 | Excellent in pots, can be pruned to shape. |
The Aromatic Awakener for Your Mind
Rosemary is an evergreen shrub with needle-like leaves and a strong, pungent aroma. It’s a Mediterranean native, so it thrives in conditions similar to lavender: plenty of sun and excellent drainage.
Growing Rosemary: A Hardy and Handsome Herb
- Sun & Soil: Rosemary absolutely loves full sun (6-8 hours daily) and well-drained, sandy or rocky soil. It’s incredibly drought-tolerant once established, making it a low-maintenance superstar. Portland Nursery notes it “thrives in full sun.”
- Watering: Water sparingly. Allow the soil to dry out completely between waterings. Overwatering is a common killer of rosemary.
- Hardiness: Most varieties are hardy in USDA Zones 7-10, though some cultivars like ‘Arp’ or ‘Madeline Hill’ can tolerate colder temperatures (Zone 6). In colder climates, it can be grown in containers and brought indoors for winter.
- Pruning: Prune regularly to maintain shape and encourage new growth. Avoid cutting into old, woody stems too deeply, as they may not regrow. Portland Nursery advises pruning “shrubby herbs (lavender, rosemary, tea) in late winter/early spring to maintain shape.”
Harvesting & Brewing: A Mental Pick-Me-Up
- Harvesting: Snip off sprigs of rosemary as needed throughout the year. The leaves are evergreen, so you have a continuous supply!
- Drying: Rosemary dries well, retaining much of its flavor. Hang bundles or spread sprigs on a screen. Once dry, strip the leaves from the woody stems and store in an airtight container.
- Brewing: Use 1-2 teaspoons of fresh or dried rosemary leaves per cup. Steep for 5-7 minutes. The tea has a strong, savory, slightly piney flavor. It’s quite potent, so start with a smaller amount and adjust to your taste.
- Benefits: Rosemary is traditionally used to improve memory and concentration. It contains compounds like rosmarinic acid and carnosic acid, which are powerful antioxidants.
- Cognitive Boost: Anecdotal evidence and some studies suggest it can enhance focus and memory.
- Anti-inflammatory: Helps reduce inflammation.
- Antioxidant: Protects cells from damage.
- Digestive Aid: Can help soothe an upset stomach. For more on how this aromatic herb can benefit your well-being, explore our Health Benefits of Tea (https://www.growingteas.com/category/health-benefits-of-tea/) section.
- Our Anecdote: We once had a particularly grueling brainstorming session at Growing Teas™. Someone brewed a pot of fresh rosemary tea, and the invigorating aroma alone seemed to sharpen our minds. The tea itself was a revelation – a refreshing, earthy counterpoint to the usual coffee. It’s now a go-to for our “focus” blends.
User Reviews & Our Take
“I never thought to drink rosemary, but it’s surprisingly good!” says Tom from Georgia. “It really helps me concentrate when I’m working. Plus, it’s so easy to grow, even I can’t kill it!” We love hearing that, Tom! Rosemary is a fantastic, low-effort addition to any Herbal Tea Planting (https://www.growingteas.com/category/herbal-tea-planting/) collection, offering both culinary versatility and unique tea benefits.
👉 CHECK PRICE on:
- Rosemary Plants: Amazon | Burpee Official Website | Etsy
12. Calendula: The Golden Healer
Often mistaken for a common marigold, Calendula (Calendula officinalis), or Pot Marigold, is a vibrant, cheerful flower that’s much more than just a pretty face. Its bright orange and yellow petals are not only edible but also make a beautiful, mild, and beneficial tea. We like to call it “The Golden Healer” for its traditional uses in soothing the digestive system and promoting overall well-being.
🌿 Plant Profile & Ratings
| Aspect | Rating (1-10) | Notes |
|---|---|---|
| Ease of Growth | 9 | Super easy, grows in almost any soil, self-seeds. |
| Flavor Potential | 6 | Mild, slightly earthy, sometimes peppery; best for color and benefits. |
| Yield | 9 | Prolific flower production with regular deadheading. |
| Aesthetic Appeal | 9 | Cheerful, bright, daisy-like flowers. |
| Container Suitability | 8 | Excellent in pots and window boxes. |
The Sunny Petals with Hidden Powers
Calendula is an annual flowering plant that produces a continuous display of sunny orange and yellow blooms from spring until frost. It’s a fantastic companion plant in the garden, attracting pollinators and deterring pests, but its true magic lies in its petals.
Growing Calendula: A Gardener’s Dream
- Sun & Soil: Calendula is incredibly unfussy. It thrives in full sun to partial shade and will grow in almost any well-drained soil, even poor soil.
- Starting from Seed: It’s “super easy” to grow from seed. You can direct sow seeds in early spring after the last frost, or even in late fall for early spring blooms. They germinate quickly and reliably.
- Watering: Keep the soil consistently moist, but it’s quite tolerant of drier conditions once established.
- Deadheading: To ensure a continuous flush of blooms (and therefore more petals for your tea!), regularly deadhead spent flowers. This encourages the plant to produce more flowers rather than setting seed.
- Self-Seeding: Like chamomile, calendula is a prolific self-seeder. Once you have it in your garden, you’ll likely see new plants popping up year after year, making it a truly low-maintenance addition to your Herbal Tea Planting (https://www.growingteas.com/category/herbal-tea-planting/) efforts.
Harvesting & Brewing: Adding Golden Hues and Gentle Benefits
- When to Harvest: Harvest the petals from fully open flowers. You can pick individual petals or snip off the entire flower head.
- How to Harvest: Simply pinch or snip the petals from the flower head.
- Drying: Spread the petals in a single layer on a screen or use a dehydrator on a very low setting. They dry quickly and retain their vibrant color. Store in an airtight container.
- NGB.org notes to harvest “petals for dry tea” and suggests steeping “fresh or dried petals for 4 minutes.”
- Brewing: Use 1-2 teaspoons of dried calendula petals per cup. Steep for 5-7 minutes. The tea will have a beautiful golden hue and a very mild, slightly earthy, sometimes subtly peppery flavor. It’s not a strong-flavored tea, but it’s wonderful for its color and gentle benefits. We often blend it with other herbs like lemon balm or mint.
- Benefits: Calendula is traditionally known for its soothing and healing properties.
- Digestive Support: It’s often used to soothe the digestive tract. NGB.org mentions it’s “good for digestion.”
- Anti-inflammatory: Helps reduce inflammation.
- Antioxidant: Contains compounds that protect cells.
- Skin Health: While primarily used topically for skin, its internal benefits contribute to overall wellness.
- NGB.org also highlights it’s “High in Vitamin C,” making it a great addition for an immune boost. For more on the gentle healing powers of calendula, check out our Health Benefits of Tea (https://www.growingteas.com/category/health-benefits-of-tea/) section.
User Reviews & Our Take
“Calendula is so easy and adds such a cheerful pop of color to my garden,” says Lisa from Washington. “The tea is mild, but I love the golden color, and I feel good knowing it’s beneficial for my gut.” We agree, Lisa! As NGB.org describes it, calendula is “A much-loved addition with an earthy, peppery bite.” It’s a fantastic, low-effort plant that brings both beauty and subtle wellness to your homegrown tea collection.
👉 CHECK PRICE on:
- Calendula Seeds: Amazon | Burpee Official Website | Etsy
🪴 Houseplants… Adaptive Gardening Pleasure For The Rest Of Your Life
So, you’re dreaming of a vibrant tea garden, but your “yard” is a fire escape, a balcony, or perhaps just a very sunny windowsill? Fear not, fellow leaf-lovers! At Growing Teas™, we firmly believe that a lack of sprawling acreage should never deter your tea-growing ambitions. This is where Adaptive Gardening comes into play – making the most of the space you have, no matter how small. Many of our favorite tea plants are perfectly happy living indoors, bringing green life and delicious sips right into your home.
The Joys of Indoor Tea Cultivation
Growing tea plants as houseplants isn’t just a compromise; it’s a delightful way to enjoy fresh herbs year-round, regardless of your climate. It brings a touch of nature indoors, purifies your air, and provides a constant source of inspiration for your next brew.
Top Tea Plants for Indoor Living
- True Tea (Camellia sinensis): Yes, the actual tea plant! While it can grow into a large shrub outdoors, it adapts beautifully to container life indoors. With a bright, sunny window and a large pot, it can thrive as a stunning indoor shrub. It might not yield enough for daily brewing, but it’s incredibly rewarding to harvest your own “true” tea leaves.
- Lemongrass (Cymbopogon citratus): This architectural beauty is surprisingly easy to grow indoors. You can even start it from a stalk bought at the grocery store!
- Our Step-by-Step:
- Take a fresh stalk of lemongrass (ensure the base is intact).
- Place the base in a glass of water, ensuring the bottom inch is submerged.
- Place in a sunny spot.
- Change the water every few days.
- Within a week or two, you’ll see roots emerge.
- Once roots are a few inches long, plant in a pot with well-drained potting mix.
- NGB.org calls lemongrass “truly a unique plant” and notes its ease of growth. Chestnut Herbs also highlights its container suitability for bringing indoors. It adds a wonderful citrusy note to teas.
- Our Step-by-Step:
- Scented Geraniums (Pelargonium species): These aren’t your typical garden geraniums. Scented geraniums come in an astonishing array of fragrances – rose, lemon, peppermint, apple, even chocolate! Their leaves can be used to make exotic, fragrant teas.
- Our Favorite: ‘Rose Geranium’ for a delicate floral tea, or ‘Lemon Fizz’ for a bright citrusy brew. Portland Nursery also mentions “Scented Geranium” with many flavors for tea.
- Mint (Mentha species): As we’ve already discussed, mint is a champion container plant. Its invasive nature outdoors makes it perfectly suited for a pot indoors, where its spread is contained. Keep it in a bright spot, and you’ll have fresh mint for tea all winter long.
- Lemon Balm (Melissa officinalis): Another mint family member that thrives indoors. Its cheerful lemon scent will brighten any room, and its calming properties are a welcome addition to your indoor tea stash.
- Stevia (Stevia rebaudiana): Given its tender perennial nature, growing stevia in a pot and bringing it indoors for winter is an excellent strategy. It will continue to provide natural sweetness even when the snow flies.
- Holy Basil (Tulsi) (Ocimum tenuiflorum): While an annual outdoors in most climates, Tulsi can be grown indoors in a sunny window, providing its adaptogenic benefits year-round.
The Benefits of Bringing Your Tea Garden Inside
- Year-Round Harvest: No more waiting for spring! Enjoy fresh herbs even in the depths of winter.
- Pest Control: Indoor plants are generally less susceptible to outdoor garden pests.
- Convenience: Your tea ingredients are just steps away from your kettle.
- Beauty & Air Quality: Houseplants add aesthetic appeal and can improve indoor air quality.
So, whether you have a sprawling estate or a cozy apartment, your dream of a homegrown tea garden is entirely within reach. Embrace the world of Herbal Tea Planting (https://www.growingteas.com/category/herbal-tea-planting/) indoors!
❄️ Easy Tips to Keep Your Houseplants Happy & Healthy in Winter
Winter can be a challenging time for our indoor tea plants. The cozy warmth of our homes often comes with dry air, shorter days, and fluctuating temperatures – conditions that can stress out even the hardiest herbs. But don’t fret! With a few simple adjustments, you can keep your indoor tea garden thriving, ensuring a continuous supply of fresh leaves for your winter brews. This is crucial for anyone dedicated to Cultivate Your Own Tea year-round.
Here at Growing Teas™, we’ve learned these lessons through trial and error (and a few sad, crispy plants). Here are our expert tips to keep your houseplants happy and healthy through the colder months:
-
Humidity is Key: Combat the Dry Air!
- The Problem: Indoor heating systems drastically reduce humidity, mimicking a desert environment. Most tea herbs prefer moderate to high humidity.
- Our Solution: Place your pots on a pebble tray. Fill a shallow tray with pebbles, add water until it’s just below the top of the pebbles, and set your pots on top. As the water evaporates, it creates a humid microclimate around your plants.
- ❌ Do not let the pot sit directly in the water, as this can lead to root rot!
- Consider a Humidifier: For a larger collection of plants, a small room humidifier can make a huge difference. We’ve had great success with the Levoit Humidifiers for Bedroom (https://www.amazon.com/LEVOIT-Humidifiers-Bedroom-Ultrasonic-Cool/dp/B08C75191C?tag=bestbrands0a9-20) for maintaining consistent humidity.
-
Light Matters: Boost Those Winter Rays!
- The Problem: Winter days are shorter, and the sun’s intensity is much weaker, especially if you live in northern latitudes. Your plants might become “leggy” (long stems with few leaves) as they stretch for light.
- Our Solution:
- Relocate: Move plants to your brightest, sunniest window. South-facing windows are usually best in the Northern Hemisphere.
- Clean Windows: Dust and grime on windows can block a surprising amount of light. Give them a good scrub!
- Supplemental Lighting: For serious tea growers, a small LED grow light is a game-changer. We highly recommend the Sansi 15W LED Grow Light Bulb (https://www.amazon.com/SANSI-Daylight-Spectrum-Sunlight-Seedlings/dp/B07BRKT563?tag=bestbrands0a9-20). It screws into a standard lamp fixture and provides a full spectrum light that your plants will adore. It’s an easy way to ensure your Herbal Tea Planting (https://www.growingteas.com/category/herbal-tea-planting/) continues to thrive.
-
Watch the Drafts: Protect from Temperature Swings!
- The Problem: Plants don’t appreciate sudden temperature changes or cold drafts. Placing them near drafty windows, exterior doors, or directly in front of heating vents can cause stress, leaf drop, and stunted growth.
- Our Solution: Keep your plants away from direct drafts and heat sources. They prefer a steady, consistent temperature, just like you do. If a window is particularly drafty, consider moving the plant a foot or two away.
-
Water Less: Embrace Winter Dormancy!
- The Problem: Plants grow slower in winter due to reduced light and cooler temperatures. Their water needs decrease significantly. Overwatering is the number one killer of houseplants during winter.
- Our Solution: Adjust your watering schedule. Stick your finger into the soil; if it’s dry an inch or two down, then water. If it still feels moist, wait. Err on the side of underwatering rather than overwatering. ✅
- Tip: Lift the pot. If it feels surprisingly light, it’s probably dry.
-
Hold the Fertilizer: Let Them Rest!
- The Problem: Plants aren’t actively growing as much in winter, so they don’t need extra nutrients. Fertilizing dormant plants can lead to nutrient burn.
- Our Solution: Pause fertilization during the winter months (roughly November to February). Resume a light feeding schedule in early spring when you see signs of new growth.
-
Pest Patrol: Keep an Eye Out!
- The Problem: Dry indoor air can sometimes encourage pests like spider mites.
- Our Solution: Regularly inspect your plants for any signs of pests. A quick wipe-down of leaves with a damp cloth can help deter them. If you spot any, address them immediately with organic pest control methods like neem oil.
By following these simple tips, you can ensure your indoor tea plants remain vibrant and productive, ready to provide you with delicious, fresh infusions throughout the colder months. For even more detailed advice on year-round plant care, dive into our comprehensive guide: How to Care for Tea Plants: 15 Expert Tips for Thriving Leaves 🌿.
👉 Shop Grow Lights on:
- Sansi 15W LED Grow Light Bulb: Amazon | Walmart | Sansi Official Website
- Levoit Humidifiers: Amazon | Walmart | Levoit Official Website
🚜 Soil, Sun, and Sips: The Ultimate Growing Guide
You’ve picked your plants, you’re ready to get your hands dirty, but what’s the secret sauce to truly thriving tea herbs? It all comes down to the fundamentals: soil, sun, and water. Get these right, and your plants will reward you with abundant, flavorful leaves. Get them wrong, and you’ll be left scratching your head, wondering why your lemon balm looks more like a sad, droopy ghost.
At Growing Teas™, we’ve experimented with countless combinations, and we’ve distilled our findings into this ultimate guide. This isn’t just about keeping plants alive; it’s about making them sing for your sips!
☀️ The Power of the Sun: Light Up Your Leaves!
Sunlight is literally food for your plants. It’s where photosynthesis happens, creating the energy that fuels growth and, crucially, the production of those aromatic essential oils that make your tea taste so good.
- Most Herbs Love Full Sun: The vast majority of tea herbs – mint, lemon balm, chamomile, lavender, rosemary, stevia, hibiscus, holy basil, lemon verbena – crave at least 6-8 hours of direct sunlight per day. Think of them as sunbathers, soaking up every ray.
- Signs of Insufficient Light: If your plants look “leggy” (long, stretched-out stems with sparse leaves), pale, or aren’t producing many flowers or leaves, they’re likely reaching for more light.
- Partial Shade Exceptions: While full sun is generally best, some herbs, like Camellia sinensis (especially in hot climates), and even mint and lemon balm in scorching afternoon sun, can benefit from a little afternoon shade. This prevents scorching and helps maintain moisture. Portland Nursery notes that Camellia sinensis prefers “partial shade.”
- Our Anecdote: We once tried to grow a patch of mint in a shady corner of the garden, hoping it would be less invasive. It grew, but the leaves were thin, pale, and lacked that vibrant minty punch. Moving it to a sunnier spot transformed it into a lush, fragrant powerhouse. Lesson learned: don’t skimp on the sun!
🪨 The Foundation: Soil Matters More Than You Think!
Good soil isn’t just dirt; it’s a living ecosystem that provides nutrients, anchors your plants, and manages water. For tea herbs, drainage is the magic word.
- Well-Drained Soil is Paramount: Most herbs absolutely hate “wet feet” – roots sitting in soggy, waterlogged soil. This leads to root rot, the silent killer of many herb gardens.
- In-Ground Gardens: If you have heavy clay soil, amend it generously with organic matter like compost, well-rotted manure, or even some coarse sand. This improves aeration and drainage. For more on improving your soil naturally, check out our Organic Farming Techniques (https://www.growingteas.com/category/organic-farming-techniques/) guide.
- Container Gardens: This is where a high-quality potting mix is essential. We swear by FoxFarm Ocean Forest Potting Soil (https://www.amazon.com/FoxFarm-Ocean-Forest-Potting-Soil/dp/B007797622?tag=bestbrands0a9-20). It’s a rich, well-aerated mix that provides excellent drainage while retaining enough moisture. It’s a bit of an investment, but your plants will thank you.
- pH Levels: Most herbs prefer a slightly acidic to neutral pH (6.0-7.0). The big exception is Camellia sinensis, which demands acidic soil (4.5-6.0). If you’re growing true tea, you’ll need to amend with an acidifier like Espoma Organic Holly-Tone (https://www.amazon.com/Espoma-HT4-Holly-Tone-4-4-4-Food/dp/B000207Z0W?tag=bestbrands0a9-20) or peat moss.
- Nutrient Content: While herbs don’t need excessively rich soil, a good base of organic matter provides essential nutrients. Compost is your best friend!
💧 The Lifeblood: Watering Wisdom
Watering seems simple, but it’s often where new gardeners go wrong. Too much, too little, at the wrong time – it all impacts your plant’s health and the flavor of your tea.
- Consistency, Not Drowning: The goal is consistent moisture, not constant saturation.
- The Finger Test: Our golden rule: Stick your finger an inch or two into the soil. If it feels dry, it’s time to water. If it’s still moist, wait. This is especially true for container plants.
- Water Deeply: When you do water, water thoroughly until you see water draining from the bottom of the pot (for containers) or the soil is moist several inches down (for in-ground plants). This encourages deep root growth.
- Morning is Best: Water in the morning. This allows the leaves to dry before nightfall, reducing the risk of fungal diseases.
- Drought Tolerance: Many Mediterranean herbs (lavender, rosemary, lemon verbena) are quite drought-tolerant once established. They prefer to dry out between waterings. Others, like mint and lemon balm, prefer more consistent moisture.
- Conflicting Advice? You might read conflicting advice on watering. For example, Portland Nursery suggests “Daily watering in hot sun” for some herbs, while we emphasize the finger test. The key is to observe your plants and your specific climate. A plant in a small pot in full sun during a heatwave will need daily watering, while the same plant in a larger pot in partial shade might only need water every few days. Trust your finger and your plant’s signals!
🍽️ Feeding Your Flavor: Fertilization Finesse
Herbs generally don’t need heavy feeding. Too much nitrogen, in particular, can lead to lush, leafy growth but weak flavor and reduced essential oil production.
- Less is More: For most tea herbs, a light feeding once or twice during the growing season is sufficient.
- Organic is Our Choice: We always opt for organic, slow-release fertilizers. They feed the soil, not just the plant, and reduce the risk of chemical buildup.
- Compost Tea: A fantastic, gentle way to feed your plants.
- Granular Organic Fertilizers: Brands like Espoma Garden-tone (https://www.amazon.com/Espoma-GT4-Garden-tone-3-4-4-Food/dp/B000207Z0W?tag=bestbrands0a9-20) offer balanced nutrients. Apply once in spring and again mid-summer.
- When to Fertilize: Fertilize when plants are actively growing, typically from spring through mid-summer. Avoid fertilizing in late fall or winter when plants are slowing down or dormant.
By understanding these core principles of soil, sun, and water, you’re not just growing plants; you’re cultivating the very essence of flavor and wellness for your homemade teas. For more in-depth knowledge on nurturing your green companions, explore our How to Care for Tea Plants: 15 Expert Tips for Thriving Leaves 🌿 (https://www.growingteas.com/how-to-care-for-tea-plants/) article!
👉 Shop Soil & Fertilizers on:
- FoxFarm Ocean Forest Potting Soil: Amazon | Walmart
- Espoma Organic Holly-Tone: Amazon | Walmart | Espoma Official Website
- Espoma Garden-tone: Amazon | Walmart | Espoma Official Website
✂️ Harvesting and Drying Your Leaves for the Perfect Cup
You’ve nurtured your tea plants, watched them grow, and now comes the most exciting part (besides drinking the tea, of course!): harvesting and drying! This is where you transform vibrant green leaves and fragrant flowers into shelf-stable ingredients for your future brews. Getting this step right is crucial for preserving flavor, potency, and aroma. A poorly dried herb can quickly turn moldy or lose its essential oils, leaving you with a bland, disappointing cup.
At Growing Teas™, we’ve spent countless hours snipping, hanging, and dehydrating. We’ve learned the nuances that make all the difference between a mediocre harvest and a truly exceptional one.
🗓️ When to Harvest: Timing is Everything!
The timing of your harvest significantly impacts the flavor and potency of your herbs.
- The Golden Rule: Morning After Dew Dries: Always harvest in the morning after the dew has evaporated but before the sun gets too hot. This is when the plant’s essential oils are most concentrated in the leaves. Harvesting in the heat of the day can cause the oils to evaporate, leading to less flavorful tea.
- Before Flowering (for leaves): For leafy herbs like mint, lemon balm, holy basil, and lemon verbena, the flavor is often best just before the plant starts to flower. Once a plant puts energy into flowering and setting seed, the flavor in the leaves can diminish.
- At Peak Bloom (for flowers): For flowering teas like chamomile, lavender, and calendula, harvest when the flowers are fully open and at their peak.
- Rose Hips: Harvest after the first light frost, but before they get too soft.
🌿 How to Harvest: Gentle Hands, Sharp Shears!
- Clean Tools: Always use clean, sharp scissors or pruning shears. This makes clean cuts and prevents damage to the plant.
- Don’t Overdo It: Never take more than 1/3 of the plant at a time. This allows the plant to recover and continue producing. For perennial herbs, you can often get multiple harvests throughout the growing season.
- Pinch or Snip:
- Leaves: For individual leaves (like stevia or lemon verbena), simply pinch them off. For leafy herbs like mint or basil, snip off entire stems, cutting just above a leaf node to encourage bushier growth.
- Flowers: For chamomile, pinch off individual flower heads. For lavender or calendula, snip the flower stalks or petals.
🌬️ Drying Your Harvest: Preserving Nature’s Goodness
Proper drying is essential to prevent mold and retain the herb’s beneficial compounds. There are a few methods, and the best one depends on the herb and your resources. University of Maryland Extension offers excellent general advice on “Harvesting and Drying Herbs.”
1. Air Drying (Our Favorite for Most Herbs!)
This is the simplest and often the best method for most leafy herbs and flowers.
- Step 1: Prepare: Gently rinse your harvested herbs if they’re dirty, then pat them completely dry. Remove any damaged or yellowing leaves.
- Step 2: Bundle: For leafy herbs, gather small bundles (about 5-10 stems) and tie them loosely with twine or a rubber band. Don’t make the bundles too thick, as this can trap moisture and lead to mold.
- Step 3: Hang: Hang the bundles upside down in a cool, dark, well-ventilated area. A pantry, closet, or attic works well. Avoid direct sunlight, which can degrade essential oils and fade color.
- Step 4: Monitor: Check regularly. Drying can take anywhere from a few days to a few weeks, depending on the herb and humidity. Herbs are “crispy” dry when they crumble easily between your fingers.
2. Dehydrator Drying (Fast & Reliable!)
A food dehydrator offers a faster, more controlled drying environment.
- Step 1: Prepare: Rinse and pat dry your herbs. Spread them in a single layer on the dehydrator trays.
- Step 2: Set Temperature: Set your dehydrator to the lowest possible temperature (usually around 95-105°F or 35-40°C). Higher temperatures can cook the herbs and destroy delicate essential oils.
- Step 3: Dry: Dry until the herbs are completely crispy. This can take several hours.
- Our Recommendation: The COSORI Food Dehydrator Machine (https://www.amazon.com/COSORI-Dehydrator-Machine-Stainless-Temperature/dp/B08216147G?tag=bestbrands0a9-20) is a fantastic option for its even drying and precise temperature control.
3. Oven Drying (Use with Caution!)
We generally don’t recommend oven drying unless absolutely necessary, as it’s very easy to “cook” your herbs and lose their potency. If you must:
- Step 1: Prepare: Spread herbs in a single layer on a baking sheet.
- Step 2: Low Heat: Set your oven to its absolute lowest temperature (often “warm” or 150°F/65°C). Prop the oven door open slightly to allow moisture to escape.
- Step 3: Monitor Closely: Check frequently and turn the herbs to ensure even drying. This method is a last resort! ❌
🏺 Storage: Keeping Your Tea Fresh!
Once your herbs are thoroughly dry (and we mean thoroughly – any residual moisture will lead to mold!), proper storage is key to maintaining their quality for months.
- Airtight Containers: Store your dried herbs in airtight glass jars. We love Ball Mason Jars (https://www.amazon.com/Ball-Mason-Jars-Regular-Mouth/dp/B0759Y4366?tag=bestbrands0a9-20) for their reliability and classic look.
- Dark & Cool: Store the jars in a cool, dark place (a pantry or cupboard). Light and heat are enemies of dried herbs, causing them to degrade and lose flavor.
- Labeling: Don’t forget to label your jars with the herb name and the date of harvest. You’ll thank yourself later!
- Shelf Life: Properly dried and stored herbs can last for 6-12 months, though their potency will gradually diminish over time. For optimal flavor, try to use them within a year.
By mastering these harvesting and drying techniques, you’re not just preserving herbs; you’re preserving the essence of your garden, ready to be transformed into a comforting cup whenever you desire. This is a vital step in DIY Tea Blending (https://www.growingteas.com/category/diy-tea-blending/) and truly enjoying the fruits of your labor.
👉 Shop Drying & Storage Essentials on:
- COSORI Food Dehydrator Machine: Amazon | Walmart | COSORI Official Website
- Ball Mason Jars: Amazon | Walmart
☕️ Ready to Enjoy a Homegrown Cup of Tea?
You’ve done it! You’ve nurtured your plants, harvested their bounty, and carefully dried your leaves and flowers. Now, the moment of truth arrives: brewing that perfect, aromatic cup of homegrown tea. This is the culmination of all your hard work, a sensory reward that connects you directly to the earth and your own green thumb.
At Growing Teas™, we believe the brewing process is just as important as the growing. It’s the final act of alchemy that transforms dried botanicals into a comforting, flavorful infusion. So, let’s get that kettle on and brew up some magic!
The Art of the Steep: How to Brew Your Homegrown Goodness
Brewing tea is a personal journey, and while there are guidelines, don’t be afraid to experiment to find your perfect cup.
-
Measure Your Herbs: Fresh vs. Dried
- Fresh Herbs: Generally, you’ll need more fresh herbs than dried. A good starting point is 3 teaspoons of fresh herbs per cup of water. Bruise the leaves slightly to release their essential oils.
- Dried Herbs: Dried herbs are more concentrated. Start with 1 teaspoon of dried herbs per cup of water. You can crush them lightly just before brewing to enhance flavor extraction.
- Our Anecdote: One of our team members, new to brewing with fresh mint, once used the same amount as dried. The resulting tea was so intensely minty it felt like a menthol blast! We quickly learned the fresh-to-dried ratio is crucial.
-
Water Temperature: Don’t Scorch the Goodness! The temperature of your water can drastically affect the flavor of your tea. Too hot, and delicate herbs can become bitter; too cool, and you won’t extract enough flavor.
- Delicate Herbs (Chamomile, Lemon Balm, Lavender, Green Tea): Aim for “just before boiling” – around 175°F-190°F (80°C-88°C). If you don’t have a thermometer, bring water to a boil, then let it sit for 1-2 minutes before pouring. This prevents scorching the delicate compounds.
- Hardier Herbs (Mint, Rosemary, Hibiscus, Holy Basil, Rose Hips): These can handle hotter water. Bring water to a full rolling boil, around 200°F-212°F (93°C-100°C).
- Our Recommendation: A variable temperature kettle like the COSORI Electric Kettle Gooseneck with 5 Presets (https://www.amazon.com/COSORI-Electric-Gooseneck-Temperature-Stainless/dp/B081191845?tag=bestbrands0a9-20) is a fantastic investment for any serious tea brewer. It allows precise temperature control, ensuring you get the best out of every herb.
-
Steep Time: Patience is a Virtue! This is where you extract the flavor, aroma, and beneficial compounds.
- General Rule: For most herbal infusions, 5-10 minutes is usually the sweet spot.
- Lighter Flavors: For delicate herbs or a milder taste, start with 3-5 minutes.
- Stronger Flavors/Medicinal Teas: For a more potent brew or to extract maximum benefits, steep for 7-10 minutes, or even longer for roots or very hardy herbs.
- Taste Test: The best way to find your preferred steep time is to taste as you go! After 3-4 minutes, take a small sip. If you want more flavor, let it steep longer.
-
Strain & Serve: The Final Flourish!
- Strain: Use a fine-mesh strainer, tea infuser, or French press to separate the herbs from the liquid.
- Serve: Pour into your favorite mug.
- Enhance: Now’s the time to add your personal touch!
- Sweeteners: A drizzle of local honey, a slice of homegrown stevia leaf, or a touch of maple syrup.
- Citrus: A squeeze of fresh lemon or lime juice can brighten many herbal teas.
- Spices: A pinch of cinnamon, a slice of ginger, or a few cardamom pods can add depth and warmth, especially to holy basil or hibiscus teas.
- Blends: This is where your DIY Tea Blending (https://www.growingteas.com/category/diy-tea-blending/) skills truly shine! Combine different homegrown herbs for unique flavor profiles and enhanced benefits.
The Unspoken Ingredient: Connection
Beyond the taste, there’s an intangible quality to a homegrown cup of tea. It’s the satisfaction of knowing you cultivated it yourself, the connection to the earth, and the quiet pride in your self-sufficiency. Each sip becomes a moment of mindfulness, a celebration of nature’s bounty and your own efforts.
So, go ahead. Brew that cup. Inhale the aroma. Savor the flavor. You’ve earned it. And as you sip, ponder this: what other amazing flavors are waiting to be discovered in your garden next season? The journey of Cultivate Your Own Tea is just beginning!
👉 Shop Brewing Essentials on:
- COSORI Electric Kettle Gooseneck with 5 Presets: Amazon | Walmart | COSORI Official Website
- Tea Infusers: Amazon | Etsy
✨ Conclusion

So, what tea plants are easy to grow? The answer is a resounding almost all of them! Whether you start with the “unkillable” mint, the calming lemon balm, or the majestic Camellia sinensis (the true tea plant), each offers unique flavors, health benefits, and gardening experiences that enrich your life and your cup.
We’ve taken you from ancient legends to modern balconies, from soil prep to the perfect steep, revealing the secrets that transform humble plants into extraordinary teas. Along the way, you’ve learned that growing tea isn’t just a hobby—it’s a journey of connection, patience, and discovery.
If you’re a beginner, we confidently recommend starting with mint or lemon balm for their ease and rapid rewards. For those ready to take on a challenge, Camellia sinensis offers the ultimate payoff: your very own green, black, or white tea leaves. And for indoor gardeners, adaptive plants like lemongrass, scented geraniums, and holy basil bring the tea garden inside, year-round.
Remember, every gardener faces setbacks—be it a rogue squirrel, a dry spell, or a mysterious leaf spot. But with persistence, observation, and a little love, your tea plants will thrive, and so will your tea ritual.
So, grab your pruners, pick a plant, and start brewing your own story. Your taste buds—and your soul—will thank you.
🔗 Recommended Links
Shop Seeds, Plants & Supplies
-
Camellia Sinensis Plants:
Amazon | Etsy | Logee’s Plants Official Website -
Espoma Organic Holly-Tone (Acidifier for Tea Plants):
Amazon | Walmart | Espoma Official Website -
Mint Seeds & Plants:
Amazon | Burpee Official Website | Etsy -
Lemon Balm Seeds & Plants:
Amazon | Burpee Official Website | Etsy -
German Chamomile Seeds:
Amazon | Burpee Official Website | Etsy -
Lavender ‘Munstead’ & ‘Hidcote’ Plants:
Amazon | Burpee Official Website | Etsy -
Lemon Verbena Plants:
Amazon | Etsy | Richters Herbs Official Website -
Holy Basil (Tulsi) Seeds:
Amazon | Etsy | Strictly Medicinal Seeds Official Website -
Hibiscus Sabdariffa Seeds:
Amazon | Etsy | Baker Creek Heirloom Seeds Official Website -
Stevia Seeds & Plants:
Amazon | Burpee Official Website | Etsy -
Rugosa Rose Plants (for Rose Hips):
Amazon | Etsy | Stark Bro’s Nurseries Official Website -
Rosemary Plants:
Amazon | Burpee Official Website | Etsy -
Calendula Seeds:
Amazon | Burpee Official Website | Etsy
Shop Growing & Drying Supplies
-
COSORI Food Dehydrator Machine:
Amazon | Walmart | COSORI Official Website
Shop Indoor Growing & Brewing Essentials
-
Sansi 15W LED Grow Light Bulb:
Amazon | Walmart | Sansi Official Website -
Levoit Humidifiers for Bedroom:
Amazon | Walmart | Levoit Official Website -
COSORI Electric Kettle Gooseneck with 5 Presets:
Amazon | Walmart | COSORI Official Website
Recommended Books on Tea Gardening & Herbal Teas
- The Tea Book: All Things Tea by Louise Cheadle & Nick Kilby — Amazon
- The Herbal Tea Garden: How to Grow and Make Your Own Herbal Teas by Marietta Marshall — Amazon
- The Tea Lover’s Treasury: A Journey in Search of Tea and the Perfect Cup by Jane Pettigrew — Amazon
❓ FAQ

Can I grow tea plants indoors or do they need to be outside?
Absolutely! Many tea plants can thrive indoors if provided with sufficient light, humidity, and care. For example, Camellia sinensis can be grown as a large indoor shrub near a bright window, while herbs like mint, lemon balm, holy basil, and lemongrass are well-suited to container life indoors. Indoor growing allows year-round harvesting and is ideal for those without garden space. However, some plants like Camellia sinensis prefer cooler temperatures and partial shade, so mimic their natural environment as best as possible. Supplemental grow lights and humidity trays can help maintain optimal conditions.
Can tea plants be grown indoors in pots or containers for year-round harvesting?
✅ Yes! Container gardening is perfect for tea plants, especially for invasive herbs like mint or tender perennials like lemon verbena and stevia. Containers allow you to control soil quality, drainage, and mobility (bringing plants indoors during winter). With proper light (6-8 hours of sun or grow lights), watering, and humidity management, you can enjoy fresh tea leaves all year. Just ensure pots have good drainage and avoid overwatering.
What are the most disease-resistant and low-maintenance tea plants for home cultivation?
Some of the most disease-resistant and low-maintenance tea plants include:
- Mint: Extremely hardy and fast-growing, though invasive if not contained.
- Lemon Balm: Resilient and self-seeding, with minimal pest issues.
- Holy Basil (Tulsi): Adaptable and robust with few disease problems.
- Rosemary: Drought-tolerant and pest-resistant.
- Calendula: Easy to grow with natural pest-deterring properties.
Camellia sinensis requires more specific soil and climate conditions but is generally hardy once established. Regular pruning and proper watering reduce disease risk.
What climate and soil conditions are ideal for growing tea plants?
Ideal conditions vary by plant, but generally:
- True Tea Plant (Camellia sinensis): Prefers acidic soil (pH 4.5-6.0), well-drained, rich in organic matter, and partial shade in warmer climates. Hardy in USDA Zones 7-9.
- Herbal Tea Plants: Most prefer full sun (6-8 hours), well-drained soil, and moderate watering. Mediterranean herbs like lavender and rosemary thrive in sandy, well-drained soils with less water.
- Humidity: Moderate humidity benefits many herbs, especially indoors.
- Temperature: Tender perennials like lemon verbena and stevia need protection in colder zones.
Amending soil with organic matter and adjusting pH with products like Espoma Holly-Tone can optimize conditions.
How do I care for my tea plants to ensure optimal growth and flavor?
Key care tips include:
- Sunlight: Provide 6-8 hours of direct sun or supplement with grow lights.
- Watering: Maintain consistent moisture without waterlogging; use the finger test.
- Soil: Use well-drained, fertile soil; amend as needed.
- Fertilizing: Use organic, slow-release fertilizers sparingly during active growth.
- Pruning: Regularly prune to encourage bushier growth and prevent legginess.
- Harvesting: Pick leaves in the morning after dew dries; avoid overharvesting.
- Pest Management: Monitor regularly and use organic controls if needed.
- Winter Care: Adjust watering, humidity, and light indoors during colder months.
For detailed tips, see our guide: How to Care for Tea Plants: 15 Expert Tips for Thriving Leaves 🌿.
What are the best tea plants for beginners to grow at home?
For beginners, we recommend:
- Mint: Virtually unkillable and fast-growing.
- Lemon Balm: Easy to grow, fragrant, and calming.
- Chamomile: Simple from seed, self-seeding annual.
- Holy Basil (Tulsi): Easy to grow and highly beneficial.
- Calendula: Bright, easy, and low-maintenance.
These plants provide quick rewards and build confidence for more challenging varieties like Camellia sinensis.
What plants are good for homemade tea?
Great plants for homemade tea include:
- True Tea: Camellia sinensis (green, black, white, oolong teas)
- Herbal Teas: Mint, lemon balm, chamomile, lavender, lemon verbena, holy basil, hibiscus, stevia, rose hips, rosemary, calendula
- Others: Anise hyssop, lemongrass, scented geraniums, cinnamon basil
Each offers unique flavors and health benefits, allowing you to craft personalized blends.
📚 Reference Links
- Growing Herbs for Tea | Portland Nursery — Comprehensive guide on herbs suitable for tea and their cultivation.
- University of Maryland Extension: Harvesting and Drying Herbs — Expert advice on proper herb harvesting and drying techniques.
- Missouri Botanical Garden: Camellia sinensis — Detailed plant profile and growing tips.
- Espoma Organic Fertilizers — Official site for organic soil amendments and fertilizers.
- Burpee Seeds — Trusted seed supplier with a wide range of tea herbs.
- Baker Creek Heirloom Seeds — Specialty seeds including heirloom and rare tea plants.
- Strictly Medicinal Seeds — Medicinal and culinary herb seeds including holy basil.
- COSORI Official Website — Quality kitchen appliances including dehydrators and electric kettles.
- Levoit Official Website — Humidifiers and air purifiers for indoor plant care.
- Sansi LED Grow Lights — Grow lights for indoor gardening.
By combining these trusted sources with our Growing Teas™ expertise, you’re well-equipped to cultivate your own delicious, healthful teas at home. Happy growing and happy sipping!