Support our educational content for free when you purchase through links on our site. Learn more
12 Tea Leaf Harvesting Techniques for Beginners 🍃

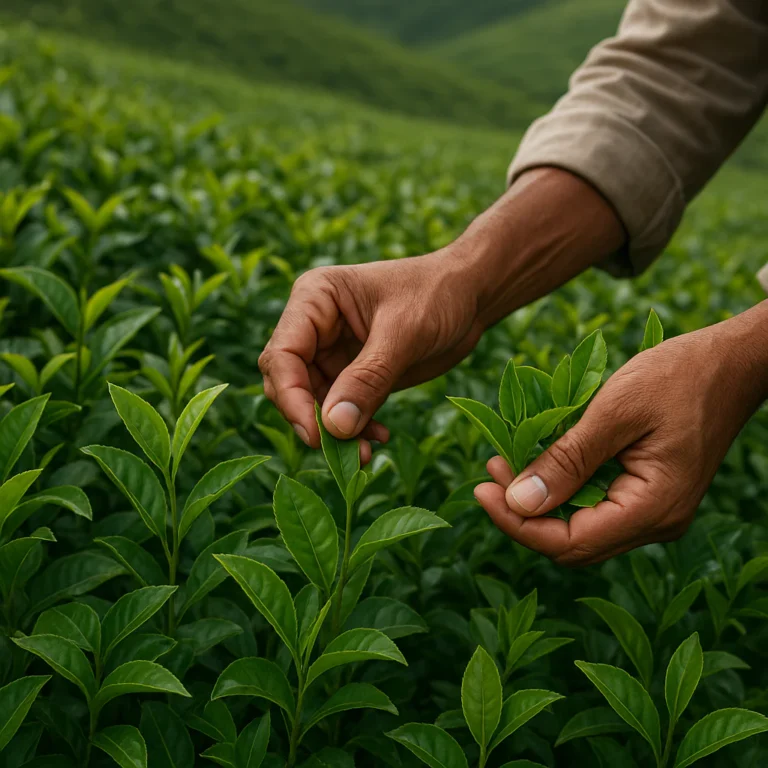
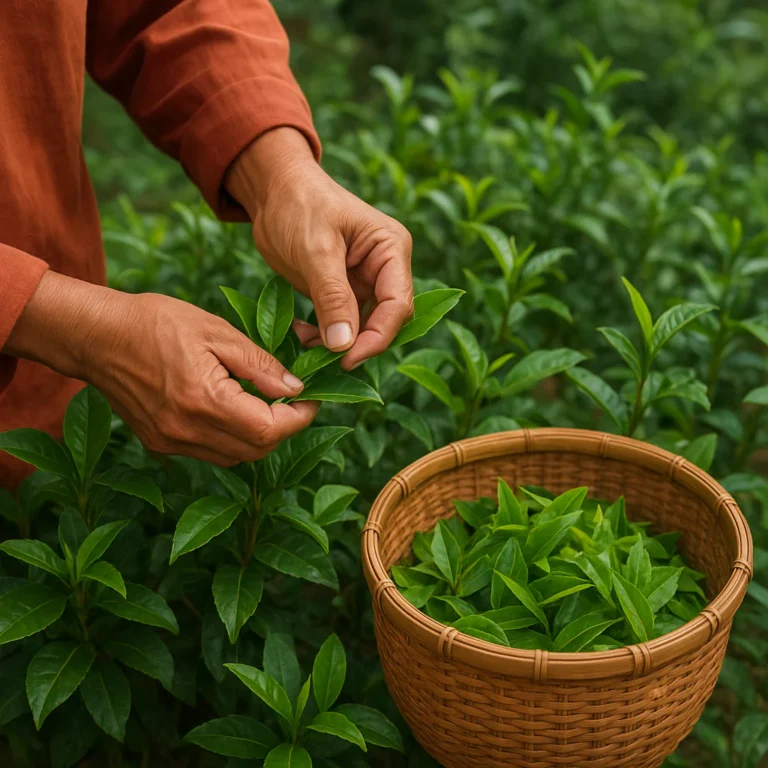
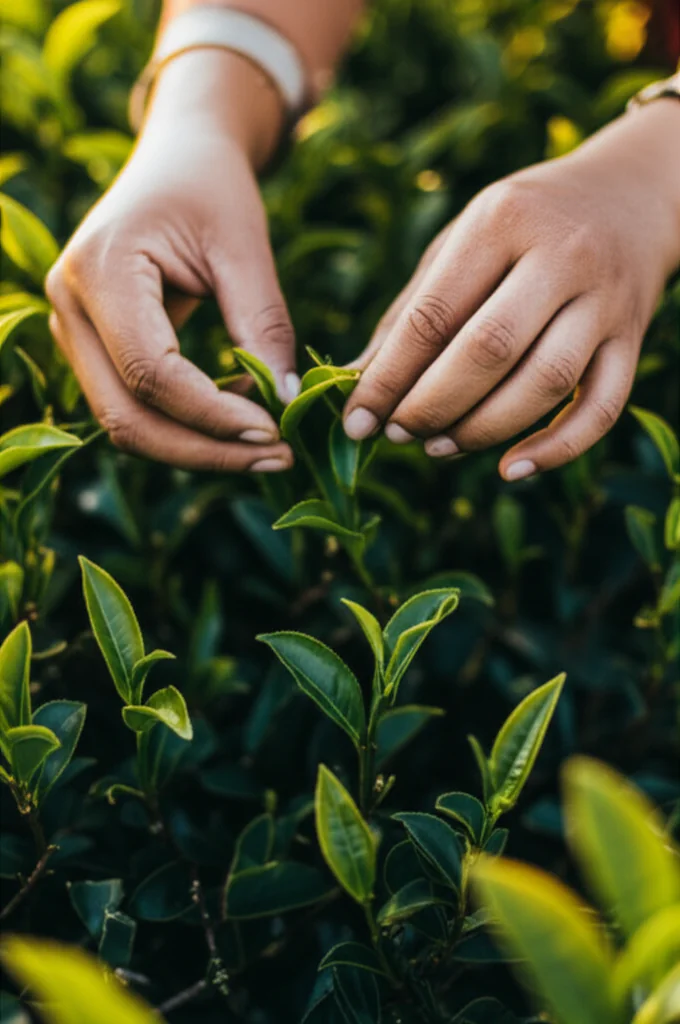
The best tea leaf harvesting techniques for beginners are simple: pick healthy, tender shoots by hand, take only what the plant can spare, and process the leaves promptly. Start with the classic “bud and two leaves” standard on an established Camellia sinensis plant—not an ornamental camellia or a plant under stress.
At Growing Teas™, we’ve learned that a small, carefully chosen harvest can teach you more than a basketful of mixed leaves. One shoot bends free with a gentle pinch; another needs a tug. That little difference is your first field lesson in picking at the right stage.
Key Takeaways
- Pick tender shoots selectively, often one bud and the two youngest leaves.
- Use your fingers for small harvests so you can choose shoots and avoid damaging the plant.
- Leave plenty of healthy foliage—especially on young, stressed, or recently transplanted tea plants.
- Harvest in dry, mild conditions and keep fresh leaves loose, shaded, and clean.
- Sort and process promptly, since leaf maturity and handling affect the finished tea.
- Let the plant guide your schedule: wait for healthy new growth rather than following a fixed harvest calendar.
Table of Contents
- ⚡️ Quick Tips and Facts
- 🍃 Tea Leaf Harvesting: What Beginners Need to Know
- 📜 A Brief History of Tea Plucking and Harvesting
- 🌱 Which Tea Plants Can You Harvest?
- Camellia sinensis and true tea
- Tea varieties, cultivars, and growing conditions
- How to tell when a tea plant is ready to pick
- 🗓️ When to Harvest Tea Leaves
- Best season and weather for tea picking
- How leaf maturity affects flavor
- How often to harvest without stressing the plant
- 🧺 Tools and Supplies for Harvesting Tea Leaves
- Hand-picking tools and clean containers
- When pruning shears are useful
- Keeping harvested leaves clean and fresh
- 🌿 12 Tea Leaf Harvesting Techniques for Beginners
- 1. Learn the “two leaves and a bud” standard
- 2. Use fine plucking for tender, high-quality leaves
- 3. Try coarse plucking for a sturdier harvest
- 4. Pinch the shoot cleanly by hand
- 5. Avoid crushing or bruising fresh leaves
- 6. Harvest only healthy, dry shoots
- 7. Leave enough foliage for healthy regrowth
- 8. Pick selectively instead of stripping branches
- 9. Rotate harvest areas to give plants a rest
- 10. Keep different harvest grades separate
- 11. Handle leaves gently from garden to processing
- 12. Record harvest dates and plant responses
- ✂️ Hand Plucking vs. Shears and Mechanical Harvesting
- Choosing the right method for your garden
- Common beginner mistakes and how to avoid them
- 🪴 Harvesting Tea from Garden and Container Plants
- Harvesting young tea plants safely
- Picking from mature bushes and hedges
- Small-space and patio tea harvesting
- 🌧️ Sustainable and Organic Tea Harvesting Practices
- Protecting soil, pollinators, and wildlife
- Pesticide safety and washing harvested leaves
- Harvesting responsibly in hot or dry weather
- 🔎 Sorting and Quality-Checking Fresh Tea Leaves
- Recognizing good shoots and damaged leaves
- What to do with stems, older leaves, and imperfect picks
- 🍵 What to Do After Picking Tea Leaves
- How quickly to process fresh tea leaves
- Making green, black, white, and olong tea at home
- Drying and storing harvested tea leaves
- ❓ Tea Harvesting Questions Beginners Often Ask
- Can you harvest tea leaves after rain?
- Can you harvest tea from any Camellia plant?
- How many leaves can one tea plant produce?
- Can you harvest tea leaves more than once a year?
- Are tea leaves safe to eat raw?
- ✅ Tea Leaf Harvesting Checklist for Your First Pick
- 🔗 Recommended Links
- 📚 Reference Links
- 🎉 Conclusion
Table of Contents
- ⚡️ Quick Tips and Facts
- 🍃 Tea Leaf Harvesting: What Beginners Need to Know
- 📜 A Brief History of Tea Plucking and Harvesting
- 🌱 Which Tea Plants Can You Harvest?
- Camellia sinensis and true tea
- Tea varieties, cultivars, and growing conditions
- How to tell when a tea plant is ready to pick
- 🗓️ When to Harvest Tea Leaves
- Best season and weather for tea picking
- How leaf maturity affects flavor
- How often to harvest without stressing the plant
- 🧺 Tools and Supplies for Harvesting Tea Leaves
- Hand-picking tools and clean containers
- When pruning shears are useful
- Keeping harvested leaves clean and fresh
- 🌿 12 Tea Leaf Harvesting Techniques for Beginners
- 1. Learn the “two leaves and a bud” standard
- 2. Use fine plucking for tender, high-quality leaves
- 3. Try coarse plucking for a sturdier harvest
- 4. Pinch the shoot cleanly by hand
- 5. Avoid crushing or bruising fresh leaves
- 6. Harvest only healthy, dry shoots
- 7. Leave enough foliage for healthy regrowth
- 8. Pick selectively instead of stripping branches
- 9. Rotate harvest areas to give plants a rest
- 10. Keep different harvest grades separate
- 11. Handle leaves gently from garden to processing
- 12. Record harvest dates and plant responses
- ✂️ Hand Plucking vs. Shears and Mechanical Harvesting
- Choosing the right method for your garden
- Common beginner mistakes and how to avoid them
- 🪴 Harvesting Tea from Garden and Container Plants
- Harvesting young tea plants safely
- Picking from mature bushes and hedges
- Small-space and patio tea harvesting
- 🌧️ Sustainable and Organic Tea Harvesting Practices
- Protecting soil, pollinators, and wildlife
- Pesticide safety and washing harvested leaves
- Harvesting responsibly in hot or dry weather
- 🔎 Sorting and Quality-Checking Fresh Tea Leaves
- Recognizing good shoots and damaged leaves
- What to do with stems, older leaves, and imperfect picks
- 🍵 What to Do After Picking Tea Leaves
- How quickly to process fresh tea leaves
- Making green, black, white, and olong tea at home
- Drying and storing harvested tea leaves
- ❓ Tea Harvesting Questions Beginners Often Ask
- Can you harvest tea leaves after rain?
- Can you harvest tea from any Camellia plant?
- How many leaves can one tea plant produce?
- Can you harvest tea leaves more than once a year?
- Are tea leaves safe to eat raw?
- ✅ Tea Leaf Harvesting Checklist for Your First Pick
- ❓ Frequently Asked Questions
- 🔗 Recommended Links
- 📚 Reference Links
- 🎉 Conclusion
⚡️ Quick Tips and Facts
For more detail on seasonal timing and picking methods, see our guide to when and how to harvest tea leaves.
- Pick the tender shoot tip: For a classic fine harvest, look for one unopened bud and the two youngest leaves beneath it.
- Use a gentle touch: Pinch or bend the shoot rather than yanking it. If it resists, leave it; it may be too mature or the plant may not be ready.
- Choose healthy, dry foliage: Pick after dew has dried, and skip leaves that are diseased, pest-damaged, or wet.
- Don’t strip a young plant: Tea needs leaves to grow. Harvest lightly, especially from plants that are still establishing.
- Process promptly: Fresh leaves can heat up and bruise when packed tightly. Keep them loose, shaded, and clean.
- Hand-picking gives you control; shears give you speed. For a small home harvest, we recommend hand-picking.
- Tea comes from Camellia sinensis. Mint, raspberry leaf, and chamomile can make herbal infusions, but they are not tea leaves in the botanical sense.
- A small harvest is still a successful harvest. A few carefully picked shoots teach you more than a basket of mixed-age leaves.
| Beginner question | Practical answer |
|---|---|
| What should I pick? | A healthy, tender shoot, often a bud plus two young leaves |
| When should I pick? | When shoots are actively growing and dry, not by a rigid calendar |
| What tool do I need? | Clean hands and a shallow, breathable container |
| How much should I take? | Only what the plant can spare; leave plenty of healthy foliage |
| What happens next? | Sort and process the leaves promptly for the tea style you want |
🍃 Tea Leaf Harvesting: What Beginners Need to Know
Tea harvesting—also called tea plucking or tea picking—is the selective removal of young shoots from Camellia sinensis. The goal is not to gather every green leaf in sight. It is to choose shoots at a useful stage of maturity, handle them gently, and leave the plant with enough foliage to keep growing.
A review of black-tea production describes the common plucking standard as “a bud and two or three leaves.” For home growers, we suggest beginning with a bud and two leaves: it is a straightforward quality target, though exact standards vary by tea style, cultivar, weather, and local practice (review of tea processing and quality).
A Japanese green-tea guide makes a similar practical point: young, tender leaves and careful hand-picking help preserve consistency and leaf quality (Nio Teas’ harvesting guide). That doesn’t mean every homegrown batch must meet a commercial grading standard. It means start by picking evenly and gently, then experiment.
At Growing Teas™, we’ve found that the first pick is often less about filling a container and more about learning the bush. You notice which shoots snap easily, which parts are pushing new growth, and how much foliage your plant has to spare. The tempting question is: what if your leaves don’t look like the neat “two leaves and a bud” pictures? The answer depends on what you’re growing and how mature the plant is, so let’s identify the plant first.
📜 A Brief History of Tea Plucking and Harvesting

Tea’s long history has shaped the way growers pick it. Camellia sinensis is cultivated across a wide range of climates and made into green, black, white, olong, and other teas. Processing methods differ, but the harvest still begins with shoots selected from the plant.
In commercial tea-growing regions, the choice between fine hand-plucking and faster mechanical or shear harvesting reflects a real trade-off: selectivity, labor, yield, and cost. A recent review of black-tea production reports that hand-picked leaves can offer more consistent shoots, while mechanical or shear harvesting is faster but may collect leaves at mixed stages of maturity (tea-processing review).
For a home gardener, the history lesson is pleasantly practical: there is no single universal picking style. The best method is the one that suits your plant, your intended tea, and the amount of leaf you can process promptly.
🌱 Which Tea Plants Can You Harvest?
Camellia sinensis and true tea
The leaves used for conventional tea—green, black, white, and olong—come from Camellia sinensis. The plant belongs to the Camellia genus, but not every ornamental camellia in a garden is a tea plant. Check the botanical label or source before harvesting for consumption. The Royal Horticultural Society’s Camellia sinensis profile provides a useful identification and growing reference.
Herbal infusions are a different category. Raspberry leaf, mint, and chamomile are commonly steeped as herbal drinks, but they are not Camellia sinensis. If you’re interested in other homegrown infusions, explore our Herbal Tea Planting resources.
Tea varieties, cultivars, and growing conditions
Tea plants vary in leaf size, growth habit, and tolerance of local conditions. A plant’s age, cultivar, climate, soil, light, water, and pruning history all influence how quickly new shoots appear. That is why a calendar copied from a tea farm in another region may not fit your garden.
| Growing factor | What you may notice | Harvesting implication |
|---|---|---|
| New flush of growth | Several soft shoots appear together | A good time to assess and selectively pick |
| Cool or slow growth | Shots develop gradually | Pick carefully; don’t assume a frequent commercial schedule applies |
| Warm, wet growth | New shoots may appear more quickly | Keep an eye on maturity and avoid allowing shoots to become coarse |
| Young or recently pruned plant | Fewer shoots or limited foliage | Harvest lightly or allow the plant to establish |
| Container-grown plant | Growth may be limited by pot size, water, and nutrients | Take smaller amounts and watch for signs of stress |
For growing advice, see our Green Tea Cultivation and Fertilizers for Tea Plants guides. Fertilizer is not a shortcut to a harvest-ready plant: healthy roots, appropriate conditions, and enough mature foliage matter just as much.
How to tell when a tea plant is ready to pick
Look for fresh, healthy shoots at the growing tips. A tender shoot bends readily; a woody stem or hardened leaf is a sign to leave it or use it for a different purpose.
Before picking, check:
- Is the plant actively growing?
- Are the shoots healthy and free of obvious pests or disease?
- Is there enough established foliage left on the plant after picking?
- Can you process the amount you plan to harvest?
If the plant is small, newly planted, weak, or recovering from stress, the best harvest may be no harvest yet. A patient gardener gets more seasons of picking.
🗓️ When to Harvest Tea Leaves
Best season and weather for tea picking
Harvest when the plant is producing new growth and the shoots are at the maturity you want. In many regions, this means picking during one or more growth flushes in the warmer part of the growing season, but local conditions determine the actual timing.
Choose a dry, mild part of the day, after dew has evaporated. Wet leaves are harder to handle and can spoil more easily if stored in a pile. Avoid harvesting during heat stress, drought stress, or immediately after heavy rain.
Season affects both growth and leaf chemistry. A review of black tea notes that cool or slow-growing conditions may produce lower yields but can favor quality characteristics, while warm, wet conditions can encourage faster growth and greater output (research review). These are broad production observations—not a promise that one season will taste a certain way in every backyard.
How leaf maturity affects flavor
Young shoots are generally more tender and easier to process. As leaves mature, they become thicker and more fibrous. Coarser harvesting can increase the share of older leaf and stem material, which can change the consistency and character of the finished tea.
The “right” maturity depends partly on your aim:
- Tender tip harvest: Select shoots with a bud and the youngest leaves for a fine, uniform batch.
- Broader home harvest: Include slightly more mature leaves when you value quantity over strict uniformity.
- Herbal-style use: Older leaves may have uses, but they will not behave exactly like young shoots in traditional tea processing.
A video perspective included in the article’s featured video makes the test wonderfully simple: bend the shoot gently; if it comes away easily, it is a better candidate than one that needs a yank. The same video warns against shoots that are too small or already hardened off. See the featured video for that demonstration. Treat this as a practical field cue, not a laboratory rule.
How often to harvest without stressing the plant
Commercial harvest intervals vary by climate, cultivar, labor, and plucking standard. The production review discusses short intervals such as five or seven days in particular contexts, but these are not universal instructions for home gardens (review).
For beginners, use the plant—not a farm calendar—as your guide:
- Pick only when healthy new shoots are available.
- Let the plant regrow between harvests.
- If growth slows or leaves look stressed, pause.
- Note how long it takes your plant to produce another flush.
- Adjust next time based on its response.
The plant’s recovery is more useful than chasing a fixed number of harvests per year.
🧺 Tools and Supplies for Harvesting Tea Leaves
Hand-picking tools and clean containers
You need less than you might think:
- Clean hands or clean, well-fitting garden gloves
- A shallow basket or breathable container to keep leaves from being crushed
- A clean tray for sorting
- A notebook or phone to record harvest dates and observations
- Optional: clean, sharp hand pruners for removing unsuitable woody growth—not for indiscriminate leaf stripping
A wide, shallow harvest basket is more useful than a deep bag: leaves stay loose rather than becoming a compressed green sandwich. If you want a dedicated basket, choose a food-safe, easy-to-clean option from a reputable garden or kitchenware brand. Avoid chemical-treated containers or ones previously used for pesticides.
When pruning shears are useful
Shears are handy for maintenance pruning and may help with a larger, even canopy. They are less selective than hand-picking and can cut shoots at mixed stages, so they are not our first choice for a small premium-style harvest.
Clean tools reduce the chance of transferring plant pathogens. The University of Minnesota Extension explains how to clean and disinfect garden tools, including the importance of removing soil and plant debris before disinfection (tool hygiene guidance).
Keeping harvested leaves clean and fresh
- Keep leaves out of direct sun while picking.
- Do not press them into a dense bundle.
- Keep harvested tea separate from soil, compost, and garden chemicals.
- Sort and process the leaves as soon as practical.
- Wash only if needed for cleanliness; wet leaves need extra care before processing.
A kitchen scale can help you compare harvests and keep small batches consistent. A notebook is even more valuable: record plant, date, weather, shoot standard, and processing notes. The records reveal patterns that memory tends to turn into garden folklore.
🌿 12 Tea Leaf Harvesting Techniques for Beginners
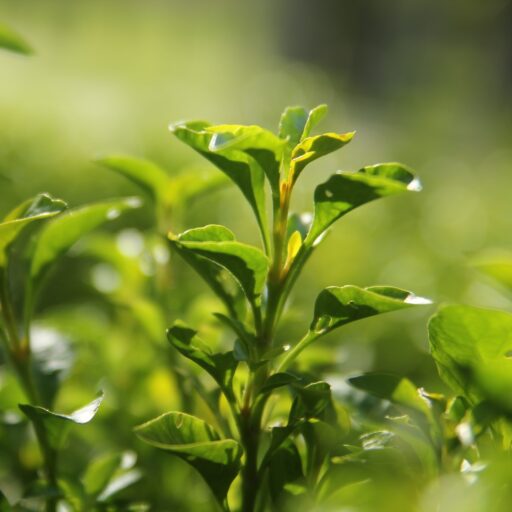
1. Learn the “two leaves and a bud” standard
Find a shoot tip with one unopened bud and two young leaves. This is a useful beginner target because it gives you a clear, repeatable selection rule. Commercial grades may define fine, medium, and coarse plucking differently, so don’t treat the phrase as a law for every tea and region (tea-processing review).
2. Use fine plucking for tender, high-quality leaves
Fine plucking means selecting a high proportion of tender tip shoots. It takes longer than a broad sweep through the bush, but it gives you a more uniform batch. This is especially useful when you’re experimenting with small-batch processing and want to understand how a particular leaf stage affects the result.
3. Try coarse plucking for a sturdier harvest
Some harvest standards include a bud with three or four leaves, or a higher proportion of mature leaf. This can increase the amount collected, but it also creates a less uniform mix and may include tougher material. The production review describes fine, medium, and coarse categories as trade-offs in quality and yield, rather than declaring one approach best for every purpose (review).
For a first home batch, keep grades separate. Taste them after processing and let your own plant provide the lesson.
4. Pinch the shoot cleanly by hand
Hold the shoot gently and pinch or bend it at the tender point. Do not crush it between your fingers or pull hard enough to tear a long strip of stem.
A tea-processing review describes a traditional “tiger’s mouth” hand-picking position, in which the thumb and fingers guide the shoot without squeezing it in the palm (research review). You do not need to master a formal hand shape on day one; the principle is control without crushing.
5. Avoid crushing or bruising fresh leaves
Bruising changes how leaves behave during processing, especially for teas that rely on controlled oxidation. Handle shoots lightly and avoid packing the container tightly. A Japanese green tea harvesting guide similarly emphasizes careful picking and gentle handling for quality.
6. Harvest only healthy, dry shoots
Leave aside leaves that are diseased, badly chewed, heavily spotted, or contaminated. Also skip wet shoots when possible. Don’t assume that washing will make a damaged or questionable leaf suitable for tea.
If you have treated the plant with a pesticide or fungicide, follow the product label’s crop-use and pre-harvest instructions. When in doubt, do not harvest for drinking.
7. Leave enough foliage for healthy regrowth
A tea plant needs leaves to photosynthesize and support future growth. Never strip a small plant bare just to fill a bowl. Leave a substantial amount of healthy foliage and avoid taking every growing tip from a weak or recently transplanted plant.
The correct amount depends on plant size and condition; there is no safe universal percentage for every garden. When uncertain, take less.
8. Pick selectively instead of stripping branches
Choose suitable shoots across the plant rather than removing all leaves from one branch. This spreads the impact and helps you avoid creating bare patches. Selectivity also makes it easier to separate tender shoots from older leaves.
9. Rotate harvest areas to give plants a rest
If your bush has several actively growing sections, harvest one area lightly and leave another untouched. On the next flush, reassess rather than automatically repeating the same pattern. This is a simple home-garden way to balance picking with regrowth.
10. Keep different harvest grades separate
Put fine tip shoots in one container and coarser or damaged material in another. Mixed-age leaves can respond differently during withering, heating, and rolling, making it harder to control a small batch.
The video’s advice about harvesting shoots of similar size has the same logic: uniform leaves are easier to process consistently. That is one reason a modest, carefully sorted harvest can outperform a larger mixed pile.
11. Handle leaves gently from garden to processing
Move leaves in a shallow container, shade them, and avoid leaving them in a hot car or sealed plastic bag. Process them promptly. If you need to pause, spread the leaves in a clean, cool place rather than stacking them into a warm heap.
12. Record harvest dates and plant responses
Make a simple note of:
- Harvest date and weather
- Plant or cultivar, if known
- Number of leaves per shoot
- Approximate quantity harvested
- Processing method
- Plant recovery and new growth afterward
- Flavor, aroma, and texture of the finished tea
This small record turns a year of trial and error into useful experience. It also helps answer the question most new growers ask after their first batch: was that flavor caused by the harvest, the processing, or both?
✂️ Hand Plucking vs. Shears and Mechanical Harvesting
| Method | Selectivity | Speed | Best suited to | Main drawback |
|---|---|---|---|---|
| Hand-picking | High | Slow | Small gardens and careful tip selection | Takes time and practice |
| Hand shears | Medium to low | Faster | Even, accessible growth on larger bushes | Can collect mixed-age shoots |
| Mechanical harvesting | Low to variable | Fast at scale | Commercial production | Requires specialized equipment and may reduce selection precision |
A review of black-tea research reports that hand-picked leaves can be more uniform and may have advantages in some quality measures, while shear harvesting can reduce labor costs and may collect coarser, more mixed shoots (review of harvesting and processing). The findings concern production conditions, not a guarantee that every hand-picked home batch will taste better.
Choosing the right method for your garden
For one or a few tea plants, hand-pick. You can choose only the shoots you want, avoid removing too much foliage, and learn how the plant responds.
Consider shears when:
- The bush is large and regularly maintained as a hedge.
- Your goal is a larger, less selective harvest.
- You can sort the cut material afterward.
- You understand that speed may come at the expense of uniformity.
There is no need for a powered tea harvester in a home garden. That would be like bringing a combine harvester to a window box: impressive, perhaps, but not especially helpful.
Common beginner mistakes and how to avoid them
- Yanking shoots: Use a gentle pinch or bend; leave resistant growth.
- Picking everything green: Choose young, healthy shoots rather than stripping the bush.
- Harvesting wet leaves: Wait for them to dry when possible.
- Mixing all maturity stages: Sort fine tips from coarse leaves.
- Taking too much from a young plant: Start with a tiny test harvest or wait.
- Leaving leaves in a hot, closed container: Keep them cool, loose, and shaded.
- Assuming harvest technique alone determines flavor: Cultivar, growing conditions, and processing all matter.
🪴 Harvesting Tea from Garden and Container Plants
Harvesting young tea plants safely
Young tea plants are still establishing their roots and structure. If the plant is newly planted, weak, or has only a few shoots, let it grow before harvesting. A tiny sample may be possible from a vigorous plant, but the priority is a strong, leafy plant that can support future picking.
Avoid harvesting from a plant that is:
- Recently transplanted and not yet established
- Recovering from drought, frost, pests, or disease
- Producing very little new growth
- Mostly bare or heavily pruned
Picking from mature bushes and hedges
On a mature bush, inspect the whole canopy before you start. Pick a selection of healthy shoots, distribute your harvest, and leave enough leaves for continued growth. If the plant is maintained as a hedge, avoid cutting deeply into old woody structure just to collect more material.
Small-space and patio tea harvesting
Container-grown tea can be harvested, but pots limit root volume and can dry out faster than garden soil. Take smaller harvests, monitor moisture, and watch the plant after picking.
For small-space growing:
- Use a stable, well-draining container.
- Check soil moisture regularly; don’t let the pot dry out severely.
- Give the plant suitable light for its growing conditions.
- Harvest only vigorous new shoots.
- Keep fertilizer and pesticide records, especially if leaves are intended for tea.
Our Green Tea Cultivation category offers more growing guidance, while Fertilizers for Tea Plants covers nutrient care.
🌧️ Sustainable and Organic Tea Harvesting Practices
Protecting soil, pollinators, and wildlife
Pick selectively and avoid unnecessary disturbance around the plant. Keep the root zone mulched appropriately, protect nearby habitat, and use integrated pest management before reaching for a chemical treatment. Our Organic Farming Techniques resources cover broader garden practices.
“Organic” is not a synonym for “automatically safe.” Any product used on a plant intended for tea should be labeled for the crop and used exactly as directed. The U.S. Environmental Protection Agency’s pesticide guidance explains why the label is central to safe use.
Pesticide safety and washing harvested leaves
Before harvest, ask:
- Was any pesticide, fungicide, or foliar spray used?
- Is the product labeled for edible crops or tea?
- Has its required pre-harvest interval passed?
- Are there visible signs of contamination or disease?
Washing cannot reliably remove every pesticide residue, and it does not reverse a missed pre-harvest interval. Follow the label and local guidance. If you are unsure whether the leaves are safe, do not use them as food or drink.
Harvesting responsibly in hot or dry weather
A plant under drought or heat stress has less capacity to recover from leaf removal. Water appropriately, postpone picking during severe stress, and resume only when the plant is growing well. This is a good moment to prioritize plant health over the teapot.
🔎 Sorting and Quality-Checking Fresh Tea Leaves
Recognizing good shoots and damaged leaves
A useful harvest is clean, healthy, and reasonably consistent. Keep shoots that are:
- Fresh and tender
- Free of visible disease or heavy insect damage
- Similar enough in size for the batch you plan to process
- Picked from a plant with no unresolved chemical-safety concern
Set aside leaves that are slimy, moldy, badly bruised, or contaminated. Do not try to rescue suspect leaves by drying them.
What to do with stems, older leaves, and imperfect picks
Separate stems and older leaves from fine shoots. If the material is healthy and safe, you can experiment with it in a separate batch, but expect a different texture and result. Do not mix it into a carefully sorted batch simply to increase the yield.
The research review describes coarser harvests as having a different balance of leaf maturity and quality-related characteristics than fine plucking (tea-processing review). The home-grower’s version is simple: sort first, experiment second.
🍵 What to Do After Picking Tea Leaves
How quickly to process fresh tea leaves
Process the leaves as soon as practical. Keep them out of direct sun and avoid sealed, warm piles. For a small batch, sorting right after picking is usually easiest: remove debris, separate different grades, and start the process appropriate to your intended tea.
Do not assume every tea requires the same treatment. Green tea is heated early to limit oxidation; black tea is deliberately withered and oxidized; olong uses partial oxidation; white tea is generally handled with minimal processing, though methods vary.
Making green, black, white, and olong tea at home
The following is a simplified overview, not a one-size-fits-all recipe:
| Tea style | Broad processing idea | Beginner consideration |
|---|---|---|
| Green | Heat fresh leaves early to limit oxidation, then dry | Temperature and |