Support our educational content for free when you purchase through links on our site. Learn more
10 Tea Harvesting Mistakes to Avoid 🍃

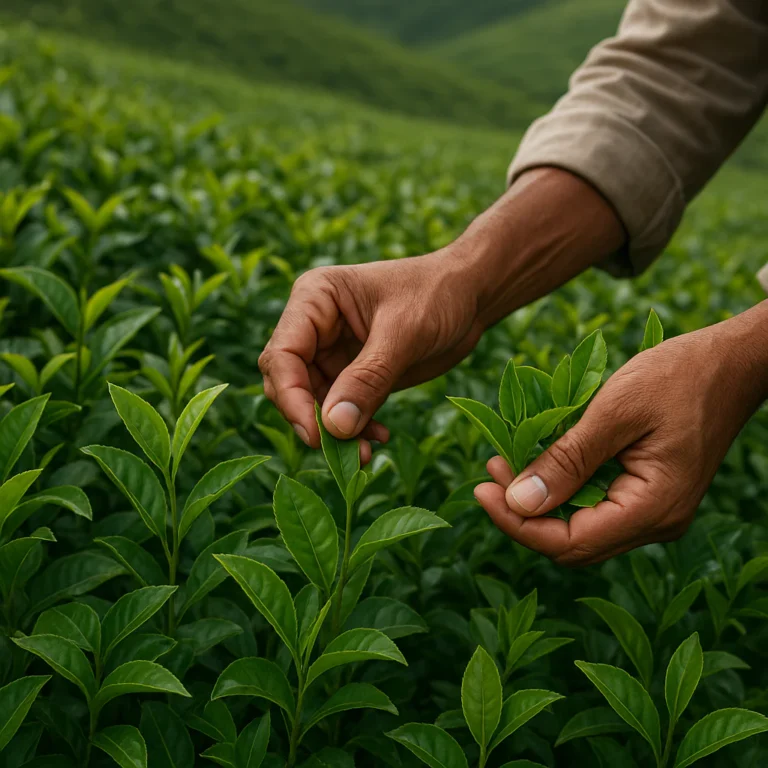
Pick only healthy, tender shoots, handle them gently, and process them promptly; for a short delay, keep fresh leaves cool, loose, and ventilated. That’s the core answer to “What are some common mistakes to avoid when harvesting tea leaves, and how can I store them properly after picking?”—and it can make the difference between a fragrant homegrown batch and a warm, bruised handful.
We learned the hard way that a deep bowl is a poor harvest basket: leaves at the bottom got compressed while we finished picking. A shallow basket in the shade would have spared them the botanical equivalent of a crowded commute. 🌿
Key Takeaways
- Choose tender, healthy shoots and leave plenty of mature foliage so the tea plant can recover.
- Harvest dry leaves when practical and handle them gently to avoid tearing, bruising, and excess moisture.
- Use a clean, shallow, breathable container. Don’t leave fresh leaves in a hot, sealed bag or pile.
- Process the harvest promptly. Refrigeration can help with a brief delay, but fresh leaves aren’t long-term storage material.
- Store processed tea only when fully dry and cool in an airtight container away from light, heat, moisture, and strong odors.
- Discard leaves with mold, a musty smell, or slimy texture; don’t try to rescue questionable tea by heating or brewing it.
Table of Contents
- ⚡️ Quick Tips and Facts
- 🌱 Tea Harvesting Basics: What You’re Picking and Why It Matters
- 🍃 What Counts as a Tea Leaf?
- 🌿 How Tea Variety and Growing Conditions Affect Harvesting
- 📜 A Brief History of Tea Plucking and Leaf Storage
- 🗓️ When to Harvest Tea Leaves
- 🌦️ Best Seasons, Flushes, and Weather for Picking Tea
- 🔎 How to Tell When New Tea Growth Is Ready
- 🌍 Harvesting Tea in Different Climates
- 🔁 How Often Can You Pick Tea Leaves?
- ✂️ How to Harvest Camellia sinensis Without Damaging the Plant
- 🧺 Tools and Supplies for Plucking Tea Leaves
- 🌱 The Two Leaves and a Bud Plucking Method
- 🤲 Hand-Picking vs. Using Pruning Shears
- ⚖️ How Much to Harvest from a Tea Bush
- 🍃 Tea Plucking Standards: Which Leaves Make the Best Tea?
- 🔬 Tea Buds, Young Leaves, and Mature Leaves Compared
- 🍵 Choosing Leaves for Green, Black, White, and Oolong Tea
- 🧺 What to Do After Harvesting Fresh Tea Leaves
- 🧹 Sorting, Cleaning, and Handling Tea Leaves
- ⏱️ How Quickly to Process Tea After Picking
- ❄️ How to Store Freshly Picked Tea Leaves
- 🧊 Refrigerating, Freezing, or Keeping Leaves at Room Temperature
- 🚫 Signs Fresh Tea Leaves Have Spoiled
- 🍵 From Harvest to Homemade Tea: What Happens Next?
- 🌬️ Withering and Oxidation
- 🌀 Rolling, Fixing, and Drying Tea Leaves
- 🏠 Simple Ways to Process Tea at Home
- 📦 Storing Processed Tea for Freshness
- 🌿 Harvesting Tea from Pots, Gardens, and Indoor Plants
- 🪴 When to Harvest a Young Tea Plant
- 🧤 Picking Tea from Container-Grown Camellia sinensis
- 💚 Harvesting Without Weakening Your Plant
- 🛠️ Common Tea Harvesting Mistakes to Avoid
- 1. Picking Leaves That Are Too Young or Too Old
- 2. Harvesting Wet Leaves or Picking in Poor Weather
- 3. Stripping Too Much Growth from the Tea Bush
- 4. Tearing or Crushing Leaves During Picking
- 5. Using Dirty Tools or Containers
- 6. Leaving Fresh Leaves in a Hot, Sealed Pile
- 7. Washing Leaves Without Drying Them Properly
- 8. Waiting Too Long to Process or Store the Harvest
- 9. Storing Leaves While Damp or Warm
- 10. Expecting Fresh Leaves to Stay Fresh Indefinitely
- 🩺 Tea Plant Health, Pests, and Safe Leaf Picking
- 🐛 Checking Leaves for Pests, Disease, and Damage
- 🧴 Pesticide Residue and Food-Safe Harvesting
- 📈 Improving Your Tea Harvest Year After Year
- 📝 Keeping a Tea Harvest and Storage Log
- 🌿 Pruning, Feeding, and Caring for Tea Plants Between Flushes
- ✅ Key Takeaways for Harvesting and Storing Tea Leaves
- Conclusion
- Recommended Links
- Reference Links
⚡️ Quick Tips and Facts
If you’re wondering when and how to harvest tea leaves, remember this simple rule: pick selectively, handle gently, and process promptly. A tea shoot is not a salad leaf that can sit forgotten in a warm bag until tomorrow. 🍃
| At a glance | Best practice |
|---|---|
| What to pick | A tender shoot, often the terminal bud and one or two young leaves |
| When to pick | On a dry, cool part of the day, after dew has evaporated |
| How to carry it | Use a clean, shallow, breathable basket or tray; keep leaves loose and shaded |
| Should you wash it? | Usually no, unless visibly dirty; if rinsed, dry thoroughly |
| How long can it wait? | As little as practical. Aim to sort and begin processing promptly |
| Fresh-leaf storage | A brief, cool, ventilated hold—not long-term preservation |
| Finished-tea storage | Dry completely, cool fully, then store airtight in a cool, dark, dry place |
The biggest avoidable mistakes: stripping too much growth, bruising leaves, harvesting wet foliage, sealing warm leaves in plastic, and storing tea before it is fully dry. The University of California Statewide Integrated Pest Management Program notes that tea plants need suitable growing conditions and care; the same principle applies to harvesting: a healthy plant is your best starting point.
Fresh leaves and finished tea have different storage needs. Fresh leaves are perishable plant material; processed, thoroughly dried tea is shelf-stable when protected from moisture, heat, light, and odors. We’ll keep those two jobs clearly separate.
🌱 Tea Harvesting Basics: What You’re Picking and Why It Matters
Tea comes from Camellia sinensis, an evergreen shrub. The familiar tea styles—green, white, olong, and black—are made from its leaves; processing, rather than a different plant, creates much of the difference. The Royal Botanic Gardens, Kew lists Camellia sinensis as the accepted botanical name.
At Growing Teas™, we grow tea for the pleasure of tending the plant as much as for the cup. In our experience, a modest, carefully chosen harvest is more rewarding than a large handful of rough leaves. You get a better chance at a clean-tasting batch, and the shrub keeps the foliage it needs to recover.
🍃 What Counts as a Tea Leaf?
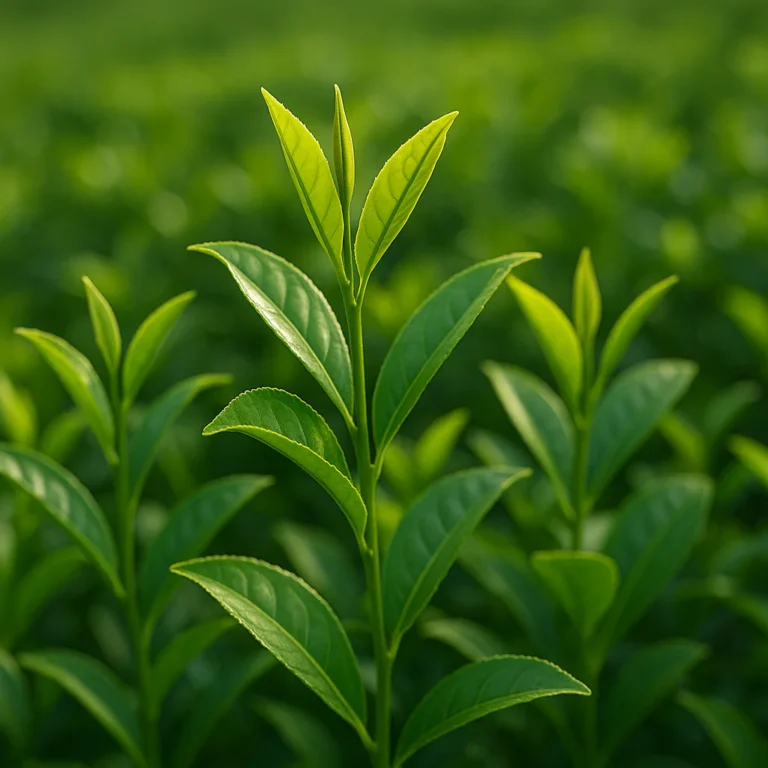
A tea “flush” is a period of fresh shoot growth. The shoot tip includes a terminal bud and young leaves; as those leaves mature, they become firmer and less tender.
| Plant part | Typical character | Common use |
|---|---|---|
| Terminal bud | Small, tender, often covered in fine hairs | Delicate styles; frequently included in premium plucking standards |
| First young leaf | Soft, newly expanded | Commonly picked with the bud |
| Second young leaf | More developed but still tender | Often included in home and commercial plucking |
| Mature leaf | Firmer, darker, fully expanded | Usually left on the bush to support plant growth |
| Woody stem | Tough, not a standard leaf-plucking target | Avoid cutting into it during routine picking |
“Two leaves and a bud” is a useful guide, not a law of botany. Some teas use a bud with one leaf; others include more mature leaves. Your target depends on the plant, the style you hope to make, and whether the shrub can spare the growth.
🌿 How Tea Variety and Growing Conditions Affect Harvesting
Tea cultivars differ in leaf size, growth habit, cold tolerance, and flushing patterns. Sunlight, moisture, soil drainage, pruning, and nutrition also affect how quickly a shoot develops. There is no universal date or shoot length that guarantees a ready harvest.
For home growers, watch the plant rather than the calendar:
- New growth should look healthy and actively developing.
- Shots should be tender enough to pinch or snap without tearing woody tissue.
- The plant should be well-watered and free of obvious stress.
- Leave enough mature leaves for continued growth and recovery.
For growing guidance, see our resources on Green Tea Cultivation, Fertilizers for Tea Plants, and Organic Farming Techniques. Tea plants are not the same as culinary herbs, but our Herbal Tea Planting section can help you plan a broader edible garden.
📜 A Brief History of Tea Plucking and Leaf Storage

Tea has a long history of cultivation and processing across Asia. As production developed, growers and makers refined plucking standards to balance leaf quality with the plant’s ability to keep producing. The exact standard varies by region, cultivar, and tea style; “bud and two leaves” is common, but not universal.
Traditional tea making also illustrates why storage matters. Freshly plucked leaves are handled and processed differently depending on the intended tea. A tender harvest destined for green tea is heated early to limit oxidation; leaves intended for black tea undergo more oxidation before drying. The Food and Agriculture Organization of the United Nations describes tea production as a sequence of agricultural and processing practices, not simply picking and drying.
We once gathered a small batch on a breezy morning and set it aside in a deep bowl while we finished other garden chores. The leaves at the bottom warmed and compressed, while those on top still looked fresh. That was our reminder: a basket is part of the process, not just a carrying accessory.
🗓️ When to Harvest Tea Leaves
Harvest when the plant has tender new growth and conditions are dry—not simply because a date on the calendar says “tea season.” In many regions, tea flushes follow seasonal growth patterns, but local climate and plant health can shift the timing considerably.
🌦️ Best Seasons, Flushes, and Weather for Picking Tea
Tea plants commonly produce bursts of new growth during favorable growing conditions. A “flush” is that fresh growth period. The timing and number of flushes depend on climate, cultivar, water, and management.
Good picking conditions:
- Dry foliage, with morning dew gone.
- Cool or mild weather rather than intense heat.
- A healthy plant that is actively growing.
- A clean, shaded place ready for the harvest.
Rain does not make a harvest impossible, but wet leaves are harder to handle and can take longer to dry. Skip picking during or just after heavy rain if you can. Conversely, hot midday sun can wilt tender shoots while you are still gathering them.
🔎 How to Tell When New Tea Growth Is Ready
Look for a healthy shoot with a tender bud and young leaves. A shoot around 3 inches long may be a useful visual cue, but it is not a universal readiness test. Cultivars and growing conditions vary, and shoot tenderness matters more than a ruler.
- Inspect the tip. Choose fresh, active growth, not yellowing or damaged leaves.
- Check leaf stage. The bud and first leaves should be soft and not fully hardened.
- Test gently. Pinch the stem lightly; it should yield without needing a forceful tug.
- Assess the bush. If the plant is drought-stressed, recently pruned, pest-damaged, or recovering, give it time.
🌍 Harvesting Tea in Different Climates
| Growing conditions | What to watch | Harvesting adjustment |
|---|---|---|
| Cool or short growing season | Slow or uneven growth | Pick lightly; prioritize plant recovery |
| Warm, humid climate | Rapid growth and persistent dampness | Harvest when foliage is dry; ventilate leaves carefully |
| Hot, dry weather | Wilting and water stress | Avoid heat of day; postpone if the plant is stressed |
| Container growing | Faster drying of poting mix | Check moisture and plant vigor before taking shoots |
| Indoor growing | Limited light and slower growth | Harvest sparingly; avoid repeatedly removing new tips |
Tea generally prefers conditions suited to its cultivar, so the best harvest plan begins with good cultivation. The Royal Horticultural Society’s guidance on growing tea offers practical growing context.
🔁 How Often Can You Pick Tea Leaves?
There is no one-size-fits-all interval. Let the shrub produce healthy new growth and recover between harvests. A vigorous, established plant may flush more readily than a young or stressed one, but picking every available tip can weaken either.
A practical home-grower rule: harvest a small portion, then wait until the plant has visibly recovered and produced fresh growth before picking again. Avoid taking all the shoots from one side or stripping the whole canopy at once.
✂️ How to Harvest Camellia sinensis Without Damaging the Plant
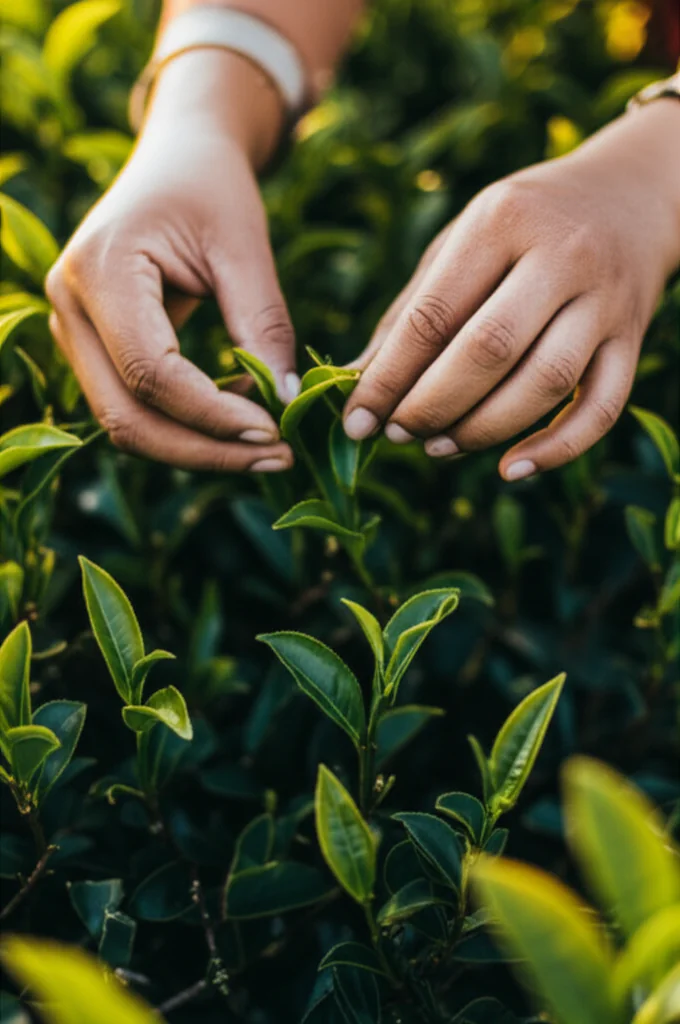
The goal is to remove a tender shoot cleanly while leaving the plant with plenty of healthy foliage. A gentle hand harvest works well for small batches; clean, sharp snips are useful when a stem resists.
🧺 Tools and Supplies for Plucking Tea Leaves
You do not need a complicated kit. Prepare clean hands, a shallow breathable container, and—if necessary—sharp snips.
| Supply | Why it helps | Practical note |
|---|---|---|
| Shallow basket or tray | Limits compression and heat buildup | Avoid overfilling |
| Clean, sharp snips | Makes a clean cut on resistant stems | Disinfect and dry between plants if disease is a concern |
| Clean hands | Reduces dirt and handling damage | Handle leaves gently |
| Label and notebook | Helps track harvest and processing | Record date, weather, and leaf stage |
| Clean work surface | Makes sorting easier | Keep away from strong odors and household chemicals |
For a small home garden, Felco pruning tools and Fiskars garden snips are established brands. Choose a tool that feels comfortable and can be cleaned and sharpened. Avoid using dirty or dull blades: they can crush tissue or transfer contamination.
🌱 The Two Leaves and a Bud Plucking Method
This is a familiar plucking standard, especially for tender tea, but adapt it to your plant and intended batch.
- Choose a healthy shoot. Look for a fresh terminal bud with young leaves.
- Support the branch. Hold the shoot gently so you are not pulling the whole stem.
- Pinch or snap cleanly. Remove the shoot without tearing bark or damaging nearby buds.
- Use snips if needed. Cut just above a suitable leafy point rather than deep into woody growth.
- Leave plenty behind. Do not take every tip; retain healthy foliage across the shrub.
- Place leaves loosely in the basket. Do not squeeze them into a bag or compress them under heavier items.
- Move to shade. Keep the harvest cool while you finish picking.
Some tea makers choose a bud and one leaf for a delicate batch; others include two or more leaves. The right standard depends on the result you want and the amount your plant can spare.
🤲 Hand-Picking vs. Using Pruning Shears
| Method | Benefits | Drawbacks | Best suited to |
|---|---|---|---|
| Pinching by hand | Precise, quick for tender shoots, little equipment | Can bruise or tear if you pull forcefully | Small, careful home harvests |
| Sharp snips | Clean cut on firmer stems; useful for sore hands | Tool hygiene and sharpness matter | Larger or more resistant shoots |
| Hedge shears | Fast over a broad surface | Less selective; may cut mature growth and damage plant shape | Shaping or managed hedges, not selective leaf plucking |
We recommend hand-picking or clean snips for a home tea harvest. Hedge shears are tempting when the bush is full, but speed can become an expensive bargain if you remove too much healthy growth.
⚖️ How Much to Harvest from a Tea Bush
There is no reliable universal percentage that suits every tea plant. A young, recently planted, drought-stressed, or recently pruned bush should be harvested very lightly—or not at all.
- Take only a portion of the tender shoots.
- Distribute picking across the plant rather than stripping one area.
- Leave healthy mature leaves to support ongoing growth.
- Stop if shoots are sparse, leaves are yellowing, or the plant appears stressed.
- Let the shrub recover before the next harvest.
Small batches are a feature, not a failure. Homegrown tea rewards patience, and a healthy plant can offer more flushes later.
🍃 Tea Plucking Standards: Which Leaves Make the Best Tea?
The “best” leaves depend on the style you want, but tender, healthy shoots are generally easier to handle and often produce a more delicate cup than old, tough foliage. Avoid leaves that are diseased, badly insect-damaged, or coated in unknown garden chemicals.
🔬 Tea Buds, Young Leaves, and Mature Leaves Compared
| Leaf stage | Texture and handling | Typical result |
|---|---|---|
| Bud | Very tender; easy to bruise | Delicate, often prized in bud-focused teas |
| Young leaf | Tender and pliable | Commonly used in home processing |
| Partly mature leaf | Firmer, more substantial | Can suit broader plucking standards |
| Old, tough leaf | More fibrous and difficult to process evenly | May yield a coarser or less balanced batch |
This is not a promise that every young leaf will taste wonderful. Processing, freshness, plant variety, and growing conditions all matter. A badly stored tender leaf can still make a disappointing cup.
🍵 Choosing Leaves for Green, Black, White, and Oolong Tea
The same species can become different tea styles through processing. As a broad guide:
| Style | General processing direction | Home-harvest note |
|---|---|---|
| Green | Heated early to limit oxidation, then shaped and dried | Work promptly after picking |
| White | Withered and dried with minimal handling | Use clean, tender leaves and protect from moisture |
| Oolong | Partially oxidized, with repeated handling and shaping | Requires closer process control |
| Black | Oxidized before final drying | Keep the harvest clean and process consistently |
These are simplified descriptions; commercial tea styles involve many regional methods. For a home grower, small experiments are sensible. Our Green Tea Cultivation resources offer related growing guidance, while the National Center for Biotechnology Information provides a research overview of tea composition and processing-related factors.
🧺 What to Do After Harvesting Fresh Tea Leaves
The moment the shoot leaves the bush, your job changes from growing to handling. Keep the harvest clean, cool, loose, and moving toward processing.
🧹 Sorting, Cleaning, and Handling Tea Leaves
Sort leaves soon after picking. Remove:
- Yellowed, diseased, or heavily insect-damaged leaves.
- Sticks, soil, and other garden debris.
- Leaves crushed or badly bruised during collection.
Clean leaves generally do not need washing. Water adds moisture and can complicate withering and drying. If leaves are visibly dirty, rinse gently with clean water, drain well, and spread them to dry the surface before processing. Never store wet leaves in a pile.
Handle them like delicate salad greens: avoid squeezing, kneading, or packing them tightly. The University of Minnesota Extension’s food-safety guidance is a useful reminder that clean handling and suitable storage conditions matter for foods prepared at home.
⏱️ How Quickly to Process Tea After Picking
As soon as practical. A few hours of careful, cool handling is different from leaving leaves packed in a warm, sealed bag all day. Fresh leaves continue to change after harvest; bruising and warmth can speed unwanted deterioration.
If you cannot begin processing immediately:
- Spread leaves loosely in a clean, shallow tray or basket.
- Keep them shaded, cool, and ventilated.
- Avoid a hot car, sunny windowsill, or sealed plastic bag.
- Check for warming, dampness, or wilting.
- Process as soon as you can.
There is no single safe “wait time” for every home harvest. Leaf condition, room temperature, humidity, batch depth, and intended tea style all affect the outcome.
❄️ How to Store Freshly Picked Tea Leaves
Freshly picked leaves are best treated as short-term perishables, not pantry goods.
- For a short delay, spread them in a loose layer in a clean, shallow, breathable container.
- Keep them in a cool, shaded place away from steam, heat, and strong odors.
- If a delay is unavoidable, refrigeration may slow deterioration, but use a clean container and avoid trapping condensation.
- Do not seal warm or damp leaves in an airtight container.
- Process promptly; refrigeration is a stopgap, not a substitute for processing.
A paper-lined, ventilated tray or shallow basket can be useful for a brief hold. Avoid crushing leaves beneath other produce. The USDA’s food storage guidance is not tea-specific, but it reinforces the importance of temperature control and careful handling for perishable foods.
🧊 Refrigerating, Freezing, or Keeping Leaves at Room Temperature
| Method | Appropriate use | Main concern |
|---|---|---|
| Cool room, loose and shaded | Brief holding while preparing to process | Warm rooms can speed wilting and deterioration |
| Refrigerator | Short delay when processing must wait | Condensation, odors, and excessive drying |
| Freezer | Not recommended as routine fresh-leaf storage for home processing | Freezing changes leaf texture and may affect processing behavior |
| Airtight container while fresh | Generally avoid | Trapped moisture and warmth can encourage spoilage |
Freezing can preserve plant material for some purposes, but it is not the best default for keeping fresh tea leaves ready for normal processing. If you experiment, freeze a small, labeled portion and compare it with freshly processed leaves rather than risking the whole harvest.
🚫 Signs Fresh Tea Leaves Have Spoiled
Discard leaves that show:
- Visible mold.
- A persistently musty, sour, or unpleasant smell.
- Sliminess or unusual wetness.
- Extensive darkening associated with poor storage.
- Heat buildup inside a closed bag or container.
Do not taste-test questionable leaves, and do not try to rescue moldy material by roasting, brewing, or drying it. When in doubt, compost the batch and improve handling next time. A wasted handful is better than a questionable cup.
🍵 From Harvest to Homemade Tea: What Happens Next?
Harvesting is only the beginning. The processing steps—especially withering, heating, rolling, oxidation, and drying—shape the final leaf. The right sequence depends on the tea style, so start with a small batch and take notes.
🌬️ Withering and Oxidation
Withering lets fresh leaves lose some moisture and become more pliable. Oxidation is a chemical process that occurs when leaf tissue is damaged and exposed to oxygen; it is deliberately managed in many tea styles. These are related but not identical steps.
For green tea, makers generally apply heat early to limit oxidation. For black tea, oxidation is allowed to develop further before drying. Oolong falls between those broad descriptions, with varied levels and methods.
The Tea Association of the USA offers general tea information, while the FAO tea production document gives broader agricultural and processing context. At home, humidity, airflow, leaf thickness, and batch size make fixed processing times unreliable.
🌀 Rolling, Fixing, and Drying Tea Leaves
- Fixing: Heat is used in green-tea processing to limit oxidation.
- Rolling: Leaves are shaped and their tissues may be gently disrupted.
- Oxidation: Managed according to the intended style.
- Drying: Moisture is reduced so the finished tea can be stored more safely.
For small home batches, use modest heat, keep leaves moving, and watch closely for scorching. Do not treat a recipe’s time or temperature as universal: ovens vary, and a thin layer dries differently from a crowded tray.
🏠 Simple Ways to Process Tea at Home
- Sort the harvest and remove damaged material.
- Spread leaves loosely in a clean, shaded, ventilated area if withering is part of your chosen style.
- Choose a tea style before applying heat or rolling.
- Process a small test batch rather than the entire harvest.
- Dry thoroughly, checking the leaves often and reducing the layer if drying is uneven.
- Cool completely before packing.
- Record the results: harvest time, leaf stage, method, and any changes you would make next time.
Some home methods use a low oven or dehydrator, but appliances can run hotter or less evenly than expected. Watch closely, stir as appropriate, and stop if leaves scorch or smell unpleasant. The National Center for Home Food Preservation provides general preservation principles; it is not a tea-processing recipe, so use tea-specific methods cautiously and prioritize thorough drying.
📦 Storing Processed Tea for Freshness
Only store tea once it is fully dry and completely cool. Finished leaves should feel dry and crisp rather than leathery or cool-damp. Pack them in a clean, dry, airtight container and keep it away from:
- Sunlight and heat.
- Steam, sinks, and damp cupboards.
- Coffee, spices, and other strong odors.
- Frequent opening that exposes the leaves to humid air.
Opaque tins are convenient; a clear jar can work if kept in a dark cupboard. Label the container with the tea style and processing date. The International Organization for Standardization’s ISO 3720 sets a standard for black tea characteristics, but it does not replace careful home drying and storage.
If stored tea softens without signs of mold or an off smell, assess it cautiously and consider drying it again only if you are confident it remains clean and safe. Discard any batch with visible mold, persistent dampness, or a musty odor. Do not try to fix unsafe tea by reheating it.
🌿 Harvesting Tea from Pots, Gardens, and Indoor Plants
The same selective approach applies whether your tea plant is in a garden bed, a pot on a patio, or a bright indoor spot. The difference is how quickly conditions can stress the plant.
🪴 When to Harvest a Young Tea Plant
Give a young plant time to establish before taking meaningful harvests. A newly planted shrub needs leaves and shoots to build roots and structure. Harvest only lightly once it is healthy and producing robust new growth; skip picking if it is wilting, recently transplanted, or recovering from pruning.
🧤 Picking Tea from Container-Grown Camellia sinensis
Potted plants can dry faster than those in the ground, especially in warm weather. Before harvesting:
- Check that the poting mix is not bone-dry.
- Look for firm, healthy foliage and active growth.
- Avoid taking multiple shoots from a small plant.
- Ensure the pot drains well and the plant receives appropriate light.
- Give it time to recover after picking.
Container roots have less room to explore for water, so a harvest that seems modest on a large garden shrub may be excessive for a small pot.
💚 Harvesting Without Weakening Your Plant
A healthy tea plant needs foliage to support growth. Leave enough leaves, avoid repeated heavy picking, and do not harvest a plant already stressed by drought, pests, disease, or severe pruning.
For more cultivation help, explore Fertilizers for Tea Plants and Organic Farming Techniques. Fertilizer is not a shortcut for recovering from overharvesting; correct watering, suitable light, and time matter too.
🛠️ Common Tea Harvesting Mistakes to Avoid
1. Picking Leaves That Are Too Young or Too Old
Very immature shoots may be difficult to handle, while tough, mature leaves may not suit a delicate batch. Choose healthy, tender growth and adapt your plucking standard to the tea style.
2. Harvesting Wet Leaves or Picking in Poor Weather
Wet leaves add moisture to the process and can be harder to dry evenly. Wait for dew to evaporate where possible, and avoid harvesting a stressed or heat-wilted plant.
3. Stripping Too Much Growth from the Tea Bush
Taking every growing tip leaves the plant with less foliage and can slow recovery. Harvest selectively, spread your picking across the shrub, and leave plenty of healthy leaves.
4. Tearing or Crushing Leaves During Picking
Forceful pulling can damage shoots; squeezing the harvest can bruise leaves and start unwanted changes. Support the branch, pinch gently, and use clean snips if the stem resists.
5. Using Dirty Tools or Containers
Garden soil, debris, and dirty blades have no place in your tea batch. Start with clean hands, a clean basket, and sharp tools. Clean tools between plants if disease is suspected.
6. Leaving Fresh Leaves in a Hot, Sealed Pile
A closed bag can trap warmth and moisture. Carry leaves loosely in a shallow container, keep them shaded, and avoid leaving a harvest in a car or on a sunny counter.
7. Washing Leaves Without Drying Them Properly
Leaves do not need washing if they are clean. If rinsing is necessary, drain and spread them until surface water is gone before processing. Never pack wet leaves away.
8. Waiting Too Long to Process or Store the Harvest
Fresh leaves are not long-term storage material. Sort and begin processing promptly; if there is a short delay, keep them cool, loose, and ventilated.
9. Storing Leaves While Damp or Warm
Warm leaves can create condensation in a sealed container, and damp leaves may spoil. Cool processed tea completely and confirm it is dry before storing it airtight.
10. Expecting Fresh Tea Leaves to Stay Fresh Indefinitely
Refrigeration may slow deterioration briefly, but it does not preserve fresh leaves indefinitely. Plan the harvest around the time you have available to process it.
The advice from tea growers and home-processing guides differs mainly in emphasis. Some recommend prompt processing above all; others describe a brief refrigerated hold. Those can both be reasonable: prompt processing is best, while refrigeration is a temporary fallback when timing slips. For detailed home-processing steps, see our guide, How to Harvest & Process Tea at Home.
🩺 Tea Plant Health, Pests, and Safe Leaf Picking
A good cup begins with correctly identified, healthy leaves. Do not assume every shrub called “tea” is suitable for drinking; confirm the plant is Camellia sinensis and that leaves have not been exposed to unsafe chemicals.
🐛 Checking Leaves for Pests, Disease, and Damage
Inspect both sides of leaves and the shoot tips. Avoid material with extensive insect damage, disease symptoms, mold, or contamination. A few small imperfections are not the same as a heavily damaged or unhealthy harvest.
The UC Statewide IPM Program’s tea plant information can help with plant-health context. If you use pest-control products, follow the label exactly and confirm the product is approved for edible plants and that any required pre-harvest interval has passed.
🧴 Pesticide Residue and Food-Safe Harvesting
- Use only products labeled for the intended edible crop and application.
- Follow label directions, including any waiting period before harvest.
- Do not harvest from plants treated with an unknown product.
- Keep garden chemicals away from harvest containers and work surfaces.
- Rinse leaves only when needed; washing is not a reliable way to make an improperly treated crop safe.
For general pesticide safety, consult the U.S. Environmental Protection Agency and the product label. When plant identity or treatment history is uncertain, do not consume the leaves.
📈 Improving Your Tea Harvest Year After Year
Small, repeatable experiments teach more than one oversized batch. Change one variable at a time—leaf stage, plucking method, withering conditions, or drying approach—so you can tell what affected the result.
📝 Keeping a Tea Harvest and Storage Log
Record:
- Harvest date and time.
- Weather and whether leaves were dry.
- Plant age, location, and visible health.
- Shoot stage and plucking standard.
- How long leaves waited before processing.
- Processing steps and drying observations.
- Storage container and any changes in aroma or texture.
A few notes can explain why one batch stayed bright and another became musty. If you’re watching the featured video, the Nio Teas TV guide to tea harvesting offers a visual look at how picking choices affect the leaf. The video is titled “Complete Guide about Tea Harvesting – How tea is Picked and Why it Matters,” and its demonstration can help you compare shoot selection and handling with your own plants.
🌿 Pruning, Feeding, and Caring for Tea Plants Between Flushes
Between harvests, keep the plant healthy with suitable light, watering, drainage, and pruning. Feed according to plant needs rather than assuming more fertilizer means more tea. Overfeeding can create problems, while drought stress can make a plant a poor harvest candidate.
Explore our guidance on Fertilizers for Tea Plants and Organic Farming Techniques. For broader tea-related reading, see Health Benefits of Tea; remember that a homegrown batch’s taste and composition depend on the plant and processing, not just its label.
References and practical sources
- Royal Botanic Gardens, Kew: Camellia sinensis
- Royal Horticultural Society: Growing tea
- FAO: Tea production and processing
- UC Statewide IPM Program: Tea
- USDA Food Safety and Inspection Service: Safe food handling
- Growing Teas™: When and how should I harvest tea leaves?
- Growing Teas™: How to Harvest & Process Tea at Home