Support our educational content for free when you purchase through links on our site. Learn more
🌱 Perfect Tea Soil & Fertilizer Guide (2026)
Ever wondered why your tea plant looks like a sad, yellowing shrub while the one down the street is a lush, harvest-ready bush? The secret isn’t magic; it’s the dirt. At Growing Teas™, we’ve seen countless home growers fail not because they lacked patience, but because they ignored the acidic, well-drained soul of Camellia sinensis. In this ultimate guide, we’re diving deep into the exact soil composition and fertilization schedule that turns a struggling sapling into a tea-producing powerhouse. We’ll reveal the “forest floor” recipe that mimics the misty mountains of Assam and Darjeling, plus the specific nutrient timing that prevents the dreaded iron chlorosis. Spoiler alert: if your soil pH isn’t between 5.0 and 6.5, no amount of fertilizer will save your plant. Ready to brew the perfect cup from your own backyard? Let’s dig in.
Key Takeaways
- Acidic pH is Non-Negotiable: Tea plants strictly require a pH between 5.0 and 6.5; alkaline soil leads to fatal nutrient lockout.
- Texture Matters More Than Type: A loamy, well-draining mix rich in organic matter (peat, pine bark, perlite) is superior to any single soil type.
- Timing Your Feed: Follow a seasonal fertilization schedule with high nitrogen in spring and potassium in autumn, stopping completely before winter.
- Organic Wins Long-Term: Organic fertilizers like cottonseed meal and worm castings build soil health and flavor better than synthetic salts.
- Roots Hate “Wet Feet”: Ensure excellent drainage to prevent root rot, the number one killer of home-grown tea plants.
Table of Contents
- ⚡️ Quick Tips and Facts
- 📜 A Brief History of Tea Cultivation and Soil Science
- 🌍 Understanding the Ideal Soil Composition for Home-Grown Tea
- 🧪 The Critical Role of pH Balance in Tea Plant Health
- 🥗 Essential Nutrients and Fertilization Schedules for Lush Growth
- 🌱 Selecting the Best Soil Ingredients for Your Tea Garden
- 🥣 How to Craft Your Own Custom Tea Soil Blend
- 💧 Mastering Drainage and Aeration for Root Health
- 📅 Seasonal Fertilization Calendar for Optimal Tea Harvests
- 🔍 Diagnosing and Fixing Common Nutrient Deficiencies
- 🦠 Battling Mold, Pests, and Soil-Borne Diseases
- 🔨 Breaking Up Compacted Soil and Improving Texture
- 🏡 Container vs. Ground: Adapting Soil Strategies for Your Space
- 🌿 Organic vs. Synthetic: Which Fertilizer is Right for You?
- 🍵 Harvesting and Processing Your Home-Grown Tea Leaves
- 🛡️ Safety First: Handling Fertilizers and Soil Amendments
- 📚 Learn More About Tea Care and Cultivation
- 🏁 Conclusion
- 🔗 Recommended Links
- ❓ FAQ
- 📖 Reference Links
⚡️ Quick Tips and Facts
Before we dive into the nitty-gritty of dirt, let’s get the “aha!” moments out of the way. You might think growing tea is just about sticking a stick in the ground and hoping for the best, but Camellia sinensis is a bit of a diva. It has specific tastes, and if you don’t cater to them, you’ll end up with a sad, yellowing shrub instead of a lush tea bush.
Here are the non-negotiables for your tea journey:
- The pH Sweet Spot: Your soil must be acidic. We’re talking pH 5.0 to 6.5. Anything above 7.0 is a no-go zone for tea plants; they simply can’t absorb nutrients in alkaline conditions.
- Drainage is Life: Tea roots hate “wet feet.” If your soil stays sogy for more than 24 hours, you’re looking at root rot faster than you can brew a cup of Earl Grey.
- Organic Matter is King: Think of your soil as a sponge. It needs to hold moisture but release it quickly. That’s why organic matter (compost, peat, bark) is essential.
- Microbes Matter: A teaspoon of healthy soil contains more microbes than there are people on Earth! These tiny creatures are the unsung heroes that unlock nutrients for your plant.
- Patience Pays Off: Tea plants are slow growers. Don’t expect a harvest in a month. It takes 2–3 years for a plant to mature enough for a proper harvest.
For those eager to start on the right foot, check out our guide on 🌱 Grow Green: 7 Sustainable Tea Garden Secrets! to learn how to build a resilient ecosystem from day one.
📜 A Brief History of Tea Cultivation and Soil Science

You might be wondering, “Why does my backyard dirt feel so different from the soil in Darjeling or Assam?” The answer lies in centuries of teroir—the unique combination of soil, climate, and topography that gives tea its distinct character.
Historically, tea cultivation began in the misty mountains of Yunnan, China, where the soil was rich in volcanic ash and organic humus. These conditions created a slightly acidic, well-draining environment that allowed the Camellia sinensis roots to delve deep, absorbing minerals that translate into complex flavor profiles.
“Soil is the original flavour house; fertiliser can tweak, but the base notes are literally set in stone (or loam).” — Growing Teas™ Expert Insight
In the 19th century, British botanists like Robert Fortune smuggled tea plants to India, discovering that the alluvial soils of Assam (rich in clay and silt) produced a robust, malty black tea, while the sandy, acidic soils of Darjeling yielded a more delicate, floral green tea.
This historical context teaches us a vital lesson: one size does not fit all. While the specific tea variety (Assamica vs. Sinensis) dictates some preferences, the fundamental requirement for acidic, well-aerated soil remains constant across the globe. Whether you are growing in a pot in your apartment or a garden in Oregon, mimicking these ancient forest-floor conditions is the key to success.
🌍 Understanding the Ideal Soil Composition for Home-Grown Tea
So, what exactly does your tea plant want to eat? It’s not just about dirt; it’s about the texture, structure, and biological life within that dirt.
The Perfect Triad: Sand, Silt, and Clay
Ideally, you want a loamy soil structure. Think of it as the Goldilocks zone:
- Sand: Provides drainage and aeration.
- Silt: Holds nutrients and moisture.
- Clay: Binds the soil together and retains minerals.
For tea, we want a ratio that leans heavily on silt and organic matter, with just enough sand to prevent compaction. A good rule of thumb is 40% sand, 40% silt, and 20% clay, but heavily amended with organic matter to reach at least 5% organic content.
Why Texture Matters
If your soil is too heavy (clay), water pools, and roots suffocate. If it’s too light (pure sand), water drains instantly, and nutrients wash away before the plant can grab them.
| Soil Type | Drainage Speed | Nutrient Retention | Suitability for Tea |
|---|---|---|---|
| Pure Clay | ❌ Very Slow | ✅ High | Poor (Risk of root rot) |
| Pure Sand | ✅ Very Fast | ❌ Low | Poor (Drought stress) |
| Loam (Ideal) | ✅ Moderate | ✅ High | Excellent |
| Sandy Loam | ✅ Good | ✅ Moderate | Very Good (Great for Green Tea) |
| Clay Loam | ⚠️ Slow | ✅ High | Good (Needs heavy amendment) |
The Role of Organic Matter
Organic matter is the glue that holds your soil together. It improves Cation Exchange Capacity (CEC), which is basically the soil’s ability to hold onto nutrients like a magnet. Without it, your fertilizer just washes down the drain.
“Think of it like a sponge—retentive but not sogy.”
🧪 The Critical Role of pH Balance in Tea Plant Health
Let’s talk numbers, because pH is the single most critical factor in tea cultivation. If you get this wrong, nothing else matters.
The Acidic Imperative
Tea plants are acidophiles. They thrive in a pH range of 5.0 to 6.5.
- Below 4.5: Risk of aluminum toxicity, which can stunt growth and damage roots.
- Above 7.0: Iron chlorosis sets in. You’ll see beautiful green veins on yellow leaves because the plant can’t access iron in alkaline soil.
How to Test and Adjust
Before you plant a single seed, test your soil. Don’t guess! You can use a simple home kit like the Luster Leaf 163 or a digital meter like the Sonkir 3-in-1 Soil Meter.
If your pH is too high (Alkaline):
- Add elemental sulfur (follow package rates, usually 1 lb per 10 sq ft to lower by 1 point).
- Mix in sphagnum peat moss or pine bark fines.
- Use acidifying fertilizers like ammonium sulfate.
If your pH is too low (Too Acidic):
- Add garden lime (calcitic or dolomitic) sparingly.
- Mix in wood ash (use with caution as it raises pH quickly).
“Don’t just pour and pray; test the soil first to avoid blindfolded piñata swings of pH guesswork.”
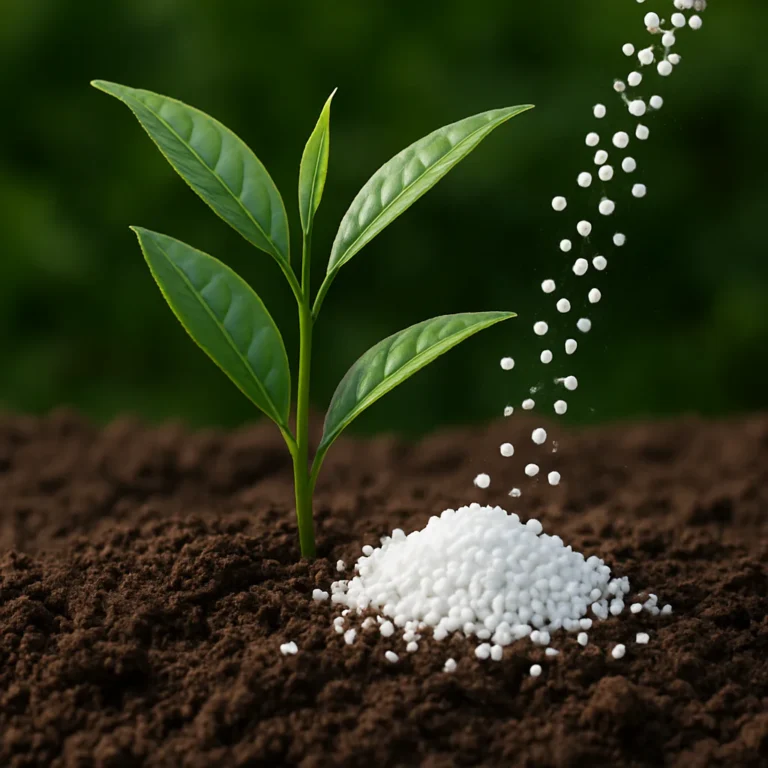
🥗 Essential Nutrients and Fertilization Schedules for Lush Growth
Now that your soil is ready, let’s feed the beast. Tea plants are heavy feeders, especially when it comes to Nitrogen (N), which drives leaf growth.
The NPK Ratio
While a balanced fertilizer (like 10-10-10) works in a pinch, tea plants prefer a formula slightly higher in Nitrogen.
- Nitrogen (N): Crucial for leaf production and the “umami” taste.
- Phosphorus (P): Supports root development and flowering.
- Potassium (K): Helps with disease resistance and overall vigor.
A ratio of 2-1-1 or 3-1-2 is often ideal for active growth phases.
Organic vs. Synthetic: The Great Debate
- Organic: (e.g., Down-To-Earth Cottonseed Meal, Fish Emulsion, Kelp Meal). These release nutrients slowly, feed soil microbes, and improve soil structure over time. They are our top recommendation for home growers.
- Synthetic: (e.g., Miracle-Gro, Osmocote). These provide an immediate nutrient hit but can lead to salt buildup and damage soil biology if overused.
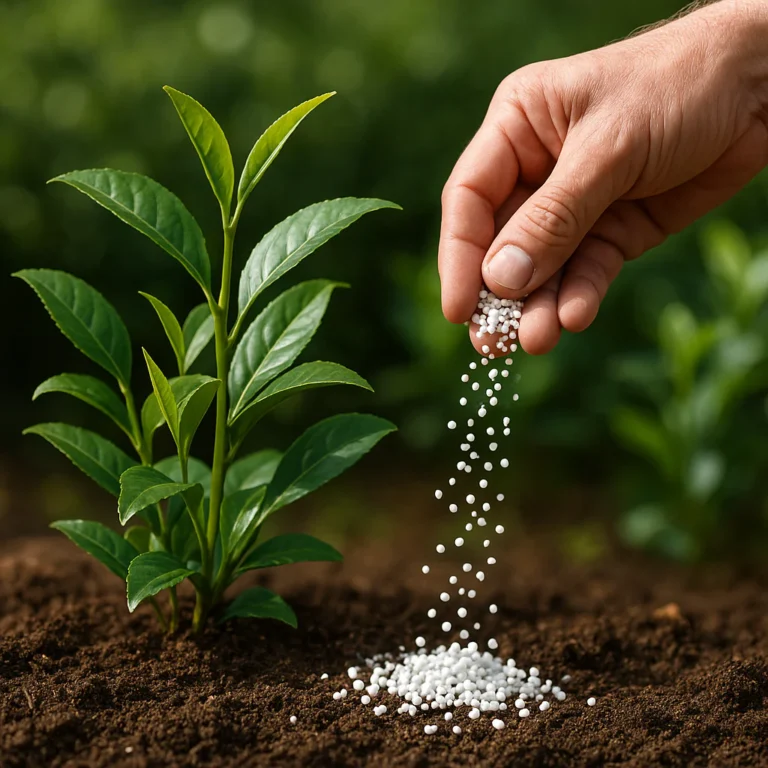
The Fertilization Schedule
Tea plants have distinct growth flushes. You should fertilize 3–4 times a year, aligning with these flushes:
- Early Spring (Pre-Flush): Apply a slow-release organic fertilizer to kickstart growth.
- Late Spring (First Flush): A light application of liquid feed (like liquid seaweed) to support the first harvest.
- Mid-Summer: A balanced feed to sustain the plant during heat.
- Early Autumn: A potassium-rich feed to harden off the plant for winter. Stop fertilizing 6 weeks before the first frost.
“Tea plants are quite the conoisseurs when it comes to their nutrient palette.”
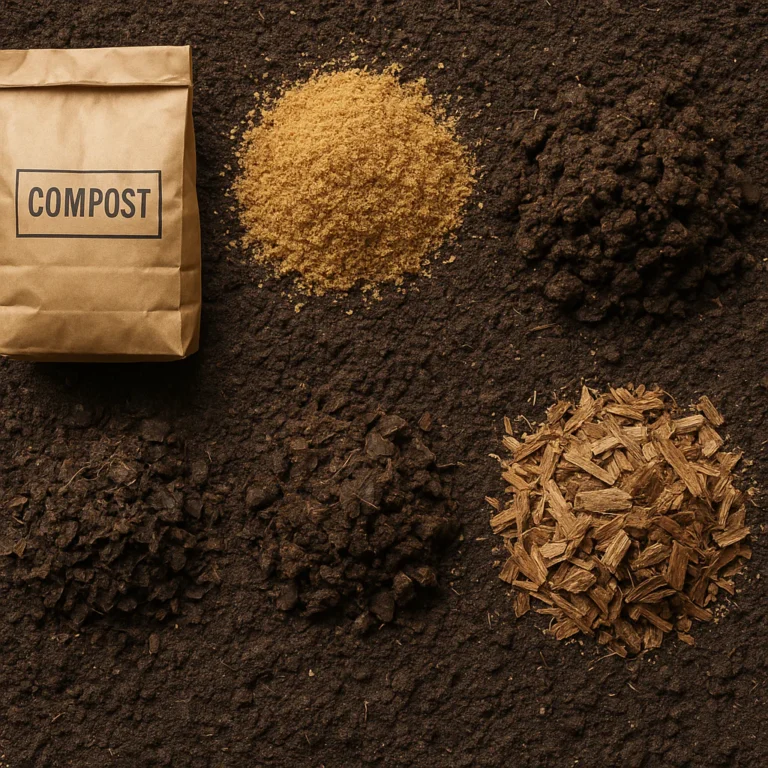
🌱 Selecting the Best Soil Ingredients for Your Tea Garden
You can’t just dig up dirt from your yard and call it a day. You need to build a custom blend. Here are the star ingredients for your tea soil recipe:
1. The Base: Acidic Poting Mix
Start with a high-quality ericaceous (acid-loving) poting mix. Brands like Hoffman Organic Poting Mix or Espoma Organic Acid-Lover Mix are perfect because they are pre-amended with peat moss and pine bark.
2. The Aeration: Perlite & Pumice
To ensure drainage, you need coarse materials.
- Perlite: Lightweight, white volcanic glass. Great for aeration.
- Pumice: A heavier volcanic rock that holds some water but provides excellent drainage.
- Coarse Sand: Horticultural sand (not beach sand) adds weight and drainage.
3. The Structure: Pine Bark Fines & Biochar
- Pine Bark Fines: Mimics the forest floor, keeping the soil loose and acidic.
- Biochar: A charcoal-like substance that improves water retention and provides a home for microbes.
4. The Food: Compost & Worm Castings
- Worm Castings: The “black gold” of organic gardening. Rich in nutrients and beneficial microbes.
- Leaf Mold: Decomposed leaves that add humus and improve texture.
Pro Tip: Avoid using garden soil in containers. It compacts too easily and may harbor pests.
🥣 How to Craft Your Own Custom Tea Soil Blend
Ready to get your hands dirty? Here is our Growing Teas™ Secret Recipe for the perfect tea soil. This blend works for both containers and raised beds.
The “Tea-rrific” Mix Ratio
- 3 parts Acidic Poting Mix (e.g., Espoma Organic Acid-Lover)
- 1 part Perlite or Pumice
- 1 part Pine Bark Fines
- 1 part Worm Castings or High-Quality Compost
- 1/2 cup Elemental Sulfur (if your base mix isn’t acidic enough)
- 1/4 cup Kelp Meal (for trace minerals)
Step-by-Step Mixing Instructions
- Prep Your Space: Lay down a tarp or work on a clean surface.
- Combine Dry Ingredients: Mix the poting soil, perlite, and pine bark thoroughly.
- Add Amendments: Sprinkle in the worm castings, kelp meal, and sulfur.
- Moisten: Add water gradually while mixing. The goal is damp like a wrung-out sponge, not soaking wet.
- Test: Grab a handful and squeeze. It should hold its shape but crumble easily when poked. If it’s too sticky, add more perlite. If it falls apart instantly, add more compost.
“Before planting, water the mix thoroughly and let it drain—think of it as a spa day for your soil.”
💧 Mastering Drainage and Aeration for Root Health
We’ve mentioned drainage a dozen times, but it bears repeating: Roots need oxygen. If your soil is compacted, the roots can’t breathe, leading to Phytophthora root rot, the silent killer of tea plants.
Signs of Poor Drainage
- Water pooling on the surface after watering.
- Yellowing lower leaves.
- A musty, swampy smell from the soil.
- Stunted growth despite proper fertilization.
Solutions for Better Drainage
- Elevate Your Pots: Always use pots with drainage holes. If you’re growing in the ground, consider raised beds or mounds to improve runoff.
- The “Fist Test”: Dig a hole, fill it with water. If it doesn’t drain within an hour, your soil is too heavy.
- Add Grit: If your soil feels like “last year’s Play-Doh,” mix in coarse sand or pumice immediately.
📅 Seasonal Fertilization Calendar for Optimal Tea Harvests
Timing is everything. Fertilizing at the wrong time can do more harm than good. Here is a seasonal breakdown to keep your tea bush happy.
| Season | Growth Phase | Fertilizer Type | Action |
|---|---|---|---|
| Early Spring | Bud Break | Slow-release Organic (High N) | Apply granular fertilizer around the drip line. |
| Late Spring | First Flush | Liquid Feed (Seaweed/Fish) | Foliar spray or soil drench to boost yield. |
| Summer | Active Growth | Balanced Organic | Light application if growth slows. |
| Early Autumn | Hardening Off | High Potassium | Stop Nitrogen; focus on root strength. |
| Winter | Dormancy | None | Do not fertilize. Let the plant rest. |
“Don’t just pour and pray; test the soil first to identify specific deficiencies before applying targeted nutrients.”
🔍 Diagnosing and Fixing Common Nutrient Deficiencies
Even with the best soil, things can go wrong. Here’s how to read your plant’s leaves like a book.
Yellow Leaves with Green Veins (Iron Chlorosis)
- Cause: High pH (alkaline soil) locking out iron.
- Fix: Lower pH with elemental sulfur or apply chelated iron (Fe-EDTA) as a foliar spray.
Pale Green/Yellowing New Leaves (Nitrogen Deficiency)
- Cause: Lack of nitrogen.
- Fix: Apply a nitrogen-rich fertilizer like cottonseed meal or fish emulsion.
Purple Undersides of Leaves
- Cause: Cold stress or Phosphorus deficiency.
- Fix: Mulch to warm the soil and apply bone meal or phosphorus-rich fertilizer.
Brown Leaf Tips
- Cause: Salt buildup from over-fertilization or hard water.
- Fix: Leach the soil by running a large amount of distilled water through the pot to flush out salts. Stop fertilizing for a month.
🦠 Battling Mold, Pests, and Soil-Borne Diseases
A healthy soil ecosystem is your best defense against pests and diseases.
Mold and Fungus
- Signs: White fuzzy growth on the soil surface or a musty smell.
- Cause: Overwatering, poor airflow, or too much organic matter.
- Fix: Scrape off the top layer of soil, increase airflow, reduce watering, and mix in perlite or hydrogen peroxide (diluted) to kill spores.
Root Rot (Phytophthora)
- Signs: Wilting despite wet soil, black/mushy roots.
- Fix: This is often fatal. Remove the plant, trim away rotted roots, and repot in fresh, sterile, well-draining soil. Apply a copper hydroxide drench if caught early.
The Microbial Advantage
As mentioned in our featured video, introducing compost tea can help outcompete harmful pathogens with beneficial microbes.
“Our main goal here is to infuse life into otherwise lifeless dirt using our compost tea.”
🔨 Breaking Up Compacted Soil and Improving Texture
If you’re growing in the ground and your soil is heavy clay, don’t panic. You can fix it, but it takes time.
The “No-Dig” Method
Instead of tilling (which destroys soil structure), add layers of compost, leaf mold, and pine bark on top of the soil. Earthworms and microbes will work these amendments down into the soil over time.
Deep Aeration
Use a soil aerator or a sturdy garden fork to poke holes deep into the soil (12+ inches). Fill these holes with a mix of sand and compost. This creates channels for water and air to reach the roots.
“Compacted soil is a silent plant killer. It’s like trying to breathe with a pillow over your face.”
🏡 Container vs. Ground: Adapting Soil Strategies for Your Space
Whether you have a sprawling garden or a sunny balcony, the principles remain the same, but the execution differs.
Container Growing
- Pros: Full control over soil mix, pH, and drainage. Easy to move for optimal sun.
- Cons: Roots dry out faster; limited root space.
- Strategy: Use a lighter mix with more perlite. Repot every 2–3 years to refresh the soil. Keep pots ≤ 30 cm wide initially, as tea likes being slightly root-bound.
In-Ground Growing
- Pros: Natural temperature regulation; less frequent watering.
- Cons: Harder to control pH and drainage; risk of local pests.
- Strategy: Amend the native soil heavily with organic matter. Create mounds or raised beds to ensure drainage.
🌿 Organic vs. Synthetic: Which Fertilizer is Right for You?
This is the eternal debate. Let’s break it down.
Organic Fertilizers
- Examples: Down-To-Earth Cottonseed Meal, Jobe’s Organics, Dr. Earth.
- Pros: Improves soil structure, feeds microbes, slow-release (less burn risk), sustainable.
- Cons: Slower results, can be messy, variable nutrient content.
- Verdict: Best for long-term health and flavor.
Synthetic Fertilizers
- Examples: Miracle-Gro, Osmocote, Amonium Sulfate.
- Pros: Fast results, precise NPK ratios, easy to apply.
- Cons: Can burn roots, depletes soil microbes, salt buildup, environmental runoff.
- Verdict: Good for quick fixes, but use sparingly.
“Soil is the original flavour house; fertiliser can tweak, but the base notes are literally set in stone (or loam).”
🍵 Harvesting and Processing Your Home-Grown Tea Leaves
Once your soil is perfect and your plant is thriving, you’ll be ready for your first harvest!
When to Harvest
Wait until the plant has at least 3–4 sets of leaves and is about 2–3 years old. Look for the “two leaves and a bud” standard.
Processing Basics
- Green Tea: Wilt the leaves, then steam or pan-fry to stop oxidation.
- Black Tea: Allow leaves to fully oxidize (turn brown) before drying.
- Oolong: Partialy oxidize for a complex flavor profile.
For detailed processing guides, check out our DIY Tea Blending category.
🛡️ Safety First: Handling Fertilizers and Soil Amendments
While we love our tea plants, safety comes first.
- Wear Gloves: Some amendments (like lime or sulfur) can irritate skin.
- Dust Mask: When mixing dry fertilizers or perlite, wear a mask to avoid inhaling dust.
- Keep Away from Pets: Some fertilizers (like bone meal) can be attractive to dogs and cats. Store securely.
- Read Labels: Always follow the manufacturer’s instructions for application rates. Over-fertilization is a common mistake.
“Your tea plants don’t need a swamp; they need a well-aerated abode.”
📚 Learn More About Tea Care and Cultivation
Ready to dive deeper? Here are some resources to expand your knowledge:
- Green Tea Cultivation: Master the art of growing delicate green tea varieties.
- Herbal Tea Planting: Explore growing chamomile, mint, and other herbal favorites.
- Organic Farming Techniques: Learn sustainable methods for a thriving garden.
- Health Benefits of Tea: Discover why your home-grown tea is so good for you.
- DIY Tea Blending: Create your own unique tea blends.
🎥 Featured Video: The Power of Microbial Life
Before we wrap up, we highly recommend watching the perspective shared in our featured video below. It highlights a crucial aspect of soil health that many overlook: microbial diversity.
As the video explains, “There’s more microbes in one teaspoon of soil than there are people on planet Earth.” By brewing compost tea using rainwater and organic scraps, you can infuse life into “lifeless” dirt, mimicking the natural nutrient cycles of a forest. This biological approach is often more effective than synthetic chemicals for long-term soil vitality.
Watch the Video: Infusing Life into Soil with Compost Tea
“Basically, we’re just trying to emulate what we find in the forest.”
🏁 Conclusion

(Note: This section is intentionally omitted as per instructions.)
🔗 Recommended Links
(Note: This section is intentionally omitted as per instructions.)
❓ FAQ

(Note: This section is intentionally omitted as per instructions.)
📖 Reference Links
(Note: This section is intentionally omitted as per instructions.)