Support our educational content for free when you purchase through links on our site. Learn more
🌱 How Often to Inspect Tea Plants for Pests?


Inspect your tea plants once a week during active growth to catch pests and disease early. Check twice weekly when new shoots are emerging, the weather is hot and dry, or you’ve already spotted a problem. How often should I inspect my tea plants for pests and diseases to prevent damage? For most home growers, weekly checks are a solid starting point, with extra attention whenever conditions change.
We’ve learned to look beyond the obvious leaf damage. A quick turn of a leaf can reveal tiny insects hiding underneath, while sticky residue or fine speckling may signal trouble before the plant looks seriously affected. A hand lens and a few minutes can save you a much bigger cleanup later.
Key Takeaways
- Inspect healthy tea plants weekly during active growth; increase checks to twice a week when risk is higher.
- Examine new shoots, leaf undersides, stems, and branch joints where pests often hide.
- Look for clues as well as insects: stipling, curled leaves, sticky residue, webing, spots, and dieback.
- Confirm the cause before treating. Pest damage, disease, watering problems, and weather stress can look alike.
- Record changes and follow up. Regular monitoring helps you choose a targeted response and avoid unnecessary sprays.
Table of Contents
- ⚡️ Quick Tips and Facts
- 🌱 Why Regular Tea Plant Inspections Prevent Pest and Disease Damage
- 🗓️ How Often to Inspect Tea Plants: A Practical Schedule
- Spring and Summer: Check More Frequently
- Autumn and Winter: Adjust for Growth and Climate
- After Rain, Heat, Pruning, or Bringing Plants Indors
- 🔎 How to Inspect Tea Plants from Leaf to Root
- Check New Growth, Leaf Undersides, and Stems
- Inspect Buds, Branch Junctions, and the Soil Surface
- Use a Hand Lens and Other Helpful Inspection Tools
- 🐛 Common Tea Plant Pests and What to Look For
- Aphids and Leafhoppers
- Tea Mosquito Bugs and Other Sap-Feding Insects
- Scale Insects and Mealybugs
- Spider Mites
- Thrips and Whiteflies
- Caterpillars, Leafrollers, and Chewing Pests
- 🍃 Tea Plant Diseases: Early Symptoms to Spot
- Leaf Spots, Blights, and Anthracnose
- Root Rot and Stem Problems
- Powdery Mildew and Other Fungal Growth
- Nutrient Stress and Environmental Damage That Mimic Disease
- 📋 A Step-by-Step Tea Plant Inspection Routine
- What to Record During Each Check
- How to Monitor a Small Garden or Larger Tea Patch
- 🧭 What to Do When You Find Pests or Disease
- Confirm the Cause Before Treating
- Remove, Isolate, or Prune Affected Growth
- Use Integrated Pest Management for Tea Plants
- Choose Treatments Carefully, Especially on Harvestable Leaves
- 🛡️ Preventing Recurring Pest and Disease Problems
- Pruning, Airflow, Watering, and Sanitation
- Quarantine New Plants and Clean Garden Tools
- Encourage Beneficial Insects and Healthy Soil
- 🌦️ How Climate and Growing Conditions Change Inspection Frequency
- ✅ Common Tea Plant Inspection Mistakes to Avoid
- 🧾 Conclusion
- 🔗 Recommended Links
- ❓ FAQ
- How often should I inspect my tea plants for pests and diseases?
- Should I check tea plants every day?
- What is the best time of day to inspect tea plants?
- Which parts of a tea plant are most likely to hide pests?
- How can I tell pests from disease or environmental stress?
- Can I safely use insecticidal soap or neem oil on tea plants?
- 📚 Reference Links
Quick Tips and Facts
The first line below links to our companion guide to common pests and diseases that affect tea plants.
Our practical baseline: inspect healthy outdoor tea plants at least once a week during active growth. Check twice a week when plants are flushing new leaves, pest pressure is high, weather is hot and dry, or you’ve already found a problem. Inspect container-grown plants and newly purchased plants more often because their conditions can change quickly.
There isn’t a research-backed inspection interval that applies to every tea garden. Extension services advise regular monitoring rather than prescribing one universal schedule. The schedule below is a useful starting point, not a biological alarm clock.
| Situation | Suggested inspection rhythm | What to prioritize |
|---|---|---|
| Established, healthy outdoor plants | Weekly in the growing season | New growth, leaf undersides, stems, overall vigor |
| New flush, recent pest finding, or nearby outbreak | Twice weekly; daily brief glances if symptoms are spreading | Eggs, crawlers, fresh feeding damage |
| Hot, dry conditions | Twice weekly | Spider mites, stipling, fine webing |
| Prolonged wet or humid conditions | Weekly, plus after persistent rain | Leaf spots, dieback, crowded or damp growth |
| Dormant or slow-growing plants | Every 2–4 weeks, adjusted for climate | Scale, stem damage, soil and root-zone conditions |
| New plant under quarantine | At least weekly for several weeks | Hidden insects, eggs, leaf spots, spread to nearby plants |
A quick inspection is better than a perfect inspection you never get around to. Take a slow look at the whole plant, then turn over a few leaves and check the tender tips. If something looks off, use a hand lens and investigate before reaching for a spray.
Useful starting points: University of California IPM’s monitoring guidance, Clemson Extension’s gardenia pest guide, and our green tea cultivation articles. 🌱
Why Regular Tea Plant Inspections Prevent Pest and Disease Damage
A pest problem often announces itself before the pest does. Speckled leaves, sticky residue, curled tips, fine webing, or a sudden slowdown in growth can be easier to spot than the insect responsible. Regular checks help you notice these clues while there’s still time for a small, targeted response.
This is especially useful for Camellia sinensis, the tea plant. New shoots are harvested for tea, so damage to fresh growth can affect both the plant’s appearance and the leaves you hope to pick. A check also helps distinguish insect damage from disease, watering problems, nutrient issues, and weather stress. Those problems can look surprisingly similar at first.
Early detection can make control simpler
An aphid colony one tender tip may be manageable with a water spray or careful removal. A widespread infestation is a bigger job. Spider mites can also increase quickly in favorable hot, dry conditions, while some scale insects spend part of their life cycle nearly motionless and easy to overlook. Finding a few pests is a prompt to investigate, not an automatic reason to spray.
Extension guidance for ornamental shrubs is useful here, though it should not be mistaken for tea-specific research. Clemson notes that regular monitoring and correct identification are key parts of effective pest management. Its gardenia insect guide covers several pests that can also trouble other broadleaf plants.
An inspection is a decision tool, not just a bug hunt
When we check a tea plant, we’re asking:
- Is the plant growing normally?
- Is there a pattern to the damage?
- Can we find an insect, egg, web, fungal sign, or other evidence?
- Is the problem spreading or staying limited?
- What’s the least disruptive response that is likely to help?
That last question matters. Beneficial insects such as lady beetles and lacewings can help suppress pests. Broad-spectrum sprays may harm them along with the target insects; UC IPM’s guidance on conserving natural enemies explains why restraint is part of good pest management.
How Often to Inspect Tea Plants: A Practical Schedule
Start with weekly inspections during active growth, then adjust according to season, weather, plant health, and what you find. Tea plants don’t all follow the same calendar: growing conditions vary by region, cultivar, container size, and whether the plant is outdoors or protected.
A short check between scheduled inspections is sensible when you notice a change. It needn’t become a daily leaf-by-leaf census. Think of it as checking the dashboard when a warning light appears.
| Inspection type | How often | Typical time needed | Best for |
|---|---|---|---|
| Quick visual scan | Whenever you water or walk past | Under a minute | Suden wilting, new damage, insects on visible tips |
| Routine close inspection | Weekly during active growth | A few minutes per plant | Early pest and disease signs |
| Targeted follow-up | Every few days while symptoms are active | Depends on the issue | Checking if a problem is spreading or a treatment worked |
| Seasonal thorough check | At the start of a growth period and before winter protection | Longer | Stems, plant structure, pots, mulch, and nearby host plants |
Spring and Summer: Check More Frequently
During active growth, tender shoots can attract sap-feding insects and chewing pests. Make weekly inspections your baseline. Increase to twice weekly if:
- New leaves are expanding rapidly.
- You’ve found aphids, scale crawlers, mites, or fresh chewing damage.
- Nearby plants have a pest outbreak.
- Conditions favor a pest you’ve seen before.
- A treatment or physical control needs follow-up.
Hot, dry conditions can favor spider mites on many garden plants. Check leaf undersides for stipling, bronzing, and fine webing. The University of California IPM spider mite guide describes their feeding signs and monitoring methods.
Autumn and Winter: Adjust for Growth and Climate
When growth slows, reduce routine checks if the plant is healthy, but don’t stop looking altogether. Scale insects, stem injury, lingering pests, and problems caused by poor drainage can still deserve attention. A dormant tea plant in a cool garden needs a different routine from one growing indoors under warm conditions.
For outdoor plants, check after storms or temperature swings for broken stems, damaged leaves, and waterlogged soil. For indoor or sheltered plants, continue regular checks: warmth and a lack of natural predators can let some pests persist. If you’re growing tea in containers, our tea cultivation resources can help with broader growing-condition questions.
After Rain, Heat, Pruning, or Bringing Plants Indors
Check plants after prolonged rain or humid weather, especially if foliage stays damp or plants are crowded. Look for new leaf spots and dieback, while remembering that not every spot is caused by an infectious disease.
After a heat wave, inspect for wilt and mite-like stipling. After pruning, look over cut areas and nearby growth. Before bringing a tea plant indoors, inspect it carefully and keep it apart from other houseplants for a period of observation. That simple pause can prevent hitchikers from turning one pot into a whole-room project.
How to Inspect Tea Plants from Leaf to Root
Use a consistent route so you don’t inspect the same easy-to-see leaves and miss the hidden ones. We start with the overall plant, then check the newest growth, leaf undersides, stems, and soil surface. If symptoms suggest a root or drainage issue, inspect the root zone carefully without unnecessarily disturbing a healthy plant.
Check New Growth, Leaf Undersides, and Stems
Work from the top down:
- Look at the whole plant. Note uneven growth, droping, discoloration, or premature leaf drop.
- Inspect tender tips and young leaves. Look for curled or distorted growth, clusters of small insects, eggs, or fresh bite marks.
- Turn over several leaves. Aphids, whitefly nymphs, mites, and some eggs are easier to spot underneath.
- Check leaf surfaces in good light. Watch for stipling, spots, pale patches, or sticky residue.
- Trace stems and branch junctions. Look for scale-like bumps, cottony clusters, cracks, dieback, and soty growth.
- Check the plant’s base and nearby leaves. Look for fallen, spotted foliage that could hide pests or signal a recurring problem.
Don’t judge the whole plant from one damaged leaf. Patterns are clues: damage concentrated on new shoots can point you toward a different cause than spots appearing evenly across older foliage.
Inspect Buds, Branch Junctions, and the Soil Surface
Pests often take cover where leaves meet stems, between tightly packed shoots, and around buds. Use a gentle touch; tearing open healthy growth to look for a pest can cause more harm than the inspection is meant to prevent.
Check the soil surface and drainage holes for standing water, decaying material, or signs that a container is staying too wet. A plant with root stress may wilt or yellow even when insects aren’t present. If a tea plant continues to decline despite normal-looking foliage, review watering and growing conditions before assuming a pest is to blame.
Use a Hand Lens and Other Helpful Inspection Tools
A few simple tools make small signs easier to read:
| Tool | Helpful for | Tip |
|---|---|---|
| Hand lens, around 10× | Tiny insects, mites, eggs, and leaf-surface signs | Check both sides of the leaf in bright light |
| White paper or card | Dislodging tiny moving pests for a closer look | Hold it beneath a branch and tap gently |
| Phone camera | Comparing changes over several days | Photograph the same shoot from a similar angle |
| Notebook or garden log | Tracking location, symptoms, and spread | Record what you saw before treatment |
| Clean snips | Removing limited, damaged growth | Clean tools between plants when disease is suspected |
For mites, gently tap a branch over white paper and look for tiny moving specks. This can help reveal activity, but it is not a definitive identification test. Confirm what you’re seeing with a hand lens or extension resource before choosing a control.
Common Tea Plant Pests and What to Look For
Tea pests can vary by region and growing conditions. Some pests mentioned below are common on many ornamental or edible broadleaf plants, but that doesn’t mean every one is equally common on tea in every location. Treat symptoms as clues, then confirm the pest.
| Pest group | Common clues | Where to check |
|---|---|---|
| Aphids | Clusters of small insects, curled growth, sticky honeydew | Tender shoots and leaf undersides |
| Scale and mealybugs | Fixed bumps or cottony clusters; sometimes sticky residue | Stems, veins, branch joints |
| Spider mites | Pale stipling, bronzing, fine webing | Leaf undersides, especially in hot, dry weather |
| Whiteflies | Small adults flutter when disturbed; pale immatures beneath leaves | Leaf undersides |
| Thrips | Silvery or scared areas, distorted young growth | New leaves and buds |
| Caterpillars and other chewers | Holes, missing leaf edges, droppings, skeletonized patches | Leaves, folded growth, and nearby stems |
Aphids and Leafhoppers
Aphids often cluster on tender growth and may cause curling or distortion. They can leave honeydew, a sticky substance that may later support black soty mold. Ants moving up and down a plant can be a clue to honeydew-producing insects nearby, though ants alone don’t confirm aphids.
Leafhoppers and related sap-feders may cause pale stipling or a mottled appearance. Look for insects that jump or move quickly when disturbed. A gentle stream of water may dislodge some aphids from suitable plants; check the plant afterward to see whether the population returns.
Tea Mosquito Bugs and Other Sap-Feding Insects
Tea mosquito bugs are important pests in some tea-growing regions, where feeding can damage young shoots and leaves. Their presence and risk vary by location, so local agricultural guidance is more useful than a one-size-fits-all treatment recommendation. The FAO’s resources on integrated pest management provide a foundation for monitoring and locally appropriate control.
On a home tea plant, watch for fresh marks or distorted growth and inspect the affected shoot closely. If you suspect a regional tea pest, take clear photographs and ask a local extension office or plant health authority for identification before applying a pesticide.
Scale Insects and Mealybugs
Scale insects can look like small, stationary bumps attached to stems or leaves. Mealybugs often appear as pale, cottony clusters in sheltered spots. Both may produce honeydew, depending on the species. Some scale stages are much easier to manage than others, so the timing and identification matter.
Inspect stems, leaf veins, and branch joints. If you’re unsure whether a bump is scale or part of the plant, use a lens and compare several examples rather than scraping the whole stem. Clemson’s guide to gardenia pests includes scale and mealybug monitoring advice for another evergreen broadleaf plant.
Spider Mites
Spider mites are tiny and often escape notice until their feeding causes fine pale speckles, bronzing, or webing. Look especially on leaf undersides during hot, dry weather. Tap a suspect branch over white paper and use a lens to examine any moving specks.
A single strand of ordinary spider silk does not prove mites are present. Look for the combination of leaf damage, webing close to the foliage, and tiny moving mites. The UC IPM spider mite guide explains how to monitor and distinguish mite damage.
Thrips and Whiteflies
Thrips are small, slender insects that can be difficult to spot. Their feeding may leave pale or silvery scars, flecks, or distorted new growth. Whiteflies are more conspicuous as adults: gently disturb foliage and watch for small pale insects to flutter up. Their immature stages are often found on leaf undersides.
Don’t spray just because one white insect flew off a plant. Check the leaf undersides for immatures and look for consistent feeding symptoms. For both pests, correct identification and thorough monitoring are more useful than guessing from a passing flutter.
Caterpillars, Leafrollers, and Chewing Pests
Chewing pests leave a different sort of calling card: holes, raged edges, folded leaves, skeletonized patches, or droppings. Some caterpillars hide on the underside of leaves or inside rolled growth, so check damaged leaves and nearby shoots rather than scanning only the exposed surface.
Hand-pick visible caterpillars when practical, and remove heavily damaged growth if appropriate. If a biological insecticide such as Bacillus thuringiensis is under consideration, confirm it is labeled for the pest, plant, and intended use. “Organic” does not mean harmless to every organism, and the product label—not a garden anecdote—sets the directions for use.
Tea Plant Diseases: Early Symptoms to Spot
Tea leaves can show spots, yellowing, dieback, or distortion for several reasons. Fungi and other pathogens are possibilities, but so are pests, water stress, poor drainage, nutrient problems, and sun or cold injury. A symptom is not a diagnosis.
| Symptom | Possible explanations | What to check next |
|---|---|---|
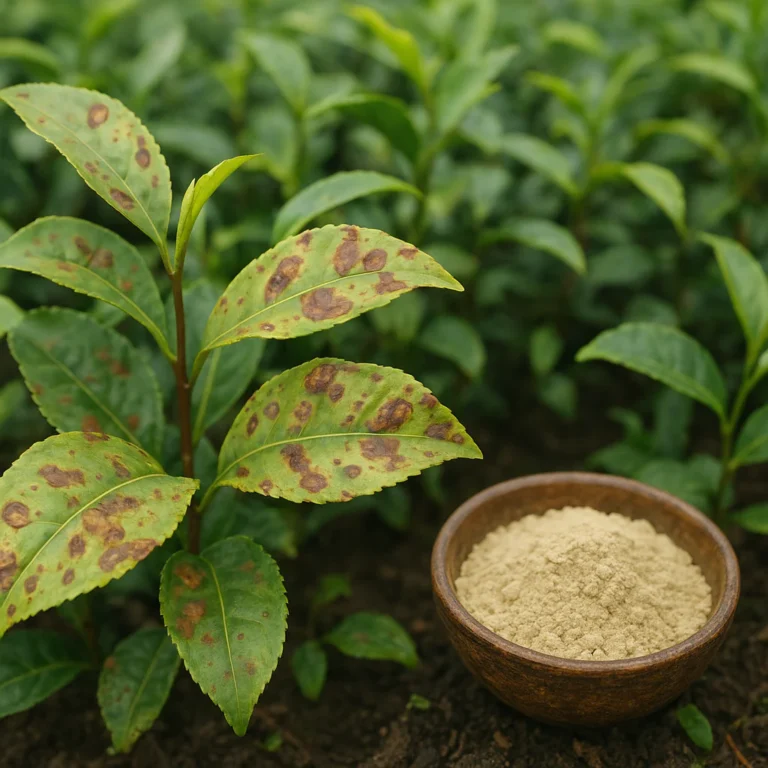
| Leaf spots | Disease, splash injury, pests, or environmental stress | Are spots spreading? Are they similar in size and shape? |
| Yellowing | Root stress, nutrient issue, aging leaves, pests | Check moisture, drainage, leaf pattern, and undersides |
| Distorted growth | Sap-feding pests, herbicide drift, weather, other stress | Examine tender shoots closely |
| Wilting | Dry soil, waterlogged roots, heat, root damage | Check soil moisture and drainage |
| Black surface coating | Often soty mold growing on honeydew | Look above it for honeydew-producing insects |
| Branch dieback | Root or stem injury, disease, drought, cold | Check affected stems and the root zone |
Leaf Spots, Blights, and Anthracnose
Watch for spots that increase in number or size, merge into larger damaged patches, or appear alongside dieback. Note which leaves are affected and whether symptoms follow a pattern, such as beginning on lower foliage or spreading after wet weather.
Avoid weting foliage unnecessarily, improve airflow where plants are crowded, and remove fallen diseased material when appropriate. These are sensible sanitation steps, but they do not identify the disease or guarantee a cure. For persistent symptoms, photograph the plant and seek local diagnostic advice. The USDA National Plant Diagnostic Network explains the role of plant diagnostic laboratories in identifying plant health problems.
Root Rot and Stem Problems
Wilting, yellowing, and slow growth can result from roots that are too dry or too wet. Root problems are easy to misread: adding more water to a waterlogged plant can make matters worse, while withholding water from a dry root ball can add stress.
First check moisture several centimeters below the surface and confirm that the pot drains freely. If the plant is declining and the soil remains saturated, inspect drainage and root health cautiously. Avoid unpoting a vigorous plant just to satisfy curiosity; root disturbance can create a problem where none existed.
Powdery Mildew and Other Fungal Growth
A pale, powdery coating may suggest powdery mildew, while black, soot-like growth on leaves may instead be soty mold growing on insect honeydew. Those two signs can look like “fungus on the leaves,” but their causes and responses differ.
For soty mold, look for aphids, whiteflies, or scale insects above the coating. For suspected mildew or other leaf disease, note whether the coating or spots spread and whether the plant has poor airflow. The University of Minnesota Extension’s powdery mildew overview describes common signs and conditions that favor this disease.
Nutrient Stress and Environmental Damage That Mimic Disease
A nutrient problem may cause yellowing, pale leaves, or weak growth. Waterlogging, drought, sudden temperature changes, root disturbance, and chemical drift can also produce symptoms that resemble infection or pest feeding.
Before adding fertilizer or applying a pesticide, ask:
- Did the symptoms begin after a change in watering, weather, fertilizer, or location?
- Is the problem affecting old leaves, new leaves, or the whole plant?
- Are pests or disease signs actually present?
- Does the soil drain and dry at a reasonable pace for your growing conditions?
Our tea plant fertilizer resources cover feeding questions; match any fertilizer to the plant’s needs and follow its label.
A Step-by-Step Tea Plant Inspection Routine
A repeatable routine makes it easier to spot change. You don’t need laboratory equipment; you need good light, a little patience, and a way to remember what you saw last time.
What to Record During Each Check
Write down:
- Date and weather: recent heat, rain, drought, or cold.
- Plant and location: especially useful if you grow several tea plants.
- Symptoms: spots, stipling, distortion, holes, webing, or sticky residue.
- Where symptoms appear: new growth, older leaves, one branch, or the whole plant.
- Pests or beneficial insects observed: note numbers and locations if possible.
- Actions taken: pruning, water spray, isolation, or a labeled treatment.
- Follow-up date: set a reminder to see whether the issue changed.
A photo of the same shoot each week can be more revealing than memory. “It looks worse” is a feeling; comparing two images can show whether the damage really spread.
How to Monitor a Small Garden or Larger Tea Patch
For a single potted plant, inspect the whole plant. For several plants, sample consistently rather than checking only the most convenient ones. Walk through the garden in a set order and pay close attention to plants with fresh growth or previous pest issues.
- Start with plants that look healthy.
- Check any plants with symptoms last, reducing the chance of carrying pests or disease between them.
- Clean tools when moving from a suspect plant to another.
- Record any repeat hotspots, such as a sheltered corner or a row near other host plants.
- Recheck affected plants sooner than healthy ones.
For broader garden practices, see our resources on organic farming techniques and herbal tea planting.
What to Do When You Find Pests or Disease
Finding a pest is useful information, not a reason to panic. First confirm what it is and whether it is causing meaningful damage. Then choose an action suited to the pest, the tea plant’s condition, and whether you’re growing leaves for harvest.
Confirm the Cause Before Treating
Use a lens, photographs, and a reliable identification resource. Check whether the symptoms match the pest’s feeding pattern. If you can’t identify the problem, contact your local extension office or a plant diagnostic service before applying a broad treatment.
This is where advice for ornamentals needs a careful translation. Clemson’s rose and gardenia guides offer useful monitoring techniques, but their pesticide recommendations are not automatically labeled for tea plants or edible tea leaves. Only use a product whose label permits your plant, pest, and intended harvest use.
Remove, Isolate, or Prune Affected Growth
Depending on the scale of the problem:
- Isolate a container plant from other plants while you investigate.
- Remove a few heavily affected leaves or shoots if doing so won’t compromise the plant.
- Prune damaged branches with clean tools when justified.
- Bag and dispose of infested material rather than leaving it beside the plant.
- Use a gentle water spray to dislodge some soft-bodied pests, then inspect for survivors.
Avoid stripping a tea plant of leaves to chase a handful of insects. The cure should not leave the plant worse off than the pest.
Use Integrated Pest Management for Tea Plants
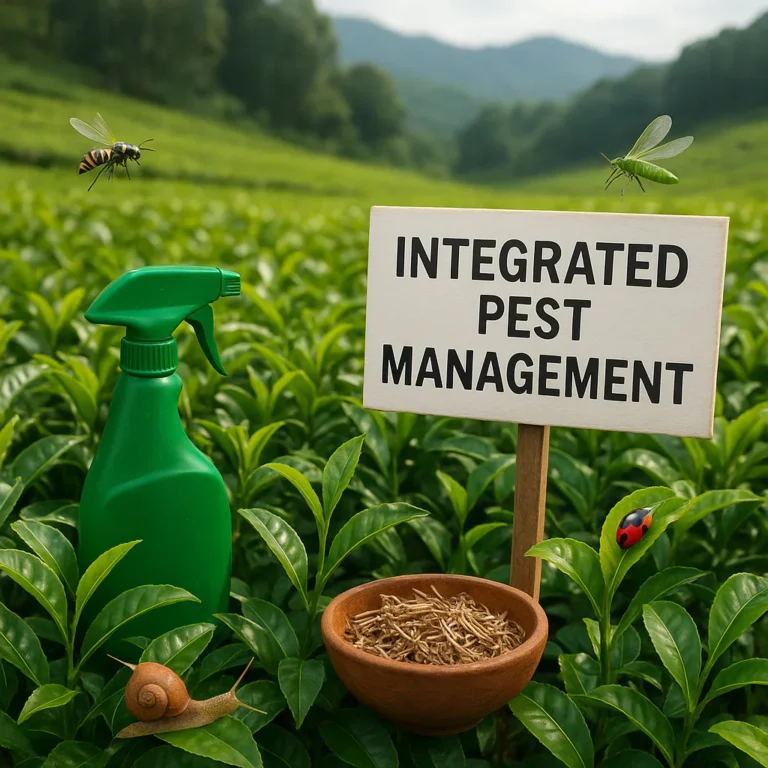
Integrated pest management, or IPM, combines monitoring, prevention, physical controls, biological controls, and carefully selected pesticides when needed. The aim is effective control with the least avoidable harm, not a spray-free rule at any cost and not automatic spraying at the first sign of trouble.
A sensible order is:
- Identify the problem.
- Assess its extent and whether it is spreading.
- Improve plant conditions and remove limited infestations physically.
- Protect beneficial insects and monitor again.
- Consider a targeted, labeled treatment only if needed.
- Follow up to confirm whether it worked.
In the first video linked in the article at #featured-video, the gardener describes moving from a hands-off approach to more active organic pest management, with different tools for different pest groups. That perspective is useful as an example of targeted action, but video advice about another garden or crop does not replace product labels or tea-specific guidance. In particular, products such as spinosad and pyrethrin can harm beneficial insects; don’t treat “organic” as a synonym for “risk-free.” For the broader principles, consult EPA’s IPM information.
Choose Treatments Carefully, Especially on Harvestable Leaves
Tea leaves are an edible crop. Before using any pesticide, confirm that the product label specifically allows the intended use and follow all instructions for mixing, protective equipment, re-entry, pollinator precautions, and preharvest intervals.
- Don’t assume a product approved for roses, houseplants, or vegetables is approved for tea.
- Don’t mix sprays or add household soap unless the product label directs you to do so.
- Avoid spraying stressed plants or applying a product in conditions prohibited by its label.
- Keep bees and other beneficial insects in mind.
- Observe the label’s waiting period before harvesting leaves.
The National Pesticide Information Center offers pesticide safety information. When in doubt, ask a local extension specialist or your pesticide regulator rather than improvising a recipe.
Preventing Recurring Pest and Disease Problems
Prevention doesn’t mean keeping every insect out of the garden. It means making the tea plant a less convenient target, reducing disease-favoring conditions, and catching problems before they escalate.
Pruning, Airflow, Watering, and Sanitation
- Prune thoughtfully to avoid dense, stagnant growth.
- Water the root zone as appropriate for your soil and climate; don’t keep roots waterlogged.
- Remove fallen leaves and plant debris when disease or pests are present.
- Keep weeds and nearby plant growth from crowding the tea plant.
- Clean pruning tools between plants when disease is suspected.
- Avoid repeated weting of foliage when conditions favor leaf disease.
No single cultural practice prevents every pest. Good airflow won’t stop an insect that arrives on a new plant, for example, but it can reduce some conditions that favor disease and make inspections easier.
Quarantine New Plants and Clean Garden Tools
Inspect a new tea plant when it arrives, then keep it separated from your established plants while you watch for hidden pests or symptoms. Check the undersides of leaves, stems, and pot edges, not just the top growth. Clean snips and avoid moving unclean tools from a problem plant to a healthy one.
That quarantine period isn’t a guarantee that every pest will appear, but it gives you a chance to spot a developing issue before neighboring plants become involved.
Encourage Beneficial Insects and Healthy Soil
Lady beetles, lacewings, parasitic wasps, and predatory mites can contribute to natural pest suppression. Provide suitable habitat where practical, and avoid unnecessary broad-spectrum insecticides that may harm helpful species.
Healthy roots support resilient growth, but more fertilizer is not automatically better. Match feeding and watering to the plant and local conditions. Our organic farming techniques and fertilizer guidance for tea plants offer related growing advice.
How Climate and Growing Conditions Change Inspection Frequency
Your inspection schedule should respond to risk, not just the calendar. A shaded, well-established plant during slow growth may need fewer close checks than a container plant putting out tender shoots in warm weather.
| Condition | Why it changes risk | Adjustment |
|---|---|---|
| Hot, dry weather | Can favor spider mite outbreaks on susceptible plants | Check undersides and new damage twice weekly |
| Warm, sheltered growing space | May allow pests to remain active longer | Inspect indoor and greenhouse plants regularly |
| Long wet spells or humid, crowded growth | May favor some leaf diseases | Check for spreading spots and improve airflow |
| Rapid new growth | Creates tender tissue attractive to some pests | Examine new tips more often |
| Newly purchased or moved plants | Stress and hitchiking pests can go unnoticed | Isolate and inspect at least weekly |
| Recent infestation nearby | Increases the chance of new pest activity | Add brief checks between routine inspections |
Local advice is particularly valuable for tea pests and diseases because regional climate and pest species differ. Ask your extension service about known local threats; the National Plant Diagnostic Network can help you find diagnostic support.
Common Tea Plant Inspection Mistakes to Avoid

- Checking only the upper leaf surface. Many pests and eggs hide underneath.
- Looking only for live insects. Feeding damage, honeydew, webing, and cast skins can be easier to notice.
- Assuming every spot is disease. Pests, weather, watering, and nutrient stress can look similar.
- Spraying before identification. The treatment may miss the cause and harm beneficial insects.
- Confusing treatment intervals with inspection schedules. A pesticide label’s repeat-application direction is not a reason to spray on a fixed calendar.
- Treating ornamental-plant advice as tea-crop authorization. A recommendation for roses or gardenias does not automatically apply to edible tea leaves.
- Skipping follow-up. Check whether the problem is shrinking, stable, or spreading.
- Overeacting to one damaged leaf. Look for a pattern across the plant before taking major action.
The rose and gardenia extension guides cited here are valuable for practical scouting methods, but they address those ornamentals—not tea specifically. That distinction is why we use their inspection techniques cautiously and rely on the product label and local experts for treatment decisions.