Support our educational content for free when you purchase through links on our site. Learn more
Is It Really Hard to Grow Tea? 12 Expert Tips to Succeed 🍃 (2025)
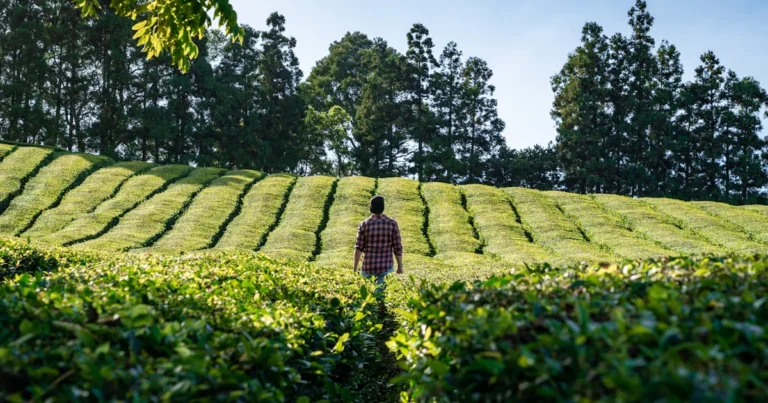
Have you ever wondered if growing your own tea is a daunting task reserved for seasoned gardeners or exotic mountain farmers? Spoiler alert: it’s not as difficult as you might think! At Growing Teas™, we’ve spent years cultivating Camellia sinensis—the magical plant behind your morning cup—and we’re here to spill the leaves on what it really takes to grow tea successfully at home or in your garden.
From choosing the right tea variety for your climate to mastering the art of harvesting “two leaves and a bud,” this guide covers everything you need to know. Curious about how to process your fresh leaves into green, black, or even floral tea? We’ve got you covered. Plus, we’ll share hilarious mishaps from our own tea-growing adventures and insider tips that will save you time, money, and frustration.
Ready to become a tea-growing pro? Let’s dive in!
Key Takeaways
- Growing tea is accessible for most home gardeners when you select the right variety (Camellia sinensis var. sinensis for temperate zones).
- Acidic, well-draining soil (pH 4.5–6.0) and consistent moisture without waterlogging are essential for healthy plants.
- Patience pays off: expect about 3 years before your first proper harvest.
- “Two leaves and a bud” is the golden rule for harvesting premium tea leaves.
- You can process your own tea at home into green, black, white, or oolong teas with simple kitchen tools.
- Tea flowers are edible and make a delightful caffeine-free infusion.
- Protect young plants from frost and pests with proper care and organic treatments.
👉 Shop Essential Tea Growing Supplies:
-
Fertilizers for Acid-Loving Plants:
Amazon | Miracle-Gro Official -
Tea Plants & Seeds:
Camellia Forest Nursery | Etsy
Table of Contents
- ⚡️ Quick Tips and Facts
- 🌱 The Ancient Roots of Tea Cultivation: A Journey Through Camellia Sinensis History
- Is Growing Tea Truly a Herculean Task? Unpacking the “Difficulty” Factor
- The Essential Ingredients for Tea Growing Success: What Your Tea Plant Craves
- Getting Started: From Seed to Sip – Your Tea Growing Journey
- Nurturing Your Tea Garden: Ongoing Care and Maintenance
- The Harvest: Plucking Your Own Precious Leaves
- From Leaf to Cup: Processing Your Homegrown Tea
- The Basics of Tea Processing: Oxidation Unveiled
- Making Green Tea: The Gentle Art of Steaming or Pan-Firing
- Crafting Black Tea: The Journey Through Withering, Rolling, and Oxidizing
- Experimenting with Oolong and White Tea: Advanced Home Processing
- Drying and Storing Your Homemade Tea: Preserving the Flavor
- Troubleshooting Common Tea Growing Challenges
- Beyond the Basics: Advanced Tea Growing Insights
- Our “Growing Teas™” Personal Anecdotes & Expert Tips
- Conclusion: So, Is Growing Tea Difficult? Our Final Verdict! ✅
- Recommended Links: Dive Deeper into the World of Tea 🔗
- FAQ: Your Burning Tea Growing Questions Answered 🔥
- Reference Links: Our Sources and Further Reading 📚
⚡️ Quick Tips and Facts
In a hurry? Here’s the tea, straight up! We’ve distilled decades of our team’s experience at Growing Teas™ into these quick sips of wisdom.
- Is it difficult? ❌ No! With the right conditions, growing tea is surprisingly manageable. As the folks at Young Mountain Tea put it, it can be “easy peasy.” The main challenge is matching the plant to your climate.
- The Plant: All true tea (black, green, oolong, white) comes from just one species: Camellia sinensis. It’s a beautiful evergreen shrub!
- Best Climate: Tea plants thrive in acidic soil (pH 4.5-6.0), with plenty of rainfall (or regular watering), and in USDA hardiness zones 7-9. Wondering about your specific area? We’ve got a whole article on whether you can grow tea plants in the US.
- Sunlight: They love a good sunbathing session but appreciate some partial shade, especially in hotter climates. Think of it as a parasol for their delicate leaves.
- Patience is a Virtue: You won’t be harvesting the day after you plant. It takes about 3 years for a tea plant to mature enough for its first proper harvest.
- Harvesting: The best tea comes from the youngest growth—the classic “two leaves and a bud” at the tip of a branch.
- Flowers: Yes, they have lovely, fragrant white flowers! While pretty, commercial growers often remove them to focus the plant’s energy on leaf production. But for the home grower? They’re a beautiful bonus and can even be brewed into a delicate, sweet tea.
🌱 The Ancient Roots of Tea Cultivation: A Journey Through Camellia Sinensis History
Before you can grow the tea, you must know the tea. Every sip you take is steeped in thousands of years of history. The story of Camellia sinensis isn’t just about a plant; it’s a tale of emperors, monks, trade routes, and a little bit of happy-accident magic.
Legend has it that in 2737 BC, the Chinese Emperor Shen Nong was boiling water under a tree when a few leaves drifted down into his pot. An avid herbalist, he tasted the resulting infusion and found it refreshing and invigorating. The tree was, you guessed it, a wild Camellia sinensis. And just like that, tea was born! You can explore more of this fascinating journey in our History of Tea section.
From its origins in the region bordering Southwest China, Tibet, and Northern India, tea cultivation was refined by Buddhist monks who used it to stay awake during long meditation sessions. It journeyed along the Silk Road, became a cornerstone of Japanese culture through the tea ceremony, and eventually sparked wars and revolutions (hello, Boston Tea Party!).
When you plant a tea seed, you’re not just gardening. You’re becoming part of a rich, global tradition that has shaped cultures for millennia. How cool is that?!
Is Growing Tea Truly a Herculean Task? Unpacking the “Difficulty” Factor
So, let’s get to the heart of it. You’re staring at your garden plot or a lonely-looking container on your balcony, wondering, “Can I really do this? Is growing tea as complicated as a 12-step Japanese tea ceremony?”
The short answer: It’s easier than you think, but it’s not foolproof.
Growing tea is less about having a magical “green thumb” and more about understanding and respecting the plant’s needs. If you can grow a blueberry bush or a rhododendron, you’ve already got the basic skills. As the experts at LoveTheGarden point out, “If you can grow other Camellias, you can likely grow Camellia sinensis.” The “difficulty” comes from trying to force it to grow in an environment it hates. It’s like trying to keep a polar bear happy in the Sahara—it’s not the polar bear’s fault!
The Allure of Homegrown Tea: Why Bother?
Why go through the effort when you can buy a box of tea bags for a few bucks? Oh, let us count the ways!
- Unbeatable Freshness: The flavor of tea made from leaves you just plucked is a revelation. It’s vibrant, complex, and alive in a way that store-bought tea rarely is.
- Total Control: You know exactly what went into your tea. No pesticides, no weird additives. Just sun, water, soil, and your loving care. This is especially important if you’re interested in the Health Benefits of Tea.
- The Ultimate Hobby: It’s a journey! You get to watch your plant grow, learn the art of plucking, and experiment with processing. It connects you to your food and a global tradition.
- Bragging Rights: Let’s be honest, serving your friends a cup of tea you grew and processed yourself is next-level hosting. You’ll be a legend.
Understanding Your Tea Plant: The Camellia Sinensis Family Tree 🌳
To succeed, you need to know your star player. Camellia sinensis is an evergreen plant from the Theaceae family. It’s a cousin to the gorgeous ornamental Camellias you see in fancy gardens, but this one is all about the leaves. There are two main varieties, or varietals, that you’ll encounter, and choosing the right one for your climate is the single most important decision you’ll make.
Camellia sinensis sinensis vs. Camellia sinensis assamica: Choosing Your Champion
Think of these as two siblings with very different personalities. One is a hardy mountain dweller, the other is a tropical sun-worshipper.
| Feature | Camellia sinensis var. sinensis | Camellia sinensis var. assamica |
|---|---|---|
| Nickname | “The Small-Leaf Tea” | “The Big-Leaf Tea” |
| Origin | China | Assam, India |
| Leaf Size | Small, narrow, serrated | Large, broad, glossy |
| Plant Size | Shrub-like, 2-4 meters (cultivated) | Tree-like, can reach 15-20 meters (wild) |
| Climate | ✅ Cold-tolerant. Thrives in cooler, higher altitudes. Perfect for zones 7-9. | ❌ Loves the heat. Needs a hot, humid, tropical or subtropical climate. |
| Flavor Profile | More delicate, sweet, complex. Ideal for Green and White teas. | More bold, robust, malty. The classic choice for strong Black teas. |
| Best for Home Growers? | Absolutely. This is the variety most home growers in temperate climates should choose. | Only if you live in a very warm, humid climate (like Florida or Hawaii). |
Our Expert Advice: For 95% of aspiring tea growers in North America and Europe, Camellia sinensis var. sinensis is your go-to. It’s the hardy, adaptable champion that will give you the best chance of success.
Other Tea-Producing Camellias: Beyond the Big Two
While sinensis and assamica are the stars, the world of tea is vast. There are thousands of cultivars—plant varieties produced by selective breeding—each with unique characteristics. You might encounter names like ‘Benifuuki’ from Japan, known for its high catechin content, or ‘Tieguanyin’, a famous Chinese oolong cultivar. As you get more experienced, exploring these different cultivars can be a fascinating part of your Cultivate Your Own Tea journey!
The Essential Ingredients for Tea Growing Success: What Your Tea Plant Craves
Alright, you’ve picked your champion (sinensis, right? 😉). Now, what does it need to thrive? Think of it like baking a cake. You need the right ingredients in the right proportions. Get one wrong, and you end up with a sad, flat… shrub.
1. ☀️ Sunshine & Shade: Finding the Perfect Light Balance
Tea plants are sun-lovers, but they can get a sunburn.
- The Ideal: Full sun to partial shade. In cooler, more northern climates (like the Pacific Northwest or the UK), full sun is generally best to help the plant become “hardy and vigorous,” as Young Mountain Tea advises.
- Hot Climates: If you live somewhere with scorching afternoon sun (think the American South), providing some partial shade, especially in the afternoon, is crucial. A spot under a tall, deciduous tree that provides dappled light is perfect.
- Indoors: A south-facing window is your best bet. If you don’t have one, you’ll need a good quality grow light.
2. 💧 Water Wisdom: Hydration for Happy Tea Plants
Tea plants are thirsty, but they HATE wet feet. This is a non-negotiable point.
- The Goal: Consistently moist soil, but excellent drainage.
- How Much? Commercial plantations get at least 60 inches of rain a year. For you, this means regular watering, especially during dry spells.
- Young Plants (First 2 Years): Water deeply 2-3 times a week during the summer. You want to soak the entire root ball.
- Established Plants: Water regularly during dry periods to encourage new growth for harvesting.
- The Finger Test: The easiest way to check? Stick your finger an inch or two into the soil. If it’s dry, it’s time to water. If it’s damp, wait another day. Overwatering is a leading cause of tea plant death!
3. ⛰️ Soil Secrets: Crafting the Ideal Growing Medium
This is where many new growers stumble. You can’t just plop a tea plant in any old dirt. Tea plants are acid-loving divas.
The pH Puzzle: Why Acidity Matters for Tea
- The Sweet Spot: Tea demands acidic soil with a pH between 4.5 and 6.0. A pH of 5.5 is often considered the bullseye.
- Why? The plant’s ability to absorb crucial nutrients is directly tied to the soil’s pH. In alkaline (high pH) soil, nutrients become “locked up,” and the plant will slowly starve, showing yellowing leaves no matter how much you fertilize it.
- The Blueberry Test: A great rule of thumb: if your area is known for growing happy, healthy blueberries, azaleas, or rhododendrons, your soil is likely acidic enough for tea.
- Testing is Key: Don’t guess! Simple soil pH test kits are inexpensive and available at any garden center or online. This is the best investment you can make.
- Amending Soil: If your soil is too alkaline, you can lower the pH by adding elemental sulfur, sphagnum peat moss, or using acidifying fertilizers. For container growing, it’s much easier—just buy a high-quality ericaceous (acid-loving) potting mix.
Nutrient Needs: Feeding Your Thirsty Tea Plants
Tea is a “heavy feeder,” especially if you’re harvesting leaves regularly.
- What to Use: A balanced fertilizer formulated for acid-loving plants is your best friend. Look for products designed for azaleas, camellias, and rhododendrons.
- When to Feed: Feed your plants in the spring as new growth begins, and potentially again in mid-summer. Avoid fertilizing in late fall or winter, as this can encourage tender new growth that will be damaged by frost.
- A Word of Caution: As noted by LoveTheGarden, the taste of fertilizer can transfer to the leaves. It’s wise to stop feeding at least 3-4 weeks before you plan to harvest.
Our Recommended Products:
- Soil Mix: Levington Peat-Free Ericaceous Compost or similar high-quality acidic potting mixes.
- Fertilizer: Miracle-Gro Azalea, Camellia & Rhododendron Soluble Plant Food is a widely available and effective option.
👉 Shop Fertilizers for Acid-Loving Plants on:
4. 🌡️ Climate Control: Temperature and Humidity Sweet Spots
Camellia sinensis sinensis is surprisingly tough.
- Temperature: It can handle brief dips down to about 10°F (-12°C) once established, but it prefers a climate where temperatures stay mostly above freezing. It thrives in the 60-85°F (15-30°C) range.
- Humidity: It loves humidity! This mimics the misty mountainsides where it originated. If you’re growing indoors in a dry, centrally-heated home, you may need to mist your plant regularly or place it on a pebble tray with water to increase local humidity.
5. 🌬️ Airflow & Protection: Guarding Against the Elements
- Air Circulation: Good airflow is important to prevent fungal diseases. Don’t crowd your plants too closely together.
- Wind: While they need air, they don’t appreciate being blasted by strong, drying winds. Planting them in a sheltered spot—near a wall, fence, or under the protection of larger shrubs—is a great idea.
- Frost: Young plants are particularly vulnerable to frost. We’ll cover how to protect them in the “Winterizing” section below!
Getting Started: From Seed to Sip – Your Tea Growing Journey
Ready to get your hands dirty? This is where the real fun begins. Let’s walk through the process of bringing your very own tea plant home and giving it a happy start in life.
1. Sourcing Your Tea Plant: Where to Find Your Green Gold 🛍️
You can’t grow what you don’t have! Finding a healthy tea plant is your first mission. You have a few options, each with its own pros and cons.
Seeds vs. Cuttings vs. Young Plants: Which Path to Choose?
| Method | Difficulty | Time to First Harvest | Cost | Pros | Cons |
|---|---|---|---|---|---|
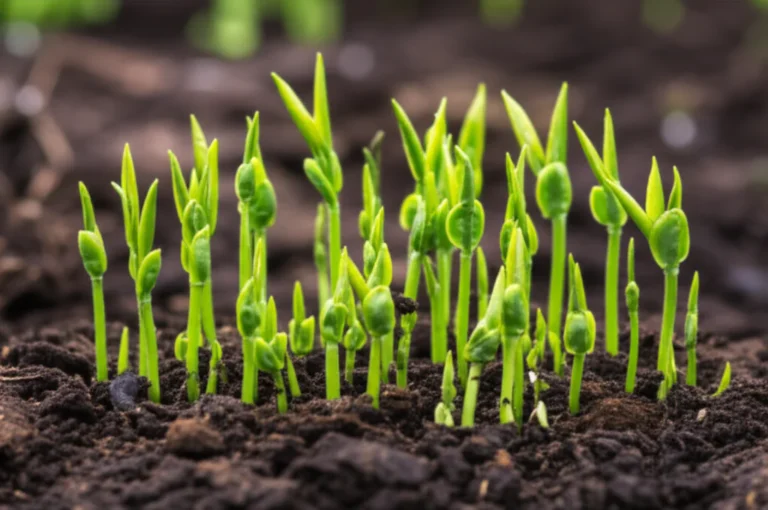
| Seeds | High | 5-7 years | Low | Very rewarding; genetic diversity. | Low germination rate; long wait; “not an exact science.” |
| Cuttings | Medium | 3-4 years | Low-Medium | Genetically identical to parent plant; faster than seed. | Can be hard to source; requires rooting skill. |
| Young Plants | Easy | 2-3 years | Medium-High | Highest success rate; already established; shortest wait time. | Most expensive option upfront. |
Our Expert Advice: For beginners, we strongly recommend starting with a 1- or 2-year-old plant. It skips the tricky germination and seedling stages and gets you much closer to your first cup of homegrown tea. The excitement of starting from seed is tempting, but the high chance of failure can be discouraging.
Reputable Suppliers: Our Top Picks for Tea Plants
Finding Camellia sinensis at your local big-box garden center can be hit-or-miss. You’ll have better luck with specialized nurseries. Here are a few highly-regarded sources in the US:
- Camellia Forest Nursery: A fantastic, knowledgeable source with a great selection of tea cultivars. They are true specialists.
- Fast-Growing-Trees.com: Often carries Camellia sinensis plants, a good option for convenience.
- Logee’s: Specializes in rare and tropical plants, and frequently has tea plants suitable for container growing.
- Etsy: You can often find small growers and nurseries selling tea plants or seeds here. Just be sure to check seller reviews!
2. Potting Up or Planting Out: Container vs. Ground Cultivation
Should your tea plant live in a pot on the patio or in the garden bed?
- ✅ Container Growing: Perfect if you have non-acidic soil, limited space, or live in a climate with cold winters (zones 6 and below). It gives you complete control over the soil and allows you to bring the plant indoors for protection.
- ✅ Ground Growing: Ideal if you live in zones 7-9 and have the right acidic soil. The plant can grow larger and will be more resilient once established.
Choosing the Right Pot: Size and Drainage Are Key
If you’re going the container route, don’t just grab any old pot.
- Material: Terracotta is a great choice because it’s porous and allows the soil to breathe, which helps prevent root rot.
- Size: Start with a pot that’s a few inches wider than the nursery pot it came in. A 5-gallon pot is a good starting size for a young plant. You’ll need to pot it up into a larger container every 2-3 years.
- Drainage, Drainage, Drainage! We can’t say it enough. The pot must have at least one large drainage hole. No exceptions!
Preparing Your Garden Bed: A Home Fit for a Tea King
If you’re planting in the ground:
- Test Your Soil: Confirm that the pH is in the 4.5-6.0 range.
- Dig the Hole: Dig a hole that is twice as wide as the plant’s root ball, but only as deep as the root ball. You want the top of the root ball to be level with the surrounding soil.
- Amend the Soil: Mix the native soil you removed with some well-aged compost or other organic matter. This improves drainage and adds nutrients.
3. Planting Techniques: Giving Your Tea Plant the Best Start
- Gently Remove: Carefully slide the plant out of its nursery pot. If the roots are tightly wound (root-bound), gently tease them apart with your fingers.
- Position: Place the plant in the center of the hole or pot.
- Backfill: Fill in the space around the root ball with your prepared soil mix, gently tamping it down to remove air pockets.
- Water Thoroughly: Give your newly planted tea a deep, long drink of water to help it settle in.
- Mulch: Apply a 2-3 inch layer of organic mulch (like pine bark, shredded leaves, or compost) around the base of the plant, but keep it a couple of inches away from the main stem to prevent rot. Mulch helps retain moisture, suppress weeds, and regulate soil temperature.
Spacing for Success: How Far Apart Should Tea Plants Be?
This depends on your goal.
- For a Hedge/Production: If you’re planting several to create a tea hedge for harvesting, space them about 1.5 to 3 feet apart.
- For a Specimen Plant: If you just want one or two beautiful shrubs in your garden, give them more room to grow to their natural shape. Space them at least 5 feet apart.
Nurturing Your Tea Garden: Ongoing Care and Maintenance
Planting is just the beginning of your relationship. Like any good friendship, your tea plant needs consistent care and attention to truly flourish. Here’s how we keep our plants happy and productive at the Growing Teas™ farm.
Pruning for Perfection: Shaping Your Tea Bush for Optimal Yield
Pruning isn’t just about giving your plant a haircut; it’s a vital conversation with your bush. You’re encouraging it to grow in a way that benefits both of you.
- Why Prune?
- Encourages Bushiness: Pruning stimulates the plant to send out more side shoots. More shoots = more branches. More branches = more of those delicious “two leaves and a bud” to harvest!
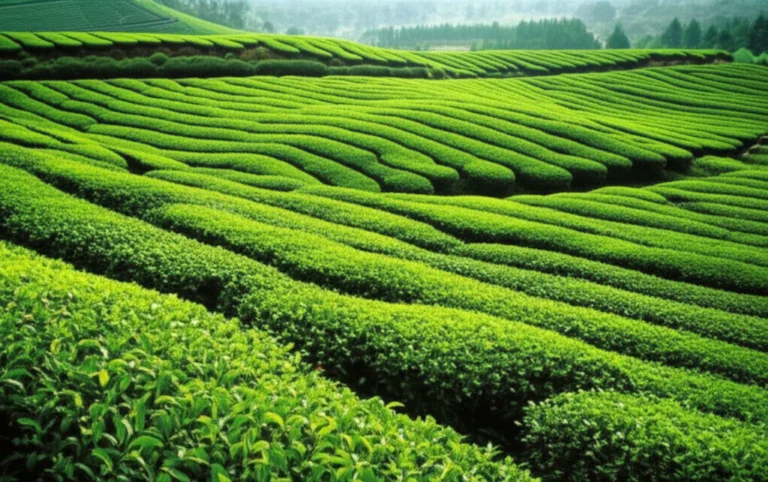
- Maintains a “Plucking Table”: In commercial fields, tea is pruned to a flat-topped hedge at a comfortable height for harvesting. You can do the same, keeping your plant at a manageable 3-4 feet tall.
- Removes Dead/Diseased Wood: Good plant hygiene keeps your tea healthy.
- When to Prune: The best time for a “hard” structural prune is in late winter or early spring when the plant is dormant. Lighter pruning and harvesting can be done throughout the growing season.
- How to Prune a Young Plant: For the first couple of years, focus on creating a strong frame. When the young plant is about a foot tall, snip off the top few inches. This will force it to branch out. Repeat this process on the new main branches to create a dense, multi-stemmed shrub.
Pest Patrol & Disease Defense: Keeping Your Tea Plants Healthy
The good news? Camellia sinensis is a pretty tough cookie and isn’t bothered by many pests or diseases, especially when grown in the right conditions. But it’s good to be prepared.
- Common Pests: Aphids, scale insects, and spider mites can sometimes be an issue, especially on stressed or indoor plants.
- Solution: Often, a strong blast of water from the hose is enough to dislodge them. For more stubborn infestations, insecticidal soap or neem oil are excellent organic options.
- Common Diseases: The biggest threat is root rot, caused by overwatering and poor drainage. Fungal issues like leaf spot or petal blight can occur in very humid conditions with poor air circulation.
- Solution: Prevention is the best cure! Ensure excellent drainage, water properly, and give your plants enough space for air to move around them.
Fertilization Finesse: When and How to Feed Your Growing Teas
We touched on this earlier, but it’s worth repeating. Feeding your tea plant is how you fuel the production of those flavorful leaves.
- Schedule: A good rule of thumb is to feed in early spring as new growth emerges, and again in early summer after the first main “flush” of harvesting.
- What to Use: Stick with a balanced, slow-release fertilizer for acid-loving plants. Organic options like compost, fish emulsion, or cottonseed meal are also fantastic.
- Don’t Overdo It: Too much fertilizer can burn the roots and lead to weak, sappy growth. Always follow the package directions. And remember: pause fertilizing a month before you harvest!
Winterizing Your Tea Plants: Protecting Against the Cold Snap ❄️
If you live in USDA Zone 7 or 8, your established in-ground plant will likely be fine. But young plants and those in colder zones need some winter TLC.
- For Potted Plants: This is easy! If you’re in Zone 6 or colder, simply bring your pot into a sheltered, unheated garage, shed, or cool porch for the winter. It doesn’t need much light as it will be dormant. Water it sparingly, just enough to keep the soil from completely drying out.
- For In-Ground Plants (Zone 7):
- Mulch Heavily: Apply a thick 4-6 inch layer of mulch (shredded leaves, straw, or pine bark) around the base of the plant after the first hard frost. This insulates the roots.
- Cover Up: If a particularly nasty cold snap is forecast, you can cover the plant with a frost blanket or even an old bedsheet overnight. Remove it in the morning so the plant can get light.
The Harvest: Plucking Your Own Precious Leaves
After years of patient nurturing, this is the moment you’ve been waiting for! The thrill of harvesting your very own tea leaves is something every tea lover should experience. It’s a delicate art, but one you can easily master.
When to Harvest: The “Flush” of Excitement
Your tea plant doesn’t grow continuously. It grows in spurts called “flushes.”
- The First Flush: The first flush of new growth in the spring is the most prized. These leaves are tender, sweet, and packed with flavor, having stored up energy all winter. This is your “premium” harvest.
- Subsequent Flushes: Depending on your climate, you may get several more flushes throughout the summer and into the fall. These leaves will still be delicious, but often a bit bolder and less delicate than the first spring leaves.
- The Rule of Three: Don’t get greedy! Do not harvest any leaves until your plant is at least three years old. It needs that time to establish a strong root system and framework. Harvesting too early can severely weaken or even kill your young plant.
The Art of Plucking: “Two Leaves and a Bud”
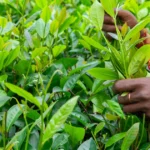
This is the mantra of tea harvesters worldwide. Look at the tip of a new, growing branch. You’ll see a small, unopened leaf bud (the pekoe) and the two youngest, brightest green leaves directly below it.
- The Technique: Using your thumbnail and forefinger, gently pinch and pluck this tender shoot from the stem. That’s it! This “imperial pluck” is the highest quality part of the plant.
- Why? These young leaves are the most tender and contain the highest concentration of the chemical compounds that give tea its unique flavor and aroma.
- What about other leaves? You can pluck lower, older leaves (the third or fourth leaf), but they will produce a stronger, more astringent, and less complex tea. It’s a fun experiment for your own DIY Tea Blending!
What About Tea Flowers? Are They Useful? 🌸
Around fall, your mature tea plant may surprise you with delicate, white, fragrant flowers with bright yellow stamens. They look a lot like small, wild roses. But are they just for show?
- The Commercial View: As Young Mountain Tea’s article points out, “Commercial tea growers discourage flowers from blooming because the blossoms redirect nutrients away from the leaf.” For maximum leaf production, you would pinch off the flower buds as they form.
- The Home Grower’s View: We say, enjoy them! They are absolutely beautiful and add ornamental value to your plant.
- Can you drink them? ✅ Yes! The flowers are not only edible but make a wonderfully unique beverage. When brewed, they produce a caffeine-free infusion that is incredibly smooth, sweet, and floral, with notes of honey and nectar. Simply pluck the fresh flowers and steep them in hot water. It’s a secret bonus harvest from your amazing tea plant!
From Leaf to Cup: Processing Your Homegrown Tea
You’ve got a basket of beautiful, fresh-plucked leaves. Now what? You can’t just steep them and call it a day. This is where the real magic happens. The incredible diversity of tea—from grassy green to robust black—all comes down to one key process: oxidation.
This might sound intimidating, but you can do it in your own kitchen with basic equipment. Let’s break down the simplest methods.
The Basics of Tea Processing: Oxidation Unveiled
Think of what happens when you cut an apple or an avocado. The flesh turns brown when exposed to air, right? That’s oxidation. The same thing happens to tea leaves.
- Green Tea: The goal is ZERO oxidation. You want to preserve that fresh, green, vegetal character.
- Black Tea: The goal is FULL oxidation. You want to encourage that browning process to develop deep, malty, fruity flavors.
- Oolong Tea: This is the tricky one. It’s PARTIALLY oxidized, sitting somewhere between green and black.
| Tea Type | Oxidation Level | Key Processing Step | Resulting Flavor Profile |
|---|---|---|---|
| Green Tea | 0% | Heating (Kill-Green): Steaming or Pan-Firing | Grassy, vegetal, nutty, fresh |
| Oolong Tea | 10-80% | Bruising & Resting: Repeatedly shaking/tumbling | Floral, fruity, creamy, complex |
| Black Tea | 100% | Rolling & Oxidizing: Breaking cell walls & resting | Malty, fruity, robust, bold |
Making Green Tea: The Gentle Art of Steaming or Pan-Firing
For a simple, homemade green tea, follow these steps. This is a great place to start your Green Tea Cultivation adventure.
- Harvest: Pluck your “two leaves and a bud.”
- Withering (Optional but Recommended): Let the leaves rest on a tray in a shady, breezy spot for 1-2 hours. This makes them less brittle and easier to work with.
- Kill-Green (The Crucial Step): You must heat the leaves quickly to deactivate the enzymes that cause oxidation.
- Pan-Firing (Chinese Method): Heat a dry wok or skillet over medium-low heat. Toss the leaves in the pan continuously for 2-3 minutes. They should wilt, turn a brighter green, and release a grassy aroma. Do not let them burn!
- Steaming (Japanese Method): Place the leaves in a steamer basket over boiling water for 60-90 seconds. They will wilt and become vibrant green.
- Rolling: While the leaves are still warm and pliable, take a small handful and roll them between your palms or on a bamboo mat. This breaks down the cell walls and shapes the leaves.
- Drying: Spread the rolled leaves in a thin layer on a baking sheet. Dry them in an oven set to its lowest temperature (around 200-225°F or 95-105°C) for 10-15 minutes, checking frequently. The leaves are done when they are completely dry and brittle.
Crafting Black Tea: The Journey Through Withering, Rolling, and Oxidizing
Ready for something bolder? Let’s embrace the browning.
- Harvest: Pluck your leaves.
- Withering: This step is essential for black tea. Spread the leaves on a tray and let them wither for 12-18 hours, until they are very limp and floppy, like old lettuce.
- Rolling: This is the most important step for oxidation. You need to be firm! Roll and twist the leaves between your hands, bruising them thoroughly. You want to break the cell walls to release the enzymes. The leaves should darken and release a fruity, floral scent.
- Oxidizing: Spread the rolled, bruised leaves in a thin layer on a tray. Cover with a damp cloth and leave in a warm, humid place (around 75-80°F or 24-27°C) for 2-4 hours. The leaves will turn from green to a reddish-copper color and develop a rich, fruity aroma. The longer you oxidize, the darker the tea.
- Drying: Dry the oxidized leaves in the oven using the same method as for green tea, until completely dry and brittle.
Experimenting with Oolong and White Tea: Advanced Home Processing
- White Tea: This is the simplest of all! It’s essentially just harvested and withered. Carefully pluck only the unopened, fuzzy silver buds (silver needles) on a dry, sunny day. Let them wither on a tray indoors until they are completely dry. That’s it!
- Oolong Tea: This is the most complex to process at home. It involves a cycle of light withering, gentle shaking/tumbling (to bruise the edges of the leaves), and resting, repeated over many hours to achieve partial oxidation before the final rolling and drying. It’s a fun challenge for the dedicated hobbyist!
Drying and Storing Your Homemade Tea: Preserving the Flavor
This step is critical! Any remaining moisture will ruin your tea. Make sure the leaves are “crispy” dry. Let them cool completely, then store them in a truly airtight container (like a metal tin or glass jar with a good seal) away from light, heat, and strong odors. Your homemade tea will be best enjoyed within 6 months.
Troubleshooting Common Tea Growing Challenges
Even with the best care, you might hit a few bumps in the road. Don’t panic! Here at Growing Teas™, we’ve seen it all. Here’s how to diagnose and fix the most common issues.
Yellowing Leaves: What’s Going Wrong?
Yellow leaves (chlorosis) are your plant’s way of screaming for help. The pattern of yellowing is the key clue.
- The Problem: Uniformly yellow leaves, especially older ones.
- The Cause: Likely a nitrogen deficiency.
- The Fix: Feed with a balanced, nitrogen-rich fertilizer for acid-loving plants.
- The Problem: Yellowing between the veins of new leaves, while the veins stay green.
- The Cause: This is a classic sign of iron chlorosis, which means the plant can’t absorb iron. The culprit is almost always soil pH that is too high (alkaline).
- The Fix: This is an urgent problem. First, test your soil pH. If it’s above 6.0, you need to acidify it. For potted plants, repotting in fresh ericaceous compost is the fastest solution. For in-ground plants, apply elemental sulfur or an iron sulfate product according to package directions.
Slow Growth: Patience, Young Padawan!
“My tea plant isn’t doing anything!” We hear this a lot.
- Remember the Timeline: Tea is not a racehorse. It’s a marathon runner. Growth can seem slow, especially in the first couple of years as it focuses on building a strong root system underground.
- Check the Basics: Is it getting enough sun? Is it getting enough water (but not too much)? Is the soil pH correct? Often, slow growth is a sign that one of the fundamental needs isn’t being met.
- Dormancy is Normal: Tea plants will go dormant or slow down significantly in the winter. Don’t expect new growth until the weather warms up in spring.
Pests and Diseases: Identifying and Treating Common Ailments
- Problem: Tiny green, black, or white insects clustered on new growth (Aphids) or hard bumps on stems (Scale).
- Solution: A strong jet of water can knock them off. For persistent issues, spray with Bonide Neem Oil or an insecticidal soap. Follow the label instructions carefully.
- Problem: Fine webbing on the undersides of leaves, with tiny moving dots (Spider Mites).
- Solution: These thrive in dry conditions. Increase humidity by misting the plant. Neem oil is also effective.
- Problem: Plant is wilting even when the soil is wet; stem is mushy at the base.
- Solution: This is likely root rot from overwatering. The prognosis is not good. You can try to save it by removing it from the pot, cutting away any black, mushy roots, and repotting in fresh, well-draining soil. Water much less frequently going forward.
Beyond the Basics: Advanced Tea Growing Insights
Once you’ve mastered the fundamentals, a whole new world of tea cultivation opens up. This is where you can truly start to express your personal style as a tea grower.
Companion Planting for Tea: Boosting Biodiversity
In nature, plants don’t grow in monocultures. Planting other beneficial plants around your tea can improve soil health, attract pollinators, and deter pests.
- Good Companions:
- Legumes (Clover, Vetch): These are nitrogen-fixers, meaning they pull nitrogen from the air and make it available in the soil, acting as a natural fertilizer for your tea.
- Mint or Marigolds: Their strong scents can help confuse and repel common pests.
- Other Acid-Lovers: Blueberries, cranberries, and heathers make great companions as they enjoy the same soil conditions.
Organic Tea Growing Practices: Nurturing Nature
Growing organically is not just about avoiding synthetic chemicals; it’s about building a healthy, living ecosystem.
- Focus on the Soil: The foundation of organic gardening is healthy soil. Feed your soil with compost, leaf mold, and other organic matter. Healthy soil grows healthy plants that are better able to resist pests and diseases on their own.
- Embrace Mulch: A thick layer of organic mulch does wonders. It feeds the soil as it breaks down, conserves water, prevents weeds, and moderates soil temperature.
- Encourage Beneficial Insects: Plant flowers that attract ladybugs, lacewings, and hoverflies. These are voracious predators of pests like aphids.
Scaling Up: From Hobby to Home Tea Farm?
What starts with one pot on a balcony can sometimes grow into a passion that takes over the backyard. If you’re thinking of planting a larger plot for more significant harvests, consider:
- Layout: Plan your rows for easy access for weeding, pruning, and harvesting. A spacing of 3 feet between plants and 4-5 feet between rows is a good starting point.
- Irrigation: For more than a few plants, hand-watering becomes a chore. A drip irrigation system on a timer is an efficient way to provide consistent moisture directly to the roots.
- Processing: Processing larger batches of tea by hand is very labor-intensive. You might want to research or build small-scale DIY equipment, like a leaf roller or a temperature-controlled drying cabinet.
Our “Growing Teas™” Personal Anecdotes & Expert Tips
We wouldn’t be experts if we hadn’t made a few mistakes along the way! Our head grower, Maria, loves to tell the story of her first tea plant. She bought a beautiful Camellia sinensis assamica, dreaming of making her own robust breakfast tea. The problem? She lives in Oregon.
She babied that plant, gave it the best acidic soil, and protected it from the wind. But every winter, it struggled. The leaves would get damaged by the frost, and it never looked happy. After two years of frustration, she finally admitted defeat and replaced it with a cold-hardy sinensis variety. That new plant took off like a rocket!
Maria’s Lesson: “It was a humbling experience! You can’t fight Mother Nature. The most important ‘skill’ in growing tea is choosing the right plant for your specific location. It solves 90% of your potential problems before you even start.”
Our Pro Tip: When you process your first batch of tea, split it in two. Try processing half as green tea and half as black tea. It is an absolutely mind-blowing experience to taste two completely different beverages and know they came from the exact same leaves, plucked on the same day. It gives you a profound appreciation for the art of the tea master.
Conclusion: So, Is Growing Tea Difficult? Our Final Verdict! ✅
After steeping ourselves in decades of tea-growing wisdom here at Growing Teas™, we can confidently say: growing tea is absolutely doable—and deeply rewarding—if you approach it with patience, respect for the plant’s needs, and a willingness to learn.
Is it difficult? ❌ Not inherently. The main hurdles are matching the right tea variety to your climate, providing acidic, well-draining soil, and consistent care. If you nail these basics, your tea plant will reward you with years—decades!—of fresh, delicious leaves.
Remember Maria’s story? Choosing the wrong variety for her Oregon climate caused frustration and heartbreak. That’s the key takeaway: choose your tea plant wisely, and you’re already halfway there.
From seed to sip, the journey is a blend of science, art, and a little bit of magic. Whether you’re harvesting your first “two leaves and a bud” or experimenting with home processing to craft your own green or black tea, the experience connects you to a global tradition thousands of years old.
So go ahead, take the plunge! Your perfect cup of homegrown tea awaits. 🍵
Recommended Links: Dive Deeper into the World of Tea 🔗
Ready to start your own tea-growing adventure or deepen your knowledge? Check out these trusted products and resources:
-
Levington Peat-Free Ericaceous Compost (50 litres):
Amazon | Walmart | Levington Official Website -
Miracle-Gro Azalea, Camellia & Rhododendron Soluble Plant Food (1kg):
Amazon | Walmart | Miracle-Gro Official Website -
Books to Deepen Your Tea Growing and Processing Knowledge:
-
Tea Plants & Seeds:
FAQ: Your Burning Tea Growing Questions Answered 🔥
What are the basic requirements for growing tea at home?
Growing tea at home requires acidic, well-draining soil (pH 4.5-6.0), consistent moisture without waterlogging, and adequate sunlight—ideally full sun to partial shade. The plant thrives in moderate temperatures (60-85°F / 15-30°C) and appreciates humidity. You’ll also want to provide good airflow to prevent fungal diseases and nutrient-rich soil, feeding with fertilizers designed for acid-loving plants. For detailed guidance, see our sections on soil secrets and water wisdom.
How long does it take for a tea plant to mature and be ready for harvest?
Tea plants typically take about 3 years to mature enough for their first meaningful harvest. Early harvesting can weaken young plants and reduce their lifespan. After three years, you can start plucking the prized “two leaves and a bud” from new growth flushes. Mature plants can remain productive for decades, sometimes over 50 years, with proper care.
What are the most common challenges faced when growing tea, and how can they be overcome?
The most common challenges include:
- Soil pH issues: Tea plants need acidic soil. If your soil is alkaline, leaves may yellow due to nutrient lockout. Solution: test soil pH and amend with sulfur or use ericaceous compost.
- Overwatering and root rot: Tea hates soggy roots. Ensure excellent drainage and water only when soil is dry to the touch.
- Climate mismatch: Choosing the wrong tea variety for your climate (e.g., tropical assamica in a cool zone) leads to poor growth or death. Solution: select Camellia sinensis var. sinensis for temperate zones.
- Pests: Aphids, scale, and spider mites can appear but are manageable with water sprays, neem oil, or insecticidal soaps.
- Slow growth: Patience is key. Tea plants grow slowly, especially in the first years.
Can tea plants be grown indoors, or do they require a specific outdoor environment to thrive?
Yes, tea plants can be grown indoors, especially in cooler climates or where outdoor conditions are unsuitable. Indoor tea plants need:
- Bright, indirect sunlight or supplemental grow lights (ideally 12-16 hours daily).
- Consistent humidity, which can be increased with misting or pebble trays.
- Well-draining acidic potting mix.
- Regular watering without waterlogging.
However, indoor plants may grow more slowly and produce fewer leaves than outdoor ones. They also require occasional pruning and pest monitoring. For best results, bring potted tea plants outdoors during warmer months to soak up natural light and fresh air.
How do I process tea leaves at home to make different types of tea?
Processing depends on the tea type:
- Green tea: Minimal oxidation; heat leaves quickly by steaming or pan-firing, then dry.
- Black tea: Full oxidation; wither leaves, roll to bruise, oxidize until dark, then dry.
- Oolong tea: Partial oxidation; involves repeated bruising and resting cycles.
- White tea: Simply wither and dry young buds with minimal handling.
You can experiment with small batches at home using simple kitchen tools. Our detailed guide in From Leaf to Cup walks you through each step.
Can tea flowers be used, and do they affect leaf production?
Tea flowers are edible and can be brewed into a fragrant, caffeine-free tea with a sweet, floral flavor. Commercial growers often remove flowers to direct the plant’s energy toward leaf production, but for home growers, allowing flowers adds ornamental beauty and a bonus harvest. If your goal is maximum leaf yield, pinch off flower buds early.
Reference Links: Our Sources and Further Reading 📚
- Young Mountain Tea: Grow Your Own Tea Plant — A practical, experienced grower’s perspective on tea cultivation.
- LoveTheGarden: How To Grow Tea — UK-based guide with detailed planting and care tips.
- Camellia Forest Nursery — Specialist tea plant nursery.
- Miracle-Gro Official Website — Fertilizer products for acid-loving plants.
- Levington Official Website — Ericaceous compost products.
- USDA Plant Hardiness Zone Map — Check your climate zone for tea suitability.
- The Tea Association of the USA — Industry insights and tea facts.
For more on tea history, cultivation, and blending, explore our History of Tea and DIY Tea Blending categories at Growing Teas™.
We hope this comprehensive guide has brewed up your confidence and curiosity to start growing your own tea. Remember, every great cup begins with a single leaf—and a little bit of love. Happy growing! 🍃🍵