Support our educational content for free when you purchase through links on our site. Learn more
🌱 7 Steps to Clone Tea Plants: The Ultimate Guide (2026)

Ever wondered how tea masters ensure every leaf in a field tastes exactly the same? It’s not magic; it’s cloning. While growing a tea plant from seed is a fun genetic gamble, propagating tea plants by cutings is the secret weapon of professional growers and serious home enthusiasts alike. At Growing Teas™, we’ve seen beginners turn a single branch into a thriving, uniform tea garden in just a few months, and we’re here to show you exactly how to do it without the heartbreak of rot or failure.
In this comprehensive guide, we’re skipping the fluff and diving straight into the semi-hardwood cutting technique that guarantees your new plants are 10% genetic clones of your favorite mother plant. Whether you’re trying to replicate a rare Assam variety or simply want a bushy Camellia sinensis for your patio, we’ll walk you through the precise steps, from selecting the perfect stem to creating a humidity dome that defies the odds. We’ll even reveal the “one-leaf” trick that experts use to maximize success rates and explain why your kitchen scissors are the enemy of a good root system.
Ready to stop guessing and start growing? By the end of this article, you’ll have the confidence to propagate dozens of tea plants, ensuring your future cup of tea is as consistent and delicious as the one that inspired you. Let’s turn that single branch into a legacy.
Key Takeaways
- Clones, Not Gamble: Propagating by cutings ensures your new plants are exact genetic copies of the mother, preserving specific flavor profiles that seed-grown plants cannot guarantee.
- Timing is Critical: The semi-hardwood stage (where the stem is firm but not fully wody) is the golden window for successful rooting, typically occurring in late spring or early summer.
- Humidity is Non-Negotiable: Without a humidity dome or misting system, cutings will desicate and die; maintaining 80-90% humidity is the single most important factor for survival.
- Sterility Prevents Rot: Using sterile tools and a well-draining medium (like peat moss and perlite) is essential to prevent fungal infections that cause stem blackening.
- Rooting Hormone Helps: While not strictly mandatory for all varieties, applying rooting hormone significantly speeds up root development and increases success rates for Camellia sinensis.
Table of Contents
- ⚡️ Quick Tips and Facts
- 📜 A Brief History of Cloning the Sacred Camellia
- 🌱 Why Choose Cutings Over Seeds? The Genetic Advantage
- 🛠️ Essential Tools and Supplies for Successful Tea Propagation
- 📋 The Ultimate Step-by-Step Guide to Propagating Tea Plants from Cutings
- Selecting the Perfect Semi-Hardwood Cutting
- Preparing the Cutting: The Art of the Clean Cut
- The Rooting Hormone Debate: To Dip or Not to Dip?
- Crafting the Ideal Rooting Medium for Camellia Sinensis
- Creating the Perfect Humidity Dome Environment
- Watering and Light: The Delicate Balance
- Monitoring Root Development and Transplanting Success
- 🌡️ Troubleshooting Common Propagation Pitfalls and Rot Prevention
- 🌿 Air Layering vs. Cutings: Which Method Wins for Tea Plants?
- 🏡 Growing Your Cloned Tea Plant in Containers vs. Ground
- ✂️ Pruning and Training Your New Propagated Tea Bush
- 🌍 Global Varieties: Propagating Assam, Darjeling, and Chinese Cultivars
- 🧪 The Science Behind Rooting: Auxins and Hormonal Magic
- 📊 Comparison Table: Seed Germination vs. Cutting Propagation
- ❓ Frequently Asked Questions About Tea Plant Cloning
- 🏆 Conclusion
- 🔗 Recommended Links
- 📚 Reference Links
⚡️ Quick Tips and Facts
Before we dive into the nitty-gritty of cloning your favorite Camellia sinensis, let’s hit the ground running with some golden nugets of wisdom from our team at Growing Teas™. We’ve seen thousands of cutings, and let’s just say, not all of them made it to the “cup” stage. Here is what you need to know right now:
- Cloning is King: Unlike seeds, which are genetic roll-of-the-dice (only retaining 50% of the mother’s DNA), cutings are clones. They retain 10% of the genetic makeup, ensuring your new plant tastes exactly like the tea you love. 🧬
- The “Sweet Spot” Timing: The absolute best time to take cutings is when the new growth has semi-hardened. This means the stem is no longer soft and floppy (softwood) but hasn’t turned into a wody stick (hardwood) yet. Think of it like a green bean that’s just starting to get firm. 🌿
- Leaf Count Matters: Don’t be greedy! While it’s tempting to keep a massive branch, the ideal cutting has 3 to 4 leaves. Too many leaves drain the cutting’s energy before roots can form. We’ll explain the “why” later, but trust us on this one.
- Humidity is Life: Tea cutings are desperate for moisture. Without a humidity dome or a misting system, they will wilt and die within days. It’s not just a suggestion; it’s a survival requirement. 💧
- Rooting Hormone isn’t Magic, but it Helps: While some plants root easily, Camellia sinensis often benefits from a dip in rooting hormone to speed up the process and prevent rot.
Pro Tip from the Team: We once tried to propagate a rare Assam variety in a dry apartment without a dome. The result? A very sad, crispy stick. Never again!
For more on our philosophy of Cultivate Your Own Tea, check out our Growing Teas™ Story.
📜 A Brief History of Cloning the Sacred Camellia

You might think cloning tea plants is a modern scientific marvel, but the art of vegetative propagation has deep roots in tea history. For centuries, tea was grown from seeds, leading to the “Zairai” or native varieties found in old gardens. These plants were tough, resilient, and uniquely adapted to their local teroir, but they were also wildly inconsistent. One plant might produce a delicate, floral leaf, while its neighbor produced a bitter, astringent one.
In the early 20th century, particularly in Japan and China, tea masters realized that to produce the consistent, high-quality tea demanded by the market, they needed uniformity. This led to the widespread adoption of clonal propagation.
According to the Japan Green Tea Association, propagation by cutings now accounts for approximately 9% of total tea production in Japan, with seeds making up a mere 1%. As they note, “Nowadays planting from cutings is more common, as cutings keep 10% of the genetic information of the tea mother plant – they are a clone.”
This shift allowed for the selection of specific cultivars like Yabukita, known for its balanced taste and cold resistance, or Okumidori, prized for its intense umami. By cloning these superior plants, farmers could ensure that every bush in the field harvested at the exact same time, making mechanical harvesting possible and guaranteeing a consistent flavor profile in your cup.
But why did the West lag behind? In the United States and Europe, tea was often grown as an ornamental curiosity rather than a cash crop. It wasn’t until the rise of the “home tea grower” movement that enthusiasts began experimenting with cloning their own backyard bushes to replicate the specific flavors of their favorite teas.
🌱 Why Choose Cutings Over Seeds? The Genetic Advantage
So, you have a beautiful tea plant in your garden. You seeds forming. Should you plant them? Or should you take a cutting? This is the million-dollar question (or at least the million-cup question).
The Seed Gamble 🎲
When you grow a tea plant from seed, you are essentially playing a genetic lottery.
- Genetic Variability: A seedling inherits only 50% of its DNA from the mother plant. The other 50% comes from the pollen donor (which could be a random neighbor).
- Inconsistency: You might get a plant that produces amazing tea, or you might get a plant that tastes like grass and dirt.
- Time: Seed-grown plants often take longer to mature and may not produce a harvestable crop for several years.
- Growth Habits: Seedlings grow unevenly, making pruning and harvesting a nightmare.
The Cutting Certainty ✅
Taking a cutting is like hitting the genetic jackpot.
- Exact Clone: The new plant is a genetic twin of the mother. If the mother produces a sweet, low-astringency leaf, the cutting will too.
- Predictability: You know exactly what you are getting.
- Speed: Cutings often root faster and establish themselves more quickly than seedlings, leading to an earlier harvest.
- Uniformity: Perfect for creating a neat, manageable tea garden where all plants are the same height and harvest at the same time.
The Verdict: If you want to replicate a specific flavor profile (like a specific Darjeling or Sencha cultivar), cutings are the only way to go. If you just want to see if you can grow a tea plant and don’t care about the taste, seeds are fun. But for the serious home grower? Cutings win every time.
🛠️ Essential Tools and Supplies for Successful Tea Propagation
You can’t build a house with a spoon, and you can’t propagate tea plants with a dull pair of kitchen scissors. To ensure your cutings have the best chance of survival, you need the right gear. We’ve tested everything from cheap craft knives to professional forestry tools, and here is what actually works.
The Non-Negotiables
- Sharp, Sterile Pruners: This is critical. A jaged cut crushes the plant’s vascular system, inviting rot and disease.
Our Top Pick: The Felco 310 pruners. These are the gold standard for tea propagation. They are incredibly sharp, ergonomic, and designed for precision cuts on wody stems. The Table Rock Tea Company specifically recommends these for their “most important video” on the subject.
Alternative: High-quality bypass hand pruners (like Fiskars or Corona) work well if they are razor-sharp. - Rooting Hormone: While some plants root without it, Camellia sinensis benefits greatly from a boost.
Recommended: Hormex Rooting Hormone Powder or Clonex Gel. These contain IBA (Indole-3-butyric acid), which stimulates root growth. - Sterile Rooting Medium: Regular garden soil is a no-go. It’s too heavy and holds too much water, leading to rot.
Best Mix: A 50/50 mix of peat moss and perlite, or conut coir and vermiculite. - Humidity Dome: A clear plastic dome or a cut-off plastic bottle to create a mini-greenhouse effect.
- Clean Pots: Small 2-4 inch pots with drainage holes.
Optional but Helpful
- Mist Bottle: For keeping the leaves hydrated without drowning the roots.
- Heat Mat: To keep the rooting medium at a consistent 70-75°F (21-24°C).
- Rubing Alcohol: To sterilize your tools between cuts.
👉 Shop Pruning Tools on:
- Felco 310: Amazon | Walmart | Felco Official
👉 Shop Rooting Hormone on:
- Hormex Rooting Powder: Amazon | Walmart | Gardeners Supply
📋 The Ultimate Step-by-Step Guide to Propagating Tea Plants from Cutings
Ready to get your hands dirty? This is the moment you’ve been waiting for. We’ve broken down the process into seven foolproof steps. Follow these, and you’ll be sipping your own homegrown tea in no time.
1. Selecting the Perfect Semi-Hardwood Cutting
Timing is everything. You want to look for a stem that is in the transition phase.
- What to look for: The stem should be green at the tip but starting to turn brown and wody at the base. It should snap with a crisp sound, not bend like a rubber band.
- Where to cut: Choose a healthy, vigorous branch. Avoid any branches that look diseased, yellowed, or damaged.
- The “One Leaf” Rule: As noted in the Table Rock Tea Company video, “the way you transplant tea is one leaf at a time.” This means you want a cutting that has a few leaves but isn’t a massive branch.
2. Preparing the Cutting: The Art of the Clean Cut
This is where your Felco 310 pruners earn their keep.
- The Cut: Make a clean, diagonal cut about 3 to 4 inches below the top of the branch. The diagonal cut increases the surface area for rooting.
- Leaf Trimming: Remove the bottom leaves, leaving only the top 3 to 4 leaves.
Why? If you leave too many leaves (like the 10+ leaves mentioned in the “My First Tea Plant” article), the cutting will struggle to support them while trying to grow roots. It’s a resource drain!
Pro Tip: If the remaining leaves are very large, you can trim them in half horizontally. This reduces water loss through transpiration without sacrificing too much photosynthesis.
3. The Rooting Hormone Debate: To Dip or Not to Dip?
Some purists argue that nature knows best, but we at Growing Teas™ believe in a little help.
- The Process: Dip the cut end of the stem into water, then into the rooting hormone powder. Tap off the excess.
- Why it works: The hormone stimulates the cells at the cut site to differentiate into root cells. It also creates a protective barrier against soil-borne pathogens.
- The Verdict: Yes, use it. It significantly increases your success rate and speeds up the process.
4. Crafting the Ideal Rooting Medium for Camellia Sinensis
Do not use garden soil! It’s too dense and will suffocate your cutting.
- The Mix: Combine 50% peat moss (or coconut coir) with 50% perlite.
- Preparation: Moisten the mix until it feels like a wrung-out sponge. It should be damp, not sogy.
- Planting: Make a hole in the medium with a pencil or stick, insert the cutting, and gently firm the soil around it. This ensures good contact between the stem and the medium.
5. Creating the Perfect Humidity Dome Environment
This is the make-or-break step. Tea cutings have no roots to drink water, so they rely on absorbing moisture through their leaves.
- The Dome: Place a clear plastic bag or a cut-off plastic bottle over the pot. Ensure the plastic doesn’t touch the leaves (use sticks to prop it up if necessary).
- Ventilation: Open the dome for 10-15 minutes a day to prevent mold and allow fresh air in.
- Location: Place the pot in a spot with bright, indirect light. Direct sun will cook your cutings inside the dome.
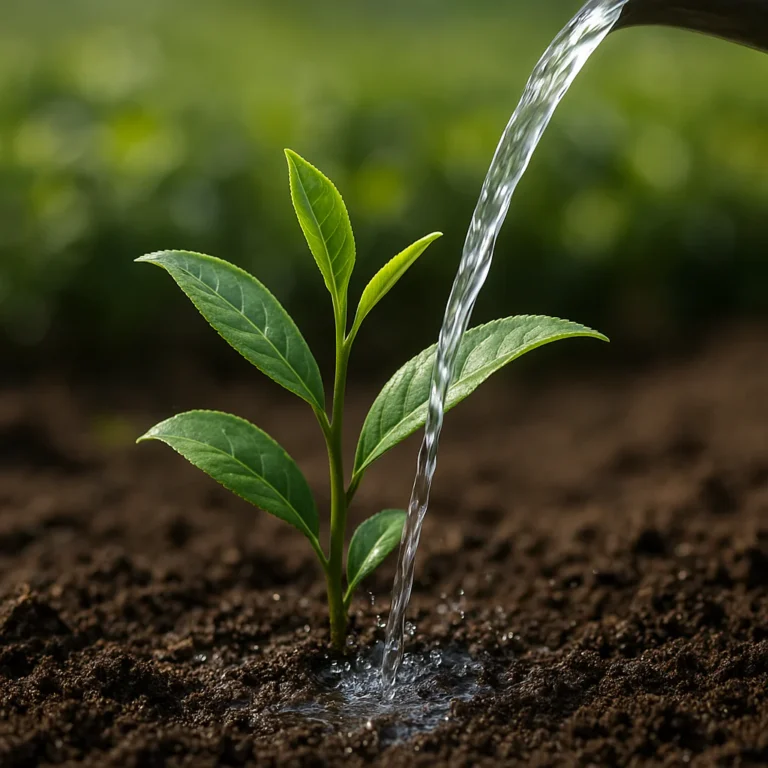
6. Watering and Light: The Delicate Balance
- Watering: Keep the medium consistently moist but never waterlogged. Check daily. If the leaves look wilted, mist them lightly.
- Light: Bright, filtered light is ideal. A north-facing window or a spot under a shade cloth works perfectly.
- Temperature: Aim for a consistent temperature between 70°F and 75°F (21°C – 24°C).
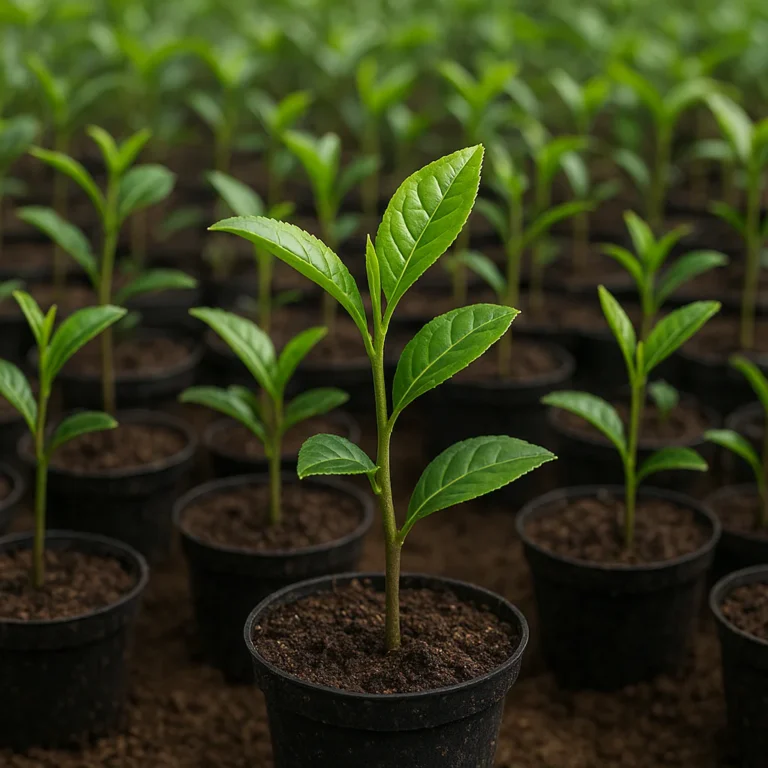
7. Monitoring Root Development and Transplanting Success
Patience is a virtue in tea growing.
- The Timeline: Roots usually start forming in 4 to 8 weeks, but it can take up to 3 months.
- The Test: Gently tug on the cutting. If you feel resistance, roots have formed!
- Transplanting: Once you have a good root system, you can remove the dome gradually over a week to aclimate the plant to lower humidity. Then, transplant it into a larger pot with a well-draining poting mix.
Curiosity Check: You might be wondering, “What if I don’t have a humidity dome?” We’ll cover some clever DIY alternatives in the troubleshooting section, but trust us, a dome is the safest bet for beginners.
🌡️ Troubleshooting Common Propagation Pitfalls and Rot Prevention
Even with the best intentions, things can go wrong. Here are the most common issues we’ve seen at Growing Teas™ and how to fix them.
The “Black Rot” Nightmare ❌
Symptom: The stem turns black and mushy at the soil line.
Cause: Overwatering, poor drainage, or lack of air circulation.
Solution:
- Remove the affected cutting immediately.
- Ensure your medium is well-draining (add more perlite).
- Increase ventilation in your humidity dome.
- Use a sterile medium to prevent fungal spores.
The “Wilting” Dilemma 🥀
Symptom: Leaves drop and turn brown, even though the soil is wet.
Cause: The cutting has lost too much water through transpiration.
Solution:
- Check your humidity dome. Is it sealed tight?
- Mist the leaves more frequently.
- Ensure the light isn’t too intense.
The “No Roots” Frustration 🚫
Symptom: After 3 months, the cutting is still alive but has no roots.
Cause: Temperature too low, lack of rooting hormone, or the cutting was taken from a too-wody stem.
Solution:
- Move to a warmer location or use a heat mat.
- Ensure you are taking semi-hardwood cutings, not fully hardened wood.
- Be patient! Some varieties take longer than others.
Did you know? In the video by Table Rock Tea Company, they mention a “1 in 1,0 anomaly” called the Ebbie Tea. This plant is so unique that it has made horticulturists wep. If you are lucky enough to propagate a rare variety, extra care is needed, as these genetic anomalies can be more sensitive to environmental stress.
🌿 Air Layering vs. Cutings: Which Method Wins for Tea Plants?
While cutings are the most common method, there is another technique called air layering. How does it compare?
Air Layering Explained
Air layering involves wounding a stem on the mother plant, applying rooting hormone, wrapping it in moist sphagnum moss, and covering it with plastic. Roots grow while the stem is still attached to the mother plant.
Comparison Table: Cutings vs. Air Layering
| Feature | Cutings | Air Layering |
|---|---|---|
| Success Rate | Moderate to High (with care) | Very High |
| Time to Roots | 4-12 weeks | 6-12 weeks |
| Plant Size | Small, manageable | Large, heavy |
| Risk to Mother | Low (just a branch removed) | Moderate (stress on branch) |
| Equipment Needed | Minimal (pruners, dome) | Moderate (moss, plastic, ties) |
| Best For | Mass propagation, small spaces | Rare varieties, large plants |
The Verdict: For most home growers, cutings are the way to go. They are easier to manage, require less space, and you can propagate dozens of plants from a single branch. Air layering is excellent for preserving a specific, large branch of a rare cultivar without risking the loss of the mother plant, but it’s more labor-intensive.
🏡 Growing Your Cloned Tea Plant in Containers vs. Ground
Once your cutings have rooted, where should they live?
Container Growing 🪴
- Pros: Perfect for small spaces, patios, and cold climates. You can move the plant indoors during winter.
- Cons: Requires more frequent watering and fertilizing. Roots can become pot-bound.
- Best For: Beginners, renters, and those in USDA zones 8 and below.
Ground Planting 🌳
- Pros: Less watering, more stable temperatures, and the plant can grow larger.
- Cons: Not suitable for cold climates (unless mulched heavily). Harder to control pests.
- Best For: Gardeners in USDA zones 9-1 with well-draining soil.
Pro Tip: If you live in a cold climate, container growing is your best friend. You can bring your tea plant inside when temperatures drop below 20°F (-6°C).
✂️ Pruning and Training Your New Propagated Tea Bush
Now that you have a rooted plant, you want it to be bushy and productive. Tea plants respond beautifully to pruning.
- The First Cut: When the plant reaches about 12 inches tall, pinch off the top set of leaves. This encourages lateral branching.
- Regular Maintenance: Prune the plant regularly to maintain a shape that is easy to harvest. A “bush” shape is ideal for home growers.
- Harvesting: Once the plant is established (usually after 2-3 years), you can start harvesting the top two leaves and a bud.
Fun Fact: In Japan, tea fields are often pruned to a flat “table” shape to facilitate mechanical harvesting. At home, you can mimic this or let your plant grow more naturally.
🌍 Global Varieties: Propagating Assam, Darjeling, and Chinese Cultivars
Not all tea plants are created equal. Different varieties have different rooting habits.
- Assamica (Indian/Assam): These are large-leafed, vigorous plants. They root relatively easily and are great for beginners. They thrive in warm, humid climates.
- Sinensis (Chinese): These are smaller-leafed, hardier plants. They can tolerate colder temperatures but may root slightly slower than Assamica.
- Hybrids: Many modern cultivars are hybrids of these two species.
Tip: If you are propagating a specific cultivar like Yabukita (Japanese Sencha) or Assam, research its specific needs. Some varieties are more sensitive to humidity changes than others.
🧪 The Science Behind Rooting: Auxins and Hormonal Magic
Why does a cutting grow roots? It’s all about auxins.
- What are Auxins?: These are plant hormones that regulate growth. In a cutting, auxins accumulate at the base of the stem, stimulating cell division and root formation.
- The Role of Light: Light affects auxin distribution. Too much light can degrade auxins, which is why indirect light is best.
- The Role of Temperature: Warmth speeds up the metabolic processes that produce auxins. This is why a heat mat can be so effective.
By using rooting hormone, we are essentially giving the plant a massive dose of auxins, jumpstarting the rooting process.
📊 Comparison Table: Seed Germination vs. Cutting Propagation
Let’s summarize the differences one last time.
| Feature | Seed Germination | Cutting Propagation |
|---|---|---|
| Genetic Identity | 50% of Mother (Variable) | 10% of Mother (Clone) |
| Time to Harvest | 3-5 years | 2-3 years |
| Consistency | Low (Variable flavor) | High (Consistent flavor) |
| Difficulty | Moderate | Moderate (requires humidity) |
| Cost | Low (free seeds) | Low (free cutings) |
| Best Use | Breding, ornamental | Commercial, flavor replication |
❓ Frequently Asked Questions About Tea Plant Cloning
How do you care for tea plant cutings after planting to ensure growth?
Keep the medium consistently moist but not sogy. Maintain high humidity (80-90%) using a dome. Provide bright, indirect light and keep temperatures between 70-75°F. Mist the leaves daily if they look dry.
What are common problems when propagating tea plants by cutings?
The most common issues are rot (due to overwatering), wilting (due to low humidity), and failure to root (due to incorrect stem maturity or temperature).
Can tea plants be propagated from softwood or hardwood cutings?
Tea plants are best propagated from semi-hardwood cutings. Softwood cutings are too delicate and prone to rot, while hardwood cutings are too slow to root.
What type of soil is ideal for rooting tea plant cutings?
A sterile, well-draining mix like 50% peat moss and 50% perlite or conut coir and vermiculite. Avoid garden soil.
What is the best time of year to propagate tea plants by cutings?
The best time is late spring to early summer when the new growth is semi-hardened. In warmer climates, you can also try in early autumn.
Can tea plants be propagated by cutings indoors?
Yes! In fact, indoor propagation is often more successful because you can control humidity and temperature. Just ensure you have a good light source.
What are the common challenges in tea plant propagation by cutings?
Maintaining the right balance of humidity and moisture is the biggest challenge. Too much water leads to rot; too little leads to wilting.
How long does it take for tea plant cutings to develop roots?
Typically 4 to 8 weeks, but it can take up to 3 months depending on the variety and conditions.
How do you prepare tea plant cutings for successful rooting?
Make a clean diagonal cut, remove lower leaves, leave 3-4 top leaves, and dip the cut end in rooting hormone.
What care practices are needed after planting tea cutings?
Monitor humidity, mist leaves, keep soil moist, and provide indirect light. Once rooted, gradually aclimate the plant to lower humidity.
Can tea plant cutings be propagated indoors successfully?
Absolutely. Indoor environments often provide the stable humidity and temperature needed for success.
What are common problems faced during tea plant propagation by cutings?
Rot, wilting, and failure to root are the most common. These are usually due to improper moisture levels or temperature.
What type of soil is ideal for propagating tea plants from cutings?
A sterile, well-draining mix like peat moss and perlite.
How do you prepare tea plant cutings for successful rooting?
Clean cut, remove lower leaves, leave 3-4 top leaves, dip in rooting hormone.
What is the best time of year for tea plant propagation by cutings?
Late spring to early summer when growth is semi-hardened.
🏆 Conclusion

Propagating tea plants from cutings is a rewarding journey that connects you directly to the history and science of tea. By choosing cutings over seeds, you ensure that your new plants are exact clones of the mother, preserving the unique flavor profiles you love. While the process requires attention to detail—especially regarding humidity and stem maturity—the results are well worth the effort.
Whether you are growing a rare Ebbie Tea anomaly or a common Yabukita, the principles remain the same: use sharp tools, sterile medium, and a little help from rooting hormone. Don’t be afraid to experiment, and remember that even if a cutting fails, you’ve learned something valuable for the next attempt.
Our Final Recommendation: If you are serious about growing your own tea, start with cutings. It’s the most reliable way to get a consistent, high-quality harvest. And if you’re feeling adventurous, try air layering for your rarest specimens.
Did we answer your question? If you’re still wondering about the “1 in 1,0 anomaly” or how to handle the Ebbie Tea, remember that patience and observation are your best tools. Every tea plant is unique, and with the right care, you’ll be brewing your own cup of history soon.
🔗 Recommended Links
👉 Shop Pruning Tools:
- Felco 310 Pruners: Amazon | Walmart | Felco Official
👉 Shop Rooting Hormone:
- Hormex Rooting Powder: Amazon | Walmart | Gardeners Supply
👉 Shop Poting Mix:
Books on Tea Growing:
- Grow Your Own Tea: Amazon
📚 Reference Links
- Table Rock Tea Company: Table Rock Tea Company Website
- Japan Green Tea Association: Tea Plant Propagation in Japan
- My Japanese Green Tea: I Propagated My First Tea Plant
- Growing Teas™: Green Tea Cultivation
- Growing Teas™: Herbal Tea Planting
- Growing Teas™: Organic Farming Techniques
- Growing Teas™: Health Benefits of Tea
- Growing Teas™: DIY Tea Blending
- Growing Teas™: Growing Teas Story