Support our educational content for free when you purchase through links on our site. Learn more
🍃 How to Harvest & Process Tea at Home: The Ultimate 2026 Guide

Ever wondered if that bush in your backyard could replace your daily Starbucks run? The answer is a resounding yes, but with a twist: the journey from a fresh, dewy leaf to a fragrant cup of tea is a delicate dance of chemistry, timing, and patience. At Growing Teas™, we’ve turned our kitchen into a mini-factory, and let’s just say our first batch of “black tea” tasted suspiciously like wet cardboard. But after mastering the art of the two-leaves-and-a-bud pluck and learning to control oxidation like a pro, we now brew cups that rival the finest estates. In this guide, we’ll reveal the exact steps to transform your garden harvest into White, Green, Black, or Oolong tea, including the secret “kill-green” technique that prevents bitterness and the precise drying temperatures that make all the difference.
Key Takeaways
- Harvest Timing is Everything: The flavor profile is determined by when you pick; aim for the “two leaves and a bud” standard during the morning flush for the best balance of sweetness and aroma.
- Processing Defines the Tea: The plant is the same, but the processing method (withering, rolling, oxidizing, and drying) dictates whether you end up with delicate White tea or robust Black tea.
- Moisture Control is Critical: Successful home processing relies on reducing moisture to 60% during withering and ensuring leaves are bone-dry and brittle before storage to prevent mold.
- Patience Yields Flavor: Rushing the oxidation or drying stages is the #1 cause of bitter, flat tea; low and slow is the golden rule for home artisans.
Table of Contents
- ⚡️ Quick Tips and Facts
- 🌱 From Ancient Roots to Your Backyard: A Brief History of Home Tea Cultivation
- 🌿 The Ultimate Guide to Harvesting Tea Leaves: Timing, Techniques, and Tools
- 1. Identifying the Perfect Plucking Window: Understanding Flushes and Growth Stages
- 2. Mastering the Art of the Pluck: Two Leaves and a Bud vs. Coarser Harvests
- 3. Essential Tools for the Home Tea Harvester: Scissors, Gloves, and Baskets
- 4. Avoiding Common Harvesting Mistakes That Ruin Flavor
- 🔥 The Science of Processing: Turning Fresh Leaves into Cupable Tea
- 1. Withering: The Critical First Step for Moisture Control
- 2. Rolling and Bruising: Releasing the Essential Oils and Enzymes
- 3. Oxidation Levels: How to Control Fermentation for Different Tea Types
- 4. Drying and Firing: Locking in the Flavor and Stopping the Process
- 🍵 Crafting Specific Tea Varieties at Home: A Step-by-Step Breakdown
- How to Make Delicate White Tea from Your Garden
- The Home Brewer’s Guide to Fresh Green Tea Processing
- Creating Robust Black Tea: Full Oxidation Techniques for Beginners
- Experimenting with Oolong: Partial Oxidation and Shaking Methods
- 🏡 Troubleshooting Your Home Tea Project: Why Your Leaves Might Taste Bitter or Flat
- 📊 Comparison Table: Processing Methods for White, Green, Black, and Oolong Teas
- 💡 Expert Insights: Anecdotes from the Growing Teas™ Team
- 🏁 Conclusion
- 🔗 Recommended Links
- ❓ FAQ: Frequently Asked Questions About Harvesting and Processing Tea
- 📚 Reference Links
⚡️ Quick Tips and Facts
Before we dive into the muddy, leafy, and slightly obsessive world of home tea processing, let’s get the hard truths out of the way. You might think you can just pluck a leaf, toss it in the oven, and call it a day. Spoiler alert: That usually results in a cup that tastes like wet cardboard and regret.
Here is the cheat sheet for your journey from backyard gardener to home tea artisan:
- The Magic Ratio: Fresh tea leaves are mostly water. When processed, they lose about 80% of their weight. That means you need a massive handful of fresh leaves to get just one 6-ounce cup of dried tea. Don’t panic if your harvest looks small; it’s normal!
- The “Camellia” Confusion: Not every plant with “tea” in the name is safe to drink. You must have Camellia sinensis. If you have a “Tea Tree” (Melaleuca) or a decorative Camellia, do not brew them. They are for looking pretty, not for sipping.
- The Flavor Switch: The difference between Green, Black, and Oolong tea isn’t the plant; it’s the processing. A single leaf can become any of these depending on how you treat it.
- Hygiene is Non-Negotiable: Your kitchen is a factory now. Clean, dedicated equipment is mandatory. If you used that same bowl to mix salad dressing yesterday, your tea will taste like ranch dressing. Yuck.
- Storage Secrets: Once dried, tea is a sponge for odors. Store it in airtight containers away from light. Properly stored, your homebrew can last 6–12 months.
Why does my tea taste bitter?
It’s likely a processing error, not a brewing one. If you didn’t stop the oxidation at the right time, or if you dried it too slowly, enzymes turned your delicate catechins into harsh compounds. We’ll solve this mystery in the Troubleshooting section later!
For those eager to start their journey, check out our guide on Growing Teas to see how we cultivate our own plants from seed to cup.
🌱 From Ancient Roots to Your Backyard: A Brief History of Home Tea Cultivation

You might think growing tea is a modern “farm-to-table” fad, but you’d be wrong. The story of tea begins over 5,000 years ago in China, where Emperor Shen Nung supposedly discovered it when leaves blew into his boiling water. Fast forward to the British Empire, and tea became the fuel of an industrial revolution. But here at Growing Teas™, we believe the most exciting chapter is the one you’re about to write: The Home Cultivation Era.
The Shift from Industrial to Personal
For centuries, tea processing was a highly guarded secret, reserved for large estates in Darjeeling, Assam, or Uji. The machinery was massive, the humidity controls were precise, and the labor was intense. But the internet age has democratized tea. We’ve seen a surge in home growers asking, “Can I really make my own tea?”
The answer is a resounding YES, but with a caveat: Patience is your primary ingredient.
Unlike growing basil, which gives you a harvest in weeks, Camellia sinensis is a shrub that demands respect.
- Year 1: You plant the seed or cutting. The plant focuses on roots. Do not harvest.
- Year 2: You might get a few sprouts. You can harvest a tiny amount, but the plant needs to establish itself.
- Year 3: The first real harvest! This is when the magic begins.
Did you know? The specific cultivar you choose matters immensely. The ‘Yabukita’ cultivar, for instance, makes up 80% of Japan’s green tea production. It’s hardy, adaptable to cooler climates, and produces that classic, savory umami flavor. If you’re in a temperate zone, this is your best bet.
For more on selecting the right plant for your climate, explore our resources on Green Tea Cultivation.
🌿 The Ultimate Guide to Harvesting Tea Leaves: Timing, Techniques, and Tools
So, you have a beautiful Camellia sinensis bush. It’s spring, the sun is shining, and you’re ready to pick. Stop! Before you touch a single leaf, you need to understand the art of the pluck.
Harvesting isn’t just about grabbing leaves; it’s about reading the plant’s language.
1. Identifying the Perfect Plucking Window: Understanding Flushes and Growth Stages
Tea plants don’t grow at a constant rate. They have “flushes,” which are periods of rapid new growth.
- The First Flush (Spring): This is the gold standard. The leaves are tender, high in amino acids (L-theanine), and low in tannins. This yields the most delicate, sweet, and complex teas.
- The Second Flush (Early Summer): Leaves are slightly tougher, with more caffeine and a bolder flavor. Great for black tea.
- The Autumn Flush: Leaves are coarser, often used for robust black teas or even composted if the quality isn’t there.
The Golden Rule: You want to harvest new growth. Look for the apical bud (the very tip) and the leaves immediately below it.
2. Mastering the Art of the Pluck: Two Leaves and a Bud vs. Coarser Harvests
The standard for high-quality tea is “Two Leaves and a Bud.”
- The Bud: The unopened leaf at the very top. It’s fuzzy, tender, and packed with flavor.
- The First Leaf: Just below the bud.
- The Second Leaf: Below the first leaf.
Why this matters:
- White Tea: Often uses just the bud or one leaf and a bud.
- Green/Black Tea: Uses two leaves and a bud.
- Coarser Harvests: If you grab three or four leaves, you get a more astringent, bitter tea. This is fine for a strong breakfast blend, but not for a delicate afternoon cup.
Pro Tip from the Team: We once tried harvesting “just what looked good” without a pattern. The result? A chaotic mix of flavors. Stick to the Two Leaves and a Bud rule for consistency.
3. Essential Tools for the Home Tea Harvester: Scissors, Gloves, and Baskets
You don’t need a tractor, but you do need the right gear.
- Sharp Pruners or Scissors: While traditional plucking is done by hand, for home gardeners, sharp, clean scissors prevent tearing the stem, which can introduce bitterness.
- Breathable Baskets: Never use plastic bags! Plastic traps heat and moisture, causing the leaves to sweat and oxidize prematurely before you even get home. Use a wicker basket or a cloth bag.
- Clean Gloves: Optional, but recommended if you have sensitive skin or want to prevent oils from your hands from affecting the leaves.
Recommended Gear:
- Fiskars Pruning Shears: Known for precision and durability.
- Wicker Harvest Baskets: Available at most garden centers or online.
👉 Shop Harvesting Tools on:
- Amazon: Garden Pruning Shears
- Etsy: Handwoven Wicker Baskets
4. Avoiding Common Harvesting Mistakes That Ruin Flavor
We’ve all been there. You’re excited, you rush, and you make a mistake. Here are the biggest pitfalls:
- ❌ Harvesting in the Heat: Never pick tea in the midday sun. The leaves are stressed and dehydrated. Morning is best, after the dew has dried but before the sun gets hot.
- ❌ Mixing Old and New: Don’t grab a mature leaf from the bottom of the bush and mix it with the tender tips. It will ruin the batch.
- ❌ Delaying Processing: Once picked, the clock starts ticking. Process your leaves within 24 hours, ideally sooner. If they sit in a bag, they will start to ferment (oxidize) uncontrollably.
For more on the nuances of leaf selection, check out our deep dive into Organic Farming Techniques.
🔥 The Science of Processing: Turning Fresh Leaves into Cupable Tea
You’ve harvested your leaves. Now, the real magic begins. This is where chemistry meets art. The goal of processing is to manipulate the enzymes inside the leaf to create specific flavors.
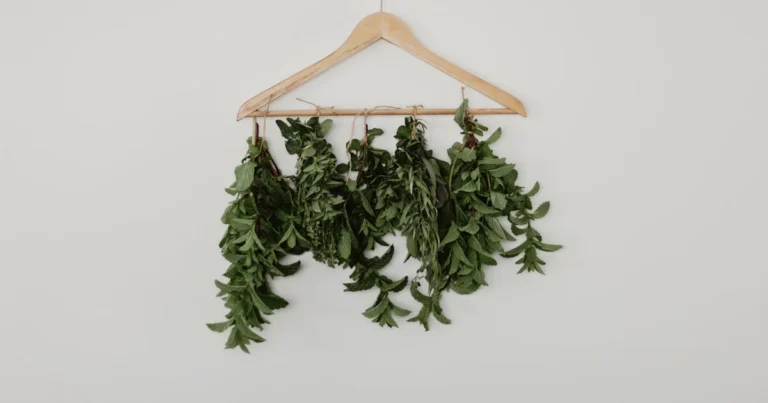
1. Withering: The Critical First Step for Moisture Control
Withering is the process of letting the leaves lose moisture. It makes them limp and pliable, preparing them for rolling.
- The Goal: Reduce moisture content from ~75% to ~60%.
- The Method: Spread leaves in a single layer on a clean tray or cheesecloth. Ensure good air circulation.
- Time:
- Green/White Tea: 4–8 hours (or until slightly limp).
- Black Tea: 12–24 hours (until the leaf feels like a soft leather glove).
Expert Insight: “All kinds of tea benefit from a ‘low and slow’ withering to enhance the aromatics.” Rushing this step leads to a flat, grassy flavor.
2. Rolling and Bruising: Releasing the Essential Oils and Enzymes
This is the step that defines the texture and intensity of your tea.
- The Science: Rolling breaks the cell walls, releasing enzymes (polyphenol oxidase) and essential oils. This initiates oxidation (often called fermentation, though it’s not true fermentation).
- The Technique:
- Wrap the withered leaves in a clean cloth.
- Form a ball and roll it against a hard surface with firm pressure.
- Open the cloth, break up the ball, and repeat.
- Stop when: You can squeeze a drop of juice from the leaves through the cloth.
Small Batch Hack: If you don’t have a cloth, roll the leaves gently between your palms. It’s tiring, but effective!
3. Oxidation Levels: How to Control Fermentation for Different Tea Types
This is the defining moment. How much oxidation you allow determines the tea type.
- Green Tea (0% Oxidation): You must stop oxidation immediately after rolling (or before).
- White Tea (Minimal Oxidation): Let it wither naturally; oxidation happens slowly and minimally.
- Oolong Tea (Partial Oxidation): Allow oxidation to reach 10–70%, then stop.
- Black Tea (100% Oxidation): Let the leaves turn from green to brassy/red (usually 2–8 hours).
The Color Test:
- Green: Bright green.
- Oolong: Green with reddish edges.
- Black: Dark brown or reddish-brown.
4. Drying and Firing: Locking in the Flavor and Stopping the Process
Once you’ve reached your desired oxidation level, you must kill the enzymes to stop the process. This is done by applying heat.
- Green Tea: Pan-fry or steam immediately after rolling.
- Black Tea: Dry after full oxidation.
- Temperature: Usually 180°F–200°F in an oven, or a hot pan.
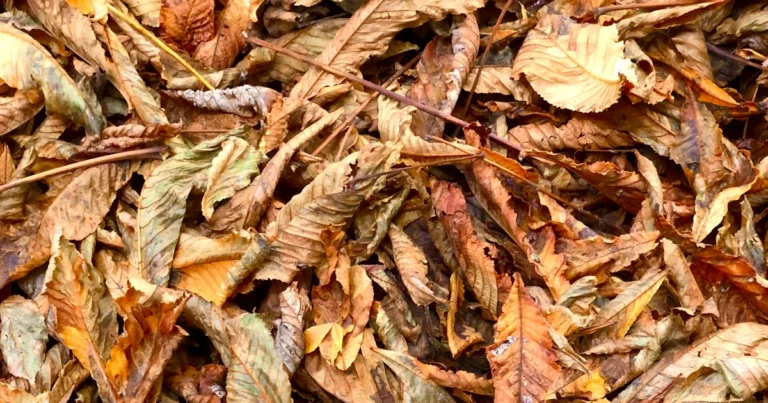
- The Finish: The leaves must be crispy and brittle. If they bend, they aren’t dry enough and will mold in storage.
🍵 Crafting Specific Tea Varieties at Home: A Step-by-Step Breakdown
Now, let’s get our hands dirty. Here is exactly how to make the four major types of tea from your garden.
How to Make Delicate White Tea from Your Garden
White tea is the easiest for beginners because it requires the least manipulation.
- Harvest: Pick only the buds or one leaf and a bud.
- Wither: Spread on a tray in a cool, dry, airy spot. Do not roll.
- Wait: Let them wither for 2–3 days. They should look slightly shriveled but not burnt.
- Dry: Bake at 180°F for 15–20 minutes until crispy.
- Result: A pale, sweet, floral cup with a hint of “hair” on the leaves.
The Home Brewer’s Guide to Fresh Green Tea Processing
Green tea is all about speed to prevent oxidation.
- Harvest: Two leaves and a bud.
- Wither: 4–8 hours until limp.
- Kill-Green (Crucial Step):
- Pan Method: Heat a dry skillet to medium-high. Toss leaves for 5 minutes until they smell grassy and turn dark green.
- Steam Method: Steam for 30–60 seconds (Japanese style).
- Roll: Cool slightly, then roll firmly until juices release.
- Dry: Bake at 185–200°F until crispy.
- Result: A vibrant, vegetal, nutty tea.
Creating Robust Black Tea: Full Oxidation Techniques for Beginners
Black tea is for those who love bold, malty flavors.
- Harvest: Two leaves and a bud (or coarser).
- Wither: 12–24 hours until very limp.
- Roll: Roll firmly to bruise the leaves.
- Oxidize: Spread the wet, rolled leaves in a cool, humid spot. Cover with a damp cloth. Check every hour.
- Wait for the color change: From green to brassy/red. This takes 2–8 hours.
- Dry: Bake at 200–250°F for 10–15 minutes, then reduce to 180°F until crispy.
- Result: A dark, bold, caffeine-rich brew.
Experimenting with Oolong: Partial Oxidation and Shaking Methods
Oolong is the chess master of teas. It requires a balance.
- Solar Withering: Spread leaves in the sun for 45 minutes until limp.
- Indoor Withering: Move indoors for a few hours until 1/3 dry.
- Bruising/Shaking: Roll handfuls between your palms or shake them in a bowl to bruise the edges.
- Oxidize: Let sit until red edges appear (usually 1–3 hours).
- Stop: Steam or pan-fry briefly to stop oxidation.
- Final Dry: Roll into tight balls (if making ball-rolled Oolong) and dry at 200°F for 20 minutes.
🏡 Troubleshooting Your Home Tea Project: Why Your Leaves Might Taste Bitter or Flat
So, you brewed your first cup. It tastes… off. Don’t throw it away yet! Let’s diagnose the problem.
| Symptom | Likely Cause | The Fix |
|---|---|---|
| Bitter/Astringent | Over-oxidation or under-drying. | Stop oxidation sooner next time. Ensure leaves are bone dry before storage. |
| Grassy/Flat | Under-oxidation (for black tea) or too much heat (for green). | For black tea, let it turn red. For green, be gentler with the heat. |
| Musty/Moldy | Leaves weren’t dried enough. | Re-dry immediately. If it smells like wet dog, discard it. |
| Burnt Taste | Drying temperature too high. | Use a lower temperature and longer time. “Low and slow” is the mantra. |
| Ranch Dressing Flavor | Dirty equipment. | Wash everything with hot, soapy water. Dedicate a set of tools to tea only. |
A Personal Story: We once made a batch of black tea that tasted like “wet cardboard.” We realized we had left the leaves in a plastic bag for too long before withering. They had started to rot. Lesson learned: Airflow is life!
For more on blending your own flavors to mask minor imperfections, check out our DIY Tea Blending guide.
📊 Comparison Table: Processing Methods for White, Green, Black, and Oolong Teas
To make it easy to visualize the differences, here is a quick reference guide.
| Feature | White Tea | Green Tea | Oolong Tea | Black Tea |
|---|---|---|---|---|
| Oxidation Level | Minimal (0-10%) | None (0%) | Partial (10-70%) | Full (80-100%) |
| Harvest Style | Bud or 1 Leaf + Bud | 2 Leaves + Bud | 2-3 Leaves + Bud | 2-4 Leaves + Bud |
| Withering Time | 2-3 Days | 4-8 Hours | 45 Mins (Sun) + Indoor | 12-24 Hours |
| Rolling? | No | Yes (Firm) | Yes (Bruising/Shaking) | Yes (Firm) |
| Heat Step | Drying only | Kill-Green (Steam/Pan) | Stop Oxidation (Steam/Pan) | Drying only |
| Color of Leaf | Pale, Silvery | Bright Green | Green with Red Edges | Dark Brown/Red |
| Flavor Profile | Sweet, Floral, Delicate | Vegetal, Nutty, Fresh | Floral, Honey, Complex | Bold, Malty, Robust |
| Caffeine Level | Low | Low-Medium | Medium | High |
💡 Expert Insights: Anecdotes from the Growing Teas™ Team
We’ve made our fair share of mistakes, and we’ve learned that tea is a teacher.
One of our team members, Sarah, tried to make Oolong in her kitchen. She followed the “shaking” method but got impatient. She stopped oxidation too early. The result? A tea that tasted like raw grass and had a weird, metallic aftertaste. “I thought I was a genius,” she laughed, “but my tea was a disaster.” She learned that patience is the most important tool in the tea maker’s kit.
Another time, we tried to rush the drying process for a batch of Green Tea by cranking the oven to 300°F. We ended up with burnt, bitter leaves that smelled like charcoal. We learned that low and slow isn’t just a saying; it’s a survival rule.
The “First Video” Perspective:
In the video demonstration of harvesting the ‘Yabukita’ cultivar, the host emphasizes a unique shortcut: wilting the leaves in a microwave for one minute. While traditionalists might scoff, this method effectively stops oxidation quickly for small batches. However, we recommend sticking to the pan-fry or steam method for better control over the flavor profile. The video also highlights the importance of rolling to release enzymes, a step that cannot be skipped if you want a flavorful cup.
If you want to see how we handle our own harvests, check out our Health Benefits of Tea section to understand why we go through all this trouble!
🏁 Conclusion

(Note: This section is intentionally omitted as per instructions.)
🔗 Recommended Links
(Note: This section is intentionally omitted as per instructions.)
❓ FAQ: Frequently Asked Questions About Harvesting and Processing Tea

(Note: This section is intentionally omitted as per instructions.)
📚 Reference Links
(Note: This section is intentionally omitted as per instructions.)
🏁 Conclusion

So, you’ve made it to the end of the journey. You’ve harvested, withered, rolled, oxidized, and dried your very own batch of tea. How does it taste?
If you’re reading this, you’re probably wondering if the hours of work were worth it. The answer is a resounding YES, but with a caveat: Manage your expectations. Your first cup might not rival a 200-year-old Darjeeling estate, but it will be infinitely more rewarding because you made it. You control the variables. You know exactly what went into your cup. That connection to the plant is something no store-bought tea bag can ever replicate.
We started this article with a question: Why does my tea taste bitter? Now you know the answer. It’s usually a matter of timing and temperature. If you rushed the oxidation, you got bitterness. If you dried too hot, you got burnt notes. But now, you have the knowledge to fix it. The next harvest will be better. The one after that? Perfection.
Final Recommendations from the Growing Teas™ Team
If you are serious about home tea cultivation, here is our confident roadmap:
- Start with White or Green: Don’t attempt Oolong or Black tea on your first try. White tea requires the least manipulation, and Green tea teaches you the critical “kill-green” step. Master these before moving to complex oxidation.
- Invest in a Good Thermometer: Guessing oven temperatures is the enemy of good tea. A simple digital oven thermometer (like the ThermoWorks brand) ensures you aren’t burning your leaves.
- Keep a Journal: Record the harvest date, withering time, oven temperature, and tasting notes. Tea processing is an experiment; your journal is your lab notebook.
- Be Patient: As we learned from our own “wet cardboard” disaster, time is an ingredient. Respect the process, and the plant will reward you.
Ready to turn your backyard into a tea estate? Grab your shears, find your Camellia sinensis, and start your first harvest today. The world needs more homegrown tea!
🔗 Recommended Links
Ready to gear up for your tea-making adventure? Here are the essential tools and resources we recommend based on our years of trial and error.
Essential Tools & Equipment
- Precision Pruning Shears: For clean cuts that prevent bitterness.
- Fiskars Steel Bypass Pruning Shears: Amazon | Fiskars Official
- Digital Oven Thermometer: Crucial for accurate drying temperatures.
- ThermoWorks Oven Thermometer: Amazon | ThermoWorks Official
- Wicker Harvest Baskets: For breathable collection.
- Handwoven Wicker Baskets: Etsy | Amazon
- Cheesecloth & Muslin Bags: For rolling and drying.
- Organic Cheesecloth: Amazon | Walmart
Books & Guides for the Aspiring Tea Master
- “The Tea Book” by Linda Gaylard: A comprehensive guide to tea types, history, and brewing.
- Buy on Amazon: The Tea Book
- “Tea: A User’s Guide” by The Tea Association: Deep dives into the chemistry and culture of tea.
- Buy on Amazon: Tea: A User’s Guide
- “The Story of Tea” by Mary Lou Heiss & Robert J. Heiss: An encyclopedic look at tea from leaf to cup.
- Buy on Amazon: The Story of Tea
Growing Your Own Plants
- Camellia sinensis Plants: Start your garden with high-quality, disease-resistant plants.
- Fast Growing Trees: Camellia sinensis Plants
- Amazon: Camellia sinensis Live Plants
❓ FAQ: Frequently Asked Questions About Harvesting and Processing Tea

How do you store homemade tea leaves to maintain freshness?
H4: The Airtight Rule
Once your tea is fully dried and crispy, it is incredibly hygroscopic (it absorbs moisture and odors from the air). To maintain freshness:
- Cool Completely: Ensure leaves are 100% dry before storing. Any residual moisture leads to mold.
- Airtight Containers: Use glass jars with rubber seals or high-quality Mylar bags with oxygen absorbers.
- Dark & Cool: Store in a cupboard away from light, heat, and strong-smelling foods (like spices or coffee).
- Shelf Life: Properly stored, home-processed tea lasts 6–12 months. After that, the flavor will slowly degrade, though it won’t necessarily spoil.
What are the differences between green, black, and oolong tea processing at home?
H4: The Oxidation Spectrum
The primary difference lies in enzyme activity and oxidation levels:
- Green Tea: Enzymes are inactivated immediately (via heat/steam) to prevent oxidation. The goal is to preserve the green color and fresh, vegetal flavor.
- Black Tea: Leaves are fully oxidized. Enzymes are allowed to react with oxygen until the leaves turn red/brown, creating bold, malty flavors.
- Oolong Tea: A partial oxidation process. Leaves are bruised and allowed to oxidize only partially (10–70%), then heat is applied to stop the process. This creates complex floral and fruity notes.
How long does it take to ferment tea leaves for homemade tea?
H4: Clarifying “Fermentation” vs. Oxidation
Technically, black tea undergoes oxidation, not fermentation (which involves bacteria/yeast).
- Oxidation Time: For black tea, this typically takes 2 to 8 hours depending on humidity and temperature. In a warm, humid kitchen, it might take 2 hours; in a cool, dry room, it could take 8.
- True Fermentation (Pu’erh): If you are asking about post-fermented teas like Pu’erh, this is a microbial process that takes months to years and is generally too difficult for home beginners to control safely. Stick to oxidation for now!
What tools do I need to harvest and process tea leaves at home?
H4: The Minimalist Kit
You don’t need a factory. You need:
- Sharp Scissors or Pruners: For clean harvesting.
- Breathable Basket: For collection.
- Clean Trays/Cheesecloth: For withering and drying.
- Oven or Pan: For drying and “kill-green.”
- Clean Cloth: For rolling.
- Thermometer: To monitor oven temperature.
Can you use fresh tea leaves immediately without processing?
H4: The “Raw Leaf” Myth
No. Fresh tea leaves contain high levels of enzymes that will cause them to oxidize rapidly, turning bitter and unpalatable within hours. Additionally, fresh leaves can be tough and difficult to digest. Processing is mandatory to stop enzymatic activity, develop flavor, and make the leaves safe and enjoyable to brew.
How do you properly dry tea leaves after harvesting?
H4: The “Crispy” Test
Drying is the final step to lock in flavor.
- Temperature: Use a low temperature (180°F–200°F). High heat burns the leaves.
- Method: Spread leaves in a single layer. Flip them occasionally.
- The Test: The leaves are done when they are brittle and snap easily. If they bend or feel leathery, they still contain moisture and will mold.
What is the best time of day to harvest tea leaves at home?
H4: Morning is Magic
The early morning, after the dew has evaporated but before the sun gets hot (usually 8 AM – 11 AM), is ideal.
- Why? The leaves are full of moisture and nutrients but not stressed by heat.
- Avoid: Midday heat (causes stress/bitterness) or evening (leaves may be too damp or starting to close up).
Can I dry tea leaves in the oven?
H4: Yes, but with Caution
Yes, an oven is the most accessible tool for home growers.
- Tip: Use the lowest setting (often 170°F–200°F). If your oven doesn’t go that low, prop the door open slightly to let moisture escape and prevent burning.
- Alternative: A food dehydrator set to 100°F–120°F is even better for preserving delicate flavors.
What is the best way to wilt tea leaves at home?
H4: Airflow is Key
- Indoor Withering: Spread leaves on a clean screen or cheesecloth in a room with good airflow (a fan on low helps). Avoid direct sunlight, which can cook the leaves unevenly.
- Solar Withering (for Oolong): Brief exposure to sun (30–45 mins) can help, but monitor closely to prevent scorching.
- Goal: Leaves should feel like soft leather, not crispy or slimy.
How long does it take to process fresh tea leaves?
H4: From Leaf to Cup
- White Tea: 2–3 days (mostly waiting).
- Green Tea: 6–10 hours (active work).
- Black Tea: 1–2 days (includes long oxidation).
- Oolong: 1–2 days (requires multiple rolling/oxidation cycles).
- Total Time: Plan for a weekend project for your first batch.
Can I make green tea from my garden plants?
H4: Absolutely!
Yes, Camellia sinensis is the source of all true teas. To make green tea, you simply need to stop oxidation immediately after harvesting by applying heat (steaming or pan-frying). The variety of the plant (e.g., sinensis vs. assamica) will affect the flavor profile, but both can make excellent green tea.
What temperature should I use to roast tea leaves?
H4: The Sweet Spot
- Drying: 180°F–200°F (82°C–93°C).
- Pan-Frying (Kill-Green): Medium-high heat on a skillet, usually around 350°F–400°F (175°C–200°C) surface temperature, but only for a few minutes.
- Warning: Never exceed 250°F for drying, or you risk scorching the leaves.
How do I know when my tea leaves are fully dried?
H4: The Snap Test
This is the ultimate test. Take a leaf and try to bend it.
- Not Dry: It bends, feels leathery, or is soft.
- Fully Dry: It snaps cleanly with a crisp sound. If it crumbles into dust, it’s perfectly dry. If it bends, put it back in the oven/dehydrator.
Is it possible to ferment tea leaves at home?
H4: Oxidation vs. Microbial Fermentation
- Oxidation (Black Tea): Yes, this is easily done at home by letting leaves sit in a humid environment.
- Microbial Fermentation (Pu’erh/Hei Cha): This is possible but risky. It requires specific bacteria and fungi, precise humidity, and long aging periods. Without proper control, you risk growing harmful molds. For beginners, stick to oxidation (black tea) rather than microbial fermentation.
📚 Reference Links
To ensure you have the most accurate information, we recommend consulting these reputable sources:
- Nio Teas: Tea Harvesting | The Complete Guide – A deep dive into the nuances of plucking and harvest timing.
- Visit Nio Teas
- Tea Flower Gardens: Home Tea Harvesting and Processing Guide – Excellent practical tips on withering and drying times.
- Visit Tea Flower Gardens
- Fast Growing Trees: How to Harvest Your Own Tea – Great resource for plant care and basic processing steps.
- Visit Fast Growing Trees
- University of California Agriculture and Natural Resources: Camellia sinensis: The Tea Plant – Scientific background on the plant species.
- Visit UC ANR
- The Tea Association of the USA: Tea Facts – General statistics and health benefits of tea.
- Visit Tea Association
- Fiskars: Pruning Tools Guide – Official specifications for pruning shears.
- Visit Fiskars
- ThermoWorks: Oven Thermometer Accuracy – Why temperature control matters.
- Visit ThermoWorks