Support our educational content for free when you purchase through links on our site. Learn more
How to Harvest & Process Tea Leaves at Home: 7 Expert Steps 🍃
Ever wondered how those delicate tea leaves in your favorite cup make their journey from garden to kettle? Spoiler alert: it’s not just about plucking leaves and pouring hot water! At Growing Teas™, we’ve rolled up our sleeves and dived deep into the art and science of harvesting and processing tea leaves right in your own backyard. Whether you’re dreaming of crafting your own green, black, oolong, or even white tea, this guide spills all the secrets—from selecting the perfect Camellia sinensis varietal to mastering oxidation and drying techniques that bring out the best flavors.
Here’s a teaser: did you know that the difference between your morning green tea and a robust black tea is simply how much the leaves are allowed to oxidize? Later, we’ll share a clever microwave “kill-green” hack that makes home processing surprisingly easy. Plus, we’ll walk you through the “two leaves and a bud” plucking rule that every tea grower swears by. Ready to transform your garden into a personal tea haven? Let’s get started!
Key Takeaways
- Harvest young tea shoots using the “two leaves and a bud” method for the best flavor and aroma.
- Oxidation level controls tea type: no oxidation for green, partial for oolong, full for black.
- Processing steps include withering, heating (kill-green), rolling, oxidizing, and drying.
- Proper storage in airtight, opaque containers preserves freshness and flavor.
- Home tea crafting requires patience but rewards you with uniquely personal brews.
Ready to brew your own story? Keep reading to unlock the full step-by-step process!
Table of Contents
- ⚡️ Quick Tips and Facts
- 🌱 The Humble Beginnings: A Brief History of Home Tea Cultivation & Crafting
- 🌿 Your Tea Garden Dream: Cultivating Camellia Sinensis at Home
- ✂️ The Art of the Pluck: When and How to Harvest Your Precious Tea Leaves
- 🔥 From Fresh Leaf to Fantastic Brew: The Home Tea Processing Journey
- The Golden Rule: Understanding Oxidation (or “Fermentation”)
- Crafting Your Own Green Tea: The Unoxidized Elixir
- Brewing Up Black Tea: The Fully Oxidized Classic
- The Enigmatic Oolong: Partially Oxidized Perfection
- The Delicate White Tea: Minimalist Magic
- Beyond the Basics: Exploring Other Home Tea Creations
- 📦 Storing Your Homemade Treasures: Keeping Your Tea Fresh and Flavorful
- 🤔 Troubleshooting Your Home Tea Craft: Common Pitfalls and How to Avoid Them
- 💡 Expert Tips & Anecdotes from the Growing Teas™ Team
- Conclusion: Your Journey from Leaf to Cup
- Recommended Links: Dive Deeper into Tea Craft
- FAQ: Your Most Pressing Home Tea Questions Answered
- Reference Links: Our Trusted Sources
Alright tea lovers, let’s get brewing! You’ve asked, and we’ve listened. The number one question we get here at Growing Teas™ isn’t about our favorite biscuit pairing (though that’s a close second!), but “How on earth do you harvest and process tea leaves at home?”
Well, pull up a chair and pour yourself a cuppa. We’re about to spill the tea, literally. Forget that dusty box from the supermarket; we’re taking you on a journey from a humble shrub in your backyard to the most satisfying brew you’ve ever tasted. It’s easier than you think, and infinitely more rewarding. Let’s dig in!
⚡️ Quick Tips and Facts
In a hurry? Here’s the express version of your home tea-making journey:
- The Plant is Key: All “true” teas (green, black, oolong, white) come from one magical plant: Camellia sinensis. Anything else is technically a “tisane” or herbal infusion.
- Patience is a Virtue: Your tea plant will need about three years to mature before you can start harvesting its leaves. Good things come to those who wait!
- It’s All About Oxidation: The difference between green, oolong, and black tea is simply how much the leaves are allowed to oxidize (react with oxygen) after being picked.
- Green Tea: ❌ No oxidation.
- Oolong Tea: 🌓 Partial oxidation.
- Black Tea: ✅ Full oxidation.
- Weight Loss Alert: Freshly picked tea leaves are mostly water! Expect your final dried tea to weigh only about 20-25% of the fresh leaf weight. A small handful of fresh leaves will make about one cup of tea.
- Storage Savvy: Keep your precious homegrown tea in an opaque, airtight container away from heat, light, and moisture to preserve its flavor.
🌱 The Humble Beginnings: A Brief History of Home Tea Cultivation & Crafting
While massive tea plantations in India and Scotland might seem worlds away, the story of tea began on a much smaller scale. Legend has it that in 2737 BC, Chinese Emperor Shen Nung was boiling water under a tree when a few leaves blew into his pot. He tasted the infusion and, voilà, tea was born! For centuries, tea was a local, home-grown affair. Monks cultivated it in their monastery gardens, and families tended to small patches for their own medicinal and daily use.
This tradition of personal tea craft is what we’re tapping into. It’s a return to the roots of tea, a hands-on connection to one of the world’s most beloved beverages. For a deeper dive into this rich past, explore our History of Tea section. The journey from a single plant to a global phenomenon is a fascinating one!
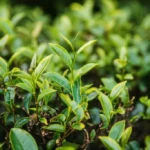
🌿 Your Tea Garden Dream: Cultivating Camellia Sinensis at Home
Before you can process tea, you need a tea plant! And yes, as The Spruce Eats rightly says, you can “Grow real tea (Camellia sinensis) at home.” It’s an attractive evergreen shrub with glossy leaves and fragrant white flowers in the fall, making it a beautiful addition to any garden or patio.
Choosing the Right Camellia Sinensis Varietal for Your Home Garden
There are two main stars of the show:
- Camellia sinensis var. sinensis: A smaller-leafed variety from China that’s more cold-tolerant, making it a great choice for cooler climates (hardy down to USDA Zone 6).
- Camellia sinensis var. assamica: A larger-leafed variety from India’s Assam region, perfect for warmer, more tropical climates (Zone 7 and south).
For beginners, we often recommend starting with a hardy sinensis variety. A particularly fantastic and popular cultivar is ‘Yabukita’, which makes up about 75% of all tea production in Japan! It’s prized for its vigorous growth, cold resistance, and the wonderfully aromatic sencha green tea it produces.
👉 Shop Tea Plants on: FastGrowingTrees.com | Camellia Forest Nursery | Etsy
Soil, Sun, and Sips: Essential Growing Conditions for Happy Tea Plants
Think of your tea plant as a slightly fussy, but ultimately rewarding, houseguest. Here’s what it needs to thrive:
- Soil: Tea plants crave well-drained, sandy, acidic soil (pH 4.5-6.0 is the sweet spot). If you’re growing in a container, The Spruce Eats suggests adding sphagnum moss to your potting mix to help retain moisture and acidity.
- Sunlight: Aim for a spot with full sun to partial shade. While they love light, a bit of afternoon shade in very hot climates can prevent scorching.
- Water: They’re thirsty! Tea plants need regular watering, especially during their first two years. The soil should be kept moist but not waterlogged. Good drainage is non-negotiable to prevent root rot.
- Climate: Camellia sinensis is generally hardy to Zone 8, but some varieties can handle Zone 6. In colder regions, planting in a pot is a brilliant solution—you can simply bring it indoors or into a greenhouse for the winter.
Pest Patrol & Plant Perks: Keeping Your Tea Bushes Thriving
The good news is that Camellia sinensis is a pretty resilient shrub. Our approach is always organic first. A simple spray of neem oil solution can deter most common pests like aphids and scale.
A fantastic tip we picked up from a featured video on home growing is to prune your plants after they flower in the winter. This encourages a flush of “new soft tips, which are perfect to be harvested in spring.” The video also recommends giving them a good feed with a specific camellia food post-pruning to fuel that delicious new growth.
✂️ The Art of the Pluck: When and How to Harvest Your Precious Tea Leaves
After about three years of patient nurturing, your tea bush is ready for its first haircut! This is the moment you’ve been waiting for. Harvesting, or “plucking,” is an art form, but one you can easily master.
1. The “Two Leaves and a Bud” Rule: Mastering the Harvest Technique
This is the golden rule of tea harvesting, echoed by tea growers everywhere. You want to pluck the flush—the youngest, most tender growth at the very top of a branch. This typically consists of an unopened leaf bud and the two leaves immediately below it. These young leaves are packed with the flavor and aromatic compounds that make for a superior cup of tea. Avoid the older, tougher leaves further down the stem.
2. Timing is Everything: Best Seasons and Times for Plucking
Harvesting is best done during the plant’s active growing season, which usually kicks off in the spring. You’ll notice your plant putting out new flushes of growth. Many experts, like those at Tea Flower Gardens, recommend plucking in the morning after the dew has evaporated.
3. Essential Tools for a Gentle Harvest
You don’t need much!
- Your Fingers: The traditional and often best tool. A gentle pinch is all it takes to snap the flush from the stem.
- A Basket or Cloth Bag: To collect your harvest. Avoid plastic bags, which can cause the leaves to start “sweating” and prematurely decomposing.
- Small Scissors or Snips: If you prefer, a clean, sharp pair of snips can also be used for a precise cut.
🔥 From Fresh Leaf to Fantastic Brew: The Home Tea Processing Journey
Here’s where the real magic happens! You’ve grown and plucked your leaves; now it’s time to transform them into a familiar, brewable tea. Remember, the only thing that separates green, oolong, and black tea is the level of oxidation.
The Golden Rule: Understanding Oxidation (or “Fermentation”)
You’ll often hear the term “fermentation,” but it’s a bit of a misnomer. Unlike kombucha or beer, tea processing doesn’t involve microbial fermentation. The process is oxidation: a series of chemical reactions that occur when the enzymes inside the tea leaf are exposed to oxygen. We control this process to create the distinct flavors of different tea types. As Tea Flower Gardens notes, “To create oxidized tea, the leaves are manipulated to release enzymes…”
Here’s a handy table to visualize the process for each tea type:
| Tea Type | Key Steps | Oxidation Level | Resulting Flavor Profile |
|---|---|---|---|
| White Tea | Withering ➡️ Drying | ~5-10% (Minimal) | Delicate, sweet, floral |
| Green Tea | Withering ➡️ Heating ➡️ Rolling ➡️ Drying | <10% (Halted) | Grassy, vegetal, fresh |
| Oolong Tea | Withering ➡️ Bruising/Shaking ➡️ Partial Oxidation ➡️ Heating ➡️ Rolling ➡️ Drying | 10-80% (Controlled) | Floral to fruity to toasty |
| Black Tea | Withering ➡️ Rolling/Bruising ➡️ Full Oxidation ➡️ Drying | 80-100% (Complete) | Malty, robust, fruity, bold |
Crafting Your Own Green Tea: The Unoxidized Elixir
The goal with green tea is to prevent oxidation entirely, preserving that fresh, vibrant, green character. The key is a step called “kill-green” or “fixing,” where we apply heat to destroy the enzymes responsible for oxidation. This is a crucial step for anyone interested in Green Tea Cultivation.
1. The Gentle Wilt: Preparing Leaves for Green Tea
After plucking, spread your leaves on a clean cloth or tray in a shady, well-ventilated area for a few hours. This removes some of the initial moisture and makes the leaves more pliable for the next steps.
2. Steaming or Pan-Firing: Halting Oxidation for Vibrant Green
This is the “kill-green” step. You have a few options:
- Steaming (Japanese Method): Place the leaves in a steamer over boiling water for 30-60 seconds. The Spruce Eats suggests about 1 minute. This method yields a brighter green color and classic umami, vegetal flavors.
- Pan-Firing (Chinese Method): Toss the leaves in a dry, clean wok or skillet over medium-low heat for a few minutes until they are soft and fragrant. This gives the tea a slightly toastier flavor.
- The Microwave Hack: For a modern, quick method, the grower in the featured video places his leaves in a muslin bag and microwaves them on high for one minute! This is a fantastic shortcut for small batches.
After heating, the leaves should be soft, moist, and a brighter shade of green.
3. Rolling & Shaping: Developing Flavor and Form
Once the leaves are cool enough to handle, it’s time to roll. Gently roll and squeeze the leaves between your palms or on a clean bamboo mat. This breaks down the cell walls further and shapes the leaves. For larger batches, Tea Flower Gardens suggests wrapping the leaves in a cloth and rolling the resulting ball firmly on a hard surface.
4. Final Drying: Locking in Freshness
Spread the rolled leaves on a baking sheet and dry them in an oven set to its lowest temperature (around 200-250°F or 93-121°C) for 15-20 minutes, or until they are completely dry and crispy. Toss them occasionally for even drying.
Brewing Up Black Tea: The Fully Oxidized Classic
For black tea, we’re doing the exact opposite of green tea: we want to encourage full oxidation. This is what develops those deep, malty, and fruity flavors.
1. The Deep Wilt: Preparing for Full Flavor Development
This is a longer withering process than for green tea. You’ll let the leaves wilt for 12-24 hours in a cool, shady place until they are very limp and pliable. Some home recipes, like the one from The Spruce Eats, even suggest leaving them in a cool spot for 2-3 days, which highlights how much home processing can vary based on your environment’s humidity and temperature.
2. The Roll Call: Bruising for Maximum Oxidation
This step is crucial. You need to vigorously roll, twist, and crush the leaves between your hands. The goal is to bruise the leaves thoroughly to break down the cell walls and release the enzymes. Keep rolling until the leaves darken, become reddish, and feel sticky.
3. The Oxidation Chamber: Letting Nature Do Its Work
Now, let the magic happen. Spread the rolled, bruised leaves in a thin layer on a tray. Cover them with a damp cloth and leave them in a warm, humid place for 2 to 8 hours. You’ll see a dramatic transformation as the leaves change from green to a “red/brassy color” or coppery brown and develop a wonderfully fragrant, fruity aroma. This reaction is faster in warmer environments.
4. The Grand Finale: Drying Your Black Tea
Once the leaves have fully oxidized, you need to stop the process by drying them. Just like with green tea, spread them on a baking sheet and dry in a low oven (around 200-250°F or 93-121°C) for about 20 minutes until crisp.
The Enigmatic Oolong: Partially Oxidized Perfection
Oolong is the artist’s tea, sitting beautifully between green and black. It requires a bit more finesse, as the goal is to achieve a specific level of partial oxidation.
1. Sun Withering & Bruising: The Dance of Oxidation
The process starts with a short withering in the sun for about 30-60 minutes. Then, bring the leaves indoors and gently shake or tumble them in a basket every hour. This light bruising of the leaf edges is what starts the oxidation process. You’ll notice the edges of the leaves slowly begin to turn red.
2. The “Kill-Green” Step: Halting Oxidation at the Right Moment
This is the critical step. Once the leaves have reached your desired level of oxidation (this can range from 10% for a greener oolong to 80% for a darker one), you must stop the process by heating them, just as you would for green tea. A quick pan-firing is the typical method.
3. Shaping & Drying: Crafting Oolong’s Unique Character
After heating, the leaves are rolled into their characteristic shapes—either long, twisted strands or tightly rolled balls. This is followed by a final drying in a low oven to lock in the complex, floral, and fruity flavors.
The Delicate White Tea: Minimalist Magic
If you’re a fan of simplicity, white tea is for you. It is the least processed of all teas. As Tea Flower Gardens puts it, “White tea has the fewest steps and is not rolled.”
1. The Simple Wilt: Nature’s Gentle Touch
That’s it. That’s the main step. Carefully pluck only the youngest, unopened buds (often called “silver needles”), which are covered in fine white hairs. Spread them on a tray and let them wither in a well-ventilated, shady spot for 2-3 days.
2. Slow Drying: Preserving Purity
Once the leaves have withered and started to dry, you can finish them with a very gentle, low-temperature drying in the oven (around 180°F or 82°C) for 15-20 minutes until they are fully crisp.
Beyond the Basics: Exploring Other Home Tea Creations
Herbal Infusions & Tisanes: Not Camellia Sinensis, but Still Delicious!
Don’t forget you can apply drying techniques to other garden plants! Mint, chamomile, lemon balm, and raspberry leaves can all be harvested and dried to create wonderful herbal infusions. This is a whole other world of flavor to explore, and you can learn more about it in our Herbal Tea Planting section.
Scented Teas: Adding Aromatic Flair
Feeling adventurous? The Spruce Eats suggests mixing your finished, dried tea leaves with fragrant flowers like jasmine or hibiscus. This is a simple way to create your own scented teas. Simply layer your dried tea with fresh, fragrant blossoms in a sealed container for a few days to allow the tea to absorb the aroma. Get more ideas over at our DIY Tea Blending corner!
📦 Storing Your Homemade Treasures: Keeping Your Tea Fresh and Flavorful
You’ve done all the hard work; don’t let it go to waste with improper storage! Freshness is paramount, especially when you consider all the potential Health Benefits of Tea that are best preserved in a fresh leaf.
The Four Foes of Freshness: Light, Air, Moisture, and Heat
Your beautifully crafted tea has four mortal enemies:
- Light: UV rays can degrade the quality and flavor of your tea.
- Air: Oxygen will continue to stale your tea, stripping it of its vibrant aromas.
- Moisture: The absolute worst enemy! Moisture can lead to mold and completely ruin your batch.
- Heat: Heat accelerates the breakdown of the delicate compounds that make your tea taste great.
Recommended Storage Solutions for Your Home-Grown Tea
The best defense is a good offense. Store your tea in an opaque, airtight container and keep it in a cool, dark cupboard away from the stove and any strong-smelling spices (tea is notorious for absorbing odors!).
Here are some excellent options:
- Fellow Atmos Vacuum Canister: These canisters have a built-in vacuum pump to remove air, keeping your tea exceptionally fresh.
- Airscape Canister: Another great option that uses a plunger lid to force out excess air before sealing.
- Simple Tea Tins: A classic for a reason. Double-lidded metal tea tins are excellent at blocking light and air.
👉 CHECK PRICE on:
- Fellow Atmos: Amazon | Fellow Official Website
- Airscape Canister: Amazon | Planetary Design Official Website
🤔 Troubleshooting Your Home Tea Craft: Common Pitfalls and How to Avoid Them
Your first few batches might not be perfect, and that’s okay! Tea making is a craft. Here are some common issues and how to fix them.
“My Tea Tastes Grassy!” – Addressing Off-Flavors
A “grassy” or overly vegetal taste, especially in green tea, usually means the “kill-green” step wasn’t hot enough or long enough to fully deactivate the enzymes. Next time, try increasing the heat slightly or extending your pan-firing/steaming time by a few seconds. For black tea, a grassy note means it wasn’t oxidized enough. Let it rest longer next time.
“My Leaves Aren’t Drying Properly!” – Humidity Hacks
If you live in a humid climate, drying can be a challenge. If your oven’s lowest setting is still too hot, you can try using a food dehydrator on a low setting. Another trick is to place the leaves on a baking sheet in the oven with just the oven light on, which provides a very gentle, dry heat.
“Is My Tea Safe to Drink?” – Ensuring Quality Control
Your senses are your best guide. Your finished tea should look and smell pleasant. If you see any signs of mold or it has any off, musty smells, discard it immediately. This is usually caused by not drying the leaves completely before storage. When in doubt, throw it out!
💡 Expert Tips & Anecdotes from the Growing Teas™ Team
Let me tell you a story. Our founder, Barnaby, on his first attempt at making black tea, decided to speed up the oxidation process by leaving the bruised leaves on the dashboard of his old pickup truck on a hot summer day. A few hours later, he came back to leaves that were not just oxidized, but practically cooked! The resulting brew tasted, in his words, “like a confused raisin that had been in a sauna.”
The lesson? Don’t rush the process. Tea making is about patience and observation. Pay attention to the changing aromas. For black tea, you’ll smell the grassy scent give way to notes of apple, rose, and caramel. For oolong, you’ll get whiffs of lilac or gardenia. These aromatic cues are your best indicators that the leaves are ready for the next step.
We also love the simple, accessible approach shown in the featured video of this article. The use of a microwave for the “kill-green” step and a simple seedling tray for drying is pure genius for the home gamer. It proves you don’t need a factory’s worth of equipment to make a delightful cup of tea, going “from plot to pot” with ease. It’s a testament to the spirit of DIY tea crafting
Conclusion: Your Journey from Leaf to Cup
Congratulations, tea artisan! You’ve traveled the full circle—from planting your Camellia sinensis shrub to harvesting those precious “two leaves and a bud,” and finally transforming them into your very own green, black, oolong, or white tea. Along the way, you’ve learned the subtle art of oxidation, the importance of timing, and how to preserve your homemade treasure with proper storage.
Remember Barnaby’s cautionary tale about rushing oxidation? It’s a gentle reminder that tea making is as much about patience and mindfulness as it is about technique. The aromas you detect during oxidation are your best guides—trust your nose!
Whether you choose the quick microwave “kill-green” hack or the traditional pan-firing, whether you prefer the delicate whisper of white tea or the bold robustness of black, the joy is in the journey and the sip. Your homemade tea is a living story of your care, curiosity, and craftsmanship.
So, next time you cradle your cup, savor not just the flavor but the story behind it—the story you created.
Recommended Links: Dive Deeper into Tea Craft
Ready to gear up or deepen your tea knowledge? Here are some trusted resources and products we love:
Tea Plants & Growing Supplies:
- Cold Hardy Tea Plant: FastGrowingTrees.com | Camellia Forest Nursery | Etsy
Tea Storage Solutions:
- Fellow Atmos Vacuum Canister: Amazon | Fellow Official Website
- Airscape Canister: Amazon | Planetary Design Official Website
Books to Brew Your Knowledge:
- The Tea Book: All Things Tea by Louise Cheadle & Nick Kilby — Amazon
- The Story of Tea: A Cultural History and Drinking Guide by Mary Lou Heiss & Robert J. Heiss — Amazon
- Homegrown Tea: How to Grow, Harvest, and Process Your Own Tea Leaves by Jane Pettigrew — Amazon
FAQ: Your Most Pressing Home Tea Questions Answered
What is the best time of day to harvest tea leaves at home?
The ideal time to harvest tea leaves is in the morning after the dew has dried but before the heat of the day sets in. This timing ensures the leaves are fresh and full of flavor compounds without excess moisture that can complicate processing or promote mold. Early morning plucking also helps preserve the delicate aromas and prevents wilting from midday sun.
How do you properly dry tea leaves after harvesting?
Drying is the final and crucial step to lock in flavor and prevent spoilage. After any oxidation or heating steps, spread your leaves in a single layer on a clean baking sheet or drying rack. Use a low oven temperature (around 180-250°F / 82-121°C) or a food dehydrator to dry the leaves evenly. Toss or stir the leaves occasionally to ensure uniform drying. Leaves should be crispy and brittle when fully dried. Avoid high heat, which can scorch or alter flavors.
Can you use fresh tea leaves immediately without processing?
Fresh tea leaves can be brewed immediately as a “fresh leaf infusion,” but this is not traditional tea and will taste quite different—often grassy and astringent. Processing (withering, oxidation, heating, drying) develops the complex flavors and aromas we associate with tea. So, while you can brew fresh leaves, for the classic tea experience, processing is essential.
What tools do I need to harvest and process tea leaves at home?
You’ll need:
- Hands (for gentle plucking and rolling)
- Sharp scissors or pruning shears (optional, for precise harvesting)
- Clean cloth or basket (to collect leaves)
- Steamer or skillet (for kill-green step)
- Oven or food dehydrator (for drying)
- Rolling surface or cloth (for bruising/rolling leaves)
- Airtight storage containers (for preserving your finished tea)
How long does it take to ferment tea leaves for homemade tea?
Fermentation (oxidation) time varies by tea type and environmental conditions:
- Black tea: 2 to 8 hours, depending on temperature and humidity.
- Oolong tea: Partial oxidation, often 1 to 3 hours with intermittent bruising.
- Green and white teas: Minimal to no fermentation; oxidation is halted quickly or avoided.
The key is to watch for color and aroma changes rather than strictly timing. Warmer, more humid conditions speed oxidation.
What are the differences between green, black, and oolong tea processing at home?
- Green Tea: Leaves are quickly heated (steamed or pan-fired) after plucking to halt oxidation, then rolled and dried.
- Black Tea: Leaves are withered longer, rolled to bruise and release enzymes, fully oxidized until dark reddish, then dried.
- Oolong Tea: Partial oxidation achieved by sun withering and gentle bruising, then heated to stop oxidation at a desired level, rolled, and dried.
Each method creates distinct flavor profiles and aromas.
How do you store homemade tea leaves to maintain freshness?
Store your dried tea in opaque, airtight containers away from light, heat, moisture, and strong odors. Use vacuum-sealed canisters or double-lidded tins for best results. Keep tea in a cool, dark cupboard and consume within 6-12 months for optimal flavor.
Reference Links: Our Trusted Sources
- The Spruce Eats: Growing Tea at Home
- Tea Flower Gardens: Making Tea at Home
- English Tea Leaves: Growing and Processing Camellia Sinensis: A Journey from Plant to Cup
- Fellow Official Website
- Planetary Design Official Website
- Camellia Forest Nursery
- FastGrowingTrees.com
Thanks for joining us on this delicious adventure. Now, go forth and brew your own story—one leaf at a time! 🍵