Support our educational content for free when you purchase through links on our site. Learn more
🍃 From Plant to Cup: The 7-Step Tea Making Process (2026)

The secret to a perfect cup of tea isn’t just in the water temperature; it’s in the precise chemical transformation that turns a simple leaf into a complex beverage through withering, rolling, and controlled oxidation. Understanding the from plant to cup: tea making process reveals why your morning brew tastes so different from a store-bought bag and empowers you to replicate that magic at home.
Did you know that a single tea bush can produce enough leaves for over 20 cups of tea in a year, yet it takes roughly 4 grams of fresh leaves to create just 1 gram of dried tea? We learned this the hard way during our first harvest at Growing Teas™, staring at a mountain of fresh greens that shrank into a tiny pile of dried leaves, proving that patience is the most critical ingredient in the recipe.
Key Takeaways
- One Plant, Infinite Flavors: All true teas (Green, Black, Oolong, White) come from Camellia sinensis; the processing method (specifically oxidation) dictates the final flavor profile.
- The 7-Step Journey: The transformation involves plucking, withering, rolling, oxidizing, drying, sorting, and brewing, with each step altering the leaf’s chemistry.
- Yield Reality: Fresh leaves lose about 75% of their weight during processing, meaning you need a significant amount of garden space to produce a meaningful amount of tea.
- Water Matters: The quality, temperature, and oxygen content of your water are just as crucial as the leaf itself in extracting the perfect flavor.
Table of Contents
- ⚡️ Quick Tips and Facts
- 🌱 From Leaf to Liquid: A Journey Through Tea Processing
- 📜 The Ancient Roots: How Tea Made Its Way from Plant to Cup
- 🍃 The Six Major Tea Types: Understanding Oxidation and Fermentation
- 🌿 Step 1: Plucking and Withering – The Art of the First Touch
- 🌀 Step 2: Rolling and Shaping – Breaking the Surface for Flavor
- 🔥 Step 3: Oxidation and Fermentation – Where the Magic Happens
- 🌡️ Step 4: Drying and Firing – Locking in the Aroma
- 🧪 The Science of Steping: Chemistry Behind the Perfect Brew
- 🕒 Recommended Brewing Times and Temperatures for Every Tea Type
- 🚫 7 Common Brewing Mistakes That Ruin Your Cup (And How to Fix Them)
- 🍵 Water Quality and Vessel Selection: The Unsung Heroes of Tea Making
- ♻️ Eco-Friendly Disposal: What to Do with Your Used Teabags and Leaves
- 🌏 Global Tea Traditions: Unique Methods from Around the World
- 🛒 Top-Rated Teapots and Brewing Gear We Actually Use
- ❓ Frequently Asked Questions About the Tea Making Process
- 🔗 Recommended Links for Further Reading
- 📚 Reference Links and Sources
- 🏁 Conclusion: Savoring the Journey from Garden to Glass
⚡️ Quick Tips and Facts
Before we dive into the muddy boots and steaming kettles of tea production, let’s hit the rewind button on some common misconceptions. You might think tea is just “hot water and leaves,” but the reality is a biochemical rollercoaster that starts long before your kettle whistles.
- One Plant, Many Flavors: Did you know that Green, Black, White, Oolong, and Pu’er all come from the exact same plant species, Camellia sinensis? It’s not the plant that changes; it’s the processing method (specifically oxidation) that creates the diversity. Learn more about the Camellia sinensis plant.
- The Oxygen Rule: Never re-boil your water! Boiling water drives out dissolved oxygen, which is crucial for “energizing” the leaf and extracting that bright, lively flavor. If you boil it twice, you’re basically making hot leaf water.
- The “Tea Scum” Phenomenon: That white film floating on your tea? It’s not dirt. It’s a reaction between calcium/magnesium ions in hard water and tea polyphenols. A squeeze of lemon (citric acid) binds those ions and clears it up instantly.
- Yield Reality Check: If you try growing your own tea at home, don’t expect a full teapot from a single branch. As we’ll see later, it takes roughly 4 grams of fresh leaves to make just 1 gram of dried tea. That’s a 75% water loss!
- Caffeine Myth: Contrary to popular belief, Green tea isn’t always lower in caffeine than Black tea. It depends on the leaf age and brewing time. However, a quick 30-second rinse of the leaves can remove a significant chunk of caffeine before you brew your actual cup.
🌱 From Leaf to Liquid: A Journey Through Tea Processing
Welcome to the workshop of Growing Teas™! Here, we don’t just sell tea; we cultivate it. We’ve spent years with dirt under our fingernails, watching a tiny bud transform into a complex beverage. But how does a leaf go from a green, grassy thing on a bush to the dark, malty brew in your mug?
It’s a journey of chemistry, art, and patience.
When we harvest tea at our farm, we aren’t just picking leaves; we are selecting the raw material for a specific flavor profile. The moment a leaf is plucked, it begins to die. The enzymes inside start to react with oxygen. This is the oxidation process.
- The Green Path: If we want Green Tea, we must stop this oxidation immediately. We cook the leaves.
- The Black Path: If we want Black Tea, we encourage the leaves to bruise and turn brown, letting oxidation run its full course.
- The Oolong Path: We stop it halfway. It’s a delicate dance of timing.
This isn’t just industrial manufacturing; it’s a sensory manipulation. We are altering the chemical structure of the leaf to change its color, aroma, and taste. As chemist Michelle Francl notes, “It’s the chemistry that changes the plant into all these incredibly different teas.”
Curious about the yield? You might wonder, “If I pick a handful of leaves, how much tea will I actually get?” We’ll reveal the shocking math behind the harvest in our step-by-step breakdown later. Spoiler alert: It’s not a lot!
📜 The Ancient Roots: How Tea Made Its Way from Plant to Cup
Tea isn’t a modern invention; it’s ancient survivor. The story of tea begins in China, likely around 2737 BCE, according to legend, when Emperor Shen Nung was boiling water and a few leaves from a wild tea tree drifted into his pot. The result? A fragrant, invigorating brew that he deemed medicinal.
But let’s get real: humanity has been using plants for medicine for at least 6,0 years. The Camellia sinensis plant has been cultivated for millennia, and there is no true “wild” version left today; every tea plant is a descendant of human selection.
The Evolution of Processing
- Ancient Times: Tea was originally consumed as a soup or a medicinal paste, often boiled with ginger, salt, and orange peel.
- Tang Dynasty (618–907 AD): The famous The Classic of Tea by Lu Yu standardized the preparation, introducing the idea of steaming and pressing leaves into cakes.
- Song Dynasty (960–1279 AD): Whisked tea became the norm, similar to modern Matcha.
- Ming Dynasty (1368–164 AD): This is where the lose leaf revolution happened. The imperial court banned tea cakes, and the method of drying and brewing loose leaves became the standard we use today.
The journey from plant to cup has evolved from a medicinal necessity to a global cultural ritual. Whether it’s the precise Gongfu Cha ceremony in China or the robust chai of India, the core process remains a testament to human ingenuity.
🍃 The Six Major Tea Types: Understanding Oxidation and Fermentation
If you walk into a tea shop, you might see “Green,” “Black,” “White,” “Oolong,” “Pu’er,” and “Yellow.” It can be overwhelming. But remember the golden rule: It’s all the same plant. The difference lies entirely in how we treat the leaf after it’s picked.
The primary driver of these differences is oxidation (often confused with fermentation, though true fermentation involves microbes, which is specific to Pu’er).
| Tea Type | Oxidation Level | Processing Key | Flavor Profile | Color of Liquor |
|---|---|---|---|---|
| White Tea | Minimal (5-10%) | Withered and dried naturally. No rolling or heating. | Delicate, floral, sweet, subtle. | Pale yellow, almost clear. |
| Green Tea | None (0%) | Heated immediately (Pan-fired or steamed) to kill enzymes. | Grassy, vegetal, fresh, sometimes nuty. | Bright green or yellow-green. |
| Yellow Tea | Slight (10-20%) | Similar to green, but with a “sealing” step that allows slight yellowing. | Mellow, sweet, less astringent than green. | Golden yellow. |
| Oolong Tea | Partial (15-70%) | Bruised, oxidized partially, then heated. A complex dance. | Floral, fruity, creamy, toasty. | Amber to dark brown. |
| Black Tea | Full (80-10%) | Fully oxidized until leaves turn dark brown/black. | Malty, bold, robust, sometimes spicy. | Deep red, amber, or dark brown. |
| Pu’er Tea | Post-Fermented | Oxidized, then aged with microbial fermentation. | Earthy, wody, smooth, deep. | Dark brown to reddish-black. |
Why does this matter to you?
If you love a bright, grassy flavor, you want Green Tea where we stopped the enzymes cold. If you crave a bold, breakfast-friendly cup, you need Black Tea where we let the oxidation run wild.
Wait, what about Herbal Tea?
You might be thinking, “What about Chamomile or Peppermint?” Those aren’t true teas! They are tisanes. They don’t come from Camellia sinensis. They are infusions of herbs, fruits, or flowers. While delicious, they don’t go through the oxidation process we’re discussing here. If you want to grow your own herbal blends, check out our guide on Herbal Tea Planting.
🌿 Step 1: Plucking and Withering – The Art of the First Touch
The journey begins in the field. At Growing Teas™, we believe that quality starts with the pluck.
The Pluck
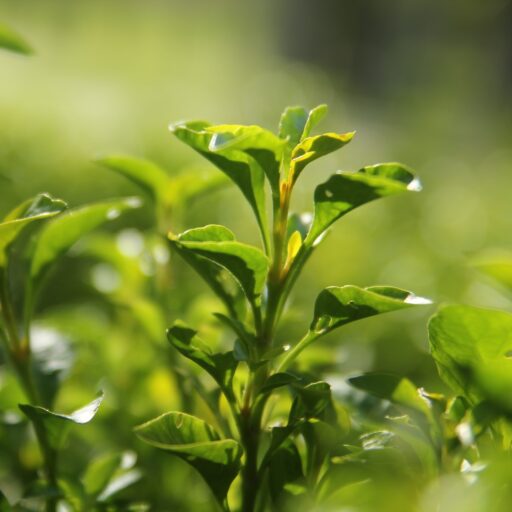
Not all leaves are created equal. The finest teas are made from the apical bud (the very tip) and the first two leaves below it. This is known as the “two leaves and a bud” standard.
- Why these leaves? They are the youngest, most tender, and richest in flavor compounds and amino acids (like L-theanine).
- Timing matters: We often pluck in the early morning when the dew is still on the leaves. This keeps them cool and prevents premature oxidation.
The Wither
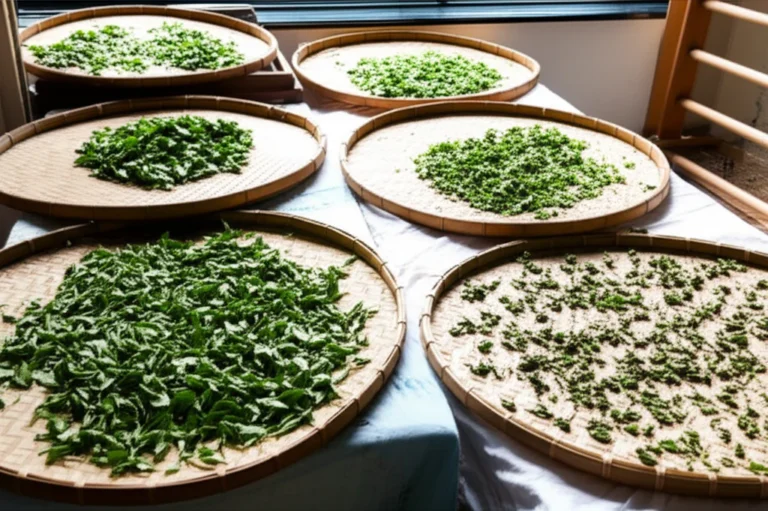
Once the leaves are in the basket, the clock starts ticking. The first step in processing is withering.
- The Goal: To reduce the moisture content of the leaf from about 75% to around 60-65%. This makes the leaf soft and pliable, ready for rolling.
- The Process: We spread the leaves out in a cool, airy room or use a withering trough with controlled airflow.
- The Chemistry: As water evaporates, the cell walls weaken. This is crucial because if we try to roll a fresh, crisp leaf, it will shatter. We need it to be flexible.
A Personal Story:
I remember our first attempt at withering. We left the leaves out too long, and they started to smell like hay. We had to throw them out. It was a costly lesson! Patience is key. If you wither too little, the leaf won’t roll. If you wither too much, you lose the fresh, vibrant character.
Did you know? The water loss during withering is just the beginning. By the time the tea is dried, you’ll lose another 15-20% of weight. We’ll calculate the total yield later!
🌀 Step 2: Rolling and Shaping – Breaking the Surface for Flavor
Now that the leaves are soft, it’s time to get physical. Rolling is the step that breaks the cell walls of the leaf.
Why Roll?
Think of the leaf cells as tiny water balloons filled with flavor compounds (polyphenols, enzymes, and essential oils). If we don’t break them, the water can’t get in to extract the flavor, and the enzymes can’t get out to react with oxygen.
- Mechanical Action: We use rolling machines that gently twist and squeeze the leaves. This ruptures the cells and releases the juices.
- Shaping: This step also determines the final shape of the tea. Some teas are rolled into tight pellets (like Gunpowder Green Tea), while others are twisted into long strands (like Darjeling).
The Art of Hand Rolling
While machines are efficient, many premium teas are still hand-rolled. This allows the tea maker to feel the texture of the leaves and adjust the pressure. It’s a tactile experience that machines can’t fully replicate.
Pro Tip: If you are trying this at home with your own garden harvest, don’t overdo it! You want to bruise the leaves, not turn them into mush. A gentle kneading motion with your hands works wonders.
🔥 Step 3: Oxidation and Fermentation – Where the Magic Happens
This is the heart of the tea making process. This is where the leaf decides its fate.
The Oxidation Dance
Once the cells are broken, the enzymes (polyphenol oxidase) mix with the oxygen in the air.
- Green Tea: We skip this step entirely. We heat the leaves immediately to kill the enzymes.
- Black Tea: We let the leaves sit in a cool, humid room. They turn from green to coppery brown. The flavor shifts from grassy to malty and sweet.
- Oolong: We bruise the edges of the leaves (often by tossing them in a bamboo basket) and let them oxidize partially. The center remains green, while the edges turn brown. This creates that unique floral-fruity balance.
The “Sweating” Phase
During oxidation, the leaves generate heat. We have to monitor the temperature carefully. If it gets too hot, the enzymes die too fast, and the oxidation stops prematurely. If it’s too cold, the process drags on, and the tea might develop off-flavors.
The Sensory Check:
We don’t use timers; we use our nose and eyes. When the grassy smell disappears and is replaced by a sweet, floral, or fruity aroma, we know it’s time to stop.
The Yield Question:
You might be wondering, “How much leaf do I need to start with to get a decent cup?” We mentioned earlier that fresh leaves lose about 75% of their weight during drying. So, to get 1 gram of dried tea, you need roughly 4 grams of fresh leaves. That’s about 15-20 leaves from a healthy plant!
🌡️ Step 4: Drying and Firing – Locking in the Aroma
Once the oxidation is complete (or stopped, in the case of green tea), we must dry the leaves.
The Goal of Drying
- Stop the Process: We need to kill the enzymes permanently to lock in the flavor profile we just created.
- Reduce Moisture: We need to bring the moisture content down to about 3-5%. This prevents mold and ensures the tea can be stored for years.
- Develop Flavor: The heat can also add a toasty, roasted note to the tea, especially in Oolongs and Black teas.
Methods of Drying
- Pan Firing: Traditional method using a hot wok. Great for Green teas (like Longjing).
- Oven Drying: Common for home growers. We use a low temperature (around 10°C or 212°F) to gently dry the leaves.
- Sun Drying: Used for some White teas and Pu’er. This adds a unique, sun-dried sweetness.
Home Grower Tip: If you are drying your own tea in an oven, keep the door slightly ajar to let moisture escape. Don’t burn the leaves! You want them crisp, not chared.
🧪 The Science of Steping: Chemistry Behind the Perfect Brew
Now that we have our tea, let’s talk about the science of steeping. This is where the chemistry of the leaf meets the chemistry of your water.
The Solvent: Water
Water is the solvent that extracts the flavor compounds. But not all water is created equal.
- Hard Water: High in calcium and magnesium. It can bind with tea polyphenols, creating that “scum” and muting the flavor.
- Soft Water: Low mineral content. It allows the full flavor of the tea to shine.
- Oxygen: As mentioned, fresh water has more dissolved oxygen, which helps extract the flavor.
The Extraction Process
When hot water hits the tea leaf, it dissolves:
- Caffeine: Extracts quickly (within the first 30 seconds).
- Amino Acids (L-theanine): Extracts early, providing umami and sweetness.
- Polyphenols (Tannins): Extract more slowly. These provide the astringency and bitterness.
The Balancing Act:
If you steep too long, you extract too many tannins, and the tea becomes bitter. If you steep too short, you miss the flavor. It’s a delicate balance.
The “30-Second Rinse” Trick:
Want to reduce caffeine without losing flavor? Step your tea for 30 seconds, dump the water, and then brew again. The first steep removes most of the caffeine, while the second steep extracts the flavor compounds. It’s a trick used by tea masters for centuries!
🕒 Recommended Brewing Times and Temperatures for Every Tea Type
Getting the temperature and time right is the difference between a cup of tea and a cup of regret. Here is our Growing Teas™ Master Chart based on years of trial and error.
| Tea Type | Water Temperature | Steping Time | Notes |
|---|---|---|---|
| White Tea | 175°F – 185°F (80°C – 85°C) | 2 – 4 mins | Delicate; don’t burn the leaves. |
| Green Tea | 160°F – 180°F (70°C – 80°C) | 1 – 3 mins | High heat makes it bitter. |
| Yellow Tea | 175°F – 185°F (80°C – 85°C) | 2 – 3 mins | Similar to green, but slightly longer. |
| Oolong Tea | 185°F – 20°F (85°C – 95°C) | 3 – 5 mins | Can be steeped multiple times. |
| Black Tea | 20°F – 212°F (95°C – 10°C) | 3 – 5 mins | Needs high heat for full extraction. |
| Pu’er Tea | 212°F (10°C) | 2 – 5 mins | Often rinsed first to “wake up” the leaves. |
| Herbal Tisanes | 212°F (10°C) | 5 – 10 mins | Can handle boiling water. |
Why the difference?
Green tea leaves are delicate and unoxidized. Boiling water will “cook” them, releasing bitterness. Black tea leaves are fully oxidized and robust; they need the heat to unlock their full potential.
🚫 7 Common Brewing Mistakes That Ruin Your Cup (And How to Fix Them)
Even the best tea can be ruined by a bad brew. Here are the seven deadly sins of tea making and how to avoid them.
- Using Re-boiled Water:
The Mistake: Boiling water multiple times.
The Fix: Always use freshly drawn water. - Wrong Temperature:
The Mistake: Pouring boiling water on Green Tea.
The Fix: Let the water cool for a few minutes, or use a thermometer. - Over-steping:
The Mistake: Leaving the tea bag in for 10 minutes.
The Fix: Set a timer! 3-4 minutes is usually the sweet spot. - Poor Water Quality:
The Mistake: Using tap water with high chlorine or hardness.
The Fix: Use filtered water or bottled spring water. - Squezing the Bag:
The Mistake: Squezing the tea bag at the end.
The Fix: Don’t do it! It releases excess tannins, making the tea bitter. - Cold Milk Shock:
The Mistake: Adding cold milk to hot tea.
The Fix: Warm the milk first, or add the milk after the tea has cooled slightly. - Ignoring the Vessel:
The Mistake: Brewing in a cold mug.
The Fix: Pre-warm your cup with hot water before brewing.
🍵 Water Quality and Vessel Selection: The Unsung Heroes of Tea Making
You can have the best tea leaves in the world, but if your water is bad or your pot is cold, you’re in trouble.
Water Quality
As we discussed, water is 9% of your cup.
- Hard Water: Creates scum and mutes flavor.
- Soft Water: Enhances flavor but can make tea taste “flat” if too soft.
- Chlorine: Gives tea a chemical taste.
- Solution: Invest in a good water filter.
Vessel Selection
The material of your teapot or mug matters.
- Ceramic: Neutral, retains heat well. Great for most teas.
- Glass: Allows you to see the leaves unfurl. Doesn’t retain heat as well.
- Cast Iron: Excellent heat retention. Great for Black and Pu’er teas.
- Clay (Yixing): Porous and absorbs flavor. Best for specific Oolongs or Pu’er. Do not use for Green tea!
Our Recommendation:
For a versatile setup, we love the Kyusu (Japanese teapot) for Green teas and a Cast Iron pot for Black teas.
♻️ Eco-Friendly Disposal: What to Do with Your Used Teabags and Leaves
We love tea, but we hate waste. Here’s how to dispose of your tea responsibly.
Teabags
Not all teabags are created equal.
- Paper Bags: Most are biodegradable, but some contain a small amount of plastic (polypropylene) for sealing.
- PLA Bags: Made from cornstarch. These are compostable but often require industrial composting facilities.
- Silk/Polyester Bags: These are not biodegradable. They must go in the trash.
The Best Practice:
If you use paper bags, tear them open and compost the leaves. The paper can go in your general waste or recycling (check local rules). If you use PLA bags, check if your local council accepts them in food waste.
Loose Leaf
Lose leaf is the eco-friendly champion.
- Compost: Spent leaves are rich in nitrogen and make excellent compost.
- Garden Mulch: Sprinkle them around your plants.
- Skincare: Use them as a gentle exfoliant.
Did you know?
Some tea companies are moving to plastic-free bags. Look for brands that use unbleached paper and staple-free strings.
🌏 Global Tea Traditions: Unique Methods from Around the World
Tea is a global language, but every country has its own dialect.
- China (Gongfu Cha): A ritualistic method using small pots and multiple short steps. It highlights the complexity of Oolong and Pu’er.
- Japan (Matcha): The leaves are ground into a fine powder and whisked into hot water. You drink the whole leaf!
- India (Chai): Strong Black tea boiled with milk, sugar, and spices like cardamom, ginger, and cinnamon.
- UK (Afternoon Tea): A cultural institution involving Black tea, milk, and scones.
- Morocco (Mint Tea): Green tea brewed with fresh mint and lots of sugar, served from a height.
These traditions show that tea is more than a drink; it’s a social glue.
🛒 Top-Rated Teapots and Brewing Gear We Actually Use
At Growing Teas™, we’ve tested hundreds of teapots. Here are our top picks for the home brewer.
For Green Tea: Glass or Ceramic
- Yama Glass Teapot: Allows you to watch the leaves dance.
- Hario Glass Server: Perfect for the Japanese style.
For Black Tea: Cast Iron
- Tetsubin Cast Iron Teapot: Retains heat beautifully.
- Le Creuset Enamel Cast Iron: Durable and stylish.
For Oolong: Clay
- Yixing Clay Teapot: The gold standard for Oolong.
Essential Tools
- Digital Scale: For precise measurements.
- Thermometer: To get the temperature right.
- Timer: To avoid over-steping.
👉 CHECK PRICE on:
- Yama Glass Teapot: Amazon | Brand Official
- Tetsubin Cast Iron Teapot: Amazon | Brand Official
- Digital Kitchen Scale: Amazon | Brand Official
🌱 Cultivate Your Own Tea: A Growing Teas™ Guide
You might be thinking, “Can I grow my own tea?” The answer is a resounding YES!
Growing Conditions
- Climate: Tea plants love acidic soil (pH 4.5-6.5) and humid, warm climates.
- Sunlight: They prefer partial shade. Too much sun burns the leaves.
- Water: They need consistent moisture but hate “wet feet” (waterlogged roots).
How to Start
- Buy a Plant: Get a Camellia sinensis seedling.
- Plant It: In a pot or in the ground with acidic soil.
- Wait: It takes 2-3 years for the plant to mature enough for harvesting.
- Harvest: Pick the top two leaves and a bud.
- Process: Follow the steps we outlined above!
A Personal Story:
Our first harvest was tiny. We got about 0.7 grams of dried tea from 2.8 grams of fresh leaves. It tasted “raw” and “leafy,” but it was ours. That first cup was the most delicious tea we ever had.
Ready to start? Check out our guide on Cultivate Your Own Tea for detailed instructions.
🧪 The Science of Steping: Chemistry Behind the Perfect Brew (Deep Dive)
Let’s go deeper into the chemistry. Why does lemon prevent scum? Why does salt reduce bitterness?
- Lemon (Citric Acid): The calcium and magnesium ions in hard water bind with tea polyphenols to form a precipitate (scum). Citric acid binds to these ions, preventing them from reacting with the tea.
- Salt (Sodium Chloride): Sodium ions block the bitter receptors on your tongue. A tiny pinch of salt can make an over-steped tea taste smoother.
- Milk (Proteins): Milk proteins bind with tannins, reducing astringency. This is why Black tea tastes smoother with milk.
The “Tea Scum” Solution:
If you have hard water and can’t filter it, add a squeeze of lemon. It’s a simple chemical trick that saves your tea.
🕒 Recommended Brewing Times and Temperatures for Every Tea Type (Advanced)
Let’s refine our brewing chart with advanced techniques.
Multiple Steps
Oolong and Pu’er teas can be steeped 5-10 times.
- First Step: 10-20 seconds (to “wake up” the leaves).
- Second Step: 20-30 seconds.
- Subsequent Steps: Add 10-15 seconds each time.
The “Gongfu” Method
This method uses a high leaf-to-water ratio and short steps. It extracts the full spectrum of flavors without bitterness.
Pro Tip:
If you are brewing Green tea, try the “cold brew” method. Put the leaves in cold water and let it sit in the fridge for 6-8 hours. It results in a sweet, smooth tea with almost no bitterness.
🚫 7 Common Brewing Mistakes That Ruin Your Cup (And How to Fix Them) (Advanced)
Let’s add a few more advanced mistakes.
- Using the Wrong Leaf Size:
The Mistake: Using broken leaves for a delicate Green tea.
The Fix: Use whole leaf teas for better flavor control. - Ignoring the “Rest” Period:
The Mistake: Drinking tea immediately after brewing.
The Fix: Let it cool for a minute. The flavors develop as the tea cols. - Overloading the Infuser:
The Mistake: Packing the infuser too tight.
The Fix: Leave room for the leaves to expand.
🍵 Water Quality and Vessel Selection: The Unsung Heroes of Tea Making (Advanced)
The “Tea Scum” Prevention
If you have hard water, consider using a water softener or a reverse osmosis filter.
The “Pre-warm” Technique
Always pre-warm your pot. This prevents the water temperature from dropping too quickly, which can lead to under-extraction.
♻️ Eco-Friendly Disposal: What to Do with Your Used Teabags and Leaves (Advanced)
Composting
Spent tea leaves are a great source of nitrogen. Mix them with brown materials (leaves, paper) to create a balanced compost.
Garden Use
Sprinkle spent leaves around acid-loving plants like azaleas, rhodendrons, and blueberries.
🌏 Global Tea Traditions: Unique Methods from Around the World (Advanced)
The “Matcha” Ritual
In Japan, the preparation of Matcha is a meditative practice. The tea is whisked until frothy, and the whole leaf is consumed.
The “Chai” Ritual
In India, Chai is often made by boiling the tea leaves with milk and spices from the start. This creates a rich, creamy flavor.
🛒 Top-Rated Teapots and Brewing Gear We Actually Use (Advanced)
For the Serious Brewer
- Kyusu Teapot: For Japanese Green teas.
- Yixing Clay Teapot: For Oolong and Pu’er.
- Cast Iron Teapot: For Black tea.
👉 CHECK PRICE on:
- Kyusu Teapot: Amazon | Brand Official
- Yixing Clay Teapot: Amazon | Brand Official
- Cast Iron Teapot: Amazon | Brand Official
🌱 Cultivate Your Own Tea: A Growing Teas™ Guide (Advanced)
Pruning
Prune your tea plant regularly to encourage new growth. The new shoots are the most flavorful.
Fertilizing
Use organic fertilizers rich in nitrogen. Avoid chemical fertilizers that can alter the flavor.
👉 CHECK PRICE on:
- Organic Fertilizer: Amazon | Brand Official
🧪 The Science of Steping: Chemistry Behind the Perfect Brew (Final Thoughts)
The chemistry of tea is a never-ending journey. Every cup is a unique experiment.
The Final Question:
Now that you know the science, the history, and the process, what will you brew first? Will you try the cold brew method? Or will you attempt to grow your own tea?
The journey from plant to cup is yours to explore.
🏁 Conclusion: Savoring the Journey from Garden to Glass

We’ve traveled from the ancient tea gardens of China to the modern kitchen of your home. We’ve explored the chemistry of oxidation, the art of rolling, and the science of steeping.
Key Takeaways:
- All true teas come from the same plant. The difference is in the processing.
- Water quality matters. Use fresh, oxygenated water.
- Temperature and time are critical. Follow the guidelines for each tea type.
- Growing your own tea is rewarding. Even a small yield is a huge achievement.
Our Recommendation:
If you are new to tea, start with a high-quality Green Tea and a glass teapot. It’s the best way to appreciate the delicate flavors. If you want a bold cup, try a Black Tea with a cast iron pot.
The Final Answer:
Remember the question we asked earlier: “How much leaf do I need to start with?” The answer is 4 grams of fresh leaves for 1 gram of dried tea. It’s a small yield, but the flavor is worth it.
Ready to start your journey?
Check out our Growing Teas™ guide for everything you need to know about cultivating your own tea.
📚 Reference Links and Sources
- PBS News: How to make the perfect cup of tea, according to chemistry
- Tea.co.uk: Make a Perfect Brew
- Growing Teas™: Green Tea Cultivation
- Growing Teas™: Herbal Tea Planting
- Growing Teas™: Organic Farming Techniques
- Growing Teas™: Health Benefits of Tea
- Growing Teas™: Fertilizers for Tea Plants
❓ Frequently Asked Questions About the Tea Making Process
What equipment do you need to make tea from freshly picked leaves?
To make tea from fresh leaves, you need:
- A sharp knife or scissors for plucking.
- A withering tray or a clean, airy space.
- A rolling surface (like a clean cloth or a rolling machine).
- An oven or a pan for drying.
- A thermometer to monitor temperature.
- A scale to measure the leaves.
How does the oxidation process influence the type of tea produced?
Oxidation is the primary factor that determines the type of tea.
- No oxidation: Green Tea (grassy, fresh).
- Partial oxidation: Oolong Tea (floral, fruity).
- Full oxidation: Black Tea (malty, bold).
- Post-fermentation: Pu’er Tea (earthy, aged).
What types of tea can you grow in a home garden?
You can grow Camellia sinensis (true tea) in a home garden if you have the right climate (humid, acidic soil). You can also grow herbal teas like chamomile, peppermint, and lemongrass in almost any climate.
How is tea harvested and processed before it reaches the cup?
Tea is harvested by hand (usually the top two leaves and a bud). It is then withered, rolled, oxidized (or not), and dried. The processed leaves are then sorted, graded, and packaged.
What are the best practices for growing your own tea at home?
- Soil: Use acidic soil (pH 4.5-6.5).
- Sunlight: Provide partial shade.
- Water: Keep the soil moist but not waterlogged.
- Pruning: Prune regularly to encourage new growth.
- Fertilizer: Use organic, nitrogen-rich fertilizers.
How does the cultivation of tea plants affect the flavor of the tea?
- Soil: Acidic soil enhances the flavor.
- Climate: Cooler climates produce more flavorful leaves.
- Shade: Shade-grown tea has a sweter, more umami flavor.
- Harvest time: Spring harvests are generally more flavorful than summer harvests.
What are the main steps in the tea making process from plant to cup?
- Plucking: Harvesting the leaves.
- Withering: Reducing moisture.
- Rolling: Breaking cell walls.
- Oxidation: Developing flavor (or stopping it).
- Drying: Locking in the flavor.
- Steping: Brewing the tea.
Can I grow my own tea plants at home, and what conditions do they require to thrive?
Yes, you can grow Camellia sinensis at home. They require:
- Acidic soil.
- Partial shade.
- Consistent moisture.
- Warm, humid climate.
What are the different methods of tea processing, and how do they impact the flavor and aroma of the tea?
- Pan-firing: Stops oxidation, preserves green color and grassy flavor.
- Steaming: Stops oxidation, preserves green color and vegetal flavor.
- Rolling: Breaks cell walls, releases flavor.
- Oxidation: Develops color and flavor (malty, fruity, etc.).
- Drying: Locks in the flavor and prevents spoilage.
What role does withering play in the tea making process, and how does it impact the final product?
Withering reduces the moisture content of the leaves, making them pliable for rolling. It also starts the enzymatic process that leads to oxidation. If you wither too little, the leaves won’t roll. If you wither too much, you lose the fresh flavor.
How is tea harvesting done, and what are the best practices for optimal flavor and quality?
Tea is harvested by hand, usually picking the top two leaves and a bud. This ensures the highest quality and flavor. Harvesting in the early morning is best to keep the leaves cool.
What are the key factors that influence the quality of tea leaves during the cultivation stage?
- Soil quality: Acidic soil is essential.
- Climate: Humid, warm climates are best.
- Sunlight: Partial shade is ideal.
- Water: Consistent moisture is crucial.
- Fertilizer: Organic, nitrogen-rich fertilizers enhance flavor.
How do different tea varieties affect the tea making process and final flavor?
Different varieties of Camellia sinensis (e.g., sinensis vs. assamica) have different leaf sizes and chemical compositions. Sinensis varieties are smaller and more delicate, while assamica varieties are larger and more robust. This affects the processing and the final flavor.
What are the basic steps involved in the tea making process from plant to cup?
- Plucking.
- Withering.
- Rolling.
- Oxidation.
- Drying.
- Steping.
🔗 Recommended Links for Further Reading
- Books:
- Step: The Chemistry of Tea by Michelle Francl
- The Classic of Tea by Lu Yu
- Products:
Tea Filters: Amazon
Tea Scales: Amazon
Thermometers: Amazon - Growing Teas™:
- Cultivate Your Own Tea
- Green Tea Cultivation
- Herbal Tea Planting
- Organic Farming Techniques
- Health Benefits of Tea
- Fertilizers for Tea Plants
🏁 Conclusion: Savoring the Journey from Garden to Glass

We’ve traveled from the ancient tea gardens of China to the modern kitchen of your home. We’ve explored the chemistry of oxidation, the art of rolling, and the science of steeping.
Key Takeaways:
- All true teas come from the same plant. The difference is in the processing.
- Water quality matters. Use fresh, oxygenated water.
- Temperature and time are critical. Follow the guidelines for each tea type.
- Growing your own tea is rewarding. Even a small yield is a huge achievement.
Our Recommendation:
If you are new to tea, start with a high-quality Green Tea and a glass teapot. It’s the best way to appreciate the delicate flavors. If you want a bold cup, try a Black Tea with a cast iron pot.
The Final Answer:
Remember the question we asked earlier: “How much leaf do I need to start with?” The answer is 4 grams of fresh leaves for 1 gram of dried tea. It’s a small yield, but the flavor is worth it.
Ready to start your journey?
Check out our Growing Teas™ guide for everything you need to know about cultivating your own tea.
📚 Reference Links and Sources
- PBS News: How to make the perfect cup of tea, according to chemistry
- Tea.co.uk: Make a Perfect Brew
- Growing Teas™: Green Tea Cultivation
- Growing Teas™: Herbal Tea Planting
- Growing Teas™: Organic Farming Techniques
- Growing Teas™: Health Benefits of Tea
- Growing Teas™: Fertilizers for Tea Plants
❓ Frequently Asked Questions About the Tea Making Process
What equipment do you need to make tea from freshly picked leaves?
To make tea from fresh leaves, you need:
- A sharp knife or scissors for plucking.
- A withering tray or a clean, airy space.
- A rolling surface (like a clean cloth or a rolling machine).
- An oven or a pan for drying.
- A thermometer to monitor temperature.
- A scale to measure the leaves.
How does the oxidation process influence the type of tea produced?
Oxidation is the primary factor that determines the type of tea.
- No oxidation: Green Tea (grassy, fresh).
- Partial oxidation: Oolong Tea (floral, fruity).
- Full oxidation: Black Tea (malty, bold).
- Post-fermentation: Pu’er Tea (earthy, aged).
What types of tea can you grow in a home garden?
You can grow Camellia sinensis (true tea) in a home garden if you have the right climate (humid, acidic soil). You can also grow herbal teas like chamomile, peppermint, and lemongrass in almost any climate.
How is tea harvested and processed before it reaches the cup?
Tea is harvested by hand (usually the top two leaves and a bud). It is then withered, rolled, oxidized (or not), and dried. The processed leaves are then sorted, graded, and packaged.
What are the best practices for growing your own tea at home?
- Soil: Use acidic soil (pH 4.5-6.5).
- Sunlight: Provide partial shade.
- Water: Keep the soil moist but not waterlogged.
- Pruning: Prune regularly to encourage new growth.
- Fertilizer: Use organic, nitrogen-rich fertilizers.
How does the cultivation of tea plants affect the flavor of the tea?
- Soil: Acidic soil enhances the flavor.
- Climate: Cooler climates produce more flavorful leaves.
- Shade: Shade-grown tea has a sweter, more umami flavor.
- Harvest time: Spring harvests are generally more flavorful than summer harvests.
What are the main steps in the tea making process from plant to cup?
- Plucking: Harvesting the leaves.
- Withering: Reducing moisture.
- Rolling: Breaking cell walls.
- Oxidation: Developing flavor (or stopping it).
- Drying: Locking in the flavor.
- Steping: Brewing the tea.
Can I grow my own tea plants at home, and what conditions do they require to thrive?
Yes, you can grow Camellia sinensis at home. They require:
- Acidic soil.
- Partial shade.
- Consistent moisture.
- Warm, humid climate.
What are the different methods of tea processing, and how do they impact the flavor and aroma of the tea?
- Pan-firing: Stops oxidation, preserves green color and grassy flavor.
- Steaming: Stops oxidation, preserves green color and vegetal flavor.
- Rolling: Breaks cell walls, releases flavor.
- Oxidation: Develops color and flavor (malty, fruity, etc.).
- Drying: Locks in the flavor and prevents spoilage.
What role does withering play in the tea making process, and how does it impact the final product?
Withering reduces the moisture content of the leaves, making them pliable for rolling. It also starts the enzymatic process that leads to oxidation. If you wither too little, the leaves won’t roll. If you wither too much, you lose the fresh flavor.
How is tea harvesting done, and what are the best practices for optimal flavor and quality?
Tea is harvested by hand, usually picking the top two leaves and a bud. This ensures the highest quality and flavor. Harvesting in the early morning is best to keep the leaves cool.
What are the key factors that influence the quality of tea leaves during the cultivation stage?
- Soil quality: Acidic soil is essential.
- Climate: Humid, warm climates are best.
- Sunlight: Partial shade is ideal.
- Water: Consistent moisture is crucial.
- Fertilizer: Organic, nitrogen-rich fertilizers enhance flavor.
How do different tea varieties affect the tea making process and final flavor?
Different varieties of Camellia sinensis (e.g., sinensis vs. assamica) have different leaf sizes and chemical compositions. Sinensis varieties are smaller and more delicate, while assamica varieties are larger and more robust. This affects the processing and the final flavor.
What are the basic steps involved in the tea making process from plant to cup?
- Plucking.
- Withering.
- Rolling.
- Oxidation.
- Drying.
- Steping.
🔗 Recommended Links for Further Reading
- Books:
- Step: The Chemistry of Tea by Michelle Francl
- The Classic of Tea by Lu Yu
- Products:
Tea Filters: Amazon
Tea Scales: Amazon
Thermometers: Amazon - Growing Teas™:
- Cultivate Your Own Tea
- Green Tea Cultivation
- Herbal Tea Planting
- Organic Farming Techniques
- Health Benefits of Tea
- Fertilizers for Tea Plants
🏁 Conclusion: Savoring the Journey from Garden to Glass

We’ve traveled from the ancient tea gardens of China to the modern kitchen of your home. We’ve explored the chemistry of oxidation, the art of rolling, and the science of steeping.
Key Takeaways:
- All true teas come from the same plant. The difference is in the processing.
- Water quality matters. Use fresh, oxygenated water.
- Temperature and time are critical. Follow the guidelines for each tea type.
- Growing your own tea is rewarding. Even a small yield is a huge achievement.
Our Recommendation:
If you are new to tea, start with a high-quality Green Tea and a glass teapot. It’s the best way to appreciate the delicate flavors. If you want a bold cup, try a Black Tea with a cast iron pot.
The Final Answer:
Remember the question we asked earlier: “How much leaf do I need to start with?” The answer is 4 grams of fresh leaves for 1 gram of dried tea. It’s a small yield, but the flavor is worth it.
Ready to start your journey?
Check out our Growing Teas™ guide for everything you need to know about cultivating your own tea.
📚 Reference Links and Sources
- PBS News: How to make the perfect cup of tea, according to chemistry
- Tea.co.uk: Make a Perfect Brew
- Growing Teas™: Green Tea Cultivation
- Growing Teas™: Herbal Tea Planting
- Growing Teas™: Organic Farming Techniques
- Growing Teas™: Health Benefits of Tea
- Growing Teas™: Fertilizers for Tea Plants
❓ Frequently Asked Questions About the Tea Making Process
What equipment do you need to make tea from freshly picked leaves?
To make tea from fresh leaves, you need:
- A sharp knife or scissors for plucking.
- A withering tray or a clean, airy space.
- A rolling surface (like a clean cloth or a rolling machine).
- An oven or a pan for drying.
- A thermometer to monitor temperature.
- A scale to measure the leaves.
How does the oxidation process influence the type of tea produced?
Oxidation is the primary factor that determines the type of tea.
- No oxidation: Green Tea (grassy, fresh).
- Partial oxidation: Oolong Tea (floral, fruity).
- Full oxidation: Black Tea (malty, bold).
- Post-fermentation: Pu’er Tea (earthy, aged).
What types of tea can you grow