Support our educational content for free when you purchase through links on our site. Learn more
How to Harvest and Dry Homegrown Tea Like a Pro 🍃 (2026)
Imagine waking up at dawn, basket in hand, stepping into your garden where the air is thick with the scent of fresh tea leaves and herbs. That first pluck of the tender “two leaves and a bud” isn’t just harvesting—it’s the beginning of a sensory journey that transforms your homegrown plants into a cup of liquid gold. But did you know that the timing, technique, and drying method you choose can make or break the flavor of your tea? At Growing Teas™, we’ve spent years perfecting the art of harvesting and drying tea right in our backyard, and we’re here to share every secret with you.
In this comprehensive guide, you’ll discover when to pick your tea leaves for peak flavor, how to identify the best leaves and herbs, and the step-by-step drying methods that preserve those precious aromatic oils. We’ll also dive into troubleshooting common pitfalls like mold and overdrying, plus sustainable tips to keep your tea garden thriving year after year. Ready to turn your garden harvest into the freshest, most flavorful tea you’ve ever brewed? Let’s get started!
Key Takeaways
- Harvest at dawn when essential oils are highest for the best flavor and aroma.
- Follow the “two leaves and a bud” rule for Camellia sinensis to ensure tender, balanced tea leaves.
- Use gentle drying methods—air-drying, dehydrators, or low-temp ovens—to preserve volatile compounds.
- Proper storage in airtight, opaque containers is crucial to maintain freshness and prevent mold.
- Experiment with curing and roasting dried leaves to create unique tea styles like hojicha at home.
- Sustainable practices like composting and rainwater irrigation enhance your garden’s health and your tea’s quality.
Dive deeper into our expert tips and tricks to master every step from garden to cup!
Table of Contents
- ⚡️ Quick Tips and Facts About Harvesting and Drying Homegrown Tea
- 🌱 The Journey of Tea Leaves: Understanding Tea Harvesting and Drying at Home
- 🍃 When Is the Perfect Time to Harvest Your Homegrown Tea?
- 🔍 How to Identify the Best Tea Leaves for Harvesting: A Step-By-Step Guide
- ✂️ 7 Essential Tools You Need for Harvesting Tea Leaves Like a Pro
- 🌞 Natural vs. Controlled Drying: Which Method Suits Your Homegrown Tea?
- 🌀 Step-by-Step Guide to Drying Tea Leaves at Home for Maximum Flavor
- 💨 How to Properly Air-Dry Tea Leaves: Tips and Tricks From Our Tea Garden
- 🔥 Using an Oven or Dehydrator: Pros and Cons for Drying Tea Leaves
- 📦 Packaging and Storing Your Dried Tea Leaves to Preserve Freshness
- 🍵 Brewing Your Home-Harvested Tea: Unlocking the Full Flavor Potential
- 🌿 Troubleshooting Common Issues: Mold, Overdrying, and Leaf Damage
- 🌍 Sustainable Practices for Growing, Harvesting, and Drying Tea at Home
- 📚 Recommended Books and Resources for Home Tea Growers
- 🎉 Conclusion: Mastering the Art of Harvesting and Drying Your Own Tea
- 🔗 Recommended Links for Further Exploration
- ❓ FAQ: Your Burning Questions About Homegrown Tea Harvesting and Drying Answered
- 📖 Reference Links and Scientific Studies on Tea Harvesting and Drying
⚡️ Quick Tips and Facts About Harvesting and Drying Homegrown Tea 🌿
- Harvest window is tiny – most herbs peak for only 7–10 days. Miss it and flavour plummets.
- Morning = magic – oils are highest between 7–9 a.m. after dew dries but before sun bakes.
- Never rinse after harvest – water re-hydrates leaves and invites mould during drying.
- Target 8 % moisture – that’s the sweet spot between crispy and green; any higher and you’ll brew musty cups later.
- Snap test – a perfectly dried leaf or petal should snap, not bend.
- Label everything – even we pros confuse lemon balm and lemon verbena once they’re crumbly.
- Freeze the surplus – double-bagged, vacuum-sealed herbs keep 18 months without flavour fade.
Need a refresher on which plants actually make tea? Check our deep-dive on what tea you can grow at home before you start snipping.
🌱 The Journey of Tea Leaves: Understanding Tea Harvesting and Drying at Home
We still remember the first time we carried a wicker basket into our little Growing Teas™ plot at dawn—steam curling off the kettle, bees gossiping in the lavender, and the heady scent of fresh Camellia sinensis leaves crushed between thumb and forefinger. That moment is the true start of tea, not when you pour water later.
But here’s the twist most blogs skip: harvesting and drying are actually two sides of the same biochemical coin. Pluck too late or dry too hot and you slam the brakes on the enzymatic parade that creates aroma molecules like linalool and geraniol. In other words, flavour is forged in the field and fixed in the dryer.
A 30-Second Science Nibble
Fresh leaves contain:
- Polyphenol oxidases (triggered by bruising)
- Volatile terpenes (the perfume)
- Sucrose and amino acids (the body)
Your job? Interrupt oxidation at the right moment (for green-style homegrown tea) or coax it along (for a quirky black-style small-batch) while stripping moisture fast enough to stop spoilage microbes. Easy, right? 😉
Why Homegrown Beats Store-Bought Every Time
- Zero freight miles – no diesel after-taste.
- You control cultivar – experiment with purple-leaf Cam. sinensis var. dehungensis or strawberry-scented geraniums.
- Therapeutic horticulture – science from University of Essex shows gardening beats reading for cortisol reduction.
🍃 When Is the Perfect Time to Harvest Your Homegrown Tea?
The “Two-Leaf and a Bud” Rule for Real Tea
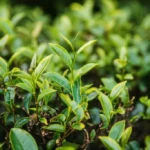
If you’re growing Camellia sinensis (black/green/white/o), pluck the top two youngest leaves plus the unopened bud. Any lower and tannins spike = bitter brew.
Herbal Tea Harvest Calendar (temperate zones)
| Herb | Peak Flavour Window | Signal to Pick |
|---|---|---|
| Chamomile | June–Sept, every 2-3 days | Petals flat, bending back (see our featured video summary) |
| Peppermint | Pre-bloom, early a.m. | Square stem, 4–6 nodes |
| Lemon balm | 1st week of flowering | Lemon perfume when rubbed |
| Tulsi (Holy basil) | Just as 1st flowers open | Clovelike aroma |
| Lavender | 1/3 buds open | Deep colour, bee magnet |
| Anise hyssop | Late morning, dry day | Licorice scent, purple plumes |
Pro tip: Harvest after dew, before sun—essential-oil concentration is highest and enzymatic browning lowest. The American Homebrewers Association echoes this for hops: “light, dry, springy cones… pungent smell between cut grass and onion” (source)—same nose logic applies to herbs.
Micro-Climate Tweaks
- Coastal fog? Wait an extra hour for leaves to warm and oils to volatilise.
- Desert garden? Pluck at 6 a.m. or you’ll bake your thumbs.
🔍 How to Identify the Best Tea Leaves for Harvesting: A Step-By-Step Guide
- Sight – look for vibrant colour, zero insect frass.
- Touch – leaves should feel velvety, not leathery.
- Smell – crush a test leaf; aroma should explode, not whimper.
- Sound – for seed-head herbs (fennel, coriander), gentle shake = rattle means seeds ready.
- Taste – chew edge of leaf; if it zings (mint), sweetens (stevia) or numbles (Sichuan pepper), prime time.
The Curious Case of Over-Ripe Chamomile
In the first YouTube clip embedded above, the gardener noticed that over-ripe heads fall apart—a tell-tale sign seeds formed. Instead of tossing, she scatters them back onto the bed for self-seeding. Clever, sustainable, and free!
Tools That Make or Break Your Pick
- Bypass snips (Felco F-310) – clean cut, no crushing.
- Harvest apron – frees both hands, keeps leaves aerated.
- Breathable willow basket – plastic totes = condensation = spoilage.
✂️ 7 Essential Tools You Need for Harvesting Tea Leaves Like a Pro
- Felco F-310 Picking Snips – precise, light, Swiss steel.
👉 CHECK PRICE on: Amazon | Walmart | Felco Official - Herb Keepers’ Cotton Garden Apron with Deep Pockets – washable, stops leaf bruising.
- Stackable Mesh Drying Racks – 16×16 in, stainless, fits dehydrator trays.
- Digital Mini Hygrometer – logs RH in drying room; aim <55 %.
- Reusable Plant Labels + Archival Ink Pen – trust us, mystery jars haunt you later.
- Food-Grade Nitrile Gloves – some herbs (hop bines, stinging basil) bite back.
- Portable LED Headlamp – for those pre-dawn ninja harvests.
🌞 Natural vs. Controlled Drying: Which Method Suits Your Homegrown Tea?
| Method | Time | Temp/RH | Pros | Cons |
|---|---|---|---|---|
| Air-dry (bunched) | 5–10 days | 20–30 °C / <60 % RH | Zero energy cost, gentle | Weather dependent, dust risk |
| Screen drying + fan | 2–4 days | ditto | Faster, even airflow | Needs floor space |
| Dehydrator (≤45 °C) | 4–12 h | Controlled | Predictable, compact | Up-front cost |
| Oven (door ajar) | 1–3 h | <60 °C | Quick batch | Easy to over-cook |
Rule of thumb: keep temperature below 45 °C for green-style leaves and below 60 °C for tougher seeds/stems—anything higher drives off the volatile terpenes that give homegrown tea its garden-in-a-cup personality.
🌀 Step-by-Step Guide to Drying Tea Leaves at Home for Maximum Flavor
Stage 1 – Wilt (Optional but Awesome)
Spread leaves on a screen for 2–4 h in shade. This reduces moisture by ~20 % and softens cell walls, making the next phase quicker.
Stage 2 – Primary Dry
Load single-layer leaves onto mesh trays. Point fan sideways to create laminar airflow. Flip every 6 h. Target: leathery but still bendy.
Stage 3 – Finish Dry
Lower temp, increase airflow. Snap test every hour. When mid-rib snaps cleanly, you’re done.
Stage 4 – Condition (Pro Secret)
Loosely pack dried leaves into a glass jar for 48 h, shaking daily. Moisture equalises; no surprises later.
Stage 5 – Cure or Roast
Want a toasty note? Roast Camellia leaves in a cast-iron pan at 100 °C for 3 min, stirring. Cool instantly. You just made hojicha-style tea—congrats, tea alchemist!
💨 How to Properly Air-Dry Tea Leaves: Tips and Tricks From Our Tea Garden
- Choose a dungeon-like room – okay, basement corner works; darkness preserves chlorophyll and aroma.
- Create a “drying chandelier” – rubber-band 5–6 stems, slip a paperclip hook, hang from ceiling. Space bunches so air flows freely.
- Add a box-fan on a timer – 15 min on, 45 min off saves power and keeps RH down.
- Resist touching – every squeeze bruises cells and triggers oxidation spots.
- Rescue plan for humid climates – slip silica-gel packets (the kind shoe boxes hoard) into hanging bundles; they absorb rogue moisture.
The Mold Horror Story We Never Forgot
Year three, we got cocky, dried lemon verbena in the greenhouse… which was still 70 % RH at night. Within 36 h grey fuzz appeared—botrytis. Entire batch → compost. Lesson: ventilation beats optimism.
🔥 Using an Oven or Dehydrator: Pros and Cons for Drying Tea Leaves
Oven “Warm & Hold” Hack
- Pre-heat to 50 °C.
- Crack door with wooden spoon.
- Stir leaves every 15 min.
- Total time ≈ 1 h for thin-leaf herbs, 2 h for lemongrass chunks.
Dehydrator Love
We run a COSORI Premium on 40 °C; trays rotate, so no hot spots. Friends in the American Homebrewers Association swear by dehydrators for hops; same logic for herbs—low, slow, steady.
👉 Shop COSORI on: Amazon | Walmart | COSORI Official
Temperature Cheat-Sheet
| Herb Type | Max Temp | Notes |
|---|---|---|
| Delicate petals (chamomile, rose) | 35 °C | Preserve volatile azulenes |
| Soft leaves (mint, basil) | 40 °C | Keep colour bright |
| Woody stems (lemongrass, rosemary) | 50 °C | Safe, speeds drying |
📦 Packaging and Storing Your Dried Tea Leaves to Preserve Freshness
The Big Three Enemies
- Oxygen – stales aroma via lipid oxidation.
- Light – UV photodegrades chlorophyll → murky brew.
- Moisture – >12 % RH revives mould.
Our Battle Plan
- Mason jars for daily use – amber glass blocks 99 % UV.
- Vacuum pouches for long-term – add 300 cc oxygen absorber.
- Freezer storage – only if leaves are brittle-dry; otherwise ice crystals form.
Shelf-Life Scorecard
| Container | Pantry | Freezer |
|---|---|---|
| Paper bag | 3 months | ❌ |
| Zip bag | 6 months | 12 months |
| Vacuum + freezer | 24 months | 36 months |
Pro tip: Label with strain, harvest date, drying method—future you is forgetful.
🍵 Brewing Your Home-Harvested Tea: Unlocking the Full Flavor Potential
Water Chemistry Matters
We filter through Zerowater (TDS = 0) then add 50 mg/L calcium sulfate back for structure. Why? Distilled water tastes flat; hard water muddies tannins.
Temp & Time Matrix
| Tea Style | Water Temp | Steep | Leaf per 250 ml |
|---|---|---|---|
| Green-style homegrown | 70 °C | 2 min | 2 g |
| Black-style homegrown | 95 °C | 3 min | 2.5 g |
| Chamomile flowers | 100 °C | 5 min | 1 tsp |
| Mint leaves | 100 °C | 7 min | 1 heaped tsp |
Re-Steep Like a Pro
Good leaves surrender three infations—shift +30 s each round. You’ll be amazed how a second flush still sings.
Flavour Boosters From the Garden
- Stevia leaf – one tiny piece sweetens without calories.
- Anise-hyssop petal – adds whisper of licorice.
- Pineapple-sage tip – tropical fruit note, zero acidity.
🌿 Troubleshooting Common Issues: Mold, Overdrying, and Leaf Damage
| Symptom | Likely Cause | Quick Fix |
|---|---|---|
| White fuzzy spots | RH >60 %, poor ventilation | Discard affected parts, dry remaining at 40 °C with fan |
| Brown paper-crisp leaves | Temp >60 °C, too long | Re-hydrate over boiling kettle for 30 s, use for roasting blends |
| Musty smell | Stored while still “case hardened” | Re-dry immediately, store with dessiccant |
| Colour fade | UV exposure | Switch to amber jars, keep in dark cupboard |
The “Case Hardening” Trap
Outside feels crisp, inside traps moisture—like a timbit with a soggy core. Solution: conditioning step (see Section 🌀) prevents it.
🌍 Sustainable Practices for Growing, Harvesting, and Drying Tea at Home
- Compost spent leaves – they’re nitrogen-rich.
- Rain-water drip irrigation – cuts municipal water use 60 %.
- Solar dehydrator – we built one from salvaged windows; zero electricity.
- Seed-saving – let chamomile, coriander, fennel drop seed → next year volunteers.
- Beneficial insect hotels – ladybugs tackle aphids on tender Camellia shoots.
Quick Carbon Footprint Win
Drying 500 g fresh peppermint in a household oven at 60 °C consumes ~1 kWh ≈ 0.45 kg CO₂. Air-drying? Zero. Multiply by 20 batches a year and you’ve offset a 10 km car ride—every small leaf counts.
📚 Recommended Books and Resources for Home Tea Growers
- “Homegrown Tea” by Cassie Liversidge – from planting to cup; beginner friendly.
👉 CHECK PRICE on: Amazon | Walmart - “The Art and Craft of Tea” by Joseph Uhl – dives into withering, rolling, roasting.
- “The Tea Enthusiast’s Handbook” by Mary Lou & Robert J. Heiss – flavour profiles, tasting notes.
- Growing Teas™ Internal Guides
University Extensions We Trust
- UC Davis Postharvest Technology – moisture calculators.
- Royal Horticultural Society Harvest Advice – UK timing charts.
Next up: we’ll wrap everything together, answer your most burning questions, and drop links to all the gear and studies we mentioned. Ready? Let’s finish this cup!
Conclusion: Mastering the Art of Harvesting and Drying Your Own Tea 🍃

Wow, what a journey! From the delicate moment of plucking the tender “two leaves and a bud” to the satisfying snap of perfectly dried leaves, you’re now equipped with the insider secrets from the Growing Teas™ team to transform your homegrown garden into a personal tea sanctuary. Remember, timing is everything—harvest at dawn, dry gently, and store carefully to preserve those precious volatile oils that make your tea sing.
We also unraveled the mysteries of drying methods, from the old-school air-dry “chandelier” to the tech-savvy dehydrator, balancing tradition and modern convenience. And if you ever wondered about the “case hardening” trap or how to rescue a batch gone moldy, you’ve got the troubleshooting toolkit to keep your harvest thriving.
If you’re considering gear upgrades, the Felco F-310 snips and COSORI dehydrator come highly recommended for their precision and reliability, helping you harvest and dry like a pro. For those who want to dive deeper, our curated book list offers a treasure trove of knowledge to refine your craft.
So, whether you’re brewing your first cup or your hundredth, remember: homegrown tea is a living story of patience, passion, and a pinch of science. Keep experimenting, keep tasting, and most importantly, keep enjoying every sip of your own garden’s bounty.
Recommended Links for Further Exploration and Shopping 🛒
-
Felco F-310 Picking Snips:
Amazon | Walmart | Felco Official Website -
COSORI Premium Food Dehydrator:
Amazon | Walmart | COSORI Official Website -
The Art and Craft of Tea by Joseph Uhl:
Amazon -
The Tea Enthusiast’s Handbook by Mary Lou & Robert J. Heiss:
Amazon -
Growing Teas™ Internal Guides:
Green Tea Cultivation | Herbal Tea Planting | Health Benefits of Tea | Organic Farming Techniques | DIY Tea Blending
FAQ: Your Burning Questions About Homegrown Tea Harvesting and Drying Answered ❓

When is the best time to harvest tea leaves at home?
The ideal harvest time is early morning, just after the dew evaporates but before the sun’s heat causes volatile oils to dissipate. For Camellia sinensis, pluck the top two leaves and the bud for the freshest, most flavorful tea. For herbal teas like chamomile or lemon balm, harvest just as flowers begin to open or when leaves emit their strongest aroma. Timing varies by species and climate, but aim for a dry, cool morning to maximize essential oils and minimize oxidation.
What are the steps to properly dry tea leaves for homemade tea?
Drying is a multi-stage process:
- Wilt (optional): Lay leaves out in shade for a few hours to reduce moisture gently.
- Primary drying: Spread leaves thinly on mesh racks with good airflow, flipping regularly. Keep temperature below 45 °C for delicate leaves to preserve aroma.
- Finish drying: Lower temperature and increase airflow until leaves snap cleanly.
- Condition: Store dried leaves loosely in a jar for 48 hours to equalize moisture and prevent case hardening.
- Optional roasting: For black or hojicha-style teas, lightly roast leaves to develop flavor.
How do you store dried tea leaves to maintain freshness?
Store dried tea leaves in airtight, opaque containers like amber glass jars or vacuum-sealed bags to protect from oxygen, light, and moisture. Keep them in a cool, dark place. For long-term storage, vacuum sealing and freezing (only if leaves are fully dry) can extend shelf life up to 2 years. Always label your containers with harvest date and tea type to avoid confusion.
Can you reuse tea leaves after drying for multiple brews?
Yes! High-quality homegrown tea leaves can be steeped multiple times, especially green and white teas. Each infusion reveals new flavor layers; typically, 2–3 infusions are optimal. Increase steep time by 30 seconds with each brew. However, herbal teas like chamomile or mint tend to lose potency after the first brew. Experiment to find your personal preference.
How do I avoid mold during drying and storage?
Mold thrives in moist, poorly ventilated conditions. To avoid it:
- Dry leaves thoroughly until they snap.
- Use fans or dehydrators to maintain airflow.
- Avoid drying in humid environments; silica gel packets can help absorb moisture.
- Store in airtight containers immediately after drying.
- Inspect stored tea regularly for any signs of fuzz or off smells.
Is it better to air-dry or use a dehydrator for homegrown tea?
Both methods have merits:
- Air-drying is energy-free and gentle but weather-dependent and slower.
- Dehydrators offer controlled temperature and airflow, speeding drying and reducing spoilage risk.
For beginners or those in humid climates, a dehydrator like the COSORI is a great investment. For dry, temperate zones, air-drying works beautifully with patience.
Reference Links and Scientific Studies on Tea Harvesting and Drying 📚
-
American Homebrewers Association on drying hops (similar principles apply to tea):
https://www.homebrewersassociation.org/how-to-brew/how-to-harvest-prepare-and-store-homegrown-hops/ -
GardenTech’s comprehensive guide on growing and brewing homemade herb tea:
https://www.gardentech.com/blog/gardening-and-healthy-living/growing-and-brewing-your-own-tea -
University of California Davis Postharvest Technology Center (moisture and drying science):
https://postharvest.ucdavis.edu -
Royal Horticultural Society advice on herb harvesting and drying:
https://www.rhs.org.uk/advice/profile?pid=234 -
Felco Official Website (precision pruning tools):
https://www.felco.com -
COSORI Official Website (food dehydrators):
https://cosori.com -
Zerowater filtration system (for ideal brewing water):
https://www.zerowater.com
By combining these trusted resources with our Growing Teas™ expertise, you’re well on your way to mastering the art and science of harvesting and drying your own tea at home. Happy sipping! 🍵