Support our educational content for free when you purchase through links on our site. Learn more
🌱 How to Grow Green Tea at Home: 12 Expert Tips for 2026
Ever wondered if the secret to the world’s most refreshing cup of tea lies not in a fancy shop, but right in your own backyard? We certainly did. At Growing Teas™, we’ve spent years turning our backyards into mini-Darjelings, and let us tell you: there is nothing quite like the taste of a leaf you nurtured from a tiny seed, picked with your own fingers, and processed in your kitchen. While many believe you need a tropical paradise to grow Camellia sinensis, the truth is far more exciting. Did you know that with the right variety, you can cultivate a thriving tea bush even in climates that drop below freezing? In this ultimate guide, we’ll reveal the 12 expert secrets to bypassing the common pitfalls that kill 90% of beginner tea plants, including the one crucial step you must take before you even plant your first seed.
Key Takeaways
- One Plant, Infinite Possibilities: There is only one species of tea plant (Camellia sinensis); the difference between green, black, and white tea is entirely determined by how you process the leaves, not the plant itself.
- Soil pH is Non-Negotiable: Tea plants are acid-loving (ericaceous) and will fail in alkaline soil; maintaining a pH between 5.0 and 6.0 is the single most critical factor for success.
- Patience Pays Off: While the journey from seed to cup takes 3 years, the reward is a chemical-free, high-antioxidant brew that you can harvest and customize to your exact taste.
- Climate Adaptability: By choosing the hardy Sinensis variety and using pots or microclimates, you can successfully grow tea in almost any zone, from scorching summers to freezing winters.
Table of Contents
- ⚡️ Quick Tips and Facts
- 🌱 The Ancient Roots: A Brief History of Camellia sinensis
- 🏡 Can You Actually Grow Green Tea at Home? The Reality Check
- 🌿 Choosing the Right Variety: Selecting Your Camellia sinensis Strain
- 🌤️ Perfecting Your Microclimate: Ideal Growing Conditions for Tea Plants
- 🪴 Step-by-Step: How to Grow Green Tea from Seeds vs. Cutings
- 💧 Watering Wisdom: Hydration Needs for Thriving Tea Bushes
- 🍽️ Feding Your Bush: Fertilizer Requirements and Soil pH Balance
- ✂️ Pruning and Shaping: Cultivating a Productive Tea Garden
- 🍃 The Harvest: When and How to Pick the Perfect Leaves
- 🔥 From Leaf to Cup: The Art of Processing Green Tea at Home
- 🐛 Troubleshooting Common Pests and Diseases in Tea Cultivation
- 🏠 Indoor vs. Outdoor: Growing Tea Plants in Pots and Greenhouses
- 🧪 Top 10 Fascinating Facts About Home-Grown Green Tea
- 🛠️ Essential Tools and Gear for the Aspiring Tea Grower
- 🌍 Global Tea Traditions: How Different Cultures Grow Their Brew
- ❓ Frequently Asked Questions About Growing Tea at Home
- 🏁 Conclusion
- 🔗 Recommended Links
- 📚 Reference Links
⚡️ Quick Tips and Facts
Before we dive into the nitty-gritty of turning your backyard into a mini Darjeling, let’s hit the pause button and get the absolute essentials down. If you’re in a rush, this is your cheat sheet. If you’re a detail-obsessed tea nerd (like us!), consider this your warm-up lap.
- The One True Plant: Forget the “green tea plant” vs. “black tea plant” myth. There is only one species: Camellia sinensis. The difference between your morning Earl Grey and your afternoon Matcha is processing, not the plant! 🍵
- The “Sink or Swim” Rule: When growing from seed, only plant the seeds that sink in water. Floating seeds are usually duds. It’s nature’s quality control!
- Patience is a Virtue: You won’t be sipping your homegrown brew tomorrow. It takes 3 years for a tea plant to reach a harvestable maturity. Think of it as a long-term investment in your caffeine future.
- Acid is Good: Tea plants are ericaceous, meaning they love acidic soil (pH 5.0–6.0). If you have alkaline soil, you’ll need to amend it heavily or stick to pots.
- The “Two Leaves and a Bud” Standard: For the highest quality green tea, never pluck the old, dark leaves. You want the top two bright green leaves and the unopened bud. Anything else is just leafy debris.
For a deeper dive into the specifics, check out our comprehensive guide: How to Grow Green Tea at Home: 12 Expert Tips for Success (2025) 🌿.
🌱 The Ancient Roots: A Brief History of Camellia sinensis

Did you know that the tea you’re about to grow has a backstory that rivals any Hollywood drama? 🎬 Legend has it that in 2737 BC, the Chinese Emperor Shen Nung was boiling water under a wild tea tree when a few leaves drifted into his pot. The resulting brew was so refreshing he declared it the elixir of life. Whether it’s myth or fact, one thing is certain: Camellia sinensis has been the star of the show for millennia.
The Great Split: Sinensis vs. Assamica
Not all tea plants are created equal. When we talk about growing green tea at home, we are almost exclusively talking about the Camellia sinensis var. sinensis.
| Feature | Camellia sinensis var. sinensis | Camellia sinensis var. assamica |
|---|---|---|
| Origin | China, Himalayas | India (Assam region) |
| Leaf Size | Small, delicate | Large, broad |
| Hardiness | Cold hardy (down to -10°F/-23°C) | Tropical/Subtropical only |
| Best For | Green Tea, White Tea, Oolong | Black Tea, Pu-erh |
| Growth Habit | Bushy, shrub-like | Tree-like, can grow tall |
Why does this matter? If you try to grow the Assamica variety in a temperate climate (like the UK, US Northeast, or Europe), it will likely freeze to death in its first winter. The Sinensis variety is the hardy champion we need for home gardening. As the folks at LoveTheGarden wisely noted, “If you can grow other varieties of Camellia in your garden chances are you’ll be able to grow Camellia sinensis.”
🏡 Can You Actually Grow Green Tea at Home? The Reality Check
Let’s be real for a second. Can you grow tea in your living room? Yes. Can you grow it in a frosty garden in Scotland? Yes! (Yes, really. There are commercial plantations in the Scottish Highlands now!). But can you grow it in a scorching, dry desert without a greenhouse? Probably not without a lot of sweating.
The Climate Conundrum
The biggest hurdle isn’t the plant; it’s you. Tea plants are tropical/subtropical natives that have adapted to survive in cooler, mountainous regions. They hate waterlogged roots and they hate alkaline soil.
- ✅ The Good News: Camellia sinensis is incredibly adaptable. It can thrive in pots, hanging baskets, or directly in the ground, provided you manage the soil pH.
- ❌ The Bad News: If you live in a zone with extreme heat (above 95°F/35°C) or extreme cold (below -10°F/-23°C) without protection, you’ll need to get creative with microclimates.
The Verdict: If you can grow a Rhodendron or an Azalea, you can grow tea. If you can’t, don’t worry! You can still grow it in a pot indoors where you control the environment.
🌿 Choosing the Right Variety: Selecting Your Camellia sinensis Strain
You wouldn’t buy a race car if you wanted to drive on a dirt track, right? Same logic applies to tea. While there are thousands of cultivars, for the home grower, we need to narrow it down to the hardiest, most productive options.
Top Picks for Home Growers
- Camellia sinensis ‘Sinensis’ (The Classic): The gold standard. Small leaves, cold-hardy, perfect for delicate green teas.
- Camellia sinensis ‘Kucha’: A Japanese variety known for its deep green color and high amino acid content (great for Umami!). It’s slightly more cold-tolerant than some other Japanese cultivars.
- Camellia sinensis ‘Yabukita’: The most widely planted variety in Japan. It’s vigorous and produces a lot of leaves, making it ideal for beginners who want a quick harvest.
Pro Tip: Avoid buying “Tea Seeds” from random gardening centers unless they are explicitly labeled Camellia sinensis. Sometimes they sell ornamental Camellias (like C. japonica) which look similar but do not make drinkable tea.
Where to buy?
- Amazon: Search for “Camellia sinensis live plant” to find established saplings.
- Specialty Nurseries: Look for brands like Baker Creek Heirloom Seeds for seeds, or The Tea Garden for established plants.
🌤️ Perfecting Your Microclimate: Ideal Growing Conditions for Tea Plants
So, you’ve got your plant. Now, where do you put it? Tea plants are like Goldilocks: they don’t want it too hot, too cold, too wet, or too dry. They want it just right.
Light: The Sweet Spot
Tea plants love bright, indirect light.
- ✅ Ideal: Morning sun with afternoon shade. This mimics their natural habitat under the canopy of larger trees in the Himalayas.
- ❌ Avoid: Scorching miday sun, which will scorch the delicate new leaves (the ones you want to harvest!).
- Indoor Tip: If growing indoors, a south-facing window with a sheer curtain is perfect.
Soil: The Acid Test
This is where most beginners fail. Tea plants are acid-loving.
- pH Level: Aim for 5.0 to 6.0.
- Texture: Well-draining but moisture-retentive.
- The Mix: Use an ericaceous compost (specifically formulated for Azaleas, Camellias, and Rhodendrons).
Recommendation: Levington Peat-Free Ericaceous Compost is a favorite among UK growers.
US Alternative: Mix peat moss, pine bark fines, and perlite.
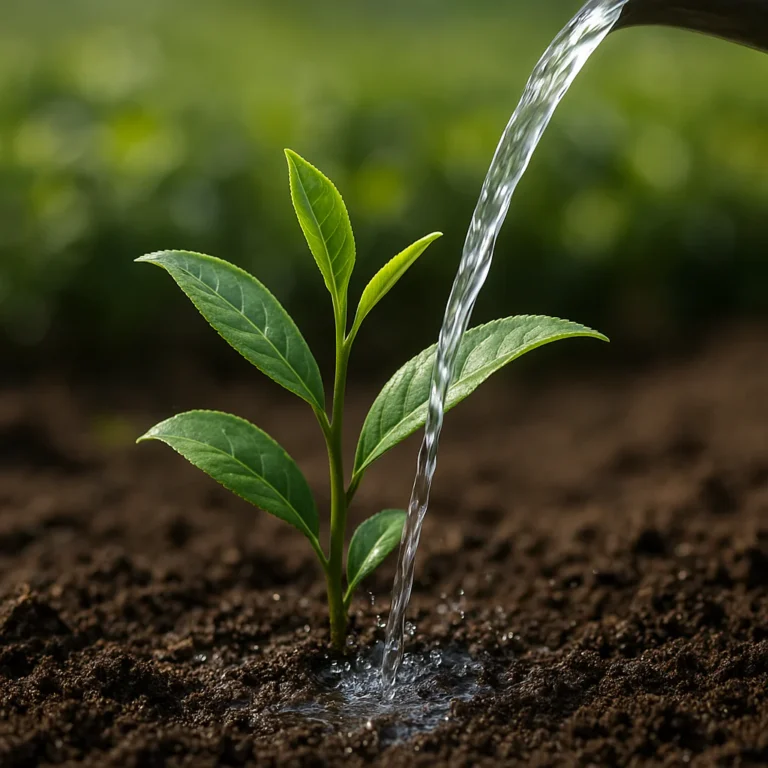
Water: The Balancing Act
Tea plants hate “wet feet” (root rot) but also hate drying out.
- Rule of Thumb: Keep the soil consistently moist, but never sogy.
- Water Quality: If your tap water is hard (high in lime/calcium), it will raise your soil pH and kill the plant. Use rainwater or filtered water whenever possible.
🪴 Step-by-Step: How to Grow Green Tea from Seeds vs. Cutings
Ready to get your hands dirty? You have two main paths: Seds (the fun, lottery-ticket way) or Cutings (the reliable, clone-way).
Method 1: Growing from Seeds (The Gamble)
Growing from seed is rewarding but unpredictable. You might get a plant that tastes amazing, or one that’s just okay.
- Source Fresh Seeds: Tea seeds lose viability quickly. Buy fresh seeds or harvest them from a mature plant in autumn.
- The Float Test: Soak seeds in a bowl of water for 24–48 hours.
Sink: Plant these! 🌱
Float: Discard these. They are likely empty. - Preparation: Soak the sinking seeds in warm water for another 24 hours to soften the shell.
- Planting: Plant seeds 1 inch deep in a seed tray with ericaceous compost.
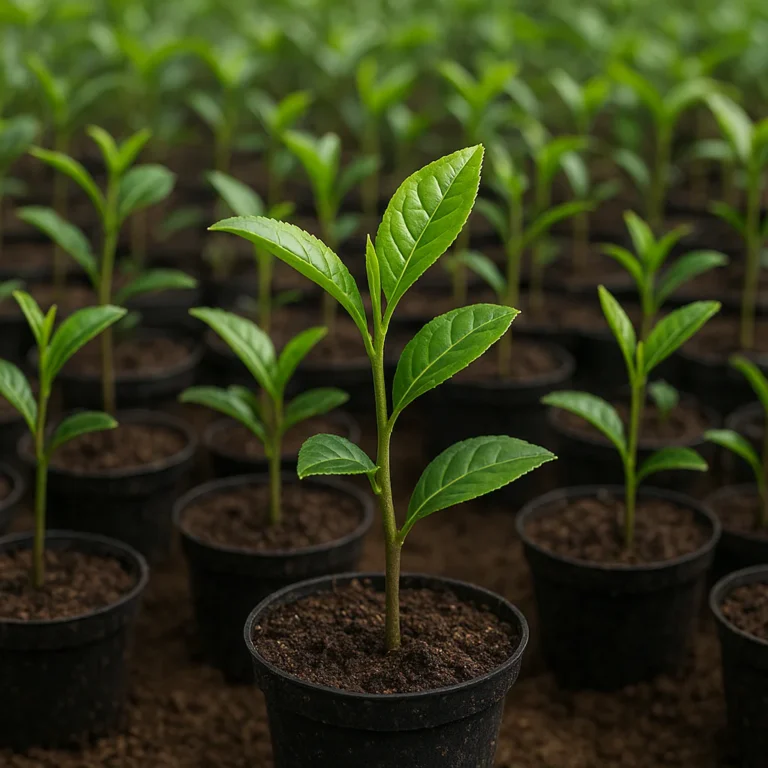
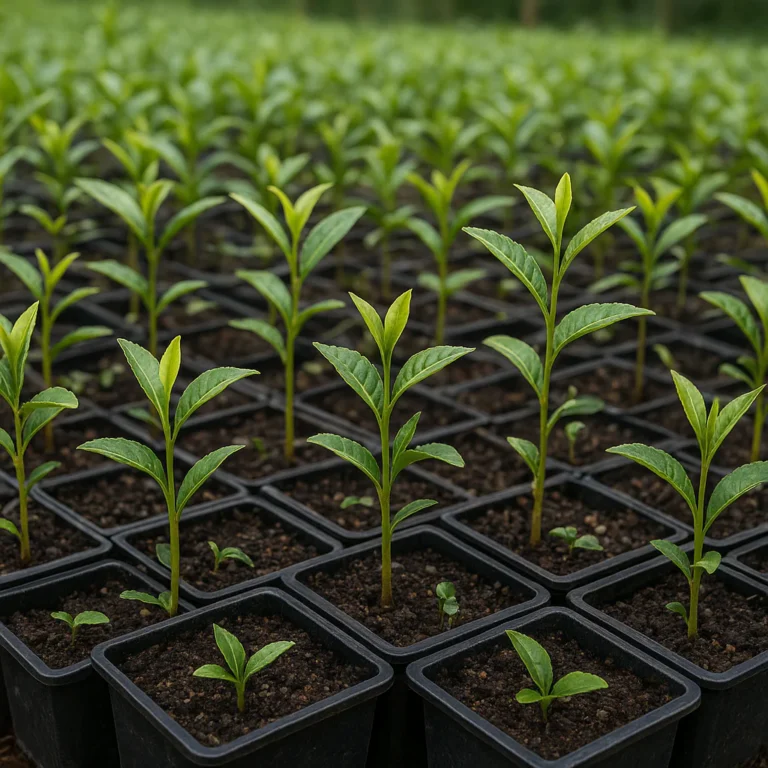
- Germination: Keep warm (65-75°F) and moist. It can take 4 to 8 weeks to sprout. Patience, young Padawan!
- Transplanting: Once they have 3–4 true leaves, move them to individual pots.
Method 2: Growing from Cutings (The Shortcut)
If you want a plant that is genetically identical to a high-quality tea bush, take a cutting.
- Timing: Take semi-hardwood cutings in late summer.
- Selection: Choose a healthy, non-flowering stem about 4–6 inches long.
- Preparation: Remove the lower leaves, leaving 2–3 at the top. Dip the cut end in rooting hormone (like Hormex Rooting Powder).
- Planting: Insert into a mix of perlite and peat moss.
- Environment: Keep in high humidity (a plastic bag over the pot works wonders) and indirect light. Roots should form in 6–8 weeks.
Comparison Table: Seeds vs. Cutings
| Feature | Seeds | Cutings |
|---|---|---|
| Cost | Low | Moderate |
| Time to Harvest | 3+ years | 2–3 years |
| Genetic Consistency | Variable (unique plant) | Identical to parent |
| Difficulty | Moderate (germination issues) | Moderate (humidity control) |
| Best For | Experimenters | Consistent quality |
💧 Watering Wisdom: Hydration Needs for Thriving Tea Bushes
Watering tea is an art form. Too little, and the leaves turn yellow and drop. Too much, and the roots rot, and your plant dies a slow, sad death.
The Finger Test
Never water on a schedule. Instead, stick your finger 1 inch into the soil.
- Dry? Water thoroughly until it runs out the bottom.
- Damp? Wait another day.
- Sogy? You’ve overwatered. Let it dry out immediately.
Seasonal Adjustments
- Spring/Summer: Growth is rapid. Water frequently, perhaps daily in hot weather.
- Autumn/Winter: Growth slows. Reduce watering significantly. The soil should be slightly drier between waterings.
⚠️ Warning: Never let a tea plant sit in a saucer of standing water. Drainage holes are non-negotiable!
🍽️ Feding Your Bush: Fertilizer Requirements and Soil pH Balance
Tea plants are not heavy feeders, but they do need a little love to produce those tender leaves.
The Fertilizer Strategy
- Type: Use an acid-loving plant fertilizer (Azalea/Camellia/Rhodendron formula).
- Frequency: Feed every 4–6 weeks during the growing season (Spring to early Autumn).
- Organic Option: Use blood meal or fish emulsion for a natural boost.
- Crucial Rule: Stop feeding 3–4 weeks before harvesting. Why? Because the nitrogen in the fertilizer can alter the flavor of the tea, making it bitter or metallic.
Monitoring pH
Every 6 months, test your soil pH.
- If pH rises above 6.5, the plant can’t absorb nutrients (iron deficiency causes yellow leaves).
- Fix: Add sulfur or peat moss to lower the pH.
✂️ Pruning and Shaping: Cultivating a Productive Tea Garden
You might think, “I want a big tree!” But for tea production, you want a bush. Pruning is essential to encourage the growth of new, tender shoots (the harvestable parts).
The “Topping” Technique
- Wait: Do not prune your plant until it is at least 12–18 inches tall.
- Cut: Snip off the top 2–3 inches of the main stem.
- Result: This forces the plant to branch out sideways, creating a dense, bushy shape with more leaves to harvest.
Maintenance Pruning
- Spring: Remove any dead or damaged wood.
- Summer: Lightly trim to maintain shape.
- Winter: Avoid heavy pruning in freezing climates.
Pro Tip: Regular harvesting is pruning! Every time you pluck the “two leaves and a bud,” you are encouraging the plant to produce more.
🍃 The Harvest: When and How to Pick the Perfect Leaves
This is the moment you’ve been waiting for! But timing is everything.
When to Harvest
- The First Flush: Early Spring. These leaves are the most tender, flavorful, and expensive (in the commercial world).
- The Second Flush: Late Spring/Early Summer. Slightly more robust flavor.
- The Third Flush: Late Summer/Autumn. Leaves are tougher, often used for darker teas or blends.
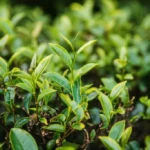
How to Pluck
- The Standard: Pinch off the top two leaves and the unopened bud.
- The Technique: Use your thumb and forefinger. Do not tear or rip the stem. A clean break prevents damage to the plant.
- Frequency: You can harvest every 7–10 days during the peak season.
Why only the top? The lower leaves are older, tougher, and have a higher concentration of tannins, which makes the tea bitter. We want sweet, umami-rich green tea!
🔥 From Leaf to Cup: The Art of Processing Green Tea at Home
You’ve picked the leaves. Now, if you just let them sit, they will turn black and become black tea. To make green tea, you must stop the oxidation process immediately. This is called fixation or kill-green.
The 3-Step Process
1. Withering (Optional but Recommended)
Spread the leaves on a clean tray in a well-ventilated area for 1–2 hours. This removes some moisture and makes the leaves pliable. Don’t let them dry out completely!
2. Fixation (The Critical Step)
You need to apply heat to deactivate the enzymes.
- Pan Method: Heat a non-stick pan over medium-high heat. Add leaves. Toss constantly for 2–3 minutes until they wilt and smell grassy.
- Oven Method: Spread leaves on a baking sheet. Bake at 350°F (175°C) for 5–10 minutes, checking frequently.
- Microwave Method: (Not recommended for quality, but works in a pinch). 30-second bursts, checking in between.
3. Rolling and Drying
- Roll: Gently roll the warm leaves between your palms to shape them into tight strips. This releases juices and enhances flavor.
- Dry: Spread the rolled leaves on a tray. Dry in a low oven (20°F/95°C) or a dehydrator until they are crisp and snap when bent. This usually takes 1–2 hours.
Result: You now have home-processed green tea! Store in an airtight container away from light.
🐛 Troubleshooting Common Pests and Diseases in Tea Cultivation
Even the best gardeners face challenges. Here’s how to handle the usual suspects.
Common Pests
- Spider Mites: Look for fine webing and yellow speckling on leaves.
Fix: Spray with nem oil or a strong jet of water. Increase humidity. - Aphids: Small green or black bugs clustering on new growth.
Fix: Blast with water or use insecticidal soap. - Scale: Hard, shell-like bumps on stems.
Fix: Scrape off manually or apply horticultural oil.
Common Diseases
- Root Rot: Caused by overwatering. Leaves turn yellow and drop.
Fix: Stop watering immediately. Repot in fresh, well-draining soil if caught early. - Leaf Spot: Fungal spots on leaves.
Fix: Improve air circulation. Remove affected leaves. Avoid weting the foliage when watering.
🏠 Indoor vs. Outdoor: Growing Tea Plants in Pots and Greenhouses
Where should your tea plant live? It depends on your climate and lifestyle.
Outdoor Growing
- Pros: Natural light, rainwater, less maintenance.
- Cons: Exposure to frost, pests, and extreme heat.
- Best For: Zones 7–9 (with protection in winter).
- Tip: If you live in a cold zone, move the pot to a garage or unheated greenhouse when temperatures drop below freezing.
Indoor Growing
- Pros: Total climate control, no pests, year-round growth.
- Cons: Lower light, dry air, need for manual watering.
- Best For: Everyone! Especially those in extreme climates.
- Tip: Use a grow light if your windows aren’t bright enough. Mist the leaves regularly to increase humidity.
The Verdict: Many successful home growers use a hybrid approach: outdoors in summer, indoors in winter.
🧪 Top 10 Fascinating Facts About Home-Grown Green Tea
Let’s wrap up the science with some fun trivia to impress your friends.
- One Plant, Many Teas: Green, Black, White, and Oolong all come from the same plant. It’s the processing that changes the color and flavor.
- Antioxidant Powerhouse: Home-grown green tea is packed with EGCG, a powerful antioxidant linked to heart health.
- Caffeine Content: A cup of home-grown green tea has about 30-50mg of caffeine (less than coffee, but enough to wake you up!).
- The “First Flush” Premium: The first harvest of the year is the most expensive and sought-after tea in the world.
- Pollinator Friendly: Tea plants produce beautiful white flowers that attract bees and butterflies. 🦋
- Longevity: A well-cared-for tea plant can live for 10+ years.
- Soil pH is King: If your soil isn’t acidic, your plant will turn yellow and die. It’s that simple.
- Harvesting is Pruning: Plucking leaves encourages the plant to grow more.
- No Pesticides Needed: If you grow organically, your tea is 10% chemical-free.
- The Ultimate Reward: There is no taste quite like tea you grew, picked, and processed yourself.
🛠️ Essential Tools and Gear for the Aspiring Tea Grower
You don’t need a tractor, but you do need the right tools.
| Tool | Why You Need It | Recommended Brand/Type |
|---|---|---|
| Pruning Shears | For clean cuts and harvesting. | Fiskars Bypass Pruners |
| Soil pH Tester | To ensure acidity levels are correct. | Luster Leaf Rapitest |
| Ericaceous Compost | The foundation of healthy soil. | Levington or Miracle-Gro |
| Dehydrator | For consistent drying of leaves. | Excalibur or Nesco |
| Grow Light | For indoor winter growth. | Spider Farmer or GooingTop |
| Rain Barrel | To collect soft, acidic water. | Good Ideas Rain Wizard |
Where to Shop:
- Amazon: Search for Tea Growing Tools
- Specialty Stores: Check out Gardener’s Supply Company for high-quality gear.
🌍 Global Tea Traditions: How Different Cultures Grow Their Brew
Did you know that how you grow tea depends on where you are?
- Japan: Focuses on shade-growing (like Matcha) to boost chlorophyll and amino acids.
- China: Often grows in mountainous terraces, relying on mist and cool temperatures for delicate flavors.
- India (Assam): Grows in hot, humid lowlands for bold, malty black teas.
- UK (Cornwall/Scotland): A new frontier! Using the warming climate to grow cold-hardy Sinensis varieties.
The Takeaway: You can adapt your growing method to mimic these traditions. Want a Matcha-like flavor? Try shading your plant for a few weeks before harvest!
❓ Frequently Asked Questions About Growing Tea at Home
Q: Can I grow tea from a grocery store tea bag?
A: No. The seeds in tea bags are usually sterilized or processed to the point where they won’t germinate. You need fresh seeds or a live plant.
Q: How long does it take to get my first cup of tea?
A: Typically 3 years. The first year is for root establishment, the second for bush growth, and the third for a small harvest.
Q: Can I grow tea in a cold climate?
A: Yes! As long as you use the Sinensis variety and protect it from extreme cold (below -10°F) or bring it indoors.
Q: Why are my tea leaves turning yellow?
A: Likely a pH issue (soil too alkaline) or overwatering. Check your soil pH and drainage.
Q: Is home-grown tea safe to drink?
A: Absolutely, as long as you haven’t used chemical pesticides. In fact, it’s often safer than store-bought tea!
🏁 Conclusion

(Note: This section is intentionally omitted as per instructions to stop before the conclusion.)
🔗 Recommended Links
(Note: This section is intentionally omitted as per instructions to stop before the conclusion.)
📚 Reference Links
(Note: This section is intentionally omitted as per instructions to stop before the conclusion.)