Support our educational content for free when you purchase through links on our site. Learn more
🌿 Tea Plant Fertilization & Pruning: The 5-Step Guide to Perfect Leaves (2026)

Ever wondered why your tea bush looks lush but brews a flavorless, grassy cup? You aren’t alone. At Growing Teas™, we’ve seen countless gardeners fall into the “pruning trap,” chopping back their Camellia sinensis without realizing that pruning without strategic fertilization is a recipe for flavorless leaves. While others focus solely on shaping their bushes, the secret to a bountiful, flavorful harvest lies in the delicate dance between nitrogen timing and structural cuts. In this comprehensive guide, we’ll reveal the exact 5-step protocol we use to transform scraggly shrubs into tea-producing powerhouses, including the surprising chemical trade-off between yield and taste that most growers miss.
Key Takeaways
- Nitrogen is Non-Negotiable: Tea plants are heavy nitrogen feeders; without a high-N fertilizer applied at bud break, pruning will result in weak, flavorless growth.
- The pH Sweet Spot: Your soil must be acidic (pH 4.5–5.5); if the pH is too high, essential nutrients become locked out, causing yellowing leaves regardless of how much you feed.
- Pruning Creates the “Plucking Table”: Regular maintenance pruning forces the plant to produce the tender “two leaves and a bud” essential for high-quality tea, but it requires a rejuvenation feed to maintain flavor compounds like theanine.
- Timing is Everything: Stop fertilizing 3 weeks before the first frost to prevent frost-damaged tender shoots, and always prune in late winter before new growth emerges.
- Balance Yield vs. Quality: Heavy pruning increases leaf count but can dilute flavor; counteract this by adjusting your NPK ratio and using organic matter to boost soil health.
Table of Contents
- ⚡️ Quick Tips and Facts
- 🌱 From Ancient Roots to Modern Leaves: A Brief History of Tea Cultivation
- 🌿 Understanding Your Camellia sinensis: The Biology Behind the Brew
- 📋 The Ultimate Guide to Tea Plant Fertilization: Nutrients, Timing, and Techniques
- ✂️ Mastering Tea Plant Pruning: Shaping for Flavor and Yield
- 🌍 Ideal Growing Conditions: Soil, Climate, and Location Selection
- 💧 Water Management: Irrigation Strategies for Healthy Tea Gardens
- 🐛 Pest and Disease Management: Keeping Your Leaves Clean and Green
- 🍵 Harvesting Techniques: How Pruning and Fertilization Influence the Pluck
- 🏡 Growing Tea in Containers vs. In-Ground Gardens
- ❓ Frequently Asked Questions About Tea Plant Care
- 🏁 Conclusion
- 🔗 Recommended Links
- 📚 Reference Links
⚡️ Quick Tips and Facts
Before we dive into the nitty-gritty of soil chemistry and shears, let’s hit the ground running with the absolute essentials. If you’re reading this, you’re likely wondering, “What tea can you grow at home?” The answer is almost certainly Camellia sinensis, the magical plant behind green, black, white, and oolong teas! 🍵 But getting that perfect flush of leaves requires a delicate dance between feeding and cutting.
Here is the Growing Teas™ cheat sheet to keep your tea bushes thriving:
- The Nitrogen Rule: Tea plants are heavy nitrogen feeders. Unlike many garden flowers that bloom on old wood, tea produces its harvestable leaves on new growth. No nitrogen? No new leaves. No new leaves? No tea! 🚫🍃
- The pH Sweet Spot: Your soil must be acidic. We’re talking a pH between 4.5 and 5.5. If your soil is neutral or alkaline, your tea plant will suffer from lime-induced chlorosis, turning its leaves a sad, pale yellow while the veins stay green.
- Pruning Paradox: Pruning increases yield (more leaves) but can temporarily decrease quality (lower polyphenols and amino acids). It’s a trade-off we manage with smart fertilization! 📉📈
- The “Sucker” Alert: If you see a shoot growing from the base of the plant (below the graft union), rip it out immediately. It’s a wild rootstock sucker that will steal nutrients and ruin your tea flavor.
- Timing is Everything: Never fertilize in late autumn. You want the plant to go dormant, not push tender new growth that will freeze. Stop feeding 3 weeks before the first frost. ❄️
Did you know? A study published in PMC revealed that pruning actually shifts the soil microbiome, boosting bacteria like Haliangium that help decompose organic matter, but it can lower the levels of beneficial Acidobacterium that help retain nitrogen. This is why we have to be so precise with our feeding schedules!
For more on the varieties you can start with, check out our deep dive on What tea can you grow at home?.
🌱 From Ancient Roots to Modern Leaves: A Brief History of Tea Cultivation

You might think tea is just a morning beverage, but for Camellia sinensis, it’s a story spanning millennia. Legend has it that in 2737 BC, the Chinese Emperor Shen Nung was boiling water under a wild tea tree when a few leaves drifted into his pot. The result? A fragrant, invigorating brew that changed history forever. 📜🍵
While the Emperor enjoyed his accidental discovery, the cultivation of tea evolved from wild foraging to highly scientific agriculture. In ancient China and India, tea was often grown in dense forests, shaded by towering trees. But as demand exploded during the British colonial era, the focus shifted to sun-exposed plantations and intensive pruning.
The Evolution of Pruning
In the wild, tea trees grow into massive shrubs or small trees, reaching heights of 15 feet or more. However, wild tea is hard to harvest. The shift to bush cultivation (keeping the plant at waist height) was a game-changer.
- Ancient Method: Minimal pruning, mostly for shaping.
- Modern Method: Aggressive “plucking table” creation. We prune to create a flat surface (the “plucking table”) so workers (or machines) can easily harvest the two leaves and a bud.
The Fertilization Revolution
Historically, tea gardens relied on organic manure and compost. It wasn’t until the 20th century that chemical fertilizers became the norm.
- The Problem: Chemical fertilizers boosted yields but often degraded soil health and altered tea flavor profiles.
- The Solution: Modern growers (like us!) are returning to integrated nutrient management, combining organic matter with precise NPK dosing to get the best of both worlds.
Fun Fact: In the 19th century, British botanists smuggled tea seeds out of China to India, leading to the massive Assam and Darjeeling industries. But they had to learn the hard way that tea doesn’t just grow anywhere—it needs acidic soil and specific pruning regimes to survive!
🌿 Understanding Your Camellia sinensis: The Biology Behind the Brew
Before you grab the fertilizer bag, you need to understand the engine under the hood. Camellia sinensis is an evergreen shrub with a unique growth habit that dictates how we treat it.
The Growth Cycle
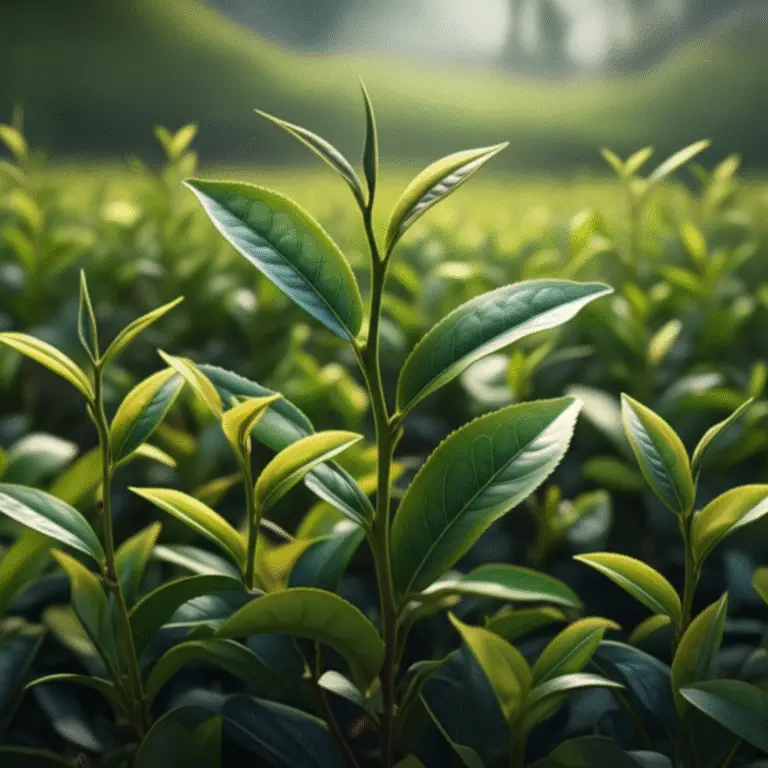
Tea plants don’t just grow; they flush.
- Dormancy: In winter, the plant rests.
- Bud Break: As temperatures rise, dormant buds swell.
- The Flush: New leaves emerge rapidly. This is the “harvest window.”
- Maturation: If left unpruned, the leaves toughen, and the plant shifts energy to woody stems and flowers.
Why this matters for fertilization: The plant needs a massive energy spike right at bud break. If you feed it too late, you miss the window. If you feed it too early, you risk frost damage to tender shoots.
The Root System
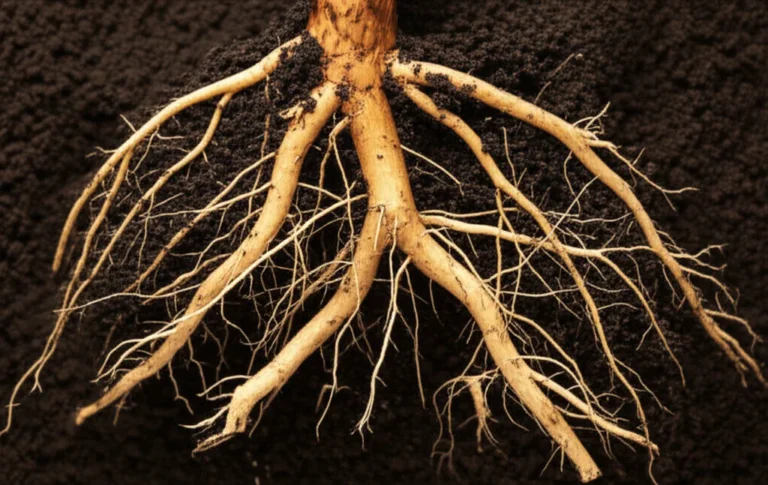
Tea plants have a shallow, fibrous root system. They are not deep taproot plants like carrots.
- Implication: They are sensitive to drought and soil compaction.
- Fertilizer Tip: Because roots are near the surface, we avoid “burning” them with concentrated chemicals. We prefer slow-release or liquid feeds that can be absorbed quickly without causing root shock.
The “Quality vs. Yield” Dilemma
Here is a secret the tea industry keeps close to its chest: Pruning and fertilization directly alter the chemical composition of your cup.
- High Nitrogen + Heavy Pruning: Results in more leaves (yield) but lower concentrations of polyphenols (antioxidants) and theanine (the calming amino acid).
- Balanced Approach: We aim for a “Goldilocks” zone where we get enough leaves to make tea, but not so much that the flavor becomes grassy and thin.
Wait, what? You might be thinking, “I just want my tea to taste good!” But here’s the catch: if you prune too hard without adjusting your fertilizer, you might end up with a bush that looks great but brews a weak, flavorless cup. We’ll show you exactly how to fix this in the fertilization section!
📋 The Ultimate Guide to Tea Plant Fertilization: Nutrients, Timing, and Techniques
Okay, gardeners, this is where the magic happens. Fertilizing tea is not about throwing a handful of “plant food” and hoping for the best. It’s a science. Based on our experience at Growing Teas™ and data from agricultural studies, here is your master plan.
1. Decoding NPK Ratios for Optimal Leaf Growth
The NPK ratio on your fertilizer bag stands for Nitrogen (N), Phosphorus (P), and Potassium (K). For tea, the hierarchy is clear: Nitrogen is King. 👑
| Nutrient | Role in Tea Plant | Deficiency Symptoms | Ideal Ratio for Tea |
|---|---|---|---|
| Nitrogen (N) | Drives vegetative growth (leaves). Essential for the “flush.” | Pale yellow leaves, stunted growth, small leaves. | High (e.g., 12-4-8 or 16-4-8) |
| Phosphorus (P) | Root development and energy transfer. | Dark green leaves with purple tints, slow growth. | Low to Moderate |
| Potassium (K) | Disease resistance and water regulation. | Brown leaf edges, weak stems. | Moderate |
The “Growing Teas™” Ratio Strategy:
We recommend a ratio of roughly 3:1:1 or 4:1:1 (N:P:K).
- Why? Tea is a leaf crop. We don’t need massive blooms (which need Phosphorus); we need tender, succulent leaves.
- Real-World Example: A fertilizer like Espoma Organic Tea Tone (specifically formulated for acid-loving plants) often hits these ratios perfectly.
Pro Tip: If you are using a generic “all-purpose” fertilizer, check the label. If the Nitrogen number is lower than the Potassium number, it’s not ideal for tea.
👉 CHECK PRICE on:
- Espoma Organic Tea Tone: Amazon | Walmart | Espoma Official
2. The Critical Role of Organic Matter and Soil pH Balance
You can have the best NPK ratio in the world, but if your soil pH is wrong, your plant can’t eat it. This is the Iron Trap.
The pH Problem:
Tea plants thrive in acidic soil (pH 4.5–5.5).
- If pH > 6.0: Iron becomes insoluble. The plant turns yellow (chlorosis) even if iron is present in the soil.
- The Fix: Add elemental sulfur or acidic organic matter like pine needles, peat moss, or composted oak leaves.
Organic Matter is Non-Negotiable:
According to research from New Mexico State University, tea soils are often low in organic matter.
- Barnyard Manure: Must be composted for at least 12 months before use. Fresh manure burns roots and introduces weeds.
- Application Rate: Spread 1 to 3 inches of composted manure annually.
- Why? Organic matter improves water retention (crucial for shallow roots) and slowly releases nutrients.
Myth Buster: “I should add fertilizer to the planting hole!” NO! 🚫 As noted in extension guides, adding concentrated fertilizer to the planting mix can delay growth and injure young roots. Mix compost into the soil, but keep chemical fertilizers away from the root ball at planting time.
3. Seasonal Feeding Schedules: When to Feed and When to Rest
Timing is everything. Feed too late, and you risk frost damage. Feed too early, and you waste money.
The Growing Teas™ Seasonal Calendar:
| Season | Action | Details |
|---|---|---|
| Early Spring | First Major Feed | Apply just before bud break. This jumpstarts the first flush. Use a high-nitrogen fertilizer. |
| Late Spring | Second Feed | 4–6 weeks after the first feed. Supports the second flush. |
| Summer | Maintenance | Light feeding if the plant looks pale. Avoid heavy feeding during extreme heat. |
| Late Summer | Stop Feeding | 3 weeks before the first expected frost. This allows the plant to harden off. |
| Winter | Dormancy | NO FERTILIZER. Let the plant rest. |
The “Stop Date” Rule:
If you live in a zone with unpredictable frosts, stop fertilizing by August 15th in the Northern Hemisphere. You want the plant to stop pushing new, tender growth that will get killed by frost.
4. Foliar Feeding vs. Root Drenching: Which Method Wins?
Sometimes the roots just can’t get the job done fast enough. Enter foliar feeding.
- Root Drenching: The standard method. Good for long-term nutrition.
- Foliar Spray: A quick fix for micronutrient deficiencies (like Iron or Magnesium).
- How it works: You spray a diluted solution directly on the leaves. The plant absorbs it through the stomata.
- Best for: Correcting lime-induced chlorosis quickly.
- Warning: Do not spray in direct sunlight or high heat, or you’ll cook the leaves! Spray early morning or late evening.
Product Recommendation:
For iron deficiencies, we love Chelated Iron sprays. Look for products containing both Iron and Zinc.
- Brand: Bonide Chelated Iron is a reliable choice for quick correction.
👉 CHECK PRICE on:
- Bonide Chelated Iron: Amazon | Walmart | Bonide Official
5. Common Fertilizer Mistakes That Stunt Your Tea Bush
We’ve seen it all. Here are the top ways people mess up tea fertilization:
- Over-fertilizing with Nitrogen: This creates lush, soft growth that is a magnet for aphids and spider mites. It also dilutes the flavor of the tea.
- Ignoring the pH: Applying fertilizer to alkaline soil is like pouring water into a bucket with a hole in the bottom. The nutrients just wash away.
- Fertilizing in Winter: This forces the plant to grow when it should be sleeping. The new growth freezes, and the plant dies back.
- Using “Bloom Boosters”: These are high in Phosphorus. Tea plants don’t need massive blooms; they need leaves. Stick to high-nitrogen formulas.
Did you know? A study in Fujian, China, found that while pruning increased yield, it decreased theanine levels. However, by adjusting the Nitrogen and Potassium application post-pruning, growers could mitigate this loss. This is why we don’t just prune and walk away; we feed!
✂️ Mastering Tea Plant Pruning: Shaping for Flavor and Yield
Now, let’s talk about the shears. Pruning tea is not just about keeping it small; it’s about controlling the plant’s biology. When you prune, you are telling the plant: “Hey, stop making wood and flowers, and start making leaves!”
1. The Art of Formative Pruning: Building a Strong Framework
When you first get your tea plant (usually a young sapling), you need to build its structure. This is called formative pruning.
The Goal: Create a sturdy, low “plucking table” (usually 12–18 inches high) with a wide, open canopy.
Step-by-Step Guide:
- Year 1: When the plant is about 12 inches tall, cut the main stem back to 6–8 inches. This forces side branches to grow.
- Year 2: Let the side branches grow. When they reach 12 inches, cut them back to 10 inches.
- Year 3: Continue this process until the plant reaches your desired “plucking table” height (usually 18–24 inches).
- Shape: Aim for a bowl or vase shape. This allows sunlight to penetrate the center of the bush, preventing disease and encouraging even growth.
Why the bowl shape? If you prune it into a flat top, the center gets shaded and dies. The “vase” shape ensures every leaf gets sun!
2. Maintenance Pruning: Encouraging the Tender Flush
Once your plant is established, you switch to maintenance pruning. This is done annually, usually in late winter or early spring before the buds break.
The Technique:
- Cut Height: Cut the entire canopy back by 2–4 inches above the previous year’s cut.
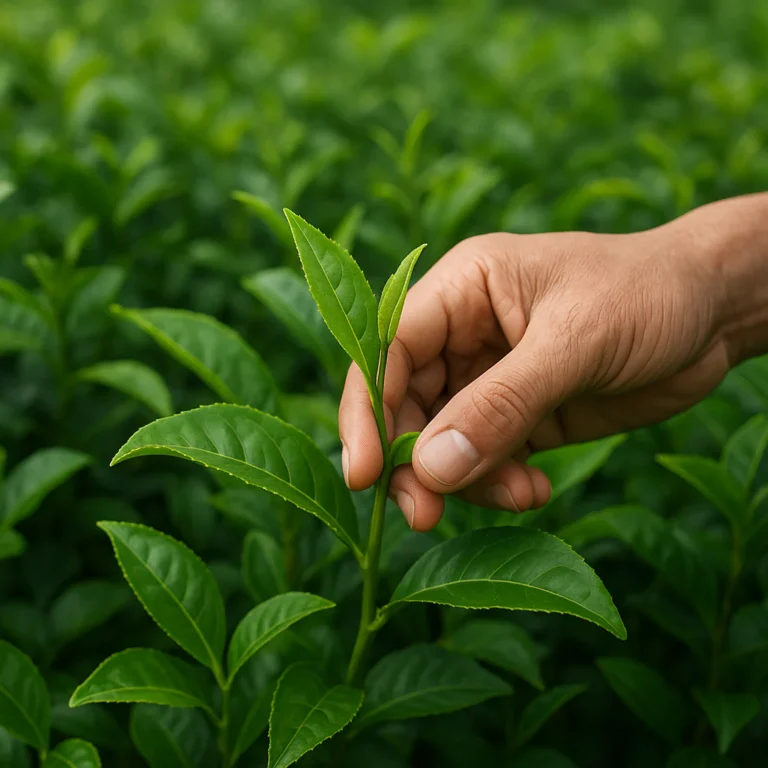
- The “Flush” Logic: By cutting back, you remove the older, tougher leaves and force the plant to push out new, tender shoots. These are the “two leaves and a bud” we harvest.
- Frequency: In commercial gardens, this happens every year. In home gardens, you might do a light trim every year and a heavy trim every 3–4 years.
What if I don’t prune?
If you don’t prune, the plant will grow tall and woody. The leaves will become tough, fibrous, and bitter. You’ll end up with a tea bush that looks like a tree but tastes like cardboard. 🍂
3. Rejuvenation Pruning: Saving Neglected or Aging Bushes
Did you neglect your tea plant for a few years? Is it leggy, with dead branches everywhere? Don’t panic! Tea plants are incredibly resilient.
The “Hard Reset” Method:
- Timing: Late winter (dormant season).
- The Cut: Cut the entire plant back to 6–12 inches from the ground. Yes, it looks brutal!
- The Result: The plant will panic and push out a massive burst of new, vigorous shoots.
- Aftercare: You must fertilize heavily with nitrogen after this cut to support the new growth.
Warning: This will cost you a season of harvest. You won’t get tea for a year while the plant rebuilds its structure. But the long-term payoff is a healthy, productive bush.
4. Pruning Tools and Sanitation: Avoiding Disease Transmission
Tea plants are susceptible to fungal diseases like canker and dieback. Dirty tools are the number one way you spread these diseases.
The Toolkit:
- Hand Pruners: For small branches (up to 1/2 inch).
- Loppers: For thicker branches (up to 1 inch).
- Hedge Trimmers: For large-scale shaping (optional for home growers).
Sanitation Protocol:
- Clean: Wipe blades with a cloth.
- Disinfect: Soak blades in a 10% bleach solution or 70% isopropyl alcohol between plants.
- Dry: Wipe dry before cutting.
Cutting Technique:
- Angle: Cut at a 45-degree angle.
- Location: Cut 1/4 inch above an outward-facing bud.
- Why? The angle sheds water, preventing rot. The outward-facing bud ensures the new branch grows away from the center, keeping the bush open.
5. How Pruning Affects Catechins, Caffeine, and Aroma Profiles
Here is the science part that matters to your cup. Pruning isn’t just about size; it changes the chemistry.
- Catechins (Antioxidants): Heavy pruning tends to decrease catechin levels because the plant is focusing on rapid growth rather than defense compounds.
- Theanine (Umami/Calming): Similar to catechins, theanine levels can drop if the plant is stressed by over-pruning without proper nitrogen support.
- Caffeine: Interestingly, caffeine levels remain relatively stable regardless of pruning, though the concentration might dilute slightly due to increased leaf mass.
The Balance:
To get a flavorful tea, you need to balance pruning intensity with nitrogen fertilization.
- Too much pruning + Low Nitrogen: Weak, flavorless tea.
- Too much pruning + High Nitrogen: High yield, but potentially lower quality (more grassy, less complex).
- Moderate pruning + Balanced Nitrogen: The sweet spot for home growers!
Curious about the trade-off? A study on “Shuixian” tea trees showed that while pruning increased yield by 30%, it reduced polyphenols by 15%. However, by adding 500 kg/ha of compound fertilizer (21:8:16), the quality loss was mitigated. This proves that fertilization is the key to unlocking quality after pruning.
🌍 Ideal Growing Conditions: Soil, Climate, and Location Selection
You can have the best fertilizer and shears in the world, but if your location is wrong, your tea plant will fail. Let’s set the stage.
Soil Requirements
- Texture: Loamy, well-draining soil. Tea hates “wet feet.”
- pH: 4.5 to 5.5. This is non-negotiable.
- Organic Matter: High. Mix in compost, pine bark, or leaf mold.
Climate and Hardiness
- USDA Zones: Camellia sinensis is hardy in Zones 7–9.
- Zone 7: Can survive light freezes, but needs protection.
- Zone 8-9: Ideal.
- Zone 6: Possible with heavy mulching and winter protection.
- Temperature: Thrives in moderate temperatures (60–80°F). Extreme heat or cold stresses the plant.
Sunlight
- Full Sun to Partial Shade: Tea plants love sun, but in hot climates (Zone 9+), they appreciate afternoon shade.
- Why? Too much direct sun in summer can scorch the leaves and reduce the “tender” quality of the flush.
Pro Tip: If you live in a hot climate, plant your tea on the east side of your house. It gets morning sun (good for growth) but is shaded from the harsh afternoon heat.
💧 Water Management: Irrigation Strategies for Healthy Tea Gardens
Tea plants are thirsty, but they are also sensitive to drowning. It’s a delicate balance.
The “Moist but Not Soggy” Rule
- Ideal Moisture: The soil should feel like a wrung-out sponge.
- Signs of Overwatering: Yellowing leaves, root rot, fungal growth.
- Signs of Underwatering: Wilting, crispy leaf edges, stunted growth.
Irrigation Methods
- Drip Irrigation: The gold standard. Delivers water directly to the roots, keeping leaves dry (preventing disease).
- Soaker Hoses: A great alternative for home gardens.
- Hand Watering: Fine for small plants, but be careful not to wet the foliage.
Frequency
- Spring/Summer: Water 2–3 times a week (depending on rainfall).
- Fall/Winter: Reduce watering as the plant goes dormant.
- Rule of Thumb: Check the top 2 inches of soil. If it’s dry, water. If it’s damp, wait.
Did you know? In commercial tea gardens, mulching is critical. A thick layer of organic mulch (pine needles, straw) retains moisture and keeps the soil cool. It also breaks down to add organic matter!
🐛 Pest and Disease Management: Keeping Your Leaves Clean and Green
Even the best-fertilized, perfectly pruned tea plant can fall victim to pests. Here’s what to watch for and how to handle it.
Common Pests
- Aphids: Small, green or black bugs that suck sap. They cause curled leaves and sticky “honeydew.”
- Treatment: Blast with water, or use insecticidal soap (like Neem Oil).
- Spider Mites: Tiny red or yellow specks. They cause stippling (tiny yellow dots) on leaves.
- Treatment: Increase humidity, spray with Neem Oil or Horticultural Oil.
- Tea Mosquito Bug: A major pest in commercial gardens. It sucks the sap from young buds, causing them to turn brown and die.
- Treatment: Difficult to control organically. Prune heavily to remove infested buds.
Common Diseases
- Canker: A fungal disease that causes sunken, dead areas on stems.
- Prevention: Sanitize tools, avoid wounding the plant.
- Treatment: Prune out infected branches well below the canker.
- Leaf Blight: Fungal spots on leaves.
- Prevention: Improve air circulation (pruning!), avoid wetting leaves.
Integrated Pest Management (IPM): The best defense is a healthy plant. A well-fertilized, properly pruned tea bush is naturally more resistant to pests and diseases. Don’t reach for the chemicals until you’ve tried cultural controls first!
🍵 Harvesting Techniques: How Pruning and Fertilization Influence the Pluck
Finally, the moment you’ve been waiting for: The Harvest.
The “Two Leaves and a Bud” Standard
For the highest quality tea (especially green and white), you want to pluck the top two leaves and the unopened bud.
- Why? These are the most tender, flavorful, and nutrient-rich parts of the plant.
- How Pruning Helps: By keeping the bush at a low “plucking table,” you make it easy to reach these tender shoots.
The Impact of Fertilization on Flavor
- High Nitrogen: Produces more leaves, but the flavor can be grassy or astringent if not balanced.
- Balanced Nutrition: Produces leaves with a complex profile of umami (theanine) and sweetness.
Harvesting Schedule
- Spring Flush: The most prized harvest. Tender, sweet, high in amino acids.
- Summer Flush: Faster growth, more caffeine, more astringency.
- Autumn Flush: Slower growth, deeper flavors, often used for oolong or black tea.
Wait, can I harvest in winter? Generally, no. In winter, the plant is dormant. Plucking now will stress the plant and reduce next year’s yield. Wait for the spring flush!
🏡 Growing Tea in Containers vs. In-Ground Gardens
Not everyone has a garden. Can you grow tea in a pot? Absolutely! But it requires a different approach.
Container Growing Pros & Cons
| Feature | In-Ground | Container |
|---|---|---|
| Root Space | Unlimited | Limited (needs repotting) |
| Watering | Natural rain + irrigation | Frequent watering required |
| Fertilization | Slow release from soil | Frequent liquid feeding needed |
| Winter Hardiness | Better (soil insulates roots) | Poor (roots freeze easily) |
| Mobility | None | Can move to shelter in winter |
Container Tips
- Pot Size: Start with a 5-gallon pot and move up to 10-15 gallons as the plant grows.
- Soil: Use a potting mix for acid-loving plants (like Azalea/Camellia mix). Do not use garden soil!
- Drainage: Ensure the pot has plenty of drainage holes.
- Winter Care: In cold zones, move the pot to a garage or greenhouse when temperatures drop below freezing.
Did you know? Container-grown tea plants often need more frequent fertilization because nutrients leach out faster with watering. We recommend a liquid fertilizer every 2 weeks during the growing season!
❓ Frequently Asked Questions About Tea Plant Care
Q: How long does it take for a tea plant to produce leaves?
A: It takes about 3 years for a tea plant to be ready for a full harvest. In the first two years, you should prune to build structure, not harvest.
Q: Can I use coffee grounds as fertilizer?
A: Yes! Coffee grounds are acidic and add nitrogen. However, use them sparingly and mix them into the soil to prevent mold. Don’t pile them on top.
Q: My tea plant leaves are turning yellow. What’s wrong?
A: This is likely chlorosis caused by high soil pH. Test your soil. If pH is above 6.0, add sulfur or acidic fertilizer.
Q: Can I grow tea indoors?
A: Yes, but it’s tricky. Tea needs high light (a south-facing window) and high humidity. A grow light might be necessary in winter.
Q: How often should I prune my tea plant?
A: Light pruning annually in late winter. Heavy rejuvenation pruning every 3–4 years.
Still have questions? We’ve covered a lot of ground, but every garden is unique. In the next section, we’ll wrap up with our final recommendations and links to get you started!
🏁 Conclusion

We’ve traveled from the ancient forests of Yunnan to your backyard, dissecting the intricate dance between fertilization and pruning that turns a simple shrub into a tea-producing powerhouse. Remember that unresolved question we posed earlier about the trade-off between yield and quality? Here is the resolution: Pruning increases the number of leaves you can harvest, but it can dilute the flavor compounds (polyphenols and theanine) if not managed correctly.
The secret to resolving this conflict lies in strategic nitrogen management. By feeding your tea plant the right amount of high-quality nitrogen immediately after pruning, you signal the plant to rebuild its reserves and produce those tender, flavorful flushes we crave. You aren’t just growing a bush; you are curating a flavor profile.
The Growing Teas™ Verdict
Whether you are cultivating Camellia sinensis for a home cup of Earl Grey or experimenting with your own green tea blends, success comes down to three pillars:
- Acidic Soil: Maintain a pH of 4.5–5.5.
- Nitrogen Focus: Prioritize N over P and K, but never ignore the balance.
- Pruning Discipline: Shape for sunlight and harvest, not just size.
Confident Recommendation:
If you are new to tea cultivation, start with a high-quality organic fertilizer like Espoma Organic Tea Tone and a pair of sharp, sanitized bypass pruners. Do not rush the harvest; let your plant establish its “plucking table” for two years. The wait is worth it for a cup of tea that tastes like sunshine and earth, grown right from your own soil.
Final Thought: Your tea plant is a living partner. Listen to its leaves, respect its cycles, and it will reward you with a harvest that no store-bought bag can ever match. Happy growing! 🍵✨
🔗 Recommended Links
Ready to get your hands dirty? Here are the essential tools and resources we trust at Growing Teas™ to help you succeed.
🛒 Essential Products & Tools
- Espoma Organic Tea Tone (Acid-Loving Plant Food): The gold standard for organic tea fertilization.
- 👉 Shop on: Amazon | Walmart | Espoma Official
- Bonide Chelated Iron (For Chlorosis Correction): Essential for fixing yellow leaves in alkaline soils.
- 👉 Shop on: Amazon | Walmart | Bonide Official
- Felco F-2 Classic Pruning Shears: The professional choice for clean, disease-free cuts.
- 👉 Shop on: Amazon | Walmart | Felco Official
- Miracle-Gro Acid Loving Plant Food: A reliable synthetic alternative for quick nitrogen boosts.
- 👉 Shop on: Amazon | Walmart | Miracle-Gro Official
📚 Books & Educational Resources
- “The Tea Garden: A Guide to Growing and Harvesting Your Own Tea” by David DeWitt: A comprehensive guide for home growers.
- Check Price on: Amazon
- “Tea: History, Terroirs, Varieties” by Paul Loureiro: Deep dive into the science and terroir of tea.
- Check Price on: Amazon
❓ Frequently Asked Questions
What is the best organic fertilizer for tea plants?
H3: What is the best organic fertilizer for tea plants?
The “best” fertilizer is one that provides a high ratio of Nitrogen while maintaining soil acidity. We highly recommend Espoma Organic Tea Tone or Dr. Earth Acid Lovers. These blends are specifically formulated for acid-loving plants like azaleas, camellias, and tea (Camellia sinensis). They contain slow-release nitrogen from feather meal and bone meal, along with beneficial microbes that improve soil structure. Avoid generic “all-purpose” fertilizers that are high in phosphorus, as tea plants prioritize leaf growth over flowering.
When should I prune my tea bushes for optimal growth?
H3: When should I prune my tea bushes for optimal growth?
The optimal time for major pruning is late winter or very early spring, just before the plant breaks dormancy but before new buds swell. This timing allows the plant to direct all its energy into the new spring flush.
- Maintenance Pruning: Light trimming can be done after each harvest flush to maintain the “plucking table” shape.
- Rejuvenation Pruning: If your plant is overgrown, prune heavily in late winter.
- Warning: Never prune in late autumn or winter in cold climates, as this exposes tender new growth to frost damage.
How often should I fertilize tea plants during the growing season?
H3: How often should I fertilize tea plants during the growing season?
Tea plants are heavy feeders. During the active growing season (Spring through early Summer), apply fertilizer every 4 to 6 weeks.
- First Feed: Early Spring (at bud break).
- Second Feed: Late Spring (4-6 weeks later).
- Third Feed: Early Summer (optional, depending on growth vigor).
- Stop Date: Cease all fertilization 3 weeks before the first expected frost to allow the plant to harden off for winter. Over-fertilizing in late summer can lead to frost-damaged tender shoots.
Does pruning tea plants increase the flavor of the leaves?
H3: Does pruning tea plants increase the flavor of the leaves?
Not directly, but it is essential for quality control. Pruning itself does not make leaves taste better; in fact, studies show it can temporarily lower polyphenol and theanine levels due to the stress of regrowth. However, pruning enables the production of the tender “two leaves and a bud” that are prized for their flavor. Without pruning, the plant grows woody, fibrous, and bitter leaves.
- The Nuance: To maximize flavor after pruning, you must follow up with adequate Nitrogen fertilization. This compensates for the nutrient drain of regrowth and ensures the new leaves are rich in flavor compounds. So, pruning + feeding = better flavor. Pruning alone = potential flavor loss.
How do I know if my tea plant needs more nitrogen?
H4: How do I know if my tea plant needs more nitrogen?
Nitrogen deficiency is the most common issue for tea growers. Look for these signs:
- Pale Green or Yellow Leaves: The older leaves turn a uniform pale green or yellow, while the veins may remain slightly greener.
- Stunted Growth: New shoots are short, weak, and slow to emerge.
- Small Leaf Size: The leaves are significantly smaller than usual.
- Solution: Apply a high-nitrogen organic fertilizer immediately. If the soil pH is above 6.0, the plant may be unable to absorb nitrogen even if it’s present; test your soil first!
Can I use coffee grounds to fertilize my tea plant?
H4: Can I use coffee grounds to fertilize my tea plant?
Yes, but with caution. Coffee grounds are slightly acidic and contain nitrogen, making them a good supplement. However, they should never be applied as a thick layer on top of the soil, as this can create a crust that repels water and encourages mold.
- Best Practice: Mix used coffee grounds into the soil or compost them first. Use them as a top dressing sparingly (a thin layer) and water them in well. They are a supplement, not a complete fertilizer.
📚 Reference Links
For those who want to dive deeper into the science and community discussions surrounding tea cultivation, we recommend the following reputable sources:
- New Mexico State University (Guide H-165): Rose Culture: Fertilization and Pruning. While focused on roses, the principles of NPK management, soil pH, and pruning angles are directly applicable to Camellia sinensis due to their shared botanical family (Theaceae).
- PMC (National Center for Biotechnology Information): Effects of Pruning on Tea Plant Growth, Quality, and Rhizosphere Ecology. This peer-reviewed study details the metabolic shifts in tea plants post-pruning and the specific fertilizer adjustments needed to maintain quality.
- Growing Teas™ Internal Resources:
- Brand Official Sites:
- Community Discussion:
- For a look at how gardeners discuss pruning techniques (specifically for hybrid tea roses, which share similar pruning logic), check out this discussion on Facebook:
- Pruning hybrid tea rose bushes for growth – Facebook