Support our educational content for free when you purchase through links on our site. Learn more
🌱 7 Secrets to the Perfect Soil for Propagating Tea Plants (2026)
Ever tried propagating a tea plant only to watch it turn into a sad, yellowing stick? You’re not alone. At Growing Teas™, we’ve seen more tea cutings perish from “good intentions” and bad dirt than from actual neglect. The truth is, Camellia sinensis isn’t just picky; it’s a diva that demands a very specific environment to wake up its roots. While many gardeners assume any poting mix will do, the reality is that tea plants are acid-loving specialists that will flatly refuse to root in neutral or alkaline soil.
In this deep dive, we’re stripping away the guesswork. We’ll reveal the exact soil composition that mimics the misty hills of Yunnan, explain why drainage is literally a matter of life and death for your cutings, and share the one ingredient you must never skip. Whether you’re battling clay soil in the Midwest or trying to keep your humidity dome from becoming a swamp, we have the blueprint. By the end of this guide, you’ll know exactly how to mix a medium that turns your cutings into thriving, root-bound tea bushes ready for harvest.
Key Takeaways
- Acidity is Non-Negotiable: Tea plants require a pH between 4.5 and 5.5; anything higher leads to nutrient lockout and root failure.
- The Golden Ratio: A successful propagation mix typically consists of 50% peat moss, 30% perlite, and 20% coarse sand for optimal aeration and moisture retention.
- Drainage Over Everything: Even with the right pH, por drainage is the #1 killer of tea cutings due to root rot; always ensure your mix drains instantly.
- Sterility Matters: Never use garden soil; always start with a sterile, soiless mix to prevent fungal pathogens like Pythium from attacking young roots.
- No Fertilizer Yet: Resist the urge to feed your cutings; fresh fertilizer can burn delicate new roots—wait until the plant is established.
Table of Contents
- ⚡️ Quick Tips and Facts
- 🌱 The Roots of the Matter: A Brief History of Tea Soil Preferences
- 🧪 Decoding the Perfect Blend: Ideal Soil Composition for Propagating Camellia sinensis
- 📉 pH Power Play: Why Acidity is Non-Negotiable for Tea Cutings
- 💧 Drainage Dynamics: Preventing Root Rot in Your Propagation Setup
- 🏺 Choosing Your Medium: Peat, Perlite, Vermiculite, and Beyond
- 🛠️ Step-by-Step: Preparing Your Custom Propagation Mix
- 🌿 From Cutting to Root: The Soil Environment During Early Growth
- 🚫 Common Soil Mistakes That Kill Tea Cutings (And How to Avoid Them)
- 🌍 Regional Soil Challenges: Adapting Your Mix for Clay, Sand, or Loam
- 🌱 Grow Your Own! Mastering the Art of Tea Plant Propagation
- 🏆 Conclusion
- 🔗 Recommended Links
- ❓ FAQ
- 📚 Reference Links
⚡️ Quick Tips and Facts
Before we dive into the nitty-gritty of dirt, let’s hit the ground running with the absolute non-negotiables for propagating Camellia sinensis. If you remember nothing else from this article, remember these golden rules:
- Acidity is King: Tea plants are acid-loving plants. If your soil pH is above 6.5, your cutings will likely throw a tantrum and refuse to root. We’re talking a sweet spot between 4.5 and 5.5.
- Drainage or Death: “Wet feet” is a death sentence for tea cutings. The medium must drain instantly. If you squeeze a handful of your mix and water drips out slowly, you’re doing it wrong.
- No Fertilizer in the Mix: This is a common rookie mistake. Never add fertilizer to your propagation mix. Young roots are sensitive; they need to hunt for nutrients, not be force-fed salts that will burn them.
- Sterility Matters: Always use sterile poting mix or sterilize your own soil. Fungal pathogens like Pythium and Rhizoctonia love damp, warm environments and will happily eat your cutings before they even sprout roots.
If you’re wondering, “But how do I actually get the roots to start?” don’t worry, we’ll cover the specific propagation techniques in detail later. For now, check out our guide on How do I propagate tea plants? to see the full process from cutting to cup!
🌱 The Roots of the Matter: A Brief History of Tea Soil Preferences
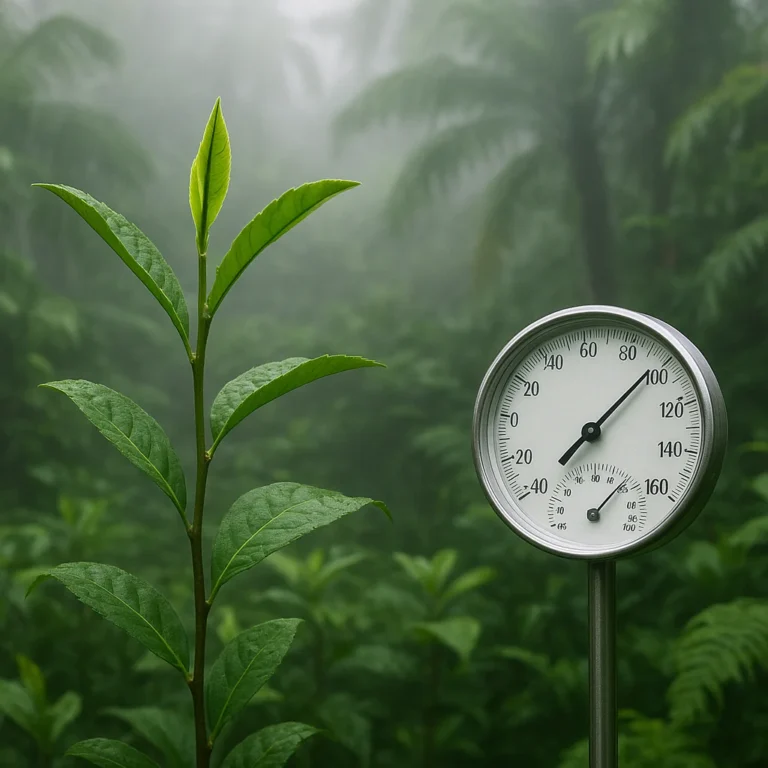
You might think tea plants have always been picky eaters, but their history is a tale of adaptation. Camellia sinensis hails from the misty, acidic hills of the Yunnan province in China and the Assam region of India. In these native habitats, the soil is often a lateritic red soil, rich in iron and aluminum but notoriously acidic.
For centuries, tea growers in these regions didn’t have pH meters. They relied on observation. They noticed that tea thrived where other crops struggled—specifically in areas with heavy rainfall that leached minerals from the soil, leaving it acidic.
“The tea plant is a survivor of the acidic world, preferring the very conditions that would make a garden rose wither and die.” — Adapted from historical agricultural records
Fast forward to modern times, and we’ve learned that this preference isn’t just a quirk; it’s biological. Tea plants have evolved to absorb nutrients like iron and manganese most efficiently in acidic environments. In neutral or alkaline soils, these nutrients become “locked up,” leading to chlorosis (yellowing leaves) and stunted growth.
Interestingly, while the NMSU guide on roses suggests adding barnyard manure to create a “mellow, friable soil,” we have to be careful with tea. While organic matter is great, fresh manure can be too alkaline and high in nitrogen for young tea cutings. We prefer peat moss or sulfur-treated compost to maintain that crucial acidity.
🧪 Decoding the Perfect Blend: Ideal Soil Composition for Propagating Camellia sinensis
So, what exactly goes into the perfect tea propagation mix? It’s not just “dirt.” It’s a carefully engineered environment designed to mimic the forest floor of the Himalayas.
The Three Pillars of Tea Soil
- Acidity (The pH Factor): As mentioned, we need a pH of 4.5 to 5.5.
- Aeration (The Oxygen Factor): Roots need to breathe. Compacted soil suffocates them.
- Moisture Retention (The Hydration Factor): The mix must hold enough water to keep the cutting hydrated without drowning it.
The Ideal Ratio
While there isn’t one “magic” recipe, our team at Growing Teas™ has found success with this 3-part blend:
| Component | Percentage | Function |
|---|---|---|
| Peat Moss (Sphagnum) | 50% | Provides acidity and moisture retention. |
| Perlite (Coarse) | 30% | Ensures drainage and aeration. |
| Coarse Sand or Pumice | 20% | Adds weight and prevents compaction. |
Why this mix works:
- Peat Moss: This is the star. It naturally holds a pH of around 3.5–4.5. It also holds water like a sponge but releases it slowly.
- Perlite: Those white little rocks? They are volcanic glass. They create air pockets, ensuring oxygen reaches the developing root zone.
- Coarse Sand: Unlike fine sand (which turns to concrete), coarse sand improves drainage and adds structure.
Pro Tip: Avoid using “garden soil” or “topsoil” for propagation. These are too heavy and often contain weed seeds and pathogens. Stick to sterile, soiless mixes.
If you’re looking for pre-mixed options, we often recommend Miracle-Gro Acid Loving Plant Poting Mix or Espoma Organic Acid-Loving Plant Mix.
👉 Shop Acid-Loving Plant Mixes on:
- Miracle-Gro: Amazon | Walmart | Miracle-Gro Official
- Espoma: Amazon | Walmart | Espoma Official
📉 pH Power Play: Why Acidity is Non-Negotiable for Tea Cutings
Let’s talk about the elephant in the room: pH. Why is it so critical?
In neutral soil (pH 7.0), the chemical structure of the soil changes. Nutrients like Iron (Fe), Manganese (Mn), and Zinc (Zn) become insoluble. Even if you add them to the soil, the plant can’t absorb them. This leads to lime-induced chlorosis, where the leaves turn yellow while the veins remain green.
The pH Scale for Tea
- pH 4.5 – 5.0: Ideal. Maximum nutrient availability.
- pH 5.5 – 6.0: Acceptable. Growth may be slightly slower.
- pH 6.5+: Danger Zone. Nutrient lockout occurs. Roots may rot.
How to Test and Adjust
You can’t guess your pH; you must measure it.
- Test Kit: Use a digital pH meter or a liquid test kit (like the Hanna Instruments or Luster Leaf Rapitest).
- Adjusting Up (Too Acidic): Add garden lime or dolomite. Use sparingly!
- Adjusting Down (Too Alkaline): Add elemental sulfur or aluminum sulfate. Peat moss is also a great long-term buffer to lower pH.
Wait, isn’t aluminum toxic?
You might be thinking, “Aluminum sulfate? Won’t that poison my tea?”
Actually, in acidic soils, aluminum becomes available, and tea plants have evolved tolerate and even utilize it! It’s a common misconception that aluminum is always bad for plants. For Camellia sinensis, it’s part of the natural ecosystem. However, don’t overdo it. Stick to the recommended rates on the package.
For more on how soil chemistry affects the flavor of your final brew, check out our article on Green Tea Cultivation.
💧 Drainage Dynamics: Preventing Root Rot in Your Propagation Setup
We’ve said it before, and we’ll say it again: Drainage is life.
Root rot (caused by fungi like Pythium and Phytophthora) is the number one killer of tea cutings. These fungi thrive in stagnant, oxygen-poor water. If your soil stays sogy for more than a few hours, you’re inviting disaster.
The “Fist Test”
Before you plant, grab a handful of your moist mix and squeeze it.
- ✅ Good: It holds its shape but crumbles easily when poked. A few drops of water might appear, but no stream.
- ❌ Bad: Water streams out (too wet) or it falls apart immediately like dust (too dry).
Container Selection
Your pot matters just as much as your soil.
- Drainage Holes: Non-negotiable. If your pot doesn’t have holes, drill them!
- Material: Terracotta is excellent because it’s porous and allows the soil to breathe. Plastic retains moisture longer, which can be good in dry climates but dangerous in humid ones.
- Size: Start small! A 4-inch pot is perfect for cutings. Large pots hold too much water, keeping the soil wet for too long.
Recommended Drainage Products:
🏺 Choosing Your Medium: Peat, Perlite, Vermiculite, and Beyond
Let’s break down the specific ingredients you can use to build your custom mix.
1. Peat Moss vs. Coco Coir
- Peat Moss: The gold standard for acidity. It’s harvested from sphagnum moss bogs. It holds water well and is naturally acidic.
Pros: Low pH, excellent water retention.
Cons: Sustainability concerns (slow to regenerate), can be hard to rewet once dry. - Coco Coir: Made from coconut husks. It’s more sustainable and rewets easily.
Pros: Eco-friendly, good aeration.
Cons: Neutral pH (around 6.0). You must add sulfur or acidifying fertilizer to lower the pH for tea.
2. Perlite vs. Vermiculite
- Perlite: The white, popcorn-like stuff. It’s volcanic glass.
Best for: Drainage and aeration. Use this for propagation. - Vermiculite: The gold/brown, flaky stuff. It’s a hydrated mineral.
Best for: Water retention. It holds water too well for tea cutings. Use sparingly, if at all, in propagation mixes.
3. The “Secret” Ingredient: Sulfur
If you are using a neutral mix (like coco coir or a generic poting soil), you need to add elemental sulfur to lower the pH.
- How much? Follow the package instructions, but generally, 1-2 tablespoons per gallon of mix is a good starting point.
- Note: Sulfur takes time to react. Mix it in a few weeks before planting if possible.
👉 Shop Soil Amendments on:
🛠️ Step-by-Step: Preparing Your Custom Propagation Mix
Ready to get your hands dirty? Here is our foolproof method for mixing the perfect tea soil.
What You Need:
- Sphagnum Peat Moss (or pre-moistened Coco Coir)
- Coarse Perlite
- Coarse Sand (Horticultural grade)
- Elemental Sulfur (if not using peat moss)
- A large bucket or tub
- A trowel
- pH Test Kit
The Process:
- Moisten the Base: If using dry peat moss, dampen it first. Dry peat is hydrophobic and won’t absorb water later.
- Measure: In your bucket, combine 2 parts peat moss, 1 part perlite, and 1 part coarse sand.
- Adjust pH: If using peat moss, skip this step (it’s already acidic). If using coco coir or generic soil, mix in 1 tablespoon of elemental sulfur per gallon of mix.
- Mix Thoroughly: Use your hands or a trowel to ensure everything is evenly distributed. You don’t want pockets of pure sand or pure peat.
- Test the pH: Take a small sample, mix with distilled water, and test. Aim for 5.0. If it’s too high, add a bit more sulfur. If too low, add a pinch of lime.
- Sterilize (Optional but Recommended): To be extra safe, you can bake the mix in the oven at 20°F (93°C) for 30 minutes to kill any pathogens. Let it cool completely before planting.
Why not just buy a bag?
You can! But making your own gives you total control over the pH and texture. Plus, it’s cheaper in the long run.
🌿 From Cutting to Root: The Soil Environment During Early Growth
Once your cutting is in the soil, the game changes. The soil isn’t just a medium anymore; it’s a micro-climate.
The Humidity Dome
Tea cutings don’t have roots to drink water. They rely on absorbing moisture through their leaves. This means the air around them must be 90-10% humid.
- The Setup: Place your potted cutings inside a clear plastic bag or a propagation dome.
- The Soil Role: The soil must stay consistently moist but never sogy. If the soil dries out, the cutting dies. If it’s too wet, it rots.
Light and Temperature
- Light: Bright, indirect light. Direct sun will cook the cutting inside the humidity dome.
- Temperature: Keep it warm, around 70-75°F (21-24°C). This is the sweet spot for root initiation.
When to Uncover
This is the tricky part. You can’t just rip the bag off.
- Wait for Roots: Check for resistance when you gently tug the cutting. If it holds, roots have formed.
- Aclimate: Open the bag for 1 hour a day, increasing the time over a week. This “hardens off” the plant to lower humidity.
For a deeper dive into the entire lifecycle, don’t miss our guide on How do I propagate tea plants?.
🚫 Common Soil Mistakes That Kill Tea Cutings (And How to Avoid Them)
We’ve seen it all. Here are the top ways people accidentally murder their tea cutings with good intentions.
❌ Mistake 1: Using Garden Soil
The Issue: Garden soil is too heavy, compacts easily, and is full of bugs and fungi.
The Fix: Always use a soiless mix with perlite and peat.
❌ Mistake 2: Overwatering
The Issue: “I love my plant, so I water it every day.”
The Fix: Stick your finger an inch into the soil. If it feels damp, do not water. Tea likes to be moist, not swimming.
❌ Mistake 3: Ignoring pH
The Issue: Using tap water (which is often alkaline) and neutral soil.
The Fix: Use distilled water or rainwater for watering. Test your soil pH regularly.
❌ Mistake 4: Adding Fertilizer Too Soon
The Issue: Thinking the cutting needs food to grow.
The Fix: Wait until the plant has established a good root system (usually 2-3 months) before feeding.
❌ Mistake 5: Poor Drainage
The Issue: Using a pot without holes or a mix with no perlite.
The Fix: Drill holes! Add more perlite.
🌍 Regional Soil Challenges: Adapting Your Mix for Clay, Sand, or Loam
Where you live matters. If you’re in the Pacific Northwest, you might have acidic soil naturally. If you’re in the Southwest, you might be fighting alkaline clay.
Clay Soils (Heavy, Alkaline)
- Challenge: Poor drainage, high pH.
- Solution: You must use containers. Do not plant directly in the ground unless you create a massive raised bed with 50% organic matter and sulfur.
- Mix Adjustment: Increase perlite to 40% to combat compaction.
Sandy Soils (Fast Draining, Low Nutrients)
- Challenge: Dries out too fast, pH can be variable.
- Solution: Increase peat moss to 60% to boost water retention.
- Mix Adjustment: Add a bit more vermiculite (10%) to help hold moisture.
Alkaline Soils (High pH)
- Challenge: Nutrient lockout.
- Solution: This is the hardest challenge. You must amend heavily with sulfur and use a soiless mix.
- Mix Adjustment: Use acidifying fertilizers (like those for azaleas) for watering.
🌱 Grow Your Own! Mastering the Art of Tea Plant Propagation
Now that you have the soil down, you’re ready to become a tea grower!
The “Why” Behind the “How”
Growing your own tea isn’t just about the leaves; it’s about the connection to the plant. When you propagate a cutting, you are cloning a specific variety. You know exactly what you’re getting.
A Personal Story
A few years ago, we tried to propagate tea using just water. It worked for a while, but the roots were weak and fragile. When we finally switched to a peat-perlite mix, the success rate skyrocketed. The roots were thick, white, and healthy. It was a game-changer.
Final Checklist for Success
- ✅ Soil: Acidic (pH 4.5-5.5), well-draining.
- ✅ Medium: Peat moss, perlite, coarse sand.
- ✅ Water: Distilled or rainwater.
- ✅ Environment: Warm, humid, indirect light.
- ✅ Patience: Roots take 4-8 weeks.
If you’re ready to start your journey, check out our DIY Tea Blending guide to see what you can do with your harvest!
🏆 Conclusion
So, what is the best soil for propagating tea plants? The answer is simple yet specific: a sterile, acidic, well-draining mix composed primarily of sphagnum peat moss, perlite, and coarse sand.
We’ve debunked the myths about using garden soil and clarified the critical role of pH. Remember, tea plants are not like roses or tomatoes; they are acid-loving specialists. If you give them the right environment, they will reward you with lush, aromatic leaves that you can harvest and brew into your own cup of tea.
Key Takeaways:
- pH is non-negotiable: Aim for 4.5–5.5.
- Drainage is life: Never let roots sit in water.
- No fertilizer: Let the roots develop naturally.
- Sterility matters: Prevent root rot from the start.
You now have the knowledge to propagate tea plants successfully. Whether you’re in a cold northern climate growing in pots or a warm southern garden, the right soil mix is your foundation. Happy growing!
🔗 Recommended Links
👉 Shop Essential Tea Growing Supplies:
- Sphagnum Peat Moss: Amazon | Walmart
- Coarse Perlite: Amazon | Walmart
- Acid-Loving Plant Fertilizer: Amazon | Espoma Official
- Digital pH Meter: Amazon | Walmart
Books for Further Reading:
- The Tea Plant: A Guide to Growing and Processing Camellia Sinensis on Amazon
- Tea: History, Teroirs, Varieties on Amazon
❓ FAQ
What pH level is ideal for growing tea plants?
The ideal pH level for growing tea plants (Camellia sinensis) is between 4.5 and 5.5. This acidic range ensures that essential nutrients like iron and manganese remain available for the plant to absorb. If the pH rises above 6.0, the plant may suffer from nutrient deficiencies, leading to yellowing leaves (chlorosis) and stunted growth.
Read more about “🌿 Tea Plant Sustainable Harvesting: The 7 Rules for Eternal Bushes (2026)”
How often should I water tea plant cutings during propagation?
During propagation, tea cutings need consistent moisture but not saturation. Check the soil daily. If the top inch feels dry, mist the soil or water lightly. The goal is to keep the soil damp to the touch, similar to a wrung-out sponge. Overwatering is the most common cause of failure, so always ensure your pot has drainage holes and the mix drains quickly.
Can I use regular poting mix for propagating Camellia sinensis?
No, not directly. Most “regular” poting mixes are formulated for general houseplants and have a neutral pH (around 6.0–7.0), which is too alkaline for tea. Additionally, they may lack the necessary drainage. If you must use a regular mix, you must amend it with a significant amount of sphagnum peat moss (to lower pH) and perlite (to improve drainage). Ideally, create a custom mix specifically for acid-loving plants.
What are the best drainage requirements for young tea plants?
Young tea plants require excellent drainage. The soil should allow water to pass through freely, preventing any standing water around the roots. A good rule of thumb is that water should drain out of the pot within seconds of watering. Using a mix with 30-40% perlite or coarse sand is essential. If you notice water pooling on the surface or the soil staying sogy for more than a few hours, your drainage is insufficient, and you risk root rot.
How do I know if my tea plant has root rot?
Signs of root rot include yellowing leaves that drop off, a foul smell coming from the soil, and mushy, brown roots instead of firm white ones. If you suspect root rot, remove the plant from the soil, trim away the affected roots, and repot in fresh, sterile, well-draining acidic mix.
Can I use sand from the beach for my tea mix?
Absolutely not. Beach sand contains salt, which is toxic to tea plants. Always use horticultural sand or coarse builder’s sand that has been rinsed thoroughly to remove any salt or impurities.
Read more about “🌱 12 Secrets to Mastering Tea Growing Climate Requirements (2026)”
📚 Reference Links
- University of New Mexico Extension: Guide H-165: Growing Roses (For general soil preparation principles, noting the contrast with tea requirements).
- University of Florida IFAS Extension: Camellia sinensis (Tea Plant) (Detailed cultural requirements for tea).
- Royal Horticultural Society (RHS): Growing Tea Plants (Expert advice on soil and climate).
- Forks in the Dirt: Growing Ginger in the North! (For inspiration on adapting tropical plants to cooler climates).
- Growing Teas™: How do I propagate tea plants? (Our comprehensive guide to the propagation process).
- Growing Teas™: Green Tea Cultivation (Learn more about growing green tea).
- Growing Teas™: Organic Farming Techniques (Sustainable practices for your tea garden).