Support our educational content for free when you purchase through links on our site. Learn more
🌱 Can I Propagate Tea Plants from Cutings? The Ultimate 7-Step Guide (2026)
Have you ever stared at a lush, fragrant tea bush and wondered, “Could I clone this magic into my own garden?” You aren’t alone. For centuries, tea growers have kept their most prized flavor profiles secret, not by hiding the seeds, but by mastering the art of the cuting. While many gardeners assume tea plants are as easy to propagate as a Pothos or a Monstera (spoiler: they require a bit more finese!), the truth is that cloning your own Camellia sinensis is not only possible, it’s the gold standard for creating a consistent, high-quality home tea garden.
In this guide, we’re pulling back the curtain on the exact methods used by commercial growers in Japan and the American South to replicate specific cultivars like Yabukita and Okumidori. We’ll reveal why a single leaf won’t work, the secret timing window you can’t miss, and the specific humidity trick that turns a 50% success rate into a near-perfect harvest. Whether you are a seasoned horticulturist or a curious beginner, by the end of this article, you’ll know exactly how to turn a simple stem into a thriving tea factory.
Key Takeaways
- ✅ Yes, it works: Propagating tea plants from semi-hardwood cutings is the most reliable method to clone your favorite plants, ensuring identical flavor and growth habits.
- ❌ No leaf-only propagation: Unlike some tropical houseplants, tea cannot be grown from a single leaf; you must include a stem segment with a node.
- ⏳ Timing is critical: The best time to take cutings is late spring to early summer when stems are semi-hardwood, or early autumn before frost.
- 🌡️ Humidity is non-negotiable: Success depends on maintaining 80-90% humidity in a controlled environment to prevent the cutting from drying out before roots form.
- 🌱 Patience pays off: Rooting takes 6 to 12 weeks; look for new leaf growth as the primary sign of success rather than pulling on the stem.
Table of Contents
- ⚡️ Quick Tips and Facts
- 🌱 The Ancient Art of Tea Propagation: A Brief History
- 🔍 Can I Propagate Tea Plants from Cutings? The Definitive Answer
- 🛠️ Essential Tools and Supplies for Successful Tea Cutings
- 📝 Step-by-Step Guide: How to Root Tea Plant Cutings Like a Pro
-
- Selecting the Perfect Semi-Hardwood Cutting
-
- Preparing the Cutting: The Node and Leaf Strategy
-
- The Rooting Hormone Debate: To Dip or Not to Dip?
-
- Choosing the Ideal Poting Mix for Camellia sinensis
-
- Creating the Perfect Humidity Dome Environment
-
- Watering and Light: The Delicate Balance
-
- Monitoring Root Development and Transplanting
- ⏳ Troubleshooting Common Propagation Pitfalls
- 🌿 Tea Plant Varieties: Which Ones Root Best from Cutings?
- 🌡️ Seasonal Timing: When is the Best Time to Take Tea Cutings?
- 🌱 Alternative Methods: Seeds vs. Cutings vs. Layering
- 🏡 Caring for Your New Tea Saplings: From Root to Cup
- 💡 Quick Tips and Facts
- 📚 Recommended Links
- ❓ Frequently Asked Questions (FAQ)
- 📖 Reference Links
- Conclusion
⚡️ Quick Tips and Facts
Before we dive into the nitty-gritty of slicing, dicing, and rooting your Camellia sinensis, let’s hit the rewind button on the most common misconceptions. We’ve seen gardeners try to root tea leaves like they’re rooting a pothos, only to end up with a sad, brown leaf and a lot of confusion. Here is the tea (pun intended) on propagating tea plants:
- ✅ Yes, you can! Propagating tea plants from cutings is not only possible; it’s the gold standard for home growers and commercial farms alike.
- ❌ No, you can’t just use a leaf. Unlike some tropical houseplants, a single tea leaf will not grow a new plant. You need a stem segment with at least one node.
- ✅ Cloning is King. Cutings produce exact genetic clones of the mother plant. This means if your mom plant makes the most amazing, sweet, low-astringency tea, your baby plant will too.
- ❌ Seeds are a gamble. While you can grow tea from seeds, the resulting plant is a genetic roll of the dice. It might taste great, or it might taste like grassy hay.
- ⏳ Patience is a virtue. Rooting takes time. We’re talking 6 to 12 weeks for a solid root system, not overnight magic.
If you are itching to get your hands dirty but need a quick roadmap, check out our deep dive on How do I propagate tea plants? for a broader overview of our cultivation philosophy.
🌱 The Ancient Art of Tea Propagation: A Brief History

You might think that growing tea is a modern hobby, but the art of cloning tea plants dates back centuries, particularly in the tea-rich regions of Japan and China. For a long time, tea was propagated primarily through seeds. This was the “wild” way, creating a diverse but unpredictable population of plants.
However, as the demand for consistent flavor profiles grew, growers realized that seeds were a problem. A seed-grown plant retains only 50% of the mother plant’s genetics. This led to uneven harvest times and wildly varying cup qualities.
Enter the cutting. As noted by the Japan Tea Association, the shift to vegetative propagation (cutings) revolutionized the industry. By using cutings, growers preserve 10% of the genetic information, creating a uniform field where every plant shoots at the same time and produces tea with identical flavor notes.
“They shoot at the same time, so it is easier to manage and harvest. It is easier to select certain characteristics and have a desirable taste.” — Japan Tea Association
Today, while a small niche of growers still seeks out Zairai (native seed-grown plants) for their unique “teroir” and natural resilience, the vast majority of the world’s tea—over 9% in Japan alone—is grown from cutings. This method allows us to replicate specific cultivars like Yabukita (the king of Japanese tea) or Okumidori (the umami powerhouse) in our own backyards.
🔍 Can I Propagate Tea Plants from Cutings? The Definitive Answer
Let’s cut to the chase: Can you propagate tea plants from cutings?
The answer is a resounding YES. In fact, it is the most reliable and recommended method for the home gardener.
Why do we love cutings so much at Growing Teas™?
- Genetic Fidelity: You get exactly what you paid for. If you buy a Yabukita cutting, you get a Yabukita plant, not a “maybe-Yabukita.”
- Faster Maturity: Cutings skip the long juvenile phase of seedlings. They are already “adult” tissue, meaning they can be harvested sooner (though we still recommend waiting a year or two for the first proper flush).
- Disease Resistance: By selecting healthy mother plants, you start with a clean slate, avoiding the soil-borne diseases that can plague seedlings.
However, there is a catch. Unlike the Monstera or Pothos you might have propagated in water, tea cutings are semi-hardwood and require a specific balance of humidity and soil aeration to succeed. They are not as forgiving as a tropical vine.
🛠️ Essential Tools and Supplies for Successful Tea Cutings
You don’t need a laboratory to propagate tea, but you do need the right gear. Think of this as your “Tea Propagation Starter Kit.” We’ve tested dozens of tools over the years, and here is what actually works.
The Non-Negotiables
- Sharp Pruning Shears: Dull blades crush the stem, damaging the vascular tissue needed for rooting. We swear by Felco F-2 pruners for their precision and durability.
- Rooting Hormone: While some old-school growers skip this, we find that a high-quality rooting hormone significantly increases success rates. Hormex Rooting Hormone Powder or Clonex Rooting Gel are industry favorites.
- Sterilization Agent: Rubing alcohol (70% isopropyl) or a bleach solution to sanitize your tools. Disease is the #1 killer of cutings.
- Clear Plastic Bags or Domes: To create a mini-greenhouse effect. You need high humidity (80-90%) to prevent the leaves from drying out before roots form.
The Soil Mix
Tea hates “wet feet.” A standard poting mix is often too heavy. You need a well-draining, acidic mix.
- The Recipe: 50% high-quality peat moss or coco coir, 25% perlite, and 25% coarse sand.
- Pro Tip: Ensure the pH is between 4.5 and 5.5. Tea plants are acid-loving!
Where to Buy Your Supplies
- Pruning Shears: Felco F-2 on Amazon | Felco Official Site
- Rooting Hormone: Hormex Rooting Powder on Amazon | Hormex Official Site
- Propagation Domes: Generic Clear Propagation Domes on Amazon
📝 Step-by-Step Guide: How to Root Tea Plant Cutings Like a Pro
Ready to make some clones? Follow this battle-tested method used by growers at Table Rock Tea Company and Growing Teas™.
1. Selecting the Perfect Semi-Hardwood Cutting
Timing and selection are everything. You want a stem that is semi-hardwood.
- What is it? It’s the part of the stem that is green and flexible at the top but has started to turn brown and wody at the base.
- Where to cut? Look for a healthy, disease-free branch. Avoid the very soft, new growth at the tip (too weak) and the old, fully wody branches (too slow to root).
- Length: Aim for a 4 to 6-inch segment.
2. Preparing the Cutting: The Node and Leaf Strategy
This is where many fail. You cannot just chop a random piece of stem.
- The Cut: Make a clean, diagonal cut just below a node (the bump where a leaf emerges). The node is where the auxins (rooting hormones) are concentrated.
- Leaf Management:
- Remove all lower leaves.
- Keep one or two leaves at the very top.
Crucial Step: If the remaining leaves are large, cut them in half horizontally. This reduces surface area and prevents the cutting from losing too much water through transpiration before it has roots to drink.
3. The Rooting Hormone Debate: To Dip or Not to Dip?
We’ve seen arguments on both sides. Some say tea roots easily without it; others say it’s essential.
- Our Verdict: Use it. It acts as an insurance policy.
- How to apply: Dip the cut end into the powder or gel. Tap off the excess. Don’t dip it twice!
4. Choosing the Ideal Poting Mix for Camellia sinensis
As mentioned, drainage is key.
- Mix Ratio: 1 part peat moss, 1 part perlite, 1 part coarse sand.
- Container: Use a small pot (3-4 inches) with plenty of drainage holes. Clear plastic cups with holes punched in the sides are excellent for monitoring root growth without disturbing the plant.
5. Creating the Perfect Humidity Dome Environment
Tea cutings need to be in a “sauna” until they root.
- Method: Place the potted cutings in a tray and cover with a clear plastic bag (use sticks to keep the bag off the leaves) or a commercial propagation dome.
- Ventilation: Open the bag/dome for 10-15 minutes a day to let fresh air in and prevent mold.
6. Watering and Light: The Delicate Balance
- Light: Bright, indirect light only. Direct sun will cook your cutings inside the humidity dome. A north-facing window or a spot under a shade cloth is perfect.
- Water: Keep the soil moist but not sogy. If you see condensation on the inside of the bag, you’re good. If the soil looks dry, mist it lightly.
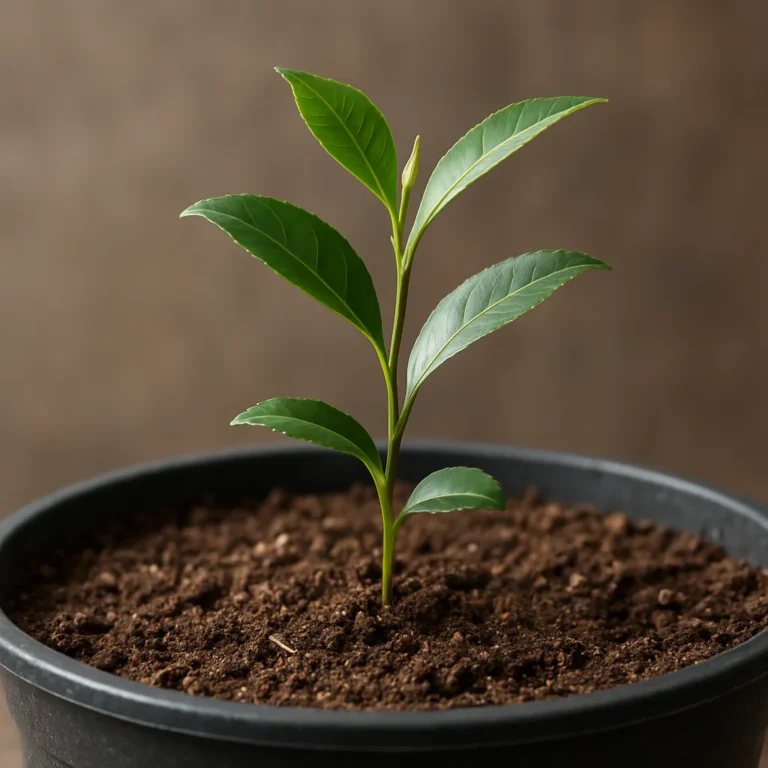
7. Monitoring Root Development and Transplanting
- The Wait: This is the hardest part. It can take 6 to 12 weeks.
- The Sign: Don’t pull the cutting to check for roots! Look for new leaf growth. If the plant is putting out new leaves, it has roots.
- Transplanting: Once you see new growth and the plant feels firm in the soil, you can gradually aclimate it to lower humidity by opening the dome for longer periods over a week.
⏳ Troubleshooting Common Propagation Pitfalls
Even with the best intentions, things can go wrong. Here is how to diagnose and fix the most common issues.
| Symptom | Possible Cause | The Fix |
|---|---|---|
| Leaves turning brown/crispy | Low humidity or too much direct sun | Increase humidity; move to indirect light. Mist the leaves. |
| Leaves turning yellow/mushy | Overwatering or poor drainage | Let the soil dry slightly; ensure the pot has drainage holes. |
| Cuting shrivels and dies | No roots formed, too much transpiration | Check if the node was damaged; ensure you kept only 1-2 leaves. |
| Mold growing on soil | Poor air circulation | Open the humidity dome more frequently; add a small fan nearby. |
| No new growth after 3 months | Dormancy or failed rooting | Be patient! Some cutings take longer. If no new leaves after 4 months, it likely failed. |
A Note on “The Pull Test”:
Many beginners get anxious and tug on the cutting. STOP! This breaks the delicate root hairs forming. If you must check, gently squeeze the stem; if it feels firm and doesn’t wigle, roots are likely forming.
🌿 Tea Plant Varieties: Which Ones Root Best from Cutings?
Not all tea plants are created equal. While Camellia sinensis var. sinensis (Chinese small-leaf) and Camellia sinensis var. assamica (Indian large-leaf) both root well, some cultivars are more vigorous than others.
- Yabukita: The most popular cultivar in Japan. It roots very easily and is highly adaptable. Perfect for beginners.
- Assamica Varieties: These tend to be more vigorous and fast-growing, making them excellent candidates for cutings.
- Specialty Cultivars (e.g., Okumidori, Sayama Kaori): These can be slightly trickier but are definitely worth the effort for their unique flavor profiles.
If you are looking for specific cultivars to start your garden, check out our guide on Green Tea Cultivation for more on selecting the right plant for your climate.
🌡️ Seasonal Timing: When is the Best Time to Take Tea Cutings?
Timing is everything in the tea world. Taking a cutting at the wrong time can result in failure.
- Best Time: Late Spring to Early Summer (when the new growth has started to harden off) or Early Autumn (before the first frost).
- Why? In late spring, the plant has stored energy from winter and is actively growing, but the stems are firm enough to handle. In early autumn, the plant is still active but slowing down, which is great for root development before dormancy.
- Avoid: Mid-summer (too hot, high transpiration) and deep winter (dormant, no energy to root).
As Steve from Table Rock Tea Company notes in his propagation video, mid-October is actually a great time in many climates to start making cutings from the healthiest plants before the seeds mature in November.
🌱 Alternative Methods: Seeds vs. Cutings vs. Layering
While cutings are our favorite, let’s look at the other options so you can make an informed choice.
Seeds
- Pros: Cheap, easy to find, creates a genetically diverse plant (good for breeding).
- Cons: Unpredictable flavor, takes 3-4 years to produce a harvestable crop, requires stratification (cold treatment) to germinate.
- Verdict: Great for the adventurous gardener who wants to experiment, but not for consistent tea production.
Layering
- Method: Bending a low branch to the ground and burying a section of it while it’s still attached to the mother plant.
- Pros: Very high success rate; the cutting is supported by the mother plant while rooting.
- Cons: You can only get a few plants per mother plant; it takes a full season to root.
- Verdict: Excellent if you have a large, established bush and want to expand without buying new plants.
Cutings (The Winner)
- Pros: High success rate, fast, produces exact clones, scalable.
- Cons: Requires specific humidity control and tools.
- Verdict: The best method for most home growers.
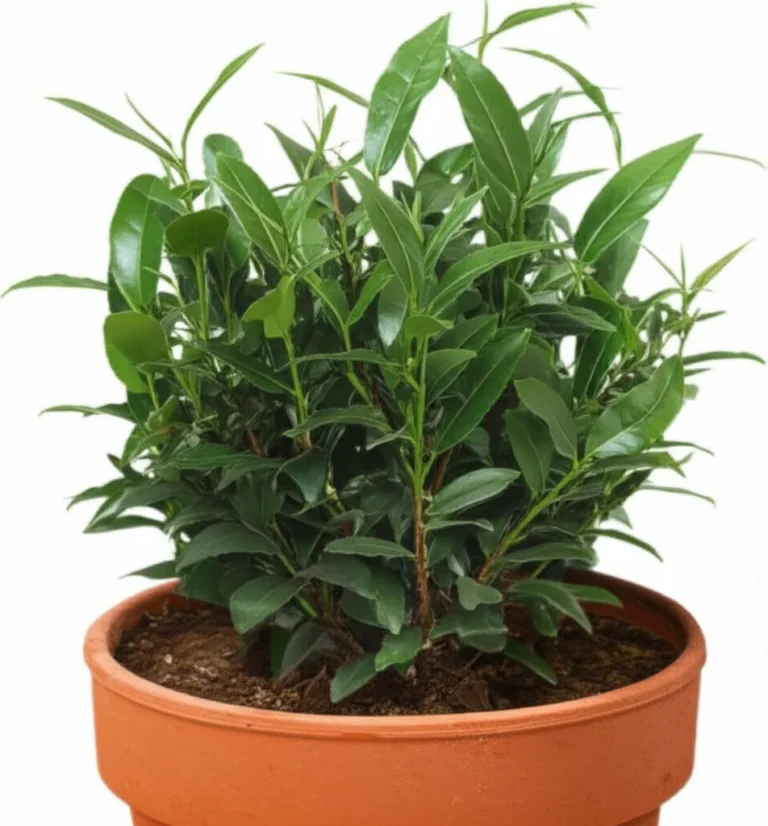
🏡 Caring for Your New Tea Saplings: From Root to Cup
So, you’ve successfully rooted your cutings! Now what?
- Aclimatization: Don’t rush to move them outside. Gradually introduce them to lower humidity and more light over 1-2 weeks.
- Poting Up: Once the roots fill the small pot, move them to a 1-gallon container with an acidic, well-draining mix.
- Feding: Tea plants are light feeders. Use a balanced, acid-loving fertilizer (like one for azaleas or camellias) in the spring. Avoid high-nitrogen fertilizers which can make the tea bitter.
- Pruning: In the first year, do not harvest. Let the plant establish its root system. You can do light pruning to encourage bushiness.
- Harvesting: After 2-3 years, you can start harvesting the top two leaves and a bud.
For more on how to brew your homegrown leaves, check out our DIY Tea Blending section!
Conclusion

So, can you propagate tea plants from cutings? Absolutely. It is the most effective, reliable, and rewarding way to expand your tea garden. By cloning your favorite plants, you ensure that every cup you brew tastes exactly as you expect.
While the process requires a bit of patience and attention to detail—specifically regarding humidity and soil acidity—the payoff is a thriving, genetically identical tea garden that will provide you with fresh leaves for years to come. Whether you are aiming for the balanced flavor of Yabukita or the umami richness of Okumidori, the cutting method is your ticket to success.
Don’t let the fear of failure stop you. Even if you lose a few cutings along the way, the ones that succeed will be the foundation of your personal tea estate. Start small, sterilize your tools, keep the humidity high, and watch your tea garden grow.
Ready to start your journey?
- 👉 Shop Rooting Hormone: Hormex on Amazon | Hormex Official Site
- 👉 Shop Pruning Shears: Felco on Amazon | Felco Official Site
- 👉 Shop Propagation Domes: Clear Domes on Amazon
Recommended Links
- The Art of Tea Cultivation – A comprehensive guide to growing tea at home.
- Camellia Sinensis Care Guide – Specific tips for tea plant maintenance.
- Organic Fertilizers for Acid-Loving Plants – Keep your tea plants happy and healthy.
❓ Frequently Asked Questions (FAQ)
 by Growing Teas")
What is the best time of year to take tea plant cutings?
The ideal time is late spring to early summer when the new growth has begun to harden (semi-hardwood stage). Early autumn is also a good window, provided you have enough time before the first frost for the roots to establish. Avoid the extremes of mid-summer heat and deep winter dormancy.
Read more about “🌱 7 Tea Plant Growth Regulators to Supercharge Your Garden (2026)”
How long does it take for tea plant cutings to root?
Patience is key! Most tea cutings will take 6 to 12 weeks to develop a sufficient root system. You will know they are ready when you see new leaf growth emerging from the stem. Do not pull on the cutting to test for roots, as this can damage the delicate new growth.
Can I propagate tea plants from leaves instead of cutings?
No. Unlike some tropical houseplants (like Pothos or Monstera), tea plants (Camellia sinensis) cannot be propagated from a single leaf. You must include a stem segment with at least one node (the bump where the leaf attaches) to stimulate root growth.
Read more about “🌸 7 Tea Plant Pollination Methods to Skyrocket Seed Yields (2026)”
What type of soil is best for rooting tea plant cutings?
Tea plants require acidic, well-draining soil. A mix of 50% peat moss or coco coir, 25% perlite, and 25% coarse sand works wonders. Avoid heavy garden soils or standard poting mixes that retain too much moisture, as this can lead to rot. Ensure the pH is between 4.5 and 5.5.
Read more about “🌱 7 Steps to Clone Tea Plants: The Ultimate Guide (2026)”
Why are my tea cutings turning yellow?
Yellowing leaves usually indicate overwatering or por drainage. Tea roots need oxygen; if the soil is waterlogged, the roots suffocate and rot. Ensure your pot has drainage holes and that the soil is moist but not sogy. Also, check that your cutings are not receiving direct sunlight, which can scorch them.
Read more about “🌿 Ultimate Tea Plant Care & Maintenance Guide (2026)”
📖 Reference Links
- Japan Tea Association: Tea Plant Propagation in Japan – Insights into commercial cloning methods.
- Table Rock Tea Company: Propagation Video Guide – Practical demonstration of the cutting process.
- The Tea Break Gardener: How to Root Monstera Cutings – A comparison of propagation techniques (note: Monstera is different from Tea, but the principles of nodes and humidity apply).
- Growing Teas™: Green Tea Cultivation – Our internal guide on growing tea.
- Growing Teas™: How do I propagate tea plants? – Detailed propagation overview.