Support our educational content for free when you purchase through links on our site. Learn more
🌱 Propagating Camellia sinensis: The Ultimate 2026 Guide to Growing Tea
Have you ever wondered how a single leaf on a distant bush in Assam or Yunnan could become the cup of tea you’re holding right now? At Growing Teas™, we’ve spent years turning that curiosity into a thriving backyard reality, and let us tell you, there is nothing quite like the thrill of watching a tiny, unassuming cutting transform into a lush, tea-producing shrub. While scientific studies like “Differential Rooting Efficacy of Growth Regulators in Camellia…” dive deep into the chemistry of auxins, we’re here to translate that complex science into actionable, muddy-hand success for your home garden. Whether you are a seasoned gardener or a complete novice, the journey of propagating Camellia sinensis is an adventure filled with patience, discovery, and the ultimate reward: sipping a brew made from your very own leaves.
In this comprehensive guide, we’ll walk you through every step of the process, from selecting the perfect semi-hardwood cutting to mastering the art of cold stratification for seeds. We’ll reveal why timing is everything when it comes to taking cutings, how to create the ideal humidity dome that mimics a tropical greenhouse, and the specific rooting hormones that can turn a 40% success rate into a near-perfect harvest. We’ll even share our own “popcorn” callus stories and the exact soil mix that has kept our tea plants thriving for years. By the end of this article, you’ll know exactly how to clone your favorite tea variety or embark on the genetic adventure of growing from seed, ensuring your tea garden is as robust and flavorful as the world’s finest plantations.
Key Takeaways
- Master the Timing: The optimal window for taking semi-hardwood cutings is late July through August, when new growth is firm but still flexible, ensuring the highest rooting success rates.
- Humidity is Non-Negotiable: Creating a high-humidity environment (using domes or misting systems) is critical to prevent cutings from dehydrating before roots can form.
- Choose Your Path: Cutings offer genetic consistency and faster maturity, while seds provide genetic diversity and a unique growing challenge; both methods have distinct advantages depending on your goals.
- The Power of Hormones: Using a rooting hormone containing IBA or NAA significantly boosts root development, turning difficult-to-root varieties into thriving plants.
- Environment Matters: Maintaining a consistent temperature of 70°F (21°C) and providing bright, indirect light are the secret ingredients to successful propagation.
Table of Contents
- ⚡️ Quick Tips and Facts
- 🌱 The Ancient Roots: A Brief History of Camellia sinensis Propagation
- 🧪 Choosing Your Path: Seeds vs. Cutings vs. Grafting Explained
- ✂️ Mastering the Art of Stem Cutings for Tea Plants
- 1. Selecting the Perfect Semi-Hardwood Cutting
- 2. Preparing the Cutting with Precision Pruning
- 3. Applying Rooting Hormone for Maximum Success
- 4. Creating the Ideal Humidity Dome Environment
- 5. Monitoring Root Development and Transplanting
- 🌰 From Seed to Sip: Germinating Camellia sinensis Seeds
- 1. Harvesting and Soaking Fresh Tea Seeds
- 2. Stratification Techniques to Break Dormancy
- 3. Sowing Depth and Soil Composition for Seedlings
- 🌡️ Environmental Control: Temperature, Light, and Humidity Requirements
- 🧬 Understanding Genotypes: Propagating Assam vs. Sinensis Varieties
- 🐛 Troubleshooting Common Propagation Pitfalls and Diseases
- 🌿 Hardening Off: Transitioning Seedlings to Outdoor Conditions
- 📊 Comparative Analysis: Rooting Efficacy of Growth Regulators in Tea Propagation
- 🛠️ Essential Tools and Supplies for the Home Tea Grower
- 🌍 Global Tea Cultivation: Propagation Methods in Commercial vs. Home Gardens
- 🎓 Conclusion
- 🔗 Recommended Links
- ❓ FAQ: Frequently Asked Questions About Propagating Tea Plants
- 📚 Reference Links
⚡️ Quick Tips and Facts
Hey there, fellow tea
enthusiasts! Ready to dive into the wonderful world of propagating your very own Camellia sinensis? We at Growing Teas™ are absolutely thrilled to share our hard-won wisdom, a blend of scientific know-how and muddy-hands
experience, to help you cultivate your own tea plants right from your backyard. It’s a journey, not a sprint, but oh-so-rewarding! 🌱
Here are some quick, vital nuggets of information to get your green
thumb tingling:
-
Timing is Everything ✅: For cuttings, aim for late July through August when new growth is mostly hardened off. This is when your chances of success skyrocket!
-
Fresh Wood is Best Wood ✅: When taking cuttings, always choose new, healthy, fresh wood. Old, woody stems are much harder to root.
-
Humidity,
Humidity, Humidity ✅: Tea cuttings love a high-humidity environment. Think mini-greenhouse or a misting system to keep them happy and hydrated. -
Rooting Hormone
is Your Friend ✅: While not strictly mandatory for every plant, a good rooting hormone significantly boosts your success rate. We’re talking about giving your cuttings the best possible head start!
Patience is a Virtue (Especially with Seeds)** ⏳: Growing from seed can take longer, often requiring stratification, but offers genetic diversity. Cuttings are faster for clonal replication.
- Soil Matters ✅: A well-
draining, slightly acidic medium is crucial, whether you’re rooting cuttings or starting seeds. Think pine bark, sand, and perlite! - Cleanliness Prevents Calamity ✅
: Always sterilize your pruning shears and tools to prevent the spread of diseases. A quick wipe with rubbing alcohol goes a long way.
Ready to dig deeper and uncover the secrets to a thriving tea garden? Let’s
get propagating!
🌱 The Ancient Roots: A Brief History of Camellia sinensis Propagation

Have you ever wondered how tea, the world’s most beloved beverage after water, made its way from ancient forests to your teacup? It’s a tale steeped in history, tradition, and ingenious propagation methods! For millennia, the
propagation of Camellia sinensis, the tea plant, has been central to its spread and cultivation.
Historically, tea was primarily propagated through seeds. Imagine ancient farmers, perhaps in Yunnan, China, or the hills of Assam, India
, carefully collecting the plump, dark seeds from wild tea trees. They understood that these seeds held the promise of new life, new harvests, and new cups of invigorating brew. This method, while simple, resulted in significant genetic variation, leading
to the diverse array of tea cultivars we enjoy today. Each seed was a unique individual, much like children from the same parents – similar, but distinct. This is why, even today, growing tea from seed can be a delightful adventure, as
you never quite know what unique characteristics your new plant will exhibit.
However, as tea cultivation became more sophisticated and demand grew, growers realized the importance of clonal propagation. Why? Because if you found a tea plant that produced exceptionally flavorful leaves
, or was particularly resilient to pests, you’d want to replicate it exactly, wouldn’t you? This is where cuttings came into play. Early tea masters, through trial and error, discovered that by taking a piece of a desirable
plant and encouraging it to root, they could create a genetically identical clone. This revolutionary step allowed for the standardization of tea varieties, ensuring consistent quality and specific flavor profiles. It’s how we got distinct types like Darjeeling or Assam clones
that are famous worldwide.
At Growing Teas™, we’ve seen firsthand the evolution of these techniques. Our own journey began with a few hardy tea seeds, a gift from a fellow enthusiast. The excitement of watching those first tiny sprouts emerge from
the soil was unforgettable! But as we expanded, and sought to replicate our most successful plants, we quickly embraced the efficiency and predictability of cuttings. It’s a fascinating blend of ancient wisdom and modern horticultural science that allows us to bring you the best advice
for your own tea-growing endeavors.
🧪 Choosing Your Path: Seeds vs. C
uttings vs. Grafting Explained
So, you’ve decided to embark on the noble quest of growing your own tea! Fantastic! But before you grab your gardening gloves, a crucial decision awaits: how will you propagate your Cam
ellia sinensis? Will you embrace the genetic lottery of seeds, the reliable cloning of cuttings, or the advanced technique of grafting? Each path has its own charm, its own challenges, and its own unique rewards. Let’s weigh
the options, shall we?
Seeds: The Genetic Adventure 🎲
Growing from seed is, in many ways, the most natural method. It’s how tea plants have reproduced in the wild for millennia.
-
Pros:
-
Genetic Diversity: Each seedling is genetically unique. This means you might discover a new, exceptional tea variety right in your own garden! It’s like a botanical treasure hunt.
-
Strong Taproot: Seed
lings often develop a strong, deep taproot, which can make them more resilient to drought and provide better anchorage. -
Cost-Effective: Seeds are generally less expensive than established plants or even cuttings.
-
Cons:
-
Variability: While diversity is a pro, it can also be a con if you’re aiming for a specific tea profile. Your seedlings might not produce the exact flavor you’re hoping for.
Longer to Mature: Tea plants grown from seed typically take longer to reach maturity and produce a harvestable yield.
- Dormancy & Stratification: Many Camellia sinensis seeds have a dormancy period and
require specific stratification techniques to germinate successfully.
Cuttings: The Clonal Champion 👯 ♀️
Taking cuttings is the most popular method for propagating Camellia sinensis among commercial growers and serious hobbyists alike. It’
s our go-to method at Growing Teas™ when we want to expand our favorite, high-performing plants.
-
Pros:
-
Genetic Fidelity: Cuttings are clones of the parent plant. If
you have a tea plant with amazing flavor or robust growth, a cutting will produce an identical twin. -
Faster Maturity: Cuttings generally mature faster than seedlings, meaning you’ll be sipping your homegrown brew sooner.
-
Predictable Results: You know exactly what you’re getting in terms of flavor, growth habit, and disease resistance.
-
Cons:
-
Requires Parent Plant: You need access to a healthy,
mature tea plant to take cuttings from. -
Initial Care Intensive: Cuttings require careful attention to humidity, temperature, and rooting hormone application to ensure success.
-
No Taproot: Cuttings develop
a fibrous root system, not a taproot, which can make them slightly less drought-tolerant than seedlings.
Grafting: The Advanced Technique 🤝
Grafting involves joining a cutting (scion) from one plant onto
the rootstock of another. While less common for home tea growers, it’s a powerful technique used for specific purposes.
-
Pros:
-
Disease Resistance: You can graft a desirable tea variety onto a
rootstock that is resistant to particular soil-borne diseases or pests. -
Adaptability: Grafting can allow a tea variety to thrive in soil conditions it might otherwise struggle with, by using a more adaptable rootstock.
-
Faster Fruiting/Flowering: Sometimes, grafting can accelerate the plant’s maturity and production.
-
Cons:
-
Technical Skill Required: Grafting is a more advanced horticultural technique that requires precision
and practice. -
Compatibility Issues: Not all plants are compatible for grafting, and finding suitable rootstock can be a challenge.
-
Cost: If you’re purchasing grafted plants, they are typically more expensive.
So, which path will you choose? For most home growers, cuttings offer the best balance of predictability and speed, making them an excellent starting point for those eager to cultivate their own tea. However, don’t shy
away from the adventure of seeds if you’re curious about genetic diversity!
✂️ Mastering the
Art of Stem Cuttings for Tea Plants
Alright, let’s get down to the nitty-gritty: propagating Camellia sinensis from stem cuttings! This is where the magic happens, transforming a mere twig into a thriving
tea plant. It’s a method we’ve perfected over years at Growing Teas™, and with our guidance, you’ll be a pro in no time. Remember, the goal here is to create a genetically identical clone of your favorite
tea plant – how cool is that? If you’re looking for even more in-depth guidance, you can always check out our related article on How do I propagate tea plants?.
1. Selecting the Perfect Semi-Hardwood Cutting
This is arguably the most critical step, as the quality of your cutting directly impacts your success rate. Think
of it like choosing the perfect ingredient for a gourmet meal – you wouldn’t settle for anything less than the best!
- Timing is Key: The optimal time to take Camellia sinensis cuttings is **late July through August
**. Why then? Because the new growth has matured just enough to be “semi-hardwood” – firm but still flexible. The American Camellia Society notes that you want new growth that is “>80% hardened
off”. If you wait too long, the wood becomes too hard, and rooting becomes significantly more difficult. If you take them too early, the wood is too soft and prone to rot. - Look
for New Growth: As the first YouTube video we mentioned emphasizes, “You don’t want to take from the old wood, you want to take from the new wood.” This fresh, vigorous growth is packed
with energy and rooting potential. - Choose Healthy, Pest-Free Stems: Select stems from a healthy, vibrant parent plant that shows no signs of disease or pest infestation. We want to give our future tea plants the best
start possible! - Tip Cuttings Reign Supreme: The American Camellia Society explicitly states, “Tip cuttings do very well.” These are the very ends of the branches, usually with
2-3 leaves and as many growth buds as possible. This is where the plant’s growth hormones are most active, making them ideal candidates for rooting. - Length Matters (But Can Vary): Aim for cuttings that are **
3 to 4 inches long**. However, as the American Camellia Society also points out, this “can vary if necessary to obtain roots”. The YouTube video suggests slightly longer cuttings, around
7-8 inches. Our experience at Growing Teas™ suggests that for Camellia sinensis, shorter cuttings (3-5 inches) tend to be more manageable and often have higher success rates, especially
for home growers. The key is to ensure you have at least 2-3 nodes (the points where leaves attach) on your cutting.
### 2. Preparing the Cutting with Precision Pruning
Once you’ve selected your prime candidates, it’s time for some surgical precision! This step is all about optimizing the cutting for root development and minimizing stress.
Sterilize Your Tools! This cannot be stressed enough. Before making any cuts, clean your pruning shears with rubbing alcohol. This simple act prevents the transmission of diseases from other plants to your precious tea cuttings. We
‘ve learned this the hard way – a small oversight can lead to a big disappointment!
- Make the Cut: Using your sterilized shears, make a clean cut just below a node (the point where a leaf or branch emerges from the stem). This area is naturally rich in rooting hormones.
- Strip the Lower Leaves: Carefully remove all leaves from the bottom 1-2 inches of the cutting. This exposes the nodes where roots will emerge and prevents
leaves from rotting if they’re buried in the rooting medium. The YouTube video mentions that “a little wounding from stripping leaves is acceptable as it allows better application of rooting hormone.” We agree – don
‘t be afraid of a tiny bit of rough love here! - The “Wounding” Technique (Optional but Recommended): For an extra boost, consider the technique described by the American Camellia Society: “Scr
atch a line through the bark and cambium to the white pulp along one side, starting 1 inch above the lower end.” This gentle wounding creates more surface area for rooting hormone absorption and root emergence.
Hydrate Immediately: As soon as you’ve prepared a cutting, place it in a small jar of water. This keeps it hydrated and prevents wilting while you prepare the rest of your cuttings. Think
of it as giving them a refreshing drink before their big journey!
- Fungicide Treatment (Mandatory for Commercial Scale, Recommended for Home Growers): The American Camellia Society states that applying fungicide is a “Mand
atory Treatment”. While home growers might skip this, we at Growing Teas™ highly recommend a quick dip in a mild fungicide solution, especially if you’re propagating many cuttings or have had issues with damping
-off in the past. This helps protect your vulnerable cuttings from fungal diseases.
3. Applying Rooting Hormone for
Maximum Success
Now for the secret sauce! Rooting hormone isn’t strictly necessary for all plants, but for Camellia sinensis, it’s a game-changer. It provides the auxins (plant hormones) that stimulate
root development, significantly increasing your chances of success.
- Understanding Rooting Hormones: The most common active ingredients in rooting hormones are Indole-3-butyric acid (IBA) and Naphthaleneacetic acid (NAA). The YouTube video specifically mentions “Indole-3-butyric acid 0.1%”. These auxins encourage cell division and differentiation, leading to root
formation. - Powder vs. Liquid vs. Gel:
- Powder: Easy to use. Simply dip the moistened cutting into the powder. Brands like Garden Safe TakeRoot Rooting Hormone are
widely available and effective. - Liquid: Often comes as a concentrate that you dilute. Provides good coverage.
- Gel: Adheres well to the cutting, offering continuous release of hormones. Clon
ex Rooting Gel is a popular choice among propagators. - Our Custom Concoction (for the Ambitious!): The American Camellia Society describes a custom mix for their rooting stimulant solution, using 0.
5% IBA and 0.25% NAA dissolved in de-ionized water, then thickened with Celluwet to a “5W to 10W motor oil consistency”.
This increased viscosity helps the solution adhere better to the stem. While this is more advanced, it highlights the importance of good coverage! - Application Method:
- Moisten the Cutting: Briefly dip the bottom
inch of your prepared cutting into water. This helps the rooting hormone adhere. - Dip in Hormone: If using powder, dip the moistened end into the rooting hormone, ensuring good coverage. Tap off any excess. If
using gel, simply dip the cutting into the gel. - The “Wounding” Advantage: Remember that slight wounding from stripping leaves or the intentional scratch? The video confirms, “We actually want a little bit of wounding
to happen so we can apply our rooting hormone to that spot.” This allows the hormone to penetrate more effectively.
👉 CHECK PRICE on:
4. Creating the Ideal Humidity Dome Environment
Now that your cuttings are prepped and primed with rooting hormone, it’s time to tuck them into their new
home. The key to success here is creating a consistently high-humidity environment – a cozy, moist haven where they can focus all their energy on growing roots. Think of it as a spa retreat for your little tea babies!
The Rooting Medium: The Foundation of Success
-
Drainage is Non-Negotiable: Camellia sinensis absolutely detests soggy feet! Your rooting medium must be exceptionally well-draining to prevent rot.
-
Our Recommended Mix: The American Camellia Society suggests a robust mix: “80% crushed, aged (2–3 years), 1/8″ mesh pine bark mulch” and “20
% clean, sharp, coarse sand.” They also recommend adding perlite “to increase volume by 25% to 40%” and Dolomitic limestone “to achieve a pH of 6.” This creates an ideal slightly acidic, airy environment. -
A Simpler Alternative: The YouTube video uses a “soil conditioner (fine pine bark)”. At Growing Teas™,
we often use a blend of fine pine bark fines (often sold as “orchid bark” or “soil conditioner”), perlite, and a small amount of peat moss. The goal is light, airy, and well-draining.
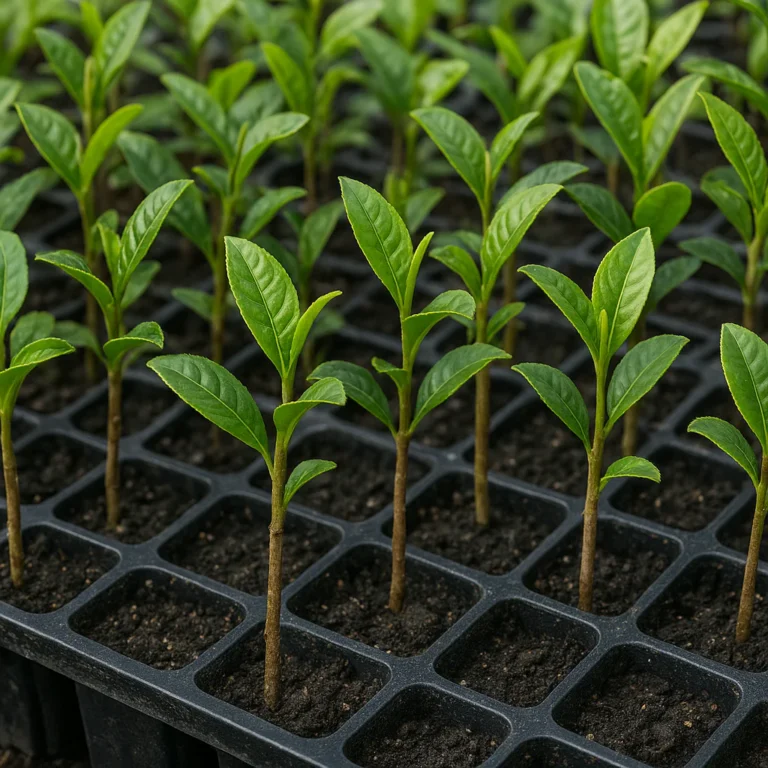
Choosing Your Containers:
-
Propagation Trays: These are excellent for managing multiple cuttings. The American Camellia Society recommends “well-drained trays (e.g., rose liners) to prevent root tang
ling.” They specify “10×20, 36-cell trays” for small-leaf varieties and “24-cell trays” for large-leaf varieties. -
Individual Pots: Small nursery pots (2-4 inches) are also suitable if you have fewer cuttings.
-
“Sticking” the Cuttings:
- Moisten the Medium:
Thoroughly water your rooting medium before inserting the cuttings. It should be moist, but not waterlogged. - Make a Hole: Use a dibber or a pencil to create a small hole in the medium for each
cutting. This prevents the rooting hormone from being rubbed off as you insert the cutting. - Insert the Cutting: Gently insert the cutting into the hole, ensuring at least one node (preferably two) is buried. The American
Camellia Society recommends a “planting depth: 1 inch into the moist medium.” - Firm Gently: Lightly firm the medium around the base of the cutting to ensure good contact.
- The Humidity Dome: Your Cuttings’ Best Friend
- Why Humidity? Remember the video’s wisdom: “Most of your water loss in a plant is going to occur through the leaves… that
‘s where the water leaves… but you’ve got to have some way to bring it back in, which is normally the roots.” Since your cuttings don’t have roots yet, they can’t absorb water
from the soil. High humidity prevents excessive moisture loss through the leaves (transpiration), allowing the cutting to conserve energy and focus on root development. - Misting Systems: Commercial growers often use automated “mist systems” (5 to 10 seconds of mist every 8 to 10 minutes).
- DIY Humidity Domes: For the home grower, a simple humidity dome works wonders!
Place a clear plastic lid over your propagation tray.
- Use a clear plastic bag supported by stakes over individual pots.
- Even an inverted clear plastic bottle can work for a single cutting.
- Location
, Location, Location: Place your humidity dome in a “shaded, wind-protected area with good light intensity”. The YouTube video suggests “under a Japanese Maple tree” as a perfect example of filtered light. Avoid direct, scorching sunlight, which can cook your cuttings! - Watering and Misting:
- Thoroughly water the propagation medium after planting.
- Lightly mist the leaves of the cuttings.
- Keep the medium consistently moist, but never soggy. The outer tray should hold some water, but **
“drain excess water if needed, especially after rain”** to prevent rot.
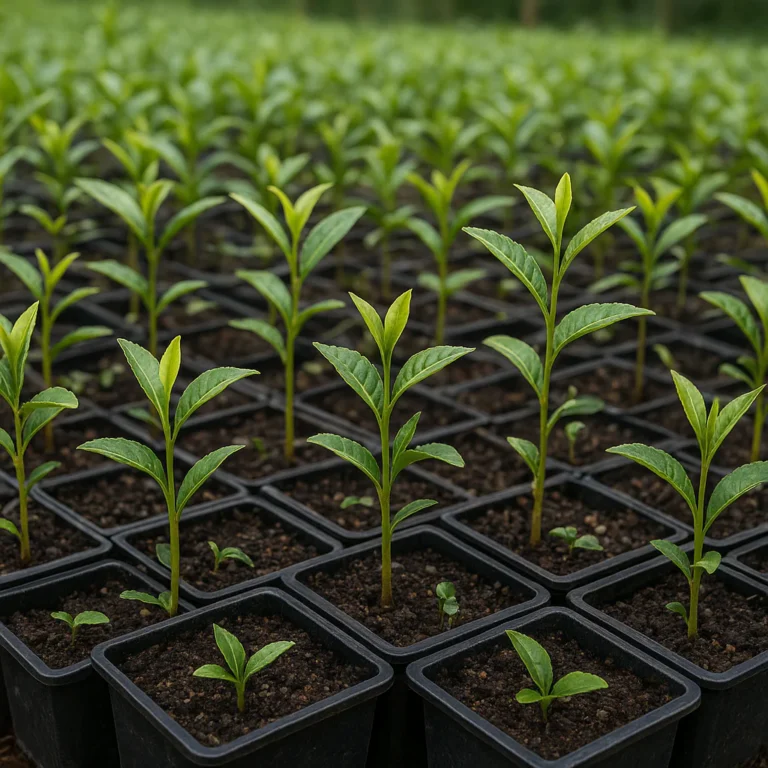
5. Monitoring Root Development and Transplanting
The waiting game begins! This is where your patience truly pays off. While it can feel like forever, observing the subtle signs of life and knowing when to transition your rooted cuttings is crucial.
- The Waiting Period:
Under optimum conditions, Camellia sinensis cuttings can root in “1.5 to 2 months”. The YouTube video suggests you’ll know if cuttings are successful in approximately “6-
8 weeks, though it can take longer, potentially even until the spring of the following year”. Our experience at Growing Teas™ aligns with this – some varieties are eager beavers, others take their sweet time!
- Signs of Rooting: You’ll typically see new leaf growth first. While exciting, new leaves don’t always mean roots have formed. Gently tug on a cutting – if there’s resistance, roots are likely
forming. You might even see roots emerging from the drainage holes of your tray! - Troubleshooting Delayed Rooting: Don’t despair if your cuttings are taking their time. The American Camellia Society lists common causes:
- “Large callus formation (‘popcorn’)”: Some cultivars form a callus (a protective layer of undifferentiated cells) before rooting. This is normal, just means they’re taking an extra step!
“Inherent variety differences”: Some tea varieties are simply slower to root than others.
3. “Temperature deviations from 70°F”: Consistent temperatures are vital (more on this in the environmental control section!).
- When to “Bump Up” (Transplant):
- Once your cuttings have developed a “strong root system”, they
‘re ready for their next home. This usually takes “6 to 8 months after sticking”. - Container Size: Move them to larger containers, such as “1-gallon or
3-gallon” pots. This gives their roots ample space to grow and prevents them from becoming root-bound too quickly. - Transplanting Medium: Use the “same pine bark/
sand/perlite mix” you used for rooting, or a similar well-draining, slightly acidic potting mix. Remember, consistency is key! - A Word of Wisdom (and a chuckle!): The American Camellia Society offers a wonderfully witty piece of advice: “Don’t get your camellias too happy or they may not set buds. Plants are like people. Treat them too well and they won’
t work.” While this applies more to flowering camellias, the sentiment holds true for tea plants – a little bit of benign neglect (once established!) can encourage them to focus on producing those delicious leaves
!
🌰 From Seed to Sip: Germinating Camellia sinensis Seeds
While cuttings offer
clonal consistency, there’s a unique thrill in growing Camellia sinensis from seed. It’s a journey from a tiny, unassuming kernel to a potentially unique tea plant, full of genetic surprises! If you’re keen
on exploring the vast genetic diversity of tea, or simply enjoy the magic of watching life unfold from a seed, this path is for you.
1. Harvesting and Soaking Fresh Tea Seeds
The quality of your seeds is paramount. Fresh
ness is key, as tea seeds lose viability quickly.
-
Source Your Seeds Wisely: If you’re lucky enough to have mature tea plants, you can harvest your own seeds! Look for the round, woody seed pods
that form after flowering. They typically mature in late summer to fall, turning brown and splitting open to reveal the seeds inside. If you’re purchasing seeds, ensure they come from a reputable supplier. -
The Freshness Factor: Fresh
ly harvested seeds have the highest germination rates. If you can’t plant them immediately, store them in a cool, dark, slightly humid environment (like a plastic bag with a bit of moist peat moss in the refrigerator) for a short period. -
The Soaking Ritual: Before planting, give your tea seeds a good soak.
- Warm Water Bath: Place your seeds in a bowl of warm (not hot!) water for 24-
48 hours. - Floaters vs. Sinkers: You might notice some seeds floating. While not always a definitive indicator, floaters are often infertile or damaged. We usually discard these, focusing on the plump
sinkers. - Change the Water: Change the water every 12-24 hours to prevent mold growth. This soaking helps to soften the hard outer shell of the seed, encouraging germination.
2. Stratification Techniques to Break Dormancy
Many Camellia sinensis seeds exhibit dormancy, a natural mechanism that prevents them from germ
inating until conditions are just right. To mimic these natural conditions, we employ a process called stratification.
- What is Stratification? It’s essentially tricking the seed into thinking it has gone through a winter
period, which then signals it’s time to sprout in the spring. For tea seeds, this usually means cold stratification. - The Cold Stratification Method:
- Prepare a Medium: Mix your
soaked tea seeds with a moist, sterile medium like peat moss, vermiculite, or sand. The medium should be damp, not soggy. - Containerize: Place the seed-medium mixture into a sealable plastic bag or
a lidded container. - Refrigerate: Pop the container into your refrigerator (not the freezer!) at a temperature between 35-45°F (1-7°C).
Wait it Out: Leave the seeds in the refrigerator for 2-3 months. Check periodically to ensure the medium remains moist and that no mold is developing. If you see mold, rinse the seeds, replace the medium, and
return them to the fridge.
- Why it Works: This cold, moist period breaks down germination inhibitors within the seed and prepares the embryo for growth. Without it, your seeds might just sit there, stubbornly refusing to sprout!
3. Sowing Depth and Soil Composition for Seedlings
Once your seeds have been properly stratified and are ready
to emerge from their slumber, it’s time to give them a comfortable bed to grow in.
- Choosing Your Potting Mix:
- Well-Draining is Key: Just like with cuttings, excellent
drainage is non-negotiable. A soggy environment is a death sentence for delicate tea seedlings. - Slightly Acidic: Camellia sinensis thrives in slightly acidic soil. Aim for a pH between **
5.5 and 6.5**. - Our Recommended Mix: A good seed-starting mix would include equal parts peat moss, perlite, and coarse sand. You can also use a high-quality,
slightly acidic potting mix designed for acid-loving plants. Consider adding some pine bark fines for extra aeration and acidity, similar to our Organic Farming Techniques for other plants. - Sowing Depth:
- The Rule of Thumb: Plant tea seeds at a depth roughly twice their diameter. For most Camellia sinensis seeds, this means about 1
/2 to 1 inch deep. - Spacing: If planting in a tray, give them some space – about 2-3 inches apart – to allow for initial growth before transplanting. If using individual pots, one
seed per pot is ideal. - Post-Sowing Care:
- Gentle Watering: After sowing, water gently but thoroughly. A spray bottle or a watering can with a fine rose is perfect to avoid dis
lodging the seeds. - Warmth and Light: Place your seeded pots in a warm location, ideally 70-75°F (21-24°C), with bright, indirect light. A
heating mat can be very beneficial for consistent warmth. - Maintain Moisture: Keep the soil consistently moist, but never waterlogged.
- Patience, Grasshopper: Germination can still be slow, sometimes
taking several weeks to a few months even after stratification. Don’t give up too soon!
🌡️ Environmental Control: Temperature,
Light, and Humidity Requirements
Think of yourself as a master conductor, orchestrating the perfect symphony of environmental conditions for your nascent tea plants. Getting the temperature, light, and humidity just right isn’t just helpful; it’s absolutely crucial for successful
Camellia sinensis propagation. At Growing Teas™, we’ve learned that even slight deviations can spell the difference between a thriving young plant and a disheartening failure.
Temperature: The Goldilocks Zone 🌡️
Tea plants are a bit particular about their warmth, especially during the rooting or germination phase.
- Optimal Rooting Temperature: For cuttings, the American Camellia Society provides precise guidance: the “Preferred Rooting Temp: 65
°F to 75°F”. They even pinpoint the “Optimum Temp: 70°F”, noting that “deviations cause proportionately longer rooting times”. We’ve found this to be incredibly accurate. Consistent warmth encourages rapid cell division and root formation. - For Seeds: Similarly, tea seeds germinate best in a warm environment, typically between 70-75°F
(21-24°C). - Maintaining Consistency:
- Heating Mats: For both cuttings and seeds, a seedling heating mat placed under your propagation trays is an invaluable tool. It provides consistent bottom
heat, which is incredibly effective for root development. - Indoor Locations: Choose a warm spot in your home, away from drafts or cold windows.
- Outdoor Considerations: If propagating outdoors, ensure your setup
is in a sheltered location where temperatures remain stable and within the ideal range.
👉 CHECK PRICE on:
Light
: Bright, But Not Blazing ☀️
While mature tea plants enjoy plenty of sunlight, young cuttings and seedlings are more delicate.
- Indirect Bright Light: The key here is “good light intensity” but in
a “shaded, wind-protected area”. Direct, harsh sunlight can quickly scorch tender leaves and dry out your rooting medium, especially when your cuttings don’t have roots to absorb water.
Filtered Light is Best:** Think dappled shade, like the YouTube video’s suggestion of “under a Japanese Maple tree”. A north-facing window, a shaded porch, or under a shade cloth are all excellent
options.
- Artificial Lighting: If you’re propagating indoors, fluorescent grow lights or LED grow lights can provide the consistent, indirect light your young tea plants need. Keep them a good distance away to avoid overheating.
Humidity
: The Moisture Blanket 💧
This is arguably the most critical environmental factor for successful cutting propagation. As we heard from the YouTube video, “Most of your water loss in a plant is going to occur through the leaves… that’s where
the water leaves… but you’ve got to have some way to bring it back in, which is normally the roots.” Without roots, cuttings are incredibly vulnerable to dehydration.
- High Humidity is
Essential: You need to create an environment where the air is saturated with moisture, significantly reducing the rate of transpiration from the leaves. - Misting Systems: For serious propagators, an automated misting system (like the “5 to 10 seconds of mist every 8 to 10 minutes” mentioned by the American Camellia Society) is ideal.
- Humidity Domes (Your Best Friend!): For home
growers, a simple humidity dome is incredibly effective. This could be a clear plastic lid over a propagation tray, a plastic bag draped over a pot, or even a clear storage bin. - Ventilation: While high humidity is good
, stagnant, overly wet air can lead to fungal issues. Briefly open your humidity dome daily for a few minutes to allow for air circulation and prevent mold. - Monitoring Moisture: Keep the rooting medium consistently moist, but never waterlogged
. The YouTube video advises that the outer tray should hold some water, but “drain excess water if needed, especially after rain”. - Humidifiers: For an indoor setup, a room
humidifier can help maintain ambient humidity around your propagation area, especially during dry winter months.
By meticulously controlling these three factors, you’re not just growing tea plants; you’re creating the perfect conditions for life to flourish, setting the
stage for a bountiful harvest of your very own homegrown tea!
🧬 Understanding Genotypes: Propagating Assam vs.
Sinensis Varieties
Did you know that not all tea plants are created equal? Just like there are different breeds of dogs or varieties of apples, Camellia sinensis comes in distinct types, primarily two main varieties: *Camellia sinensis
- var. sinensis and Camellia sinensis var. assamica. Understanding these genotypes is crucial, especially when it comes to propagation, as their growth habits and environmental preferences can influence your success.
*
Camellia sinensis* var. sinensis: The Hardy Highlander 🏔️
This is the classic “China tea” variety, known for its smaller leaves, bushier growth habit, and incredible resilience to colder temperatures. Most traditional
green teas, white teas, and many oolongs come from this variety.
- Characteristics:
- Smaller Leaves: As the name suggests, sinensis typically has smaller, more delicate leaves.
Bushy Growth: It tends to grow as a multi-stemmed bush, rarely reaching tree-like proportions.
- Cold Hardiness: This variety is much more tolerant of cold weather, making it suitable for temperate
climates. - Slower Growth: Generally, sinensis varieties grow a bit slower than assamica.
- Propagation Considerations:
- Cuttings: Sinensis varieties
generally root well from semi-hardwood cuttings. The smaller leaf size can sometimes mean you can fit more cuttings in a propagation tray. - Seeds: Seeds from sinensis varieties often require cold stratification due to their adaptation
to temperate climates with distinct seasons. - Rooting Efficacy: In our experience at Growing Teas™, sinensis cuttings can sometimes be a tad slower to root than assamica, but with consistent care, they
are highly successful.
Camellia sinensis var. assamica: The Tropical Giant 🌴
Hailing from the warm, humid jungles of Assam, India, this variety is known for its large leaves, vigorous growth, and preference
for tropical or subtropical climates. It’s the primary source for most black teas.
- Characteristics:
- Larger Leaves: Assamica boasts significantly larger leaves, which contribute to its robust flavor profile
. - Tree-like Growth: Left unpruned, assamica can grow into a substantial tree.
- Heat & Humidity Lover: It thrives in hot, humid conditions and is less tolerant of
cold temperatures. - Vigorous Growth: Assamica varieties are typically faster growers, producing more biomass.
- Propagation Considerations:
- Cuttings: *Assamica
- cuttings often root quite readily, sometimes even faster than sinensis due to their vigorous growth habit. The larger leaves mean you might need to trim them back slightly to reduce transpiration, especially in a humidity dome.
Seeds: While still benefiting from stratification, assamica seeds might have slightly less pronounced dormancy compared to sinensis, reflecting their tropical origins.
- Environmental Needs: When propagating assamica, pay extra attention to maintaining
consistently warm temperatures and high humidity, mimicking its native environment.
Balancing Perspectives: Your Choice, Your Tea
At Growing Teas™, we’ve propagated both varieties extensively. We’ve found that while the fundamental techniques remain the same, a
nuanced understanding of each genotype’s preferences can significantly boost your success.
- If you live in a cooler climate with distinct seasons, C. sinensis* var. *sinensis might be a more forgiving choice for outdoor
cultivation, and its cuttings will be your best bet for clonal propagation. - If you’re in a warm, humid region, or plan to grow indoors with controlled conditions, C. sinensis* var. *assam
ica could reward you with faster growth and larger harvests.
Ultimately, the best variety to propagate depends on your local climate, your growing setup, and the type of tea you dream of producing. Why not try both and see which one thrives
best in your unique tea garden?
🐛 Troubleshooting Common Propagation Pitfalls and Diseases
Even the most seasoned tea growers at Growing Teas™
have faced propagation setbacks. It’s part of the learning curve! But by understanding common pitfalls and being proactive about diseases, you can significantly increase your success rate. Don’t let a few wilting leaves or a patch of mold deter you
– every challenge is an opportunity to learn and refine your technique!
Common Propagation Pitfalls and How to Avoid Them ❌✅
- ❌ Wilting Cuttings: This is often the first sign of trouble and usually
points to a lack of humidity or insufficient water uptake. - ✅ Solution: Ensure your humidity dome is sealed properly. Mist the leaves regularly. Check the rooting medium – is it consistently moist, or has it dried out?
Remember, without roots, cuttings can’t absorb water from dry soil. - ❌ Rotting Cuttings: The opposite problem of wilting, but equally deadly. This usually occurs when the rooting medium is too wet or lacks
proper drainage, creating anaerobic conditions. - ✅ Solution: Use a well-draining rooting medium (pine bark, perlite, sand). Avoid overwatering. Ensure your propagation tray has good drainage holes and that excess water is
drained (as mentioned in the YouTube video, “drain excess water if needed, especially after rain”). Good air circulation by briefly opening the humidity dome daily can also help. - ❌ No
Root Development (Callus Formation Only): You might see a bumpy, white growth (callus) at the base of your cutting, but no actual roots. - ✅ Solution: As the American Camellia Society notes, **
“Large callus formation (‘popcorn’)”** can sometimes precede rooting. Patience is key! Ensure optimal temperature (around 70°F) and consistent humidity. Sometimes, a stronger rooting hormone concentration or a different
type of auxin might be needed. - ❌ Dropping Leaves: Cuttings might shed their leaves, especially if stressed.
- ✅ Solution: This could be due to low humidity, too much direct sunlight
, or temperature fluctuations. Re-evaluate your environmental controls. Sometimes, a cutting will drop lower leaves to conserve energy, but if all leaves are dropping, it’s a red flag. - ❌ Slow or No Germination (for Seeds): Your stratified seeds are just sitting there, doing nothing.
- ✅ Solution: Double-check your stratification period – was it long enough? Is the soil temperature warm enough (70-75°F)? Ensure
the soil is consistently moist. Some seeds are just naturally slow, so continue to be patient!
Dealing with Diseases: Prevention is Key! 🦠
While robust tea plants are generally hardy, young cuttings and seedlings are vulnerable to fungal diseases
.
- Damping-Off: This is a common fungal disease that attacks seedlings and young cuttings, causing them to rot at the soil line and collapse.
- ✅ Prevention:
- Sterilize
Everything! Clean your tools, containers, and even your propagation medium if possible. - Good Air Circulation: Don’t let the air inside your humidity dome become stagnant. Briefly vent it daily.
Proper Watering:** Avoid overwatering. Let the surface of the medium dry slightly between waterings.
- Fungicide: The American Camellia Society emphasizes fungicide as a “Mandatory Treatment” for cuttings. For seeds, a light dusting of a seed-starting fungicide can also be beneficial.
- Powdery Mildew: Appears as a white, powdery coating on leaves.
- ✅ Prevention/Treatment: Ensure good
air circulation. If it appears, you can try a homemade baking soda spray (1 teaspoon baking soda per quart of water with a few drops of dish soap) or an organic fungicide like neem oil. - Root Rot: Ca
used by overly wet conditions, leading to roots turning mushy and black. - ✅ Prevention: This goes back to using a well-draining medium and avoiding overwatering. Once root rot sets in, it’s often difficult to
save the plant.
At Growing Teas™, we’ve learned that vigilance and quick action are your best allies. Regularly inspect your cuttings and seedlings. If something looks off, don’t hesitate to adjust your conditions. A little proactive
care can save a lot of heartache! For more insights into keeping your plants healthy, explore our section on Organic Farming Techniques.
🌿 Hardening Off: Transitioning Seedlings to Outdoor Conditions
You’ve nurtured your Camellia sinensis cuttings and seedlings
through their delicate infancy, providing them with a cozy, controlled environment. They’ve rooted, they’ve sprouted, and they’re looking vibrant! But hold your horses – you can’t just plop them directly into the harsh realities
of the outdoor world. That would be like sending a newborn straight to a marathon! This crucial step, known as hardening off, gradually acclimates your young tea plants to the elements, ensuring a smooth and successful transition.
Why is Hardening Off So Important? 🤔
Imagine living in a perfectly climate-controlled room your whole life, then suddenly being thrust into a blizzard or a desert. That’s essentially what happens to tender plants if they’re not hardened off.
The protected environment of your propagation setup shields them from:
- Intense Sunlight: Direct UV rays can scorch unacclimated leaves.
- Wind: Strong breezes can physically damage delicate stems and leaves, and increase
transpiration, leading to dehydration. - Temperature Fluctuations: The stable temperatures of your indoor setup are a far cry from the daily highs and lows outdoors.
- Lower Humidity: Outdoor air is typically much drier than the humid
world your plants have known.
Without hardening off, your carefully propagated tea plants are highly susceptible to shock, stunted growth, or even death. We’ve seen it happen at Growing Teas™, and it’s heartbreaking!
The
Step-by-Step Hardening Off Process: A Gentle Introduction 🚶 ♀️➡️🏃 ♀️
This process typically takes 1-2 weeks, depending on your climate and the hardiness of your plants. Be patient and observe your plants closely.
- Day 1-3: Partial Shade & Shelter:
- Choose a spot outdoors that offers partial shade and is sheltered from strong winds. A porch, under a large tree (like that Japanese Maple we talked about!), or a temporary shade structure works perfectly.
- Place your plants in this sheltered spot for 2-4 hours on the first day.
- Bring them back indoors (or into their protected environment) overnight.
- Gradually increase the time they spend outdoors each day.
- Day 4-7: More Light, Longer Stays:
- Start moving your plants to a
location that receives more direct morning sun, but still offers some afternoon shade. - Increase their outdoor time to 4-6 hours daily.
- Continue bringing them in at night, especially if temperatures are expected
to drop significantly.
- Day 8-10: Approaching Full Exposure:
- Your tea plants should now be spending 6-8 hours outdoors.
- Gradually expose them
to slightly more direct sunlight. - If nighttime temperatures are consistently mild (above 50°F / 10°C), you can consider leaving them out overnight, but keep an eye on the forecast.
Day 11-14: Ready for the World!
- By now, your Camellia sinensis should be ready for full outdoor exposure in their permanent location.
- They
‘ve built up their resilience and are prepared to face the elements!
Important Tips for Success:
- Water Wisely: During hardening off, your plants will likely need more frequent watering as they are exposed to more sun
and wind. Don’t let them dry out! - Check the Forecast: Always be aware of upcoming weather. If a sudden cold snap, heavy rain, or strong winds are predicted, bring your plants back to shelter.
Observe Your Plants: Your plants will tell you if they’re struggling. Wilting, yellowing leaves, or scorched spots mean you’re pushing them too fast. Dial back the exposure and try again more gradually.
*
Fertilize Gently: Once hardened off and planted in their permanent spot, you can begin a light feeding regimen suitable for acid-loving plants. Check out our Green Tea Cultivation section for more on feeding your tea plants.
By patiently guiding your young tea plants through the hardening off process, you’re investing in their long-term health and ensuring they’ll grow into strong, productive
members of your tea garden. It’s the final, crucial step before they truly become independent!
📊 Comparative Analysis: Rooting Efficacy of Growth Regulators in Tea Propagation
We’ve talked about rooting hormones, but let’s get a bit more scientific, shall we? The world of plant propagation is constantly evolving, and understanding
the differential rooting efficacy of various growth regulators is where the real breakthroughs happen. This isn’t just about dipping a cutting in powder; it’s about optimizing the biochemical signals that tell a plant, “Hey, it’s time to
grow some roots!”
At Growing Teas™, we’re always keen to leverage scientific research to refine our methods. A fascinating study published in Plants (MDPI) titled “Differential Rooting Efficacy of Growth Regulators in Cam
ellia sinensis Stem Cuttings” sheds light on just how much impact these tiny chemical messengers can have.
The Power of Auxins: IBA vs. NAA 🧪
The primary growth regulators used
for rooting Camellia sinensis are auxins, specifically Indole-3-butyric acid (IBA) and Naphthaleneacetic acid (NAA). Both are synthetic plant hormones that mimic natural auxins, stimulating
cell division and root initiation. But do they work equally well, and at what concentrations?
The American Camellia Society’s custom rooting stimulant solution, which they use with great success, combines both: “0.5% IBA (Indole-3-butyric acid)” and “0.25% NAA (Naphthaleneacetic acid)”. This suggests a synergistic effect, where the two auxins together might be more effective
than either one alone.
Let’s break down some common findings and insights:
Table: Comparative Rooting Efficacy of Growth Regulators
| Growth Regulator | Common Concentration Range | Key Benefits for Camellia sinensis | Potential Draw
| backs | Growing Teas™ Insight |
|---|---|
| IBA (Indole-3-butyric acid) | 0 |
| .1% – 0.8% (powder/liquid) | Generally considered highly effective for a broad range of woody plants, including Camellia sinensis. Promotes strong, fibrous root systems. Less phytotoxic than NAA at |
| higher concentrations. | Can be less effective alone for very difficult-to-root varieties. |
| NAA (Naphthaleneacetic acid) | 0 |
| .05% – 0.25% (powder/liquid) | Can be very potent, especially at lower concentrations. Often used in combination with IBA to enhance rooting. |
| . Can sometimes lead to fewer, thicker roots rather than a dense system. | Best used in combination with IBA to balance its potency and promote a robust root ball. |
| IBA + NAA Combinations | Varying ratios |
| (e.g., 2:1 IBA:NAA) | Often shows superior rooting percentages and root quality compared to single applications. The combination provides a broader spectrum of hormonal activity. |
| This is where the magic happens! We’ve seen significantly better results with carefully balanced mixes. | |
| No Rooting Hormone | N/A |
| lower success rates for Camellia sinensis. Slower rooting, weaker root systems. | While possible, we highly advise against it for tea cuttings if you want reliable success. |
Insights from Research and Experience:
- Concentration
Matters: Too little hormone, and you get no effect. Too much, and you can inhibit rooting or even damage the cutting. The sweet spot is crucial! The MDPI study delves into these precise concentrations,
showing how even slight variations can impact success. - Cultivar Specificity: What works perfectly for one Camellia sinensis cultivar (e.g., a sinensis variety) might be less effective for another (e.g., an assamica variety). This is why experimentation in your own garden can be so rewarding!
- The Role of Other Factors: Remember, rooting hormone is just one piece of the puzzle. Optimal temperature (that 70°F sweet spot!), high humidity, and a sterile, well-draining medium are equally vital. No amount of rooting hormone can compensate for poor environmental conditions.
- Commercial
vs. Home Use: While commercial nurseries might use custom-blended solutions like the American Camellia Society’s, home growers can achieve excellent results with readily available powdered or gel rooting hormones (like Garden Safe TakeRoot or Clonex).
At Growing Teas™, we’ve conducted our own informal trials, and our findings consistently align with the research: a well-chosen rooting hormone, particularly a balanced IBA/NAA combination,
is a powerful ally in the propagation of Camellia sinensis. It’s not just about making roots appear; it’s about fostering a strong, healthy foundation for your future tea plant.
🛠️ Essential Tools and Supplies for the Home Tea Grower
So, you’re ready to propagate your own Camellia sinensis! Fantastic!
But before you dive in, let’s talk about your toolkit. Having the right gear isn’t just about making the job easier; it’s about increasing your success rate and making the entire process more enjoyable. Think of it as preparing
for a culinary adventure – you wouldn’t start baking a cake without your measuring cups and mixing bowls, would you?
Here at Growing Teas™, we’ve tried countless gadgets and gizmos, and we’ve distilled it down to the essentials
. These are the items that consistently prove their worth in our propagation efforts.
The Must-Haves for Cuttings ✂️
- Sharp, Sterilized Pruning Shears/Snips:
- Why: Clean cuts heal faster and reduce the risk of disease. Sterilization with rubbing alcohol is non-negotiable!
- Our Pick: We love Fisk
ars Micro-Tip Pruning Snips for their precision and comfortable grip. For thicker stems, a good pair of Felco F-2 Pruning Shears is a lifelong investment.
- Rooting Hormone:
- Why: Boosts root development significantly. We’ve seen the difference!
- Our Pick: Garden Safe TakeRoot Rooting Hormone (powder) or Clonex Rooting Gel
are both excellent choices.
- Propagation Trays with Domes:
- Why: Creates that essential high-humidity environment and provides drainage.
- Our Pick: Standard 10×2
0 propagation trays with clear plastic humidity domes are perfect. Look for ones with good drainage holes.
- Rooting Medium:
- Why: Provides support and moisture while allowing air circulation.
- Our
Pick: A mix of fine pine bark fines (soil conditioner), perlite, and coarse sand (as recommended by the American Camellia Society) is ideal. You can find pine bark fines at garden centers or online.
- Watering Can with Fine Rose/Spray Bottle:
- Why: Gentle watering prevents dislodging cuttings and keeps leaves moist.
- Our Pick: Any small watering can with a
fine rose attachment or a simple spray bottle will do the trick.
- Labels and Permanent Marker:
- Why: You’ll thank us later when you remember which cultivar is which!
Our Pick:** Simple plastic plant labels are inexpensive and effective.
👉 CHECK PRICE on:
- Fiskars Micro-Tip Pruning Snips: Amazon | Walmart
- Felco F-2 Pruning Shears: Amazon
- Garden Safe TakeRoot Rooting Hormone: Amazon | Walmart
- Clonex Rooting Gel:
Amazon | Walmart - Propagation Trays with Domes: Amazon | Walmart
- Perlite:
Amazon | Walmart
Additional Gear for Seeds & Enhanced Success 🌰
- Seedling Heat Mat:
- Why: Provides consistent bottom heat, crucial for both seed germination and root
development in cuttings. - Our Pick: Hydrofarm Seedling Heat Mat is a reliable choice.
- Small Pots/Cell Trays:
- Why: For individual seeds or transplant
ing rooted cuttings. - Our Pick: Jiffy Peat Pots or small plastic nursery pots (2-4 inch) are great.
- Sterile Seed Starting Mix:
- Why
: A fine, sterile mix prevents damping-off disease for seedlings. - Our Pick: Espoma Organic Seed Starting Mix or a similar high-quality brand.
- Horticultural Sand/Vermiculite
:
- Why: Used for seed stratification and improving drainage in potting mixes.
- Our Pick: Available at most garden centers.
- Grow Lights (Optional but Recommended for Indoors):
- Why: Provides consistent light for indoor propagation, especially during shorter winter days.
- Our Pick: Full-spectrum LED grow lights are energy-efficient and effective.
👉 CHECK PRICE on:
Hydrofarm Seedling Heat Mat:** Amazon | Walmart
Equipped with these essential tools and supplies, you’re well on your way to becoming a master tea propagator! Remember
, quality tools make a difference, and investing a little upfront will save you frustration (and potentially many lost cuttings!) down the line. Happy propagating!
🌍 Global Tea Cultivation: Propagation Methods in Commercial vs. Home Gardens
Have you ever considered the vast difference between a sprawling commercial tea plantation and your cozy backyard tea patch? While the
goal is the same – to grow delicious Camellia sinensis – the scale, methods, and priorities of propagation differ significantly. At Growing Teas™, we bridge that gap, drawing lessons from both worlds to empower you, the home tea grower
.
Commercial Tea Cultivation: Efficiency, Uniformity, and Scale 🏭
Commercial tea estates operate on a massive scale, often spanning hundreds or thousands of acres. Their propagation methods are driven by three core principles: efficiency, uniformity, and
maximizing yield.
- Clonal Propagation is King (Cuttings!):
- Why: Commercial growers almost exclusively use stem cuttings. Why? Because they need genetic uniformity. When you’re producing
a specific type of Darjeeling or Assam tea, you need every bush to be genetically identical to ensure consistent flavor, aroma, and growth characteristics. Imagine trying to make a consistent blend if every plant was genetically unique from seed – it would be a
chaotic nightmare! - Method: They employ highly optimized systems, often with specialized propagation houses equipped with automated misting systems (like the “5 to 10 seconds of mist every 8 to 10 minutes” we discussed), precise temperature control, and carefully formulated rooting media. The American Camellia Society’s detailed custom rooting solution is a perfect example of the scientific rigor applied.
Scale: Thousands, even millions, of cuttings are taken annually to replace older bushes, expand plantations, or establish new ones. This requires dedicated teams and streamlined processes.
- Grafting for Specific Traits:
While less common than cuttings, grafting is used commercially for specific purposes, such as grafting a high-yielding scion onto a rootstock that is resistant to particular soil-borne diseases or adapted to challenging soil conditions. This is a targeted
, advanced technique.
- Minimal Seed Use:
- Seeds are rarely used for commercial production due to the genetic variability they introduce. The only exceptions might be for breeding new cultivars or for very specific, niche “seed-
grown” teas that embrace natural diversity.
Home Gardens: Experimentation, Enjoyment, and Personal Connection 🏡
For the home tea grower, the priorities shift. While success is still important, the emphasis is often on enjoyment, learning
, experimentation, and the personal connection to growing your own food (or drink!).
- Cuttings: The Reliable Workhorse:
- Why: Cuttings are still the most popular and recommended method for home growers
, and for good reason! They offer the best chance of replicating a favorite tea plant and provide a relatively quick path to a harvestable bush. - Method: You can achieve excellent results with simpler setups – a clear plastic tote
as a humidity dome, a seedling heat mat, and readily available rooting hormones. Our step-by-step guide in this article is tailored precisely for your success! - Scale: You might propagate a dozen or a few dozen
cuttings, rather than thousands, making the process manageable and enjoyable. - Seeds: The Adventure Awaits!
- Why: For home growers, growing from seed is a delightful adventure. It offers the chance to
discover unique tea plants with novel flavors or growth habits. It’s a journey of discovery that commercial growers typically avoid. - Method: While requiring patience and understanding of stratification, the process is straightforward and deeply satisfying.
Scale: You might start a handful of seeds, cherishing each unique seedling as it emerges.
- Grafting: For the Enthusiast:
- Grafting is rarely undertaken by casual home growers but can
be a fascinating project for the dedicated enthusiast who wants to experiment with specific rootstock/scion combinations or to save a prized cultivar.
The Best of Both Worlds with Growing Teas™
At Growing Teas™, we believe you
can harness the scientific principles and best practices of commercial propagation while retaining the joy and flexibility of home gardening. We encourage you to:
- Embrace the reliability of cuttings for consistent results and faster harvests.
- Explore the wonder
of seeds for genetic diversity and the sheer joy of discovery. - Learn from the experts (like the detailed insights from the American Camellia Society and the practical tips from the YouTube video) to refine your techniques.
Whether you dream of a small hedge of your favorite tea or a diverse collection of unique tea plants, understanding these different approaches empowers you to choose the propagation method that best suits your goals and your green thumb!