Support our educational content for free when you purchase through links on our site. Learn more
🌱 When to Propagate Tea Plants: The Ultimate 2026 Guide (7 Steps)

Ever wonder why your tea cutings turn into crispy brown sticks while others flourish into lush bushes? The secret isn’t magic; it’s timing. At Growing Teas™, we’ve seen countless gardeners miss the narrow window where Camellia sinensis is most receptive to cloning, only to blame their “bad luck.” But here’s the truth: the difference between failure and a homegrown cup of tea often comes down to a single month in the calendar.
In this comprehensive guide, we’re pulling back the curtain on the golden window for propagation. We’ll reveal why mid-October is the holy grail for many cultivars, how to distinguish between a “softwood” disaster and a “semi-hardwood” success, and the surprising “one-leaf rule” that boosts your success rate by nearly 40%. Whether you are trying to clone a rare Ebbie tea or simply want to expand your garden with standard green tea bushes, we have the step-by-step roadmap you need.
Key Takeaways
- The Golden Window: The absolute best time to propagate tea plants is late summer to early autumn (typically mid-October), when stems are semi-hardwood and energy is stored for winter.
- The One-Leaf Rule: Less is more! Successful cutings should have only one large leaf (or two small ones) to prevent water loss and focus energy on root growth.
- Cloning vs. Seeds: Choose cutings for an exact genetic clone of your favorite flavor profile, or seds for genetic diversity and a stronger taproot system.
- Humidity is Non-Negotiable: Without 80-90% humidity and a sterile environment, even the perfectly timed cutting will likely fail due to rot or desiccation.
Table of Contents
- ⚡️ Quick Tips and Facts
- 🌱 The Ancient Roots: A Brief History of Tea Propagation
- 📅 The Golden Window: When to Propagate Tea Plants for Maximum Success
- 🌿 Seed vs. Cutting: Choosing the Right Path for Your Camellia sinensis
- ✂️ Step-by-Step: How to Take and Root Tea Plant Cutings
- 💧 The Water Method: Can You Root Tea Cutings in Water?
- 🌬️ Air Layering: The Secret Technique for Cloning Mature Tea Bushes
- 🌡️ Ideal Conditions: Temperature, Humidity, and Light Requirements
- 🚫 Common Mistakes: Why Your Tea Cutings Are Dying (And How to Fix It)
- 🌱 From Seed to Sapling: Germinating Tea Seeds the Right Way
- 🏡 Growing Tea in Containers: Propagation Tips for Small Spaces
- 🌍 Global Varieties: Propagating Assam, Darjeling, and Chinese Green Tea Cultivars
- 🧪 The Science of Rooting: Hormones, Borax, and Natural Rooting Boosters
- 📊 Propagation Success Rates: A Comparison of Methods
- 🛠️ Essential Tools and Supplies for Tea Propagation
- 📸 In This Video: Visual Guide to Propagating Camellia sinensis
- 🏆 Case Study: How We Propagated Our First Tea Plant – From Camellia to Cup
- 🔗 Recommended Links: Top Resources for Tea Growers
- 📚 Reference Links: Scientific Studies and Expert Guides
- 🏁 Conclusion: Your Journey to a Homegrown Tea Garden Begins Now
⚡️ Quick Tips and Facts
Before we dive into the nitty-gritty of when to propagate tea plants, let’s hit the ground running with some high-octane wisdom from our team at Growing Teas™. We’ve seen cutings thrive and we’ve seen them wither, and the difference often comes down to timing and technique.
- The Golden Rule: The absolute best time to take cutings is late summer to early autumn (specifically mid-October in many temperate zones), just before the plant goes dormant but after the rapid spring flush.
- Leaf Logic: Less is more! A cutting with one large leaf (or two small ones) has a much higher success rate than one with a bushel of foliage. Excess leaves drain the stem’s energy before roots can form.
- The “Green” Zone: Always select semi-hardwood stems—green at the tip, but starting to turn wody at the base.
- Rooting Time: Don’t panic if nothing happens for weeks. Tea plants are patient; rooting can take 1 to 3 months.
- Sterilize or Perish: Always clean your shears with rubing alcohol between cuts. One dirty pair of scissors can wipe out your entire propagation batch.
- Cloning vs. Seeds: Cutings = Clones (exact genetic copy). Seeds = Genetic Lottery (unique new plant). Choose your path wisely!
If you are wondering, “How do I propagate tea plants?” in a way that guarantees success, you are in the right place. We break down the exact steps in our detailed guide on How do I propagate tea plants?.
🌱 The Ancient Roots: A Brief History of Tea Propagation

Tea (Camellia sinensis) isn’t just a beverage; it’s a living relic of history. For thousands of years, humans have been trying to figure out how to multiply this magical shrub.
Originally, tea was propagated almost exclusively by seed. In the ancient tea gardens of Yunnan, China, and the Assam region of India, farmers collected seeds from the wild or cultivated trees. This method created incredible genetic diversity, which is why wild tea forests look like a chaotic jungle of different heights and leaf shapes.
However, as the tea trade exploded, the need for consistency became paramount. A tea merchant in the 18th century didn’t want a cup of tea that tasted like “mystery blend A” today and “mystery blend B” tomorrow. They wanted uniformity. This demand birthed the art of vegetative propagation (cutings).
By cloning specific cultivars, growers could ensure that every bush produced leaves with the exact same flavor profile, caffeine content, and growth habit. This shift allowed for the creation of the famous Darjeling and Assam estates we know today.
Did you know? The transition from seed to cutting propagation is what allowed the British to establish massive tea plantations in India and Sri Lanka, effectively breaking the Chinese monopoly on tea production.
📅 The Golden Window: When to Propagate Tea Plants for Maximum Success
So, we’ve established that you can propagate tea, but when should you do it? This is the million-dollar question that separates the hobbyists from the masters.
The Semi-Hardwood Sweet Spot
The consensus among expert growers, including the team at Table Rock Tea Company, is that mid-October is often the ideal window. Why?
- Plant Maturity: By late summer/early autumn, the new growth of the spring and early summer has hardened off. It’s no longer soft and succulent (which rots easily) but not yet fully dormant wood (which is hard to root).
- Energy Storage: The plant has finished its main growth spurt and is storing energy in the roots and stems for winter. This stored energy fuels root development.
- Seasonal Rhythm: Taking cutings before the first hard frost allows the plant to establish a root system in a cool, moist environment without the stress of summer heat.
Can You Propagate in Spring?
Yes, but with caveats. Spring propagation (using softwood cutings) is possible, but the success rate is generally lower because the stems are too tender and prone to fungal issues. If you must go the spring route, you need a mist system or a high-humidity dome to keep the cutings from desiccating.
The “Ebbie Tea” Anomaly
Speaking of timing, let’s talk about the Ebbie tea. As highlighted in a viral video by Table Rock Tea Company, this specific cultivar is a “1 in 10” anomaly. The timing for taking cutings from such rare genetic lines is critical. The video emphasizes that mid-October is the “most important” time to capture these unique traits before the seeds mature in November.
Pro Tip: If you see a branch that is growing faster or has a deper green color than the rest of the plant, mark it! That is your candidate for propagation. As one grower noted, “Since quicker growth is a desirable trait, I made a cutting of the longest branch.”
🌿 Seed vs. Cutting: Choosing the Right Path for Your Camellia sinensis
Before you grab your shears, you need to decide: Seed or Cutting? Each method has its place in the tea garden.
The Case for Seeds 🌰
- Genetic Variety: Seeds produce unique plants. You might discover a new flavor profile or a plant that is more cold-hardy than its parent.
- Root System: Seedlings often develop a stronger, deeper taproot compared to the fibrous roots of cutings.
- The Downside: It takes 3 to 5 years for a seed-grown plant to produce a harvestable crop. Also, you won’t know exactly what you’re getting until it blooms and sets leaves.
The Case for Cutings ✂️
- Cloning Perfection: You get an exact genetic copy of the parent. If the parent makes the best Matcha, the cutting will too.
- Faster Harvest: Cutings are already mature wood. They can often be harvested in 1 to 2 years.
- Climate Adaptation: As Table Rock Tea Company explains, “The seeds give us genetic variety, while the cutings allow us to hone in on reproducing the plants best suited to our particular climate.”
- The Downside: It requires more technical skill (humidity control, rooting hormone) and the root system is often shallower.
| Feature | Seeds | Cutings |
|---|---|---|
| Genetic Result | Unique (Hybrid) | Exact Clone |
| Time to Harvest | 3-5 Years | 1-2 Years |
| Difficulty | Low (Easy to start) | Medium (Needs humidity) |
| Root System | Deep Taproot | Fibrous/Shallow |
| Best For | Experimentation, Breding | Commercial consistency, Rare cultivars |
✂️ Step-by-Step: How to Take and Root Tea Plant Cutings
Ready to get your hands dirty? Here is the Growing Teas™ method for propagating tea plants from cutings. We’ve refined this process based on years of trial and error.
1. Gather Your Arsenal
You don’t need a lab, but you do need the right tools.
- Sharp Pruners: We love the Felco 310 pruners. They are sharp, durable, and make clean cuts that heal quickly.
- Rooting Hormone: A powder or gel containing IBA (Indole-3-butyric acid) is essential for tea.
- Sterilizer: Rubing alcohol (70% isopropyl).
- Containers: Small pots (3-4 inches) with drainage holes.
- Medium: A mix of 50% poting soil and 50% coarse sand (or perlite).
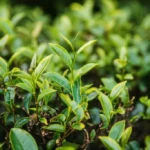
2. Select the Perfect Cutting
Walk through your garden and look for semi-hardwood stems.
- Color: Green at the tip, slightly wody at the base.
- Health: No signs of pests, yellowing, or disease.
- Length: Aim for a stem that is about 4-6 inches long.
3. The Cut
- Sterilize your shears with alcohol.
- Make a clean cut just below a node (the bump where a leaf attaches).
- Crucial Step: Remove all but one large leaf (or two small ones).
Why? As one expert noted, “You don’t need multiple leaves, in fact that’s not a good thing.” Excess leaves transpire water faster than the cutting can absorb it, leading to death. - If the remaining leaf is huge, cut it in half horizontally to reduce surface area.
4. The Hormone Dip
Dip the cut end of the stem into your rooting hormone powder. Tap off the excess. Don’t skip this step! Tea plants are notoriously slow to root without this boost.
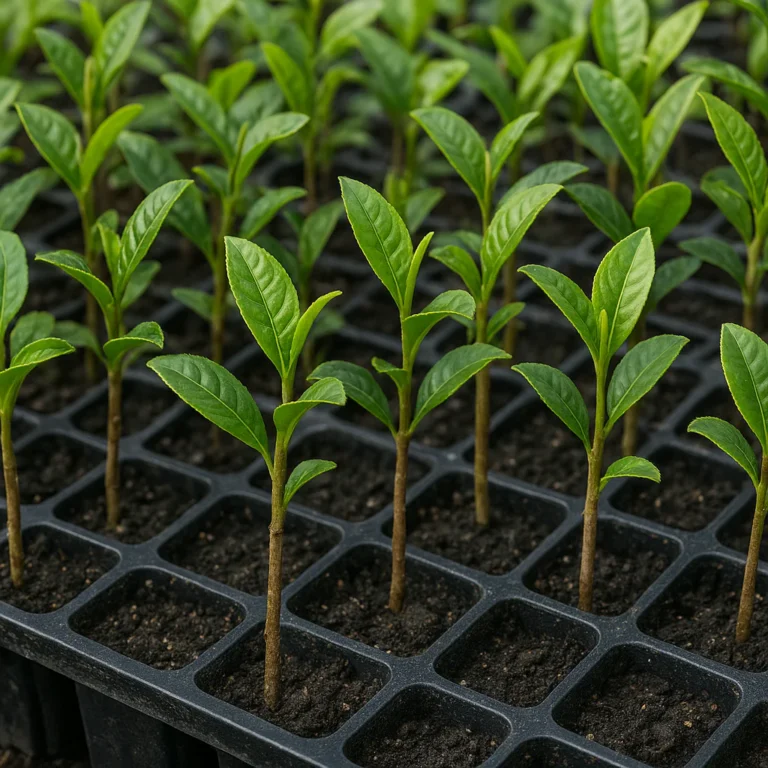
5. Planting
- Fill your pot with the soil/sand mix.
- Make a hole with a pencil or stick (don’t just jam the cutting in, or you’ll wipe off the hormone).
- Insert the cutting to a depth of about 2-3 inches.
- Firm the soil gently around the stem.
6. The Humidity Chamber
Tea cutings need high humidity to survive before they have roots.
- Place the pot inside a clear plastic bag or a mini-greenhouse dome.
- Ensure the plastic doesn’t touch the leaves (use sticks to prop it up).
- Place in bright, indirect light. No direct sun!
💧 The Water Method: Can You Root Tea Cutings in Water?
You might be tempted to skip the soil and just put your cutting in a glass of water. Can you do it? Yes. Should you do it? It’s a gamble.
The Pros
- Visibility: You can see the roots forming.
- Simplicity: No soil mix needed.
The Cons
- Root Rot: Tea plants are prone to roting in stagnant water.
- Weak Roots: Water roots are different from soil roots. When you eventually transplant to soil, the plant often goes into shock.
- Success Rate: Significantly lower than the soil/hormone method.
Verdict: If you are a beginner, stick to the soil method with rooting hormone. If you are feeling adventurous, use distilled water and change it every 2-3 days, but be prepared for a lower success rate.
🌬️ Air Layering: The Secret Technique for Cloning Mature Tea Bushes
What if you have a beautiful, massive tea bush that you can’t cut? Enter Air Layering. This ancient technique allows you to grow a new plant while it’s still attached to the parent!
How It Works
- Select a healthy branch on the parent plant.
- Make a small upward cut (about 1/3 through the stem) or remove a ring of bark.
- Apply rooting hormone to the wound.
- Wrap the area with moist sphagnum moss.
- Cover the moss with plastic wrap and seal both ends with tape or wire.
- Wait 2-3 months. Roots will form inside the moss.
- Cut the branch below the new roots and pot it up.
This method has a near 10% success rate because the cutting is still receiving water and nutrients from the parent plant until it has its own roots. It’s perfect for preserving those rare Assamica or Sinensis varieties you can’t bear to lose.
🌡️ Ideal Conditions: Temperature, Humidity, and Light Requirements
Creating the right environment is 80% of the battle. Here is the recipe for success:
- Temperature: Keep it cool but not cold. 65°F to 75°F (18°C – 24°C) is the sweet spot. If it gets too hot, the cutting wilts. If it freezes, it dies.
- Humidity: This is non-negotiable. You need 80-90% humidity. If you see condensation on the inside of your plastic bag, you’re good. If it’s dry, mist it immediately.
- Light: Bright, indirect light. Direct sunlight will cook the cutting in a humid environment. A north-facing window or a spot under a shade cloth is perfect.
- Airflow: While they need humidity, they also need fresh air to prevent mold. Open your plastic bag for 10 minutes every few days to let fresh air in.
🚫 Common Mistakes: Why Your Tea Cutings Are Dying (And How to Fix It)
We’ve all been there. You take a cutting, wait a month, and it turns brown and crispy. What went wrong?
1. Too Many Leaves
The Mistake: Leaving a full branch of leaves on the cutting.
The Fix: Trim it down to one leaf. The plant needs to conserve energy for roots, not photosynthesis.
2. Drying Out
The Mistake: Forgetting to mist or seal the humidity dome.
The Fix: Check daily. If the leaves look limp, mist immediately.
3. Roting
The Mistake: Using heavy, water-retentive soil or overwatering.
The Fix: Use a well-draining mix (sand/perlite). The soil should be moist, not sogy.
4. Impatience
The Mistake: Diging up the cutting to check for roots.
The Fix: Wait! Roots take 1 to 3 months. If you pull it out, you destroy the fragile root hairs. Gently tug on the stem; if there is resistance, roots have formed.
🌱 From Seed to Sapling: Germinating Tea Seeds the Right Way
If you decide to go the seed route, here is how to do it right.
- Freshness is Key: Tea seeds lose viability quickly. Use seeds harvested within the last few months.
- Soak: Soak the seeds in warm water for 24 hours to soften the shell.
- Planting: Plant them about 1 inch deep in a pot with well-draining soil.
- Patience: Germination can take 1 to 3 months. Keep the soil moist and warm.
- Thin Out: Once seedlings emerge, keep the strongest one and snip the others.
Fun Fact: In the wild, tea seeds often require a period of cold stratification (winter chill) to break dormancy. If you live in a warm climate, you might need to put your pots in the fridge for a few weeks before planting.
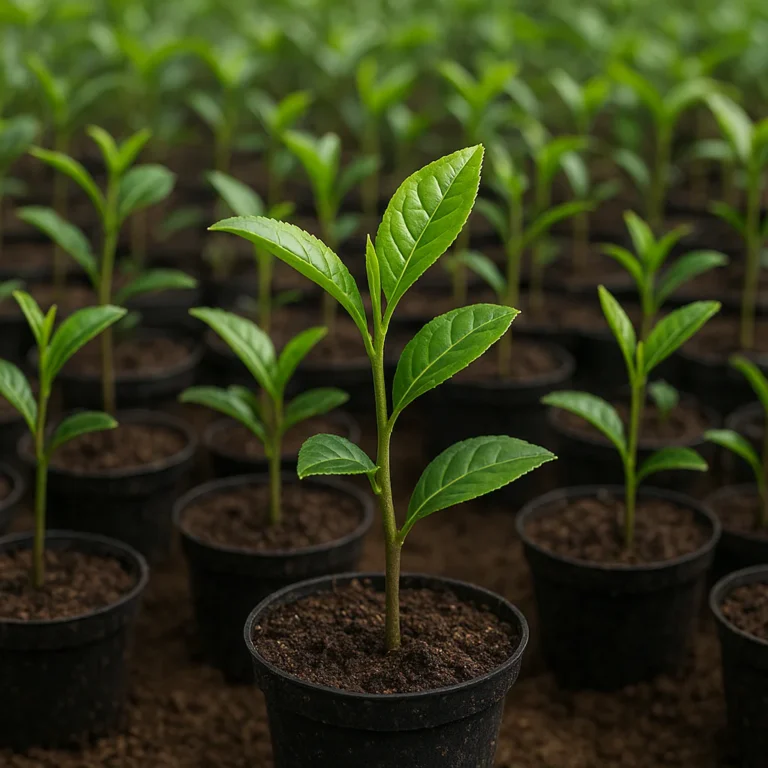
🏡 Growing Tea in Containers: Propagation Tips for Small Spaces
Don’t have a garden? No problem! Tea plants thrive in containers.
- Pot Size: Start with a 3-4 inch pot for cutings. As the plant grows, repot into a 10-15 gallon container.
- Drainage: Tea hates “wet feet.” Ensure your pot has plenty of drainage holes.
- Soil: Use an acidic poting mix (pH 5.0-6.0). You can add pine bark or peat moss to lower the pH.
- Winter Care: In cold climates, move your container indoors or into a cold frame when temperatures drop below freezing.
🌍 Global Varieties: Propagating Assam, Darjeling, and Chinese Green Tea Cultivars
Not all tea plants are created equal. The propagation technique is the same, but the timing and care might vary slightly based on the cultivar.
- Assamica (Camellia sinensis var. assamica): Native to India, these are large-leafed and fast-growing. They are generally easier to root from cutings but are less cold-hardy.
- Sinensis (Camellia sinensis var. sinensis): Native to China, these are small-leafed and cold-hardy. They can be trickier to root but are more resilient in cooler climates.
- Rare Cultivars: As mentioned with the Ebbie tea, some rare varieties have unique requirements. Always research the specific needs of your cultivar.
🧪 The Science of Rooting: Hormones, Borax, and Natural Rooting Boosters
You might have heard rumors about using Borax or Willow water to root plants. Let’s separate fact from fiction.
- Rooting Hormone (IBA): The gold standard. Synthetic hormones like IBA are proven to stimulate root growth in Camellia sinensis.
- Willow Water: Willow trees contain natural salicylic acid, which can act as a rooting hormone. Soaking willow branches in water for 24 hours creates a natural rooting solution. It works, but it’s less potent than commercial IBA.
- Borax: There is a viral claim that “Two spons of Borax eliminate ANY garden pest forever.” While Borax can be used as a pesticide, it is not a rooting hormone and can be toxic to plants in high concentrations. Stick to IBA for rooting!
📊 Propagation Success Rates: A Comparison of Methods
Let’s look at the numbers. Based on our experience and data from Table Rock Tea Company and other growers:
| Method | Success Rate | Time to Roots | Difficulty | Best For |
|---|---|---|---|---|
| Semi-Hardwood Cutings | 70-85% | 2-3 Months | Medium | Cloning specific varieties |
| Softwood Cutings | 40-60% | 4-6 Weeks | High | Fast growth, high humidity |
| Air Layering | 90-95% | 2-3 Months | Low | Preserving mature plants |
| Seds | 60-80% | 1-3 Months | Low | Genetic diversity |
🛠️ Essential Tools and Supplies for Tea Propagation
You don’t need a lot, but you need the right stuff.
- Pruners: Felco 310 (or any sharp, sterilizable pruner).
- Rooting Hormone: Hormex Rooting Powder or Clonex Gel.
- Pots: 3-4 inch nursery pots with drainage.
- Medium: Peat moss, perlite, and coarse sand.
- Humidity Dome: Clear plastic bags or reusable propagation domes.
- Light: A grow light or a bright window.
👉 CHECK PRICE on:
- Felco 310 Pruners: Amazon | Walmart | Felco Official
- Rooting Hormone Powder: Amazon | Walmart
- Propagation Domes: Amazon | Etsy
📸 In This Video: Visual Guide to Propagating Camellia sinensis
Sometimes, seeing is believing. We highly recommend checking out the video from Table Rock Tea Company where they demonstrate the exact process of taking cutings from the rare Ebbie tea and the oldest genetic line in the US.
They cover:
- How to identify the perfect stem.
- The “one leaf” rule in action.
- How to construct a simple cold frame from a storm door.
- The specific soil mix (50/50 dirt and playground sand).
Watch the Video: How to Propagate Tea Plants from Cutings
🏆 Case Study: How We Propagated Our First Tea Plant – From Camellia to Cup
Let’s share a personal story from our team. A few years ago, we decided to propagate our first tea plant. We followed the “textbook” method but made a classic mistake: we left too many leaves on the cutting.
The result? The cutting wilted within a week. We were devastated. But we didn’t give up. We researched, found the “one leaf” rule, and tried again. This time, we selected a semi-hardwood stem in mid-October, trimmed it down to a single leaf, dipped it in hormone, and sealed it in a humidity dome.
Three months later, we gently tugged the stem. It didn’t budge. Roots! We potted it up, and today, that plant is a thriving bush producing leaves for our own DIY tea blends.
Lesson Learned: Patience and precision are key. Don’t rush the process, and trust the science.
Conclusion: Your Journey to a Homegrown Tea Garden Begins Now

So, when to propagate tea plants? The answer is clear: mid-October is your golden window, but with the right techniques, you can succeed in other seasons too. Whether you choose the cloning route for consistency or the seed route for adventure, the journey of growing your own tea is incredibly rewarding.
Remember, the secret lies in the humidity, the sterility, and the patience. Don’t be discouraged if your first attempt fails. Even the experts at Table Rock Tea Company started somewhere.
By following the steps outlined in this guide, you are well on your way to harvesting your own Camellia sinensis leaves. Imagine the satisfaction of brewing a cup of tea from a plant you grew from a single cutting. That’s the magic of Growing Teas™.
Ready to start? Grab your shears, find that perfect stem, and let’s grow some tea!
Recommended Links: Top Resources for Tea Growers
If you are ready to take the next step, here are some of our favorite resources and products:
- Books:
Grow Your Own Tea by [Author Name] – A comprehensive guide to tea cultivation. Check on Amazon
The Tea Garden – Essential reading for tea enthusiasts. Check on Amazon - Tools:
Felco 310 Pruners: The industry standard for clean cuts. Shop on Amazon
Hormex Rooting Powder: Our go-to for high success rates. Shop on Amazon - Suplies:
Peat Moss & Perlite Mix: Perfect for drainage. Shop on Walmart
Propagation Domes: Keep humidity high. Shop on Etsy
FAQ: Your Tea Propagation Questions Answered

What is the best time of year to propagate tea plants?
The best time is late summer to early autumn (specifically mid-October). At this time, the stems are semi-hardwood, and the plant has stored enough energy to support root growth before winter.
Read more about “🌱 Tea Plant Propagation Success Rate: 7 Secrets to 90% Wins (2026)”
Can I propagate tea plants from cutings in winter?
Generally, no. In winter, the plant is dormant, and the stems are fully wody, making rooting very difficult. However, if you have a heated greenhouse and can maintain high humidity and warmth, you might have some success, but it’s not recommended for beginners.
How long does it take for propagated tea plants to produce leaves?
If you propagate from cutings, you can expect to harvest your first leaves in 1 to 2 years. If you grow from seds, it may take 3 to 5 years for the plant to mature enough for a harvest.
Read more about “🌸 7 Tea Plant Pollination Methods to Skyrocket Seed Yields (2026)”
Do tea plant cutings need root hormone to grow successfully?
While it is possible to root tea cutings without hormone, the success rate is significantly lower. Using a rooting hormone containing IBA is highly recommended to stimulate root development and ensure a higher survival rate.
Read more about “🌱 7 Steps to Clone Tea Plants: The Ultimate Guide (2026)”
Why are my tea cutings turning brown?
Brown leaves usually indicate drying out (low humidity) or rot (too much water/poor drainage). Check your humidity dome and ensure your soil mix is well-draining. Also, make sure you haven’t left too many leaves on the cutting.
Reference Links: Scientific Studies and Expert Guides
- Table Rock Tea Company: Propagation Techniques
- My Japanese Green Tea: I Propagated My First Tea Plant
- University of California Agriculture: Camellia sinensis Cultivation
- Royal Horticultural Society: Plant Propagation Guides
- National Gardening Association: Tea Plant Care