Support our educational content for free when you purchase through links on our site. Learn more
🌱 7 Steps to Root Tea Plant Cutings (2026)
Ever wondered how the world’s most consistent tea estates ensure every cup tastes exactly the same? The secret isn’t in the soil or the weather; it’s in the cloning. While growing tea from seeds is a gamble with flavor and growth habits, propagating Camellia sinensis from cutings is the master key to unlocking a garden of genetically identical, high-quality plants. At Growing Teas™, we’ve turned our greenhouse into a cloning lab, and let us tell you, the moment you see those tiny white roots emerge is pure magic.
But here’s the catch: tea cutings are notoriously fussy. They demand a specific humidity, a precise temperature, and a delicate touch that can make or break your entire harvest. In this guide, we’re spilling our 7 proven steps to success, including a surprising alternative to traditional soil that Chinese researchers swear by, and the one common mistake that kills 90% of beginner cutings (hint: it’s not what you think!). Whether you’re a seasoned gardener or a curious beginner, we’ll walk you through everything from selecting the perfect “one bud, one leaf” stem to transplanting your baby plants into the garden.
Ready to turn a single branch into a future tea forest? Let’s dive in.
Key Takeaways
- Genetic Perfection: Propagating from cutings ensures your new plants are exact clones of the parent, guaranteeing consistent flavor and quality for your future tea harvest.
- The Golden Ratio: For the highest success rate, select semi-hardwood stems with exactly one bud and one leaf, taken during the optimal seasonal window.
- Humidity is Life: Tea cutings cannot survive without high humidity; a sealed plastic dome or bag is non-negotiable to prevent desiccation before roots form.
- Patience Pays Off: While roots can appear in as little as 4 weeks, expect a 3–4 year journey from cutting to your first meaningful harvest.
- Hormones Help: Using a rooting hormone significantly boosts callus formation and rooting rates, turning a tricky process into a reliable one.
Table of Contents
- ⚡️ Quick Tips and Facts
- 🌱 From Leaf to Life: A Brief History of Tea Plant Propagation
- 🔪 The Ultimate Guide to Selecting and Preparing Tea Plant Cutings
- 🌿 7 Proven Steps to Successfully Root Your Camellia sinensis Cutings
- 💧 Mastering the Perfect Environment: Humidity, Light, and Soil Mixes
- 🚫 Common Mistakes That Kill Tea Cutings (And How to Avoid Them)
- 🌡️ Seasonal Timing: When to Take Cutings for Maximum Success
- 🧪 Rooting Hormones vs. Natural Alternatives: What Actually Works?
- 🌳 Transplanting Your Baby Tea Plants: From Tray to Garden
- ❓ Frequently Asked Questions About Growing Tea from Cutings
- 📚 Recommended Links and Resources
- 🔗 Reference Links
- 🏁 Conclusion
⚡️ Quick Tips and Facts
Here at Growing Teas™, we’ve
rooted more Camellia sinensis cuttings than we can count, and we’ve learned a thing or two! If you’re eager to propagate your own tea plants, here are some quick, essential facts to get you started:
Genetic Consistency is Key: Propagating tea plants from cuttings, rather than seeds, is the gold standard for ensuring your new plants are genetically identical to the parent. This means consistent taste and quality for your future tea harvests
!
- Faster to Harvest: While it still takes time, cuttings generally root in 1-2 months and can be ready for their first harvest in less time than seed-grown plants, which can
take 2-3 years just to germinate and establish. - Optimal Cutting Material: For the best success, select fresh, green tea branches. The most promising cuttings are typically young branches maintained
with one bud and one leaf. - Rooting Time Varies: You might see new roots within 1 month under optimal conditions, but expect around 8 weeks before
checking for established roots. From cutting to first harvest, be patient – it’s a journey of approximately 3-4 years. - Humidity is Non-Negotiable:
Tea cuttings are incredibly sensitive to dry conditions. A consistently moist, humid environment is crucial for success. - Rooting Hormones Boost Success: While not strictly mandatory, using a rooting hormone can significantly promote
callus formation and new root generation, increasing your rooting rate. - Bottom Heat Helps: Maintaining a consistent soil temperature around 72°F (22°C) with a heat mat can
dramatically improve rooting speed and success.
🌱 From Leaf to Life: A Brief History of Tea Plant Propagation

Have you ever wondered how those vast tea estates around the world ensure every cup of their famous brew tastes just
right, year after year? For centuries, tea plants (Camellia sinensis) were primarily propagated by seeds. It was a simple, natural method, but it came with a catch: genetic variation. Just like children from the same parents can
look and act differently, tea plants grown from seeds can produce leaves with varying flavors and characteristics. This was fine for small, personal gardens, but for commercial production, it was a recipe for inconsistency.
Enter the era of vegetative propagation,
specifically using cuttings! This revolutionary shift allowed growers to create clones of their most prized tea plants. By taking a piece of a mother plant, they could guarantee that the new plant would possess the exact same genetic makeup, ensuring uniformity
in taste, quality, and growth habits. It’s like finding a perfect recipe and being able to replicate it flawlessly every single time!
This method became particularly vital for estates like Zealong Tea in New Zealand, who exclusively use cuttings to maintain the
consistent taste and quality their customers expect. They understood that if you grow from seeds, it would take much longer, and you wouldn’t be able to ensure a consistent crop.
Today, whether you’re cultivating the delicate Camellia sinensis var. sinensis for your green or oolong tea, or the robust Camellia sinensis var. assamica for a bold black tea, propagating
from cuttings is the most reliable path to a predictable and delightful harvest. Ready to learn how we do it? Let’s dive into the nitty-gritty of selecting and preparing your tea plant cuttings. If you’re looking for more general propagation
tips, check out our guide on How do I propagate tea plants?.
🔪 The Ultimate Guide to Selecting and Preparing Tea
Plant Cuttings
Choosing the right material is half the battle won, dear tea enthusiast! Think of it like selecting the perfect ingredients for a gourmet meal – you wouldn’t pick wilted lettuce, would you? The same goes for your tea plant
cuttings.
🌳 Sourcing the Perfect Parent Plant
First things first, you need a healthy, vigorous parent tea plant. Avoid any plants showing signs of disease, pest infestation, or stress. A strong mother plant gives birth
to strong offspring! We always recommend selecting a specimen that’s been thriving and producing well.
📆 Timing is Everything (Almost!)
While we’ll delve deeper into seasonal timing later, our friends in the first YouTube video
suggest that the best time to take cuttings is in mid-October to prepare for maturation in November. [cite: The first YouTube video] This aligns with collecting semi-hardwood cuttings when the plant’s energy is focused on root development
rather than vigorous leaf growth.
✂️ Making the Cut: Precision Matters
This is where the magic (and a bit of surgical precision) happens!
- Identify the Right Stem: Look for fresh green
tea branches. The Chinese Academy of Sciences found that young branches are ideal. The presenter in the video emphasizes taking cuttings from the green part of the stem, just above where it turns brown. [cite: The first YouTube video] This ensures you’re getting pliable, yet mature enough, tissue. - Optimal Configuration: The most effective cuttings, according to research, are those maintained with one bud and one leaf. This tiny nub, nestled between the leaf and the stem, is your axillary bud – a powerhouse of future growth!
- The Cut Itself: Using clean, sharp pruning
shears (we always wipe ours down with rubbing alcohol to prevent disease transfer, a tip echoed in the video [cite: The first YouTube video] and by SFGate), make your cut approximately 2 inches below
a leaf node that contains that precious axillary bud. - Prepare for Planting: Once you have your cutting, gently remove any lower leaves that would be submerged in the rooting medium. This prevents
rot and directs the plant’s energy towards root production. You want the leaf with the bud to be at the top, just above the soil line, and the bottom 2 inches of the stem exposed for hormone application and rooting.
We
always say, take more than one cutting to guarantee a better success rate for rooting! It’s a numbers game, and even the most seasoned growers have a few duds.
Here’s a quick
comparison to help you spot the ideal cutting:
| Feature | ✅ Good Cutting | ❌ Bad Cutting |
|---|---|---|
| **Stem Color | ||
| ** | Fresh green, slightly pliable | Fully woody brown or very soft, flimsy green |
| Origin | Healthy, vigorous parent plant | Stressed, diseased, or pest-ridden plant |
| ** | ||
| Leaf/Bud Count** | One healthy leaf with an axillary bud | No bud, multiple leaves, or damaged leaf |
| Cut Location | 2 inches below a node | Random cut, too close |
| to a node, or too far | ||
| Overall Health | Turgid, vibrant, free from blemishes | Wilting, yellowing, or damaged |
Now that you’ve got your perfect little tea soldiers
ready, the next step is to give them the best possible start in life. And trust us, a little bit of rooting hormone can go a long, long way!
🌿 7 Proven Steps to Successfully Root Your *Camellia sinensis
- Cuttings
Alright, you’ve got your prime cuttings in hand – excellent work! Now, let’s get down to the business of turning those hopeful stems into thriving tea plants. We’ve refined this process over countless
batches, and we’re confident these steps will set you up for success.
Step 1: Gather Your Tools & Materials 🛠️
Before you begin, ensure you have everything within reach. This makes the process smooth and stress
-free.
- Clean Pruning Shears: Essential for making precise, clean cuts. Remember to sanitize them!
- Rooting Hormone: Powder or liquid. We’ll discuss options in detail later, but for
now, have it ready. - Propagation Tray: A shallow tray with drainage holes is perfect.
- Growing Medium: Potting soil, perlite, sand, or even sponges!
- Clear Plastic Bag or
Dome: To create that all-important humidity tent. - Rubber Band: To seal the plastic bag.
- Heat Mat: To provide consistent bottom heat.
- Misting Bottle: For keeping the medium moist.
Step 2: Prepare Your Growing Medium 🌱
The right foundation is crucial for root development. You want a mix that offers good drainage, aeration, and moisture retention without becoming waterlogged.
- Our Go-To Mix
: We often use an equal mixture of good quality potting soil and perlite. Perlite is fantastic for aeration and drainage, preventing root rot. - Alternative: The first YouTube video suggests a
basic potting mix mixed with playground sand. [cite: The first YouTube video] This also provides good drainage. - The Sponge Innovation: Interestingly, Chinese research has explored replacing traditional media with sponges to address low rooting
rates and material scarcity. They found that tea cuttings generated new roots within 1 month on sponges, achieving an initial rooting rate of 32.2%. This is a fascinating alternative if you’re feeling
experimental! - Preparation: Whichever medium you choose, moisten it thoroughly until the entire tray is damp, then allow it to drain any excess water. It should be like a wrung-out sponge
– moist, but not soggy.
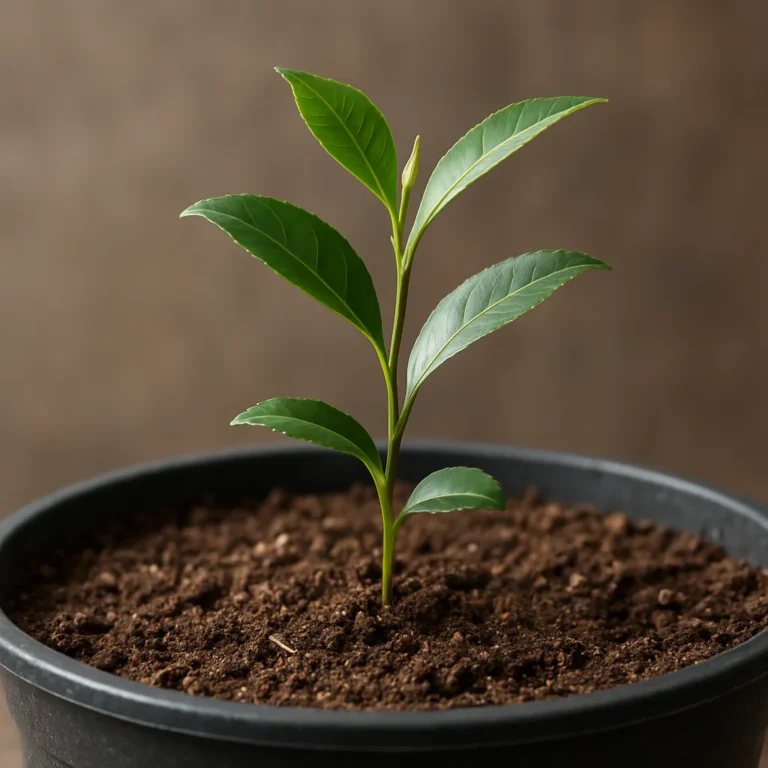
Step 3: Take Your Cuttings 🔪
(We covered this in detail in the previous section, but a quick recap never hurts!)
- Select healthy, green stems with
one bud and one leaf. - Make a clean cut about 2 inches below a leaf node.
- Remove any lower leaves that would be below the soil line.
Step 4: Apply Rooting Hormone 🧪
This step is a game-changer for many. Rooting hormones provide auxins, plant hormones that stimulate root growth.
- Powdered Hormone: If using a powder (like FastRoot mentioned in the video [cite: The first YouTube video], or Bonide Bontone Rooting Powder), simply dust the bottom 2 inches of your cutting. Gently shake off any excess.
- Liquid Hormone
: If using a liquid, follow the product instructions carefully for dilution and soaking time. The Chinese study found that applying 1.25 g∙L⁻¹ rooting powder to cuttings for 48 hours achieved the highest rooting rate
of 42.0%. This suggests a good soak can be highly effective!
Step 5: Plant Your Cuttings 🌱
Now, it’s time to tuck your cuttings into their new homes
.
- Using a pencil or a dibber, make a small hole in your prepared medium for each cutting. This prevents the rooting hormone from being scraped off.
- Insert the cutting at an angle, ensuring that the leaf with
the bud contacts the top of the medium. The video also shows planting at a 45-degree angle. [cite: The first YouTube video] This angle can increase surface area contact with the medium, potentially aiding rooting
. - Gently firm the medium around the base of each cutting to ensure good contact.
Step 6: Create a Humid Environment 💧
This is perhaps the most critical step for success. Tea cuttings need
high humidity to prevent desiccation while they’re busy forming roots.
- Place your propagation tray inside a clear plastic bag and seal it with a rubber band. Alternatively, use a clear plastic
dome if your tray came with one. - This creates a mini-greenhouse effect, trapping moisture.
- Crucial Tip: Open the bag or dome daily for a few minutes to introduce fresh air. This prevents stagnant air and fungal growth.
Step 7: Provide Optimal Conditions & Care ☀️🌡️
Now, the waiting game begins, but you’re not entirely off the hook! Consistent care is key.
Temperature:** Place your propagation setup on a heat mat set to 72°F (22°C). Bottom heat significantly encourages root development.
- Light: Position your tray in a bright
location, but avoid direct, scorching sunlight. Bright, indirect light is perfect. A north-facing window or under grow lights works wonders. - Watering: Use a misting bottle to
keep the soil moist but not soggy for approximately 8 weeks. This is where many beginners falter! We’ve seen countless promising cuttings perish because the medium dried out. “The roots are extremely sensitive to dry
soil. Do not allow the planting medium to dry out or the cutting will die.” Trust us, we learned this the hard way with an entire batch of Camellia sinensis var. assam
ica one sweltering summer. It was a sad day at Growing Teas™! - Patience: Resist the urge to tug at your cuttings every day! Check for roots after about 8 weeks by gently tugging on
a cutting; resistance indicates anchoring roots.
By following these steps, you’re well on your way to expanding your tea garden. Remember, consistency and attention to detail are your best friends in this propagation adventure
. You’re essentially nurturing a tiny, vulnerable plant baby, and it needs all the love and the right environment to thrive! For more insights into sustainable practices, explore our Organic Farming Techniques section.
💧 Mastering the Perfect Environment: Humidity, Light, and Soil Mixes
You’ve planted your cuttings, you’ve applied your hormone – now what? It’s all about
creating the perfect little spa environment for your tiny tea plants to relax and grow roots. Think of yourself as a plant concierge, catering to every need!
🌬️ Humidity is King! Why a Humid Haven is Non-Negotiable
We can’t stress this enough: humidity is the single most crucial factor for rooting tea cuttings. Why? Because your cuttings don’t have roots yet! They can’t absorb water from the soil. Instead, they rely on
absorbing moisture directly from the air through their leaves to stay hydrated. If the air is dry, they’ll quickly dehydrate, wilt, and perish.
- The Plastic Bag Method: As SFGate recommends, placing your propagation
tray inside a clear plastic bag sealed with a rubber band is a simple yet highly effective way to create a humid microclimate. - Ventilation is Key: Don’t forget to **
open the bag daily to introduce fresh air**. This prevents mold and mildew from forming, which can quickly doom your efforts. Just a few minutes of fresh air each day makes a huge difference. - M
isting: A gentle misting of the inside of the bag or dome can also help maintain high humidity levels, especially if you notice condensation dropping.
☀️ The Right Light: Bright, Not Blazing
While plants need light for
photosynthesis, your delicate cuttings aren’t ready for a full sun blast.
- Bright, Indirect Light: Place your propagation setup in a location that receives bright, indirect light. A north-facing window
, a shaded spot outdoors, or under fluorescent grow lights are all excellent choices. - Avoid Direct Sun: Direct sunlight, especially through glass, can quickly overheat your humidity dome and scorch the tender leaves, leading to stress and failure.
🌡️ The Warmth of Success: Temperature Matters
Just like us, tea plants appreciate a cozy environment. Consistent warmth at the base of the cutting encourages metabolic activity and root cell division.
- Bottom Heat is Best
: We highly recommend using a heat mat set to 72°F (22°C). This provides gentle, consistent warmth directly to the rooting zone, stimulating faster and more robust root development
. Without it, rooting can be significantly slower, especially in cooler environments.
🪴 The Foundation: Crafting the Perfect Soil Mix
The medium your cuttings call home needs to be just right – well-draining, aerated,
and capable of holding some moisture.
- Classic Blend: Our tried-and-true mix, and one recommended by SFGate, is an equal mixture of potting soil and perlite. This
combination offers excellent drainage and aeration while still providing enough moisture retention. - Sand & Soil: The first YouTube video suggests using a basic potting mix mixed with playground sand. [cite: The first YouTube video] Sand also improves drainage and provides
some grit, which can be beneficial. - The Sponge Alternative: Remember the innovative approach from the Chinese study using sponges? This method showed promising results, shortening rooting time and reducing
material restrictions. While not traditional, it highlights the importance of a sterile, moisture-retentive, and well-aerated medium. - Acid-Loving Plants: Once your cuttings are rooted and ready for transplanting, remember that tea plants
are acid-loving plants. You’ll want to use a potting mix specifically formulated for them, or amend your soil to achieve the ideal pH (typically 4.5 to 6.0).
Here’
s a quick comparison of popular rooting media:
| Medium Type | ✅ Pros | ❌ Cons | Growing Teas™ Takeaway |
|---|---|---|---|
| :— | :— | :— | :— |
| Potting Soil + Perlite | Excellent balance of drainage, aeration, moisture | Can be heavy if too much soil | Our top recommendation for reliability. |
| ** | |||
| Potting Mix + Sand** | Good drainage, readily available | Can compact if sand is too fine | A solid alternative, especially for beginners. |
| Sponges | Shortens rooting time, reduces | ||
| material expense | Less traditional, might require specific setup | Innovative, worth exploring for larger-scale propagation. | |
| Pure Perlite/Vermiculite | Superb drainage, aeration, sterile | ||
| No nutrients, requires more frequent feeding | Great for highly sensitive cuttings, but not ideal long-term. |
Getting these environmental factors dialed in is like giving your tea cuttings a VIP pass to the root-growing party! Don’t sk
imp on the details, and your plants will thank you with strong, healthy roots.
👉 Shop Soil Amendments & Equipment on:
- Perlite: Amazon | Walmart
- Seed Starting Heat Mat: Amazon | Walmart
- Clear Plastic Domes for Trays: Amazon | Etsy
🚫 Common Mistakes That Kill Tea Cuttings (And How to Avoid Them)
We’ve all been there. You’re brimming with hope, your cuttings are perfectly prepared, and then… disaster strikes! Don’t worry
, even seasoned tea growers at Growing Teas™ have faced setbacks. The good news is that many common mistakes are easily avoidable once you know what to look for. Let’s tackle these root-killers head-on!
❌
Mistake #1: Letting the Soil Dry Out
This is arguably the number one killer of tea cuttings. Remember, they don’t have established roots yet, so they can’t draw water efficiently from the soil.
- The Warning: “The roots are extremely sensitive to dry soil. Do not allow the planting medium to dry out or the cutting will die.” This isn’t just a suggestion; it’s
a critical warning! - ✅ How to Avoid: Consistency is key. Keep your growing medium consistently moist, like a well-wrung-out sponge. Use a misting bottle to rehydrate the surface if needed, and ensure
your humidity dome is doing its job. Check the moisture level daily.
❌ Mistake #2: Overwatering and Soggy Soil
Wait, isn’t “moist” the goal? Yes, but there’s a fine
line between moist and waterlogged. Soggy soil suffocates the tiny developing roots, leading to rot and fungal issues.
- ✅ How to Avoid: Ensure your propagation tray has excellent drainage holes. Use a well-aer
ated potting mix (like our recommended potting soil and perlite blend). If you see standing water, you’ve overdone it. Let the excess drain away.
❌ Mistake #3: Poor Cutting Selection
Starting with weak material
is like building a house on a shaky foundation – it’s destined for trouble.
- ✅ How to Avoid: Always select healthy, vigorous, green stems from a thriving parent plant. Look for that crucial one bud and one
leaf configuration. Avoid woody, diseased, or pest-ridden stems.
❌ Mistake #4: Insufficient Humidity
Without high humidity, your cuttings will simply dry out before they have a chance to root.
*
✅ How to Avoid: Create a sealed environment with a clear plastic bag or propagation dome. Ensure it’s sealed effectively with a rubber band. Don’t forget to vent daily for fresh air!
❌ Mistake
#5: Lack of Bottom Heat
While not always fatal, the absence of bottom heat can significantly slow down the rooting process, making your cuttings more vulnerable for longer.
- ✅ How to Avoid: Invest in a seed
starting heat mat and set it to a consistent 72°F (22°C). This provides the optimal warmth for root development.
❌ Mistake #6: Disturbing Cuttings Too Often
We
get it, the anticipation is thrilling! But constantly pulling up your cuttings to “check for roots” is a surefire way to damage delicate new growth.
- ✅ How to Avoid: Be patient! Resist the urge.
SFGate suggests checking for roots after 8 weeks by gently tugging on a cutting. If you feel resistance, it means roots have formed and are anchoring the plant. Trust the process.
❌ Mist
ake #7: Placing in Direct, Harsh Sunlight
While light is essential, intense, direct sunlight, especially magnified through a plastic dome, can cook your cuttings.
- ✅ How to Avoid: Provide bright, indirect light. A
shaded area outdoors, a north-facing window, or under grow lights are ideal.
One time, early in our journey, we had a beautiful batch of Camellia sinensis var. sinensis cuttings, all looking plump
and happy. We went away for a long weekend, confident in our setup. However, a sudden heatwave hit, and despite our humidity dome, the direct afternoon sun through the window turned our mini-greenhouse into an oven. We
returned to a tray of crispy, lifeless stems. It was a tough lesson in the power of ambient temperature and light!
By being mindful of these common pitfalls, you’ll dramatically increase your success rate and soon be admiring a tray full
of healthy, rooted tea plant babies. For more tips on nurturing your tea plants, visit our Green Tea Cultivation section.
🌡
️ Seasonal Timing: When to Take Cuttings for Maximum Success
Timing, they say, is everything. And when it comes to propagating tea plants from cuttings, while not as rigid as some other horticultural endeavors, getting the season right can significantly
boost your success rate. So, when’s the sweet spot for snatching those precious tea stems?
🍂 The Autumn Advantage
Our friends in the first YouTube video suggest that the best time to take cuttings is in mid-
October to prepare for maturation in November. [cite: The first YouTube video] This aligns with a strategy of taking semi-hardwood cuttings when the plant is still active but starting to slow down its vigorous vegetative growth. At this point, the stems
have had a full season of growth, making them more robust than tender new shoots, but they haven’t yet entered deep dormancy. The plant’s energy is shifting, making it more receptive to root formation.
☀️ Other
Good Times: Late Spring to Early Fall
While mid-autumn is a strong contender, you can often find success with tea plant cuttings during other periods too:
- Late Spring/Early Summer: After the flush of new growth has
hardened off slightly, but before the peak heat of summer. The plant is actively growing, full of vigor, and the weather is generally warm enough to encourage rooting. - Late Summer/Early Fall: Similar to the mid-October recommendation,
this period allows the cutting to establish roots before the cold of winter sets in. The stems are mature, and the ambient temperatures are still favorable.
🤔 Why Does Timing Matter?
It all comes down to the plant’s physiology
and environmental conditions:
- Plant Energy: During certain times of the year, the parent plant is channeling more energy into root development or storing energy, which can benefit the cutting.
- Stem Maturity: Cuttings
taken from very soft, new growth often rot before rooting. Cuttings from overly woody, old growth can be slow or resistant to rooting. The “Goldilocks zone” is semi-hardwood – firm but still somewhat flexible.
Environmental Factors: Optimal temperatures and humidity levels are easier to maintain naturally (or with less intervention) during certain seasons. Taking cuttings in the dead of winter or the scorching peak of summer can add extra challenges.
We’ve experimented with
cuttings at various times throughout the year. While we’ve had some success year-round with controlled indoor environments, our most consistent and robust rooting rates have definitely been in the late spring/early summer and early to mid-autumn.
There’s just something about working with the natural rhythm of the plant that seems to make all the difference!
So, keep an eye on your tea plants. When you see that sweet spot of firm, healthy green growth, that’s
your cue to grab those shears (cleaned, of course!) and get propagating!
🧪 Rooting Hormones vs. Natural Alternatives: What Actually Works?
When you’re trying to coax roots out of a tea cutting, you
‘re essentially asking it to perform a biological miracle. While tea plants can root without assistance, giving them a little nudge in the right direction can dramatically increase your success rate and speed up the process. This is where rooting hormones come into
play. But are they always necessary? And what about those natural alternatives? Let’s brew over the options!
🧪 The Power of Rooting Hormones
Rooting hormones are synthetic or natural plant auxins, which are powerful
growth regulators. They stimulate cell division and differentiation, specifically encouraging the formation of callus tissue (a protective layer) and then adventitious roots.
- Functionality: As the Chinese Academy of Sciences found, rooting powder significantly promoted
callus formation and new root generation in tea cuttings. This isn’t just anecdotal; it’s backed by scientific research. - Application:
- Powders: The most common form.
You simply dust the bottom 2 inches of your cutting with the powder, shaking off any excess. Brands like Bonide Bontone Rooting Powder and Garden Safe TakeRoot Rooting Hormone are popular choices
. The first YouTube video specifically mentions using FastRoot. [cite: The first YouTube video] - Liquids: These often involve diluting a concentrate and soaking the cuttings for a specified period. The Chinese study achieved
their highest rooting rate of 42.0% by applying 1.25 g∙L⁻¹ rooting powder to cuttings for 48 hours. This suggests that a good, prolonged exposure
to the hormone can be incredibly effective. - Types of Auxins: The most common active ingredients you’ll find are Indole-3-butyric acid (IBA) and Naphthaleneacetic acid (NAA).
These are potent and reliable. - Growing Teas™ Perspective: For tea cuttings, we confidently recommend using a rooting hormone. While some plants are easy rooters, Camellia sinensis benefits greatly from this boost. It’
s an inexpensive step that can make the difference between a few rooted cuttings and a whole thriving batch.
🌿 Natural Alternatives: Do They Measure Up?
Many gardeners prefer to go the natural route, and there are several traditional remedies
believed to encourage rooting.
-
Willow Water: Willow branches contain natural rooting hormones (salicylic acid and IBA). You can make willow water by soaking chopped willow branches in water for a few days, then using this water to soak your
cuttings or water your medium. -
Honey: Honey is an antiseptic and antifungal agent, which can help protect cuttings from rot. Some believe its sugars also provide a slight energy boost.
-
Aloe Vera: The gel from an aloe
vera leaf is thought to have some rooting properties and can also protect against pathogens. -
Growing Teas™ Takeaway on Natural Alternatives: While these natural methods can offer some benefits (especially protection against disease), they generally do
not provide the same potent hormonal kick as commercial rooting products. For Camellia sinensis, which can be a bit finicky, we find the consistent results from a good rooting hormone to be superior. If you’re committed to an
entirely organic approach, they’re worth a try, but manage your expectations regarding rooting speed and success rates compared to synthetic hormones.
Here’s a quick comparison:
| Method | ✅ Pros | ❌ Cons | Our |
|---|---|---|---|
| Recommendation | |||
| Commercial Hormone | High success rate, faster rooting, scientifically proven | Synthetic (if you prefer organic), requires purchase | Highly recommended for reliable tea propagation. |
| Willow Water | Natural, free (if you have willow), some hormonal effect | Less potent, results | |
| can be inconsistent | Good for organic trials, but expect lower success. | ||
| Honey | Natural, antiseptic, antifungal | No direct rooting hormone, limited efficacy | Useful for disease prevention, but not a |
| primary rooting agent. | |||
| Aloe Vera | Natural, protective, some anecdotal rooting effect | Limited scientific backing for strong rooting | Similar to honey, more for protection than stimulation. |
Ultimately, the choice is
yours, but for the most confident recommendations and the highest chance of success with your tea plant cuttings, we at Growing Teas™ lean heavily on the proven power of rooting hormones.
👉 Shop Rooting Hormone on:
- Bonide Bont
one Rooting Powder: Amazon | Walmart - Garden Safe TakeRoot Rooting Hormone: Amazon
- FastRoot (as mentioned in video): Amazon
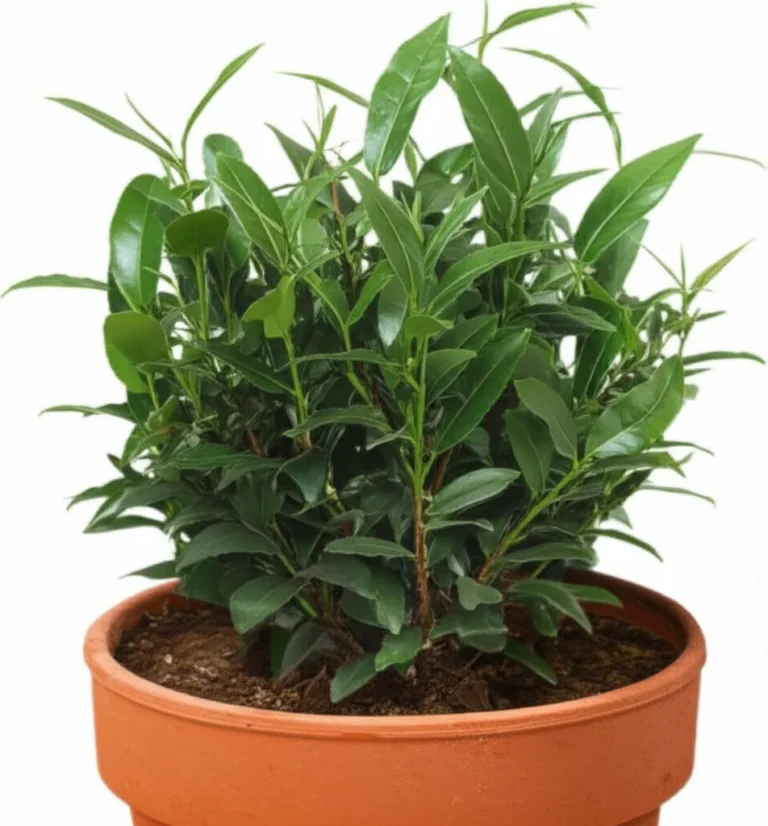
🌳 Transplanting Your Baby Tea Plants: From Tray to Garden
Congratulations! You’ve navigated the delicate dance of propagation, and now your tiny tea cuttings have transformed into sturdy little plantlets with their very own root systems. This is a
moment of triumph at Growing Teas™! But the journey isn’t over yet. The next critical phase is transplanting them from their cozy propagation tray to a more permanent home. This requires careful handling and a gradual introduction to the big
, wide world.
🗓️ When to Make the Move
Patience, young padawan! Don’t rush this step.
- Root Check: After about 8 weeks, gently tug on one of your cuttings.
If you feel resistance, it means roots have formed and are anchoring the plant in the medium. That’s your green light! - New Growth: Even better, wait until you see **
new leaf growth** appearing on your cuttings. This is a strong indicator that the root system is established enough to support above-ground development.
🪴 Potting Up: A New Home
Once your cuttings are ready
, it’s time to give them individual pots.
- Choose the Right Pot: Select small pots (around 4-6 inches in diameter) with good drainage holes.
- Acid-Loving Soil:
Remember that tea plants are acid-loving plants. Use a potting mix specifically formulated for acid-loving plants, or amend a general potting mix with peat moss or pine bark to lower the pH (aim for4.5 to 6.0). - Gentle Handling: Carefully remove each rooted cutting from the propagation tray. Be extremely gentle with the new roots – they are still fragile! Avoid pulling the stem; instead, use a small
trowel or your fingers to lift the entire root ball. - Planting: Create a small hole in the new potting mix, place the cutting’s root ball in, and gently backfill with soil, firming it
lightly around the base. Water thoroughly.
🌬️ Hardening Off: Preparing for the Outdoors
This step is crucial if your tea plants will eventually live outdoors. They’ve been living a pampered, humid, and sheltered life,
and a sudden shock to the real world can be detrimental.
- Gradual Introduction: Begin by placing your potted tea plants outdoors in a shady, sheltered location for just a few hours each day.
- Extend Exposure: Over a period of 1-2 weeks, gradually increase the amount of time they spend outdoors and slowly introduce them to more sunlight. The goal is to build up to a full 24
-hour period outdoors before permanent planting. - Monitor Closely: Watch for signs of stress like wilting or leaf burn. If you see them, move the plants back to a more protected spot and
slow down the hardening-off process.
🏡 Final Location: From Pot to Garden
Once hardened off, your tea plants are ready for their permanent home.
- Sunlight: Choose a spot with full sun or
partial shade. In very hot climates, partial shade (especially afternoon shade) is often preferred to prevent scorching. - Soil: Ensure the garden soil is well-draining and acidic. You may need to amend
heavy clay soils with organic matter. - Planting: Dig a hole slightly larger than the root ball, place the plant, backfill, and water deeply.
- Watering: Keep well-watered until established.
Consistent moisture is vital during this transition period.
⏱️ The Long-Term View: From Cutting to Cup
Now for the big question: when can you actually harvest tea from these beauties? The folks
at Zealong Tea Estate, who are experts in this, tell us that from the day you take the cutting, it takes approximately 12–15 months for the roots to fully develop. After that, the seedling is transferred to the
estate and requires another 12–15 months to grow large enough for its first harvest. So, from that initial snip to your very first cup of homegrown tea, you’re looking at roughly 3–4
years.
It might seem like a long wait, but the joy of steeping your own tea, knowing you nurtured it from a tiny cutting, is an unparalleled reward. We remember our first small harvest at
Growing Teas™ – a mere handful of leaves, but it tasted like victory!
For more guidance on cultivating your tea plants once they’re established, check out our Herbal Tea Planting resources.