Support our educational content for free when you purchase through links on our site. Learn more
🌱 5 Best Ways to Propagate Tea Plants (2026)

Ever wondered why your local tea shop sells a “Darjeling First Flush” that tastes exactly the same every single year, while your homegrown seedling tastes like a wild, unpredictable surprise? The secret lies not just in the soil, but in how that plant was born. At Growing Teas™, we’ve spent years coaxing life from both tiny seeds and delicate cutings, and let us tell you, the journey from a dormant kernel to a steaming cup is nothing short of magical. But here’s the kicker: not all propagation methods are created equal. Some are as reliable as a Swiss watch, while others are more like a game of chance with a 50% success rate.
In this comprehensive guide, we’re diving deep into the five most effective methods to propagate your own Camellia sinensis, from the foolproof air layering technique that even a beginner can master, to the advanced hydroponic setups that might just blow your mind. We’ll share our personal war stories—including the time we accidentally turned a tray of cutings into a “mossy graveyard” due to one tiny humidity mistake—and reveal the exact steps to avoid those pitfalls. Whether you crave the genetic consistency of a clone or the thrill of discovering a new flavor profile from a seed, we’ve got the roadmap for you. Ready to unlock the secrets of the tea garden? Let’s get growing!
Key Takeaways
- Clonal Consistency vs. Genetic Diversity: Asexual propagation (cutings and layering) guarantees an exact genetic copy of the parent plant, ensuring consistent flavor and yield, while sexual propagation (seds) offers unique genetic variations that can lead to new, exciting tea profiles.
- The Humidity Imperative: For successful cutings, maintaining 70-90% humidity is non-negotiable; without it, your cutings will desicate before they ever develop roots.
- Timing is Everything: The best time to take semi-hardwood cutings is typically late spring to early summer, whereas seds require a specific stratification period and fresh viability to germinate successfully.
- Soil pH Matters: Tea plants are acid-lovers; regardless of the propagation method, ensure your medium has a pH between 5.5 and 6.5 for optimal nutrient uptake.
- Patience Pays Off: While cutings can root in 1-3 months, seed germination can take 4-6 weeks or longer, and layering may require 6-12 months to establish a robust root system.
Table of Contents
- ⚡️ Quick Tips and Facts
- 📜 From Ancient Seeds to Modern Clones: A Brief History of Tea Propagation
- 🧐 Sexual vs. Asexual Propagation: Which Path Leads to the Perfect Cup?
- 🌱 The Seed Route: Sexual Propagation Deep Dive
- 🥜 Selecting and Preparing High-Viability Camellia sinensis Seeds
- ⏳ The Patience Game: Seed Stratification and Germination Timelines
- 🌍 Crafting the Ideal Soil Mix and Microclimate for Seedlings
- ✂️ The Cutting Method: Mastering Asexual Propagation for Clonal Consistency
- 🔪 Step-by-Step Guide: Taking and Preparing Semi-Hardwood Cutings
- 💊 The Rooting Hormone Debate: Essential Oils vs. Synthetic Auxins
- 🌤️ Creating the Perfect Humidity Dome and Rooting Environment
- 🌿 Hardening Off: Transitioning Your New Tea Plants to the Great Outdoors
- 🌀 Layering Techniques: Air Layering and Tip Layering for Guaranteed Success
- 📝 Air Layering: The “No-Fail” Method for Mature Branches
- 🌱 Tip Layering: Encouraging Roots from the Plant’s Extremities
- 💧 Hydroponic Propagation: Growing Tea Roots in Water and Nutrient Solutions
- 🍵 Formulating the Perfect Nutrient Cocktail for Tea Cutings
- 🔬 Monitoring pH and Oxygen Levels for Hydroponic Success
- 🚨 Troubleshooting: Why Your Propagation Efforts Might Be Failing
- ✂️ Diagnosing Low Success Rates in Stem Cutings
- 🌱 Solving Seed Dormancy and Germination Stagnation
- 🐛 Identifying and Treating Pests and Diseases in Young Propagules
- 🛡️ Safety First: Handling Tools, Chemicals, and Thorny Branches
- 🌍 Global Tea Cultivation: How Propagation Methods Vary by Region
- 🧪 The Science of Teroir: How Propagation Affects Flavor Profiles
- 🏆 Top Tools and Supplies for the Home Tea Propagator
- 🤝 Join the Community: Sharing Your Propagation Wins and Fails
- 📚 Learn More: Advanced Tea Plant Care and Cultivation
- 🏁 Conclusion: Which Method is Best for Your Tea Garden?
- 🔗 Recommended Links
- ❓ Frequently Asked Questions (FAQ)
- 📖 Reference Links
⚡️ Quick Tips and Facts
Welcome, fellow tea enthusiasts! Here at Growing Teas™, we’ve spent countless hours coax
ing tiny tea plants from humble beginnings, and let us tell you, it’s a journey filled with both triumph and a few “learning experiences” (we’ve all been there!). If you’re wondering how to propagate tea plants,
you’ve come to the right place. We’re about to spill the tea on the best methods to expand your Camellia sinensis collection!
Here’s a quick rundown
of what you absolutely need to know:
- Asexual Propagation (Cuttings & Layering): Generally offers a higher success rate and produces plants genetically identical to the parent. This means if you have a prized
tea bush with exceptional flavor, its “children” will share those same delightful characteristics. - Sexual Propagation (Seeds): A rewarding but often more challenging method, leading to genetic variation
. This can be exciting if you’re looking to develop new cultivars, but don’t expect an exact replica of the parent plant. - Optimal Soil pH: Tea plants,
whether from seed or cutting, absolutely adore acidic soil, ideally between pH 5.5 and 6.5. This is crucial for nutrient absorption! - Temperature Sweet
Spot: Aim for consistent temperatures. For cuttings, 70-80°F (21-27°C) is ideal for root development, while seeds prefer a similar range of 70-80°F
(21-27°C) for germination. - Humidity is Key: Especially for cuttings, high humidity (think 70-90%) is non-negotiable to
prevent desiccation and encourage rooting. A humidity dome is your best friend here. - Patience, Young Padawan: Seed germination can take 4-6 weeks (sometimes up to 1-2 months!), and layering can take 6-12 months to root. Cuttings typically root within 1-3 months. Good things come to those who wait!
Ready to dive deeper and discover the secrets to propagating your very own tea garden? Let’s get started! If you’re looking for even more hands-on guidance, check out our related article on How do I propagate tea plants?.
📜 From Ancient Seeds to Modern Clones: A Brief History of Tea Propagation
Imagine a world where every cup of tea tasted wildly different, even from the same “type” of tea
. That was largely the reality for centuries! Historically, tea plants were primarily propagated through seeds. This meant a delightful genetic lottery every time a new plant sprouted. While this natural variation contributed to the diverse tea landscape we cherish today, it wasn
‘t exactly ideal for commercial growers seeking consistency.
The shift towards asexual propagation, particularly through cuttings, revolutionized the tea industry. This method allowed growers to create clones – genetically identical copies – of their most productive and flavorful tea
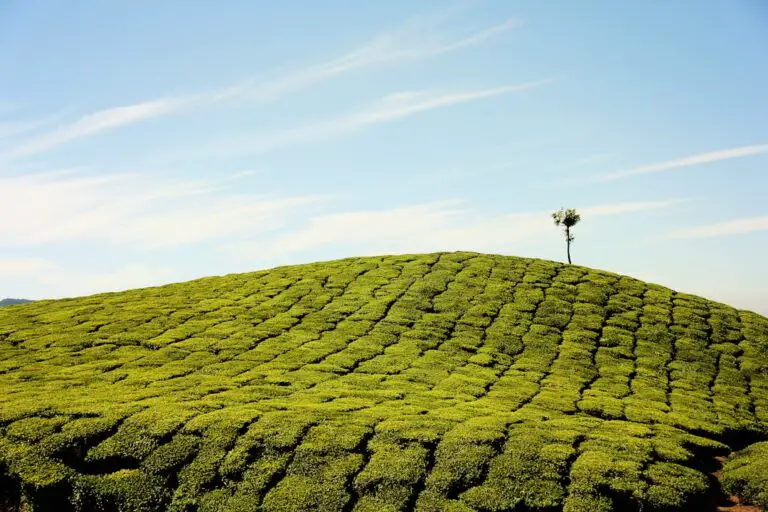
bushes. This was a game-changer for establishing vast tea estates and ensuring a consistent product, from Darjeeling’s muscatel notes to Assam’s malty strength. It’s a fascinating journey from the wild, diverse forests
where tea originated to the meticulously managed clonal gardens of today.
🧐 Sexual vs. Asexual
Propagation: Which Path Leads to the Perfect Cup?
This is the million-dollar question for any aspiring tea grower! Do you embrace the thrilling unpredictability of seeds, or opt for the reliable consistency of cuttings? There’s no single
“best” answer, as each method offers unique advantages and challenges. Let’s break it down, shall we?
Sexual Propagation (Seeds): The Genetic Adventure
- Pros:
- Genetic Diversity: Each
seed is a unique individual, offering the potential for new, exciting tea cultivars. Who knows, you might discover the next big tea sensation! - Vigor: Seedlings often exhibit stronger taproots and can be more resilient to certain
diseases or environmental stresses. - Natural Process: It’s the way nature intended, a beautiful cycle of life.
- Cons:
- Inconsistency: The resulting plants will not be identical
to the parent, meaning you can’t guarantee the same flavor profile or growth habits. - Longer Timeframe: Germination and initial growth can take longer, testing your patience.
- Lower Germ
ination Rates: Not all seeds are viable, and some can be notoriously difficult to sprout.
Asexual Propagation (Cuttings & Layering): The Clonal Guarantee
Pros:
-
Genetic Fidelity: The new plant is an exact clone of the parent, ensuring consistent flavor, growth, and yield. This is why commercial tea gardens rely heavily on cuttings.
-
Faster Maturity: Cuttings generally mature and produce tea leaves sooner than seed-grown plants.
-
Higher Success Rate: When done correctly, methods like layering and cuttings often yield more successful propag
ations than seeds. -
Cons:
-
Limited Genetic Diversity: You’re essentially replicating the same plant, so there’s no opportunity for new traits to emerge.
-
Requires Parent Plant: You need an existing, healthy tea plant to take cuttings or perform layering.
-
Skill-Dependent: While generally easier than seeds, taking successful cuttings still requires proper technique and environmental control.
Here’
s a quick comparison table to help you decide:
| Feature | Sexual Propagation (Seeds) | Asexual Propagation (Cuttings/Layering) |
|---|---|---|
| :— | :— | :— |
| Genetic Outcome | Variable, new genotypes | Identical to parent plant (clones) |
| Time to Maturity | Longer | Shorter |
| ** | ||
| Success Rate** | Can be challenging, variable | Generally higher, more reliable |
| Required Material | Fresh, viable seeds | Healthy parent plant |
| Flavor Consistency | Unpredictable | Consistent with parent |
| Disease Resistance | Potentially varied | Same as parent |
| Root System | ||
| Strong taproot often develops | Fibrous root system |
So, which path will you choose? Do you crave the thrill of discovery, or the comforting certainty of a perfect clone? The answer, dear reader, depends
on your gardening goals and your appetite for adventure!
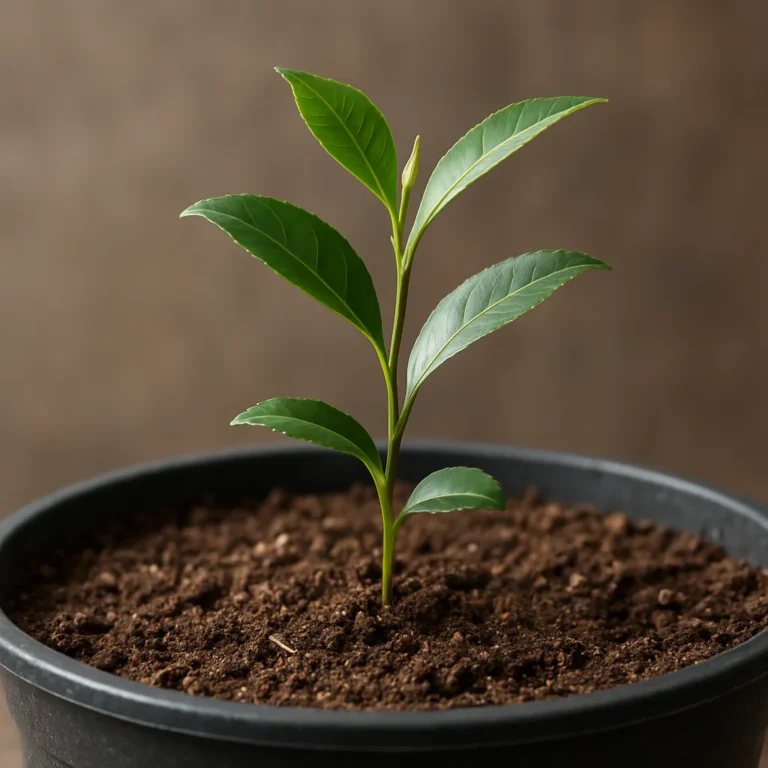
🌱 The Seed Route: Sexual Propagation Deep Dive
Ah, the humble tea seed! For
us at Growing Teas™, there’s something truly magical about coaxing life from a tiny, unassuming kernel. While it can be a “rewarding yet challenging process”, as Greg.app aptly puts it, the
potential for unique tea plants makes it incredibly worthwhile. Let’s embark on this seed-starting adventure together!
🥜 Selecting and Preparing High-Viability Camellia sinensis Seeds
Your success with seeds hinges almost entirely on their quality. Freshness is paramount! We’ve learned the hard way that old, dried-out
seeds are often just expensive bird feed.
- Source Wisely: Look for fresh Camellia sinensis seeds from reputable suppliers. If you have an existing tea plant, you can collect your own. Gardening Know How
suggests gathering seeds in mid to late fall when the capsules are ripe, reddish-brown, and beginning to split open. Crack them open to extract the pale brown seeds. - The
Float Test: This is a classic for a reason! Gently place your seeds in a bowl of water. Discard any seeds that float to the surface after 24 hours. These “floaters” are often non-viable or hollow
. The good, heavy seeds will sink. This simple step can save you a lot of heartache later on. - Soak ‘Em Up: After the float test, continue soaking the viable
seeds in water for 24 hours (or up to 48 hours) to help soften their tough outer hull. This encourages faster germination.
⏳ The Patience Game: Seed Stratification and Germination Timelines
This is where your patience will be truly tested! Tea seeds aren’t spr
inters; they’re marathon runners.
- Pre-Germination (Optional but Recommended): Gardening Know How suggests a neat trick: after soaking, spread your seeds on a damp dish towel or tarp in a sunny area.
Mist them every few hours to prevent drying. Wait 1-2 days until the hulls begin to crack, then sow immediately. This gives them a head start! - Germination Timeline: Expect signs
of growth within 4-6 weeks, though some sources, like Gardening Know How, note it can take 1-2 months. Don’t despair if you don’
t see immediate action; some seeds just like to take their sweet time. We’ve had batches where the first sprout took nearly three months, only to be followed by a flurry of activity!
🌍 Crafting the Ideal Soil Mix and Microclimate for Seedlings
The right environment is critical for tiny tea seedlings to thrive. Think of it as creating
a cozy nursery for your future tea bushes!
- Soil Mix: Tea plants demand well-draining, acidic soil. We recommend a blend of 50% quality potting soil and 50% perlite or vermicul
ite to ensure excellent drainage and aeration. Greg.app suggests a pH of 5.5-6.5, which is spot on. For those interested in sustainable practices
, incorporating some compost can also boost your soil’s organic matter and acidity, linking nicely to Organic Farming Techniques. - Plant
ing Depth: Sow your prepared seeds about 1/4 to 1 inch (2.5 cm) deep. Gardening Know How advises planting with the eye (hilum) in a horizontal position, parallel to the soil surface. - Temperature Control: Consistency is key! Maintain soil temperatures between 70-80°F (21-27°C). A germination mat can be incredibly helpful here
, especially if your growing area is cooler. We use one religiously in our propagation house. - Moisture & Humidity: Keep the soil uniformly moist, but never soggy. Covering your seed trays with plastic wrap or a clear
humidity dome will help retain crucial moisture and warmth, creating a mini-greenhouse effect. Remove the plastic wrap once sprouts appear. - Light: Provide bright, indirect light. Direct
, harsh sunlight can scorch delicate seedlings. A north-facing window or grow lights set on a timer work wonderfully.
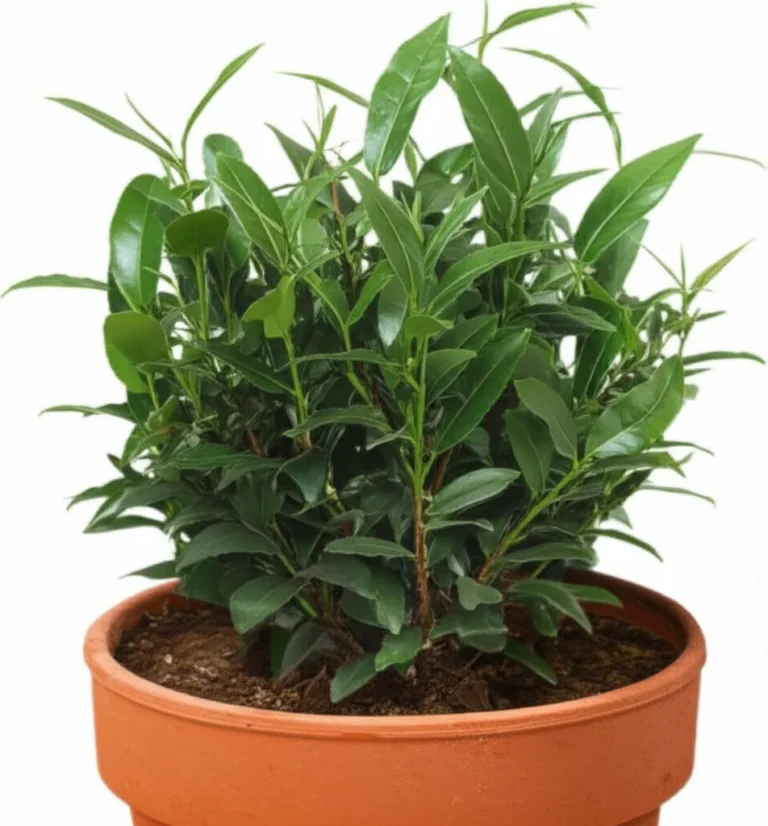
✂️ The Cutting Method: Mastering Asexual Propagation for Clonal Consistency
If you’re looking for a reliable way to expand your tea garden with plants that are genetically identical to your favorite bush
, then propagation by cuttings is your go-to method! As Shuncy.com states, “Cuttings are preferred over seed propagation, as they are more reliable in producing healthy, vigorous plants.” We
wholeheartedly agree! This is how we ensure our specific tea cultivars, like those destined for our Green Tea Cultivation fields, maintain their unique characteristics
.
Have you ever wondered how those vast tea plantations achieve such uniform growth and flavor? It’s largely thanks to the humble cutting!
🔪 Step-by-Step Guide: Taking and Preparing Semi-Hardwood Cuttings
This is where the precision comes in. Think of yourself as a plant surgeon!
- Timing is Everything
(Almost!): Greg.app suggests taking cuttings from spring to early summer, while Greg.app also mentions current season’s growth. However, our friend Steve from Table Rock Tea Company
, in the first YouTube video, shares his personal experience that mid-October is a good time for him, as seeds will be maturing in November. This highlights that optimal timing can vary based on your specific climate and region! For most home growers
, late spring to early summer when the plant is actively growing but the wood isn’t too soft, is a safe bet. - Tool Prep: Always, always, always use sharp, sterile pruning shears
or a knife. Steve from Table Rock Tea Company emphasizes cleaning pruning shears with rubbing alcohol to prevent disease transfer, and we couldn’t agree more. This prevents the spread of diseases and ensures a clean cut,
which heals faster. - Select Your Stem: Look for semi-hardwood stems from the current season’s growth. These are stems that are firm but still slightly flexible, not too green and soft, and
not too old and woody.
- Length: Aim for 4-6 inches in length.
- Nodes: Ensure each cutting has at least two nodes
(the bumps on the stem where leaves or branches emerge). These are crucial for root development.
- Make the Cut: Make a clean incision just below a node. This area has a higher concentration of
rooting hormones. - Prepare for Planting:
-
Remove Lower Leaves: Gently strip off the leaves from the bottom half of the cutting to reduce moisture loss and prevent them from rotting once planted.
-
Optional (but recommended!): Lightly scratch a small section of the bark at the very bottom of the cutting. This exposes more cambium, encouraging root formation.
💊 The Rooting Hormone Debate: Essential Oils vs. Synthetic Auxins
Rooting hormone: to use or not to use? For us
, it’s a resounding YES! While tea plants can root without it, “using a rooting hormone can significantly boost your success rate”, as Greg.app points out. It speeds up root development and increases survival
chances.
-
Synthetic Auxins: These are the most common and effective rooting hormones available. They come in powder, gel, or liquid forms. Steve from Table Rock Tea Company dips his cuttings in rooting hormone powder before planting.
-
Application: Dip the cut end of your prepared cutting into the rooting hormone. If using powder, tap off any excess.
-
Brands: Look for products like Garden
Safe TakeRoot Rooting Hormone or Clonex Rooting Gel. -
Essential Oils/Natural Alternatives: Some growers experiment with natural alternatives like willow water (containing natural auxins) or even honey. While these can have
some efficacy, they generally aren’t as potent or consistent as commercial rooting hormones. We recommend sticking with proven products for the best results.
👉 Shop Rooting Hormone on:
🌤️ Creating the Perfect Humidity Dome and Rooting Environment
This is arguably the most critical factor for successful tea
cuttings. Tea cuttings lose moisture rapidly through their leaves before they have roots to absorb water. High humidity is their lifeline!
- Humidity Dome: You need to create a mini-greenhouse effect.
- **DIY
**: A clear plastic bag tented over your pot, or an inverted clear plastic soda bottle with the bottom cut off, can work wonders. Steve from Table Rock Tea Company uses a simple cold frame made from wood and a storm door, which acts
as a large humidity chamber. - Commercial: Many garden centers sell dedicated humidity domes that fit over standard seed trays.
- Target Humidity: Greg.app recommends 70-9
0% humidity, while Shuncy.com suggests 65-75%. We aim for the higher end of that range, around **75-85%
**, for optimal root formation.
- Temperature: Maintain a consistent temperature between 70-80°F (21-27°C). A **heat mat
** placed under your propagation tray is an excellent investment, ensuring the rooting medium stays warm, which stimulates root growth. - Light: Provide bright, indirect light for 8-10 hours per day. Direct sunlight is a big no-no during this phase, as it can scorch the leaves and dry out your cuttings. Shuncy.com warns, “Tea plants need plenty of light in order to thrive, but they should
not be exposed to direct sunlight” during propagation. - Rooting Medium:
- Well-Draining is Key: The medium must hold moisture but drain exceptionally well to prevent rot
. - Our Mix: We’ve had great success with a 50/50 mix of peat moss and perlite. Steve from Table Rock Tea Company uses a 50/50 mix of dirt
and play sand, which also provides excellent drainage. Shuncy.com suggests “moist potting soil or a propagating medium”, and Greg.app recommends well-draining, acidic soil. The common thread? Drainage! - Planting: Insert your prepared cuttings into the moist rooting medium at a 45-degree angle, burying at least one node. Gently firm
the medium around the base of the cutting.
👉 Shop Propagation Supplies on:
- Seed Starting Heat Mat: Amazon | Walmart
- Humidity Dome &
Tray Kit: Amazon | Walmart - Perlite: Amazon | Walmart
🌿 Hardening Off: Transitioning Your New Tea Plants to the Great Outdoors
Once your cuttings have developed a robust root system (gently tug on a cutting; if it resists, it’s likely rooted!), it’s time to introduce them to the real world. This process, called hardening off, is crucial to prevent shock and ensure their survival.
- Gradual Exposure: Over
a period of 1-2 weeks, slowly acclimate your young tea plants to outdoor conditions.
- Start by placing them in a sheltered, shady spot for a few hours each day, gradually increasing the time outdoors
. - Slowly increase their exposure to indirect sunlight and wind.
- Reduce watering slightly to encourage the roots to seek moisture.
- Transplanting: Once hardened off, they’re ready for their
permanent home! Choose a location with partial shade and well-drained, acidic soil. Shuncy.com recommends spacing plants 18 inches apart when transplanting. Gardening Know How suggests hardening
off plants for 1 week in the fall before outdoor transplanting and providing light shade during their first summer to prevent stress.
🌀 Layering Techniques: Air Layering and Tip Layering for Guaranteed Success
If you’re looking for a propagation method with an almost ridiculously high success rate,
layering is your secret weapon! Greg.app even calls it the method with the “Highest Success Rate”. It’s a fantastic technique because the new plant remains attached to the parent, receiving continuous nourishment until it
develops its own root system. It’s like giving your tea plant a head start in life!
📝 Air
Layering: The “No-Fail” Method for Mature Branches
Air layering is a bit like magic, creating a new plant from a branch while it’s still attached to the mother plant. It’s particularly effective for woody shrubs
like tea.
- Select a Branch: Choose a healthy, pencil-thick branch that’s at least a year old.
- Girdle the Branch: About 6-12 inches from the tip of
the branch, use a sharp, sterile knife to make two parallel cuts around the circumference of the branch, about 1 inch apart. Carefully remove the ring of bark between these two cuts, exposing the inner woody tissue (cambium). You
can lightly scrape the cambium to ensure all the green tissue is removed. - Apply Rooting Hormone (Optional but Recommended): Dust the exposed cambium with rooting hormone powder.
- **Wrap with Sphagnum Moss
**: Moisten a handful of sphagnum moss and wrap it completely around the girdled section, ensuring it’s at least 2-3 inches thick. - Seal It Up: Wrap the moss tightly
with clear plastic wrap, securing both ends with twist ties or electrical tape. This creates a humid environment for roots to form. You want it to be airtight! - The Waiting Game: Keep an eye on the moss
; if it looks dry, you can inject a little water with a syringe. In 6-12 months, you should see roots forming within the moss. - Sever and Plant: Once
a good root ball has developed, cut the branch just below the new roots. Carefully unwrap the plastic and moss, and plant your new tea bush in a pot with well-draining, acidic soil.
🌱 Tip Layering: Encouraging Roots from the Plant’s Extremities
Tip layering is even simpler than air layering and
works well for flexible branches that can reach the ground.
- Choose a Flexible Branch: Select a healthy, low-growing branch that can be easily bent down to touch the soil.
- **Prepare the Ground
**: Dig a shallow trench (about 3-6 inches deep) in the soil next to the parent plant. Amend the soil with compost or peat moss to create a rich, well-draining environment. - Wound
the Branch: At a point where the branch will be buried, gently scrape a small section of the bark on the underside of the branch. This “wound” stimulates root growth. Greg.app suggests making a “small incision or scrape the bark at a
node to stimulate growth.” - Bury the Branch: Bend the wounded section of the branch into the trench and cover it with soil. Secure it with a U-shaped wire pin, a rock, or
a stake to keep it in contact with the soil. Leave the tip of the branch exposed, pointing upwards. - Maintain Moisture: Keep the soil consistently moist around the buried section.
- Rooting Time: Like
air layering, it can take 6-12 months for roots to form. - Separate and Transplant: Once rooted, you can sever the new plant from the parent and transplant it to
its permanent location.
💧 Hydroponic Propagation: Growing Tea Roots in Water and Nutrient Solutions
For the truly adventurous and tech-savvy tea grower, hydroponic propagation offers a fascinating, albeit advanced, method. While not typically used for large-scale tea production, it can be an excellent way to root cuttings in a controlled environment, especially
if you’re interested in optimizing every variable. Greg.app categorizes this as an “Advanced Method”, and we agree—it’s a step up from soil-based methods, but incredibly rewarding when successful!
Have you ever wondered if you could grow tea without soil? Well, with hydroponics, the answer is a resounding yes!
🍵 Formulating the Perfect Nutrient Cocktail for Tea Cuttings
In hydroponics, your nutrient solution is the lifeblood of your plants. It’s not just water; it’s a carefully balanced ”
cocktail” of essential elements.
- NPK Ratios: For rooting tea cuttings, you’ll want a balanced nutrient solution, often with a slightly higher phosphorus content to encourage root development. Greg.app recommends 3-
1-2 or 2-1-2 NPK ratios for balanced nitrogen, phosphorus, and potassium.
- N (Nitrogen): For leafy growth.
- P
(Phosphorus): Crucial for root development and flowering. - K (Potassium): Supports overall plant health and stress resistance.
- Specific Brands: Look for hydroponic nutrient solutions designed for general
plant growth or rooting. Brands like General Hydroponics FloraSeries or FoxFarm Grow Big Liquid Plant Food are popular and effective. Always follow the manufacturer’s dilution instructions carefully. - Water Quality: Start
with good quality water, ideally reverse osmosis (RO) or distilled water, to have complete control over your nutrient profile.
👉 Shop Hydroponic Nutrients on:
- General Hydroponics FloraSeries (Grow, Micro, Bloom): Amazon | Walmart
- FoxFarm Grow Big Liquid Plant Food: Amazon | Walmart
🔬 Monitoring pH and Oxygen Levels for Hydroponic Success
Unlike soil, where the medium buffers pH fluctuations, hydroponics
requires vigilant monitoring.
- pH Level: Tea plants, even in hydroponics, prefer an acidic environment. Maintain your nutrient solution’s pH between 5.5 and 6.5 for optimal nutrient absorption.
- Tools: A digital pH meter is essential for accurate readings. You’ll also need pH Up and pH Down solutions to adjust as needed.
- Oxygenation: Roots need oxygen! In
deep water culture (DWC) systems, an air stone and air pump are crucial to oxygenate the nutrient solution, preventing root rot and promoting healthy growth. - System Types: Greg.app mentions deep
water culture (DWC) or nutrient film technique (NFT) as suitable systems.
- DWC: Cuttings are placed in net pots with a suitable hydroponic growing medium (like rockwool or coco coir), and their roots are submerged in the oxygenated nutrient solution.
- NFT: A thin film of nutrient solution flows over the roots.
- Regular Changes: Change your nutrient solution every
7-14 days to ensure fresh nutrients and prevent pathogen buildup.
🚨 Troubleshooting: Why Your
Propagation Efforts Might Be Failing
We’ve all been there: eagerly checking on your precious cuttings or seeds, only to find disappointment. It’s frustrating, but don’t throw in the trowel just yet! Propagation can be fin
icky, and often, a small adjustment can make all the difference. Let’s diagnose some common woes and get you back on track to a thriving tea garden.
✂️ Diagnosing Low Success Rates in Stem Cuttings
If your tea cuttings are wilting, turning brown, or simply refusing to root, here are the usual suspects:
-
❌
Inadequate Humidity: This is the number one killer of cuttings! Without roots, they can’t absorb water, so high humidity is essential to prevent desiccation. -
✅ Solution: Ensure your humidity dome is sealed
, mist regularly, and consider a heat mat to maintain optimal temperatures, which also helps with humidity. -
❌ Poor Stem Selection: Using stems that are too soft (new growth) or too woody (old growth) can lead to failure
. -
✅ Solution: Stick to semi-hardwood stems from the current season’s growth. They should be firm but still slightly flexible.
-
❌ Incorrect Root
ing Hormone Application: Too much, too little, or not using it at all when it could help. -
✅ Solution: Apply rooting hormone according to instructions, ensuring the cut end is well-coated.
-
❌ **
Temperature Extremes**: Too cold, and roots won’t form. Too hot, and cuttings can stress or rot. -
✅ Solution: Maintain a consistent 70-80°F (21-27°C). A heat mat is your friend!
-
❌ Too Much Direct Light: While mature tea plants love sun, cuttings need bright, indirect light. Direct sun can scor
ch delicate leaves and dry out the cutting. -
✅ Solution: Place your propagation setup in a bright room but away from direct sun, or use grow lights on a timer.
-
❌ Waterlogged Medium: While moisture is vital, soggy soil leads to rot.
-
✅ Solution: Use a well-draining propagation medium (like peat/perlite mix or sand/dirt mix) and ensure containers have drainage holes.
🌱 Solving Seed Dormancy and Germination Stagnation
Tea seeds can be notoriously
stubborn! If your seeds aren’t sprouting, consider these factors:
-
❌ Seed Viability: Old or improperly stored seeds often won’t germinate.
-
✅ Solution: Always start with fresh, reputable
seeds. Perform the float test to discard non-viable ones. -
❌ Incorrect Moisture Levels: Too dry, and they won’t sprout. Too wet, and they can rot.
-
✅ Solution: Keep the soil consistently moist, but not waterlogged. A humidity dome helps maintain this balance.
-
❌ Temperature Fluctuations: Inconsistent temperatures can prevent germination or cause seeds to go dormant.
-
✅ Solution: Maintain a steady 70-80°F (21-27°C). A heat mat is highly recommended.
-
❌ **
Hard Seed Coat**: Tea seeds have a tough outer shell that can inhibit water absorption. -
✅ Solution: Soak seeds for 24-48 hours before planting. The pre-germination method (letting hulls crack) mentioned earlier can also be very effective.
-
❌ Planting Depth: Too deep, and seedlings might not have the energy to reach the surface.
-
✅ Solution: Sow
seeds about 1/4 to 1 inch deep.
🐛
Identifying and Treating Pests and Diseases in Young Propagules
Young tea plants are vulnerable! Keep a watchful eye for these common culprits:
-
Pests:
-
Aphids: Tiny, soft-bodied insects
that cluster on new growth, sucking sap. -
Spider Mites: Microscopic pests that create fine webbing and cause stippling on leaves.
-
Scale & Mealybugs: Small, oval-shaped insects
that cling to stems and leaves, often leaving a sticky residue. -
✅ Solution: Inspect plants regularly. For minor infestations, a strong spray of water can dislodge them. For more persistent issues, use organic insecticides like
neem oil or insecticidal soap. You can learn more about managing pests naturally in our Organic Farming Techniques section. -
Diseases:
-
Damping-Off: A fungal disease that causes seedlings to collapse at the soil line. Often due to overly wet conditions.
-
✅ Solution: Ensure good air circulation, avoid overwatering, and use sterile
seed-starting mix. -
Sanitation is Key: Always use clean tools and sterile potting mix to prevent disease introduction.
🛡️ Safety First: Handling Tools, Chemicals, and Thorny Branches
While propagating tea plants is a wonderfully rewarding hobby, it’s not without its minor hazards. As expert growers at Growing Teas™, we’ve learned that
a little caution goes a long way in preventing nicks, pricks, and other unpleasantries.
-
Sharp Tools: Pruning shears and knives are essential, but they’re also, well, sharp!
-
✅ Always use clean, sharp tools and keep them out of reach of children and pets.
-
✅ Cut away from your body and wear appropriate gardening gloves to protect your hands.
-
✅ Sterilize your tools with rubbing alcohol before and after each use to prevent disease spread, just as Steve from Table Rock Tea Company advises.
-
Rooting Hormones and
Other Chemicals: While generally safe when used correctly, these are not for consumption. -
✅ Read and follow all manufacturer instructions carefully.
-
✅ Wear gloves when handling rooting hormones, especially powders,
to avoid skin contact. -
✅ Work in a well-ventilated area to avoid inhaling fine particles.
-
✅ Store all chemicals securely away from food and out of reach of children and pets.
-
Thorny Branches: Some tea varieties can have slightly prickly stems or rough leaves.
-
✅ Wear sturdy gardening gloves to protect your hands from scratches and irritation.
-
Lifting and Moving: If
you’re moving heavy pots or bags of soil, lift with your legs, not your back, to prevent injury.
Your safety is paramount! A little mindfulness ensures your tea propagation journey is enjoyable and injury-free.
🌍 Global Tea Cultivation: How Propagation Methods Vary by Region
It’s fascinating to observe how tea propagation, while adhering
to scientific principles, also adapts to the unique climates, traditions, and economic realities of different tea-growing regions around the globe. What works perfectly in the misty hills of Darjeeling might be less practical in the sun-drenched plains of Assam,
or even in our own growing operations here at Growing Teas™.
- India and Sri Lanka (Clonal Cuttings Dominant): In established, large-scale tea estates, particularly for black tea production, **clonal cuttings
** are overwhelmingly preferred. This ensures uniformity in leaf plucking, processing, and, most importantly, the consistent flavor profiles that define famous teas like Darjeeling, Assam, and Ceylon. The goal is predictable yield and quality.
China (A Mix of Seed and Cuttings): China, with its vast geographical diversity and ancient tea traditions, utilizes a broader spectrum. While clonal propagation is common for many commercial cultivars, seed propagation is still practiced,
especially in more traditional or remote areas, and for developing new varieties. The genetic diversity from seeds can contribute to the incredible range of Chinese teas, from delicate greens to robust pu-erhs.
- Japan (Cuttings for Sencha, Seeds for Regional Varieties): For premium Japanese green teas like Sencha, clonal cuttings are standard to maintain the specific characteristics of cultivars like ‘Yabukita’. However, some regional or specialized tea gardens might still
use seeds, particularly for creating unique local varieties or for rootstock. - Emerging Regions (Often Start with Seeds, Transition to Cuttings): In newer tea-growing regions, or for hobbyist growers, starting
with seeds might be the initial approach due to easier access to seed stock. As operations scale and specific cultivars prove successful, there’s often a transition to clonal cuttings to ensure consistency and commercial viability.
Our own experiences
at Growing Teas™ reflect this adaptability. While we rely heavily on cuttings for consistency in our main tea lines, we also experiment with seeds for potential new Herbal Tea Planting varieties or to introduce more genetic resilience. It’s a testament to the versatility of the Camellia sinensis plant and the ingenuity of tea growers worldwide!
🧪 The Science of Terroir: How Propagation Affects Flavor Profiles
You’ve heard us talk about “terroir” – that magical
combination of soil, climate, and geography that gives a tea its unique character. But did you know that your choice of propagation method can profoundly impact how that terroir expresses itself in your cup? This is where the science gets really exciting!
Clonal Cuttings: Preserving the Terroir Signature: When you propagate a tea plant from a cutting, you’re essentially creating an exact genetic replica. This means that if the parent plant thrives in a particular soil and climate,
producing specific flavor notes, its clonal offspring will inherit that genetic predisposition to express those same characteristics.
- Consistency: This is why clonal propagation is so vital for maintaining the distinct flavor profiles of famous teas. A ‘Darjeeling clone
‘ will, given the right environment, produce tea with those iconic muscatel notes. The genetic consistency allows the nuances of the soil, rainfall, and elevation to shine through without the added variable of genetic difference. - Seed Propagation
: The Terroir Wildcard: Seeds, on the other hand, introduce genetic variability. Even if both parent plants are from the same renowned tea garden, their offspring will be genetically unique. - Variation: This means a
seed-grown tea plant might interpret the same terroir differently. It could produce a tea with slightly altered aroma, body, or flavor notes. While this can lead to exciting new discoveries and unique regional teas, it also means less predictability.
Resilience: Sometimes, this genetic variability can lead to plants with enhanced resilience to local pests or diseases, or better adaptation to specific microclimates. It’s a trade-off between consistency and potential for novel traits.
At
Growing Teas™, we appreciate both approaches. For our core tea lines, we prioritize clonal propagation to ensure the consistent quality and flavor our customers expect. However, we also dabble in seed propagation for experimental batches, hoping to uncover new and
exciting flavor combinations that might one day become the next big thing in DIY Tea Blending! It’s all part of understanding the intricate dance between
genetics, environment, and, ultimately, the perfect cup.
🏆 Top Tools and Supplies for
the Home Tea Propagator
Ready to get your hands dirty? Having the right tools makes all the difference between a frustrating experience and a successful propagation adventure. As seasoned growers at Growing Teas™, we’ve compiled a list of our
must-have items. You don’t need to break the bank, but investing in quality where it counts will pay off!
| Tool/Supply | Why You Need It
🤝 Join the Community: Sharing Your Propagation Wins and Fails
We’ve all got stories, haven’t we? The thrill of that first tiny root emerging from a seemingly lifeless cutting, or the crushing disappointment when a whole tray of seedlings
suddenly decides to “take a nap” permanently. That’s the beauty (and sometimes the brutal reality!) of propagation. Here at Growing Teas™, we believe that sharing these experiences, both the triumphs and the tribulations, is what truly en
riches our journey as tea growers.
I remember my very first attempt at propagating Camellia sinensis from cuttings. I was so meticulous, or so I thought! I had my humidity dome, my rooting hormone, my perfectly mixed
soil. I checked on them daily, misting like a hawk. After three weeks, nothing. Four weeks, still nothing. I was convinced I had the “brown thumb of death” for tea. Then, on week five, a
tiny, almost imperceptible fuzz appeared at the base of one cutting. Roots! It was like winning the lottery! That one success fueled my passion and taught me the ultimate lesson: patience and persistence are key.
We’ve also
had our share of hilarious fails. Like the time our intern (bless their enthusiastic heart) accidentally watered a tray of delicate seedlings with a full-blast hose, turning them into a muddy, flattened mess. Or the “experimental” batch of cuttings
we tried rooting in leftover coffee grounds (spoiler: it did not work). These moments, while frustrating at the time, become cherished anecdotes and valuable lessons.
That’s why we encourage you to join the Growing Teas™
community! Share your propagation wins – we love celebrating those little victories with you! Did you get a stubborn seed to sprout? Did your air layer finally show roots? Post about it! And don’t be shy about sharing your fails
, either. We’re a supportive bunch, and often, someone else has faced the exact same challenge and can offer advice, or at least a sympathetic emoji.
- Connect with us on social media! Find us on Instagram
and Facebook (links in our footer!) and use #GrowingTeasPropagate to share your journey. - Visit our forums! We have dedicated sections for troubleshooting, sharing tips, and showing off your progress. It’s a fantastic
resource for everything from Herbal Tea Planting questions to advanced Green Tea Cultivation techniques.
Together, we can learn, grow, and ultimately, enjoy the fruits (or rather, leaves!) of our labor. What’s your most memorable propagation story, good or bad?
We’re eager to hear it!
📚 Learn More: Advanced Tea Plant Care and Cultivation
Congratulations, you’ve
successfully propagated your tea plants! But the journey doesn’t end there. Nurturing these young plants into mature, productive tea bushes is another rewarding chapter in your tea-growing adventure. At Growing Teas™, we’re dedicated to providing you
with all the knowledge you need to cultivate your own tea, from seed to cup.
Here are some resources to help you continue your learning:
- Green Tea Cultivation: Dive deep into the specifics of growing tea for green tea production, including pruning techniques, harvesting methods, and processing tips.
- Herbal Tea Planting: While Camellia sinensis is true tea, many other wonderful plants can be grown for herbal infusions. Explore our guides on cultivating various herbs for your tea blends
. - Organic Farming Techniques: Learn how to grow your tea plants sustainably and without synthetic chemicals. Discover natural pest control, soil
enrichment, and eco-friendly practices. - Health Benefits of Tea: Understand the incredible health advantages of drinking tea, from antioxidants
to stress reduction, and how your home-grown tea contributes to your well-being. - DIY Tea Blending: Once
your tea plants are producing, unleash your creativity! Learn how to blend your own unique teas with other herbs, spices, and fruits.
The world of tea is vast and endlessly fascinating. Keep exploring, keep learning, and most importantly, keep growing
!