Support our educational content for free when you purchase through links on our site. Learn more
🌱 Air Layering Tea Plants: The 7-Step Guide to Instant Clones (2026)
Ever stared at a magnificent, high-yielding tea bush and wished you could just copy-paste it into your garden without the heartbreak of failed cutings? You aren’t alone. At Growing Teas™, we’ve watched more than a few hopeful gardeners lose their favorite Camellia sinensis clones to the dreaded “root rot” of traditional propagation. But there’s a secret weapon used by ancient Chinese horticulturists and modern tea masters alike: air layering. Unlike cutings, which gamble with humidity domes and uncertain success rates, air layering guarantees a new plant while it’s still attached to the mother, feeding it nutrients until it’s ready to stand on its own.
In this comprehensive guide, we’re pulling back the curtain on the 7-step process that turns a single branch into a thriving, genetically identical tea tree. We’ll reveal why timing is everything, how to avoid the “black rot” trap that catches 90% of beginners, and which specific tools (spoiler: it’s not just duct tape) make the difference between a shriveled branch and a lush new bush. Whether you’re cloning a rare Assam variety or trying to expand your Darjeling collection, this method is your golden ticket.
Key Takeaways
- ✅ High Success Rate: Air layering offers an 80–90% success rate for Camellia sinensis, far outperforming traditional stem cutings.
- ✅ Perfect Timing: The sweet spot for layering is late spring to early summer when the plant is in peak vegetative growth.
- ✅ Critical Technique: Success hinges on proper girdling (removing the bark ring) and maintaining a perfectly moist, airtight seal.
- ✅ Instant Gratification: You get a fully rooted, mature plant ready for poting in just 6–10 weeks, skipping the fragile seedling stage.
Table of Contents
- ⚡️ Quick Tips and Facts
- 🌱 The Ancient Art of Air Layering Tea Plants: A Brief History
- 🛠️ Essential Tools and Materials for Successful Tea Plant Propagation
- 📝 Step-by-Step Guide: How to Air Layer a Tea Plant Like a Pro
-
- Selecting the Perfect Branch for Layering
-
- Making the Precise Wound (Girdling)
-
- Applying the Rooting Hormone
-
- Wrapping with Moist Medium and Plastic
-
- Sealing the Air Layer Package
-
- Monitoring Moisture and Root Development
-
- Severing and Poting Your New Tea Clone
- 🌿 Troubleshooting Common Air Layering Mistakes with Tea Camellias
- 🌳 Air Layering vs. Cutings: Which Tea Propagation Method Wins?
- 🍵 Best Tea Varieties for Air Layering: From Assam to Darjeling
- 🕰️ Timing is Everything: When to Air Layer Your Tea Bushes
- 🌡️ Post-Layering Care: Ensuring Your New Tea Plant Thrives
- 💡 Quick Tips and Facts
- 🏆 Conclusion
- 🔗 Recommended Links
- ❓ FAQ
- 📚 Reference Links
⚡️ Quick Tips and Facts
Before we dive into the nitty-gritty of turning a single branch into a brand-new tea bush, let’s hit the ground running with some high-impact facts that will save you time, moss, and heartache.
- Success Rate: While cutings can be finicky with Camellia sinensis, air layering boasts a success rate of 80-90% when done correctly, making it the gold standard for cloning specific, high-yielding tea clones.
- The “No-Root” Myth: You might think you need a rooting hormone, but tea plants are surprisingly self-sufficient. However, using a rooting hormone (like IBA) can shave weeks off the timeline.
- Timing is Key: The absolute best time to air layer is late spring to early summer when the plant is in its most vigorous growth phase.
- The “Fukien Tea” Lesson: As we’ll discuss later, trying to air layer two spots on the same branch simultaneously is a recipe for disaster. Sap flow is a one-way street for hormones!
- Root Visibility: Don’t cut too early! You need to see thick, white roots filling the moss ball, not just a few tiny nubs.
If you’re wondering, “How do I propagate tea plants?” in general, check out our comprehensive guide on How do I propagate tea plants? to see where air layering fits into the bigger picture of your tea garden.
🌱 The Ancient Art of Air Layering Tea Plants: A Brief History

Did you know that the technique we use today to clone our favorite tea bushes was perfected by the ancient Chinese over a thousand years ago? It’s true! Long before we had plastic wrap or rooting hormones, Chinese horticulturists were manipulating plant physiology to create new trees without severing the connection to the mother plant.
Originally, this method was reserved for the elite—highly trained “plantsmen” who had the patience to wait months for roots to form. The process was labor-intensive and required keeping the medium moist with nothing but natural materials. It wasn’t until the invention of polyethylene film (plastic wrap) in the 20th century that air layering became accessible to the home gardener.
“Success was dependent upon the ability of the propagator to keep the rooting medium moist until the roots were formed and large enough to support the new plant.” — Texas A&M AgriLife Extension
At Growing Teas™, we love this history because it connects us to the very origins of tea culture. When you wrap that moss around a branch, you are performing an act that has been repeated by tea growers for centuries. It’s not just propagation; it’s living history.
🛠️ Essential Tools and Materials for Successful Tea Plant Propagation
You don’t need a laboratory to air layer a tea plant, but you do need the right gear. Using the wrong materials is like trying to bake a soufflé with a hammer—possible, but messy and likely to fail.
The “Must-Have” Toolkit
| Item | Why You Need It | Recommended Brand/Type |
|---|---|---|
| Sharp Pruning Shears | For clean cuts that heal quickly. Dull tools crush the cambium. | Felco F-2 or ARS HP-VS8Z |
| Grafting Knife | For precise scoring and bark removal. | Okatsune 103 |
| Sphagnum Moss | The rooting medium. Must be sterile and moisture-retentive. | Lambert Sphagnum Moss |
| Plastic Wrap | To create the airtight seal. | Hefty Clear Plastic Wrap |
| Rooting Hormone | Optional but recommended for faster results. | Hormex Rooting Hormone #8 |
| Tape | To seal the ends. Electrical tape works best. | 3M Scotch Super 3+ |
| Twine or Zip Ties | To secure the wrap before taping. | Gardener’s Twine |
Where to Get Your Supplies
- 👉 Shop Sphagnum Moss on: Amazon | Walmart | Lambert Peat Moss Official
- 👉 Shop Rooting Hormone on: Amazon | Gardener’s Supply Company
Pro Tip: Always soak your sphagnum moss in water for at least an hour before use, then squeeze it until it’s damp like a wrung-out sponge. If it’s dripping wet, the roots will rot. If it’s dry, they won’t form. It’s a delicate balance!
📝 Step-by-Step Guide: How to Air Layer a Tea Plant Like a Pro
Ready to get your hands dirty? This is where the magic happens. We’ve broken this down into a foolproof 7-step process. Follow these instructions, and you’ll be sipping tea from your own clone in no time.
1. Selecting the Perfect Branch for Layering
Not every branch is created equal. You want a branch that is healthy, vigorous, and about the thickness of a pencil (or slightly thicker).
- ✅ Do: Choose a branch from the current season’s growth that has plenty of leaves.
- ❌ Don’t: Pick a branch that looks diseased, has yellowing leaves, or is too wody and old.
- The “Fukien Tea” Warning: As discussed in our research, avoid trying to layer two spots on the same vertical line. The lower layer won’t get the hormonal signal from the leaves above if the upper layer is already blocking the flow.
2. Making the Precise Wound (Girdling)
This is the most critical step. You need to interrupt the phloem (the tissue that transports sugars downward) without damaging the xylem (the water pipe).
- Make two parallel cuts around the stem, about 1.5 inches apart.
- Connect them with a vertical cut.
- Pel off the ring of bark completely, exposing the pale green or white inner wood (cambium).
- Scrape the exposed wood gently to remove any remaining green tissue. This prevents the bark from healing over too quickly.
3. Applying the Rooting Hormone
While tea plants can root without it, applying a rooting hormone (like IBA) significantly speeds up the process.
- Dust the exposed wound lightly with the powder.
- Tap off the excess. You don’t need a thick coating; a light dusting is enough.
- Note: Some experts argue that for Camellia sinensis, the natural auxins are sufficient, but we at Growing Teas™ find that a little boost never hurts.
4. Wrapping with Moist Medium and Plastic
Now, take your damp sphagnum moss and form a ball around the wound.
- Ensure the moss covers the wound and extends about an inch above and below it.
- The ball should be firm but not compressed.
- Wrap the moss ball tightly with clear plastic wrap.
5. Sealing the Air Layer Package
This is where many beginners fail. The seal must be airtight.
- Use electrical tape to seal the top and bottom of the plastic wrap.
- The tape should extend onto the stem to create a perfect seal.
- No moss should be exposed. If air gets in, the moss dries out. If water gets in (from rain), the moss rots.
- Alternative: Some growers use tin foil (as seen in popular YouTube tutorials) for the outer layer to block light and keep the moss cool, but clear plastic allows you to monitor root growth. We recommend a double layer: clear plastic inside, foil outside.
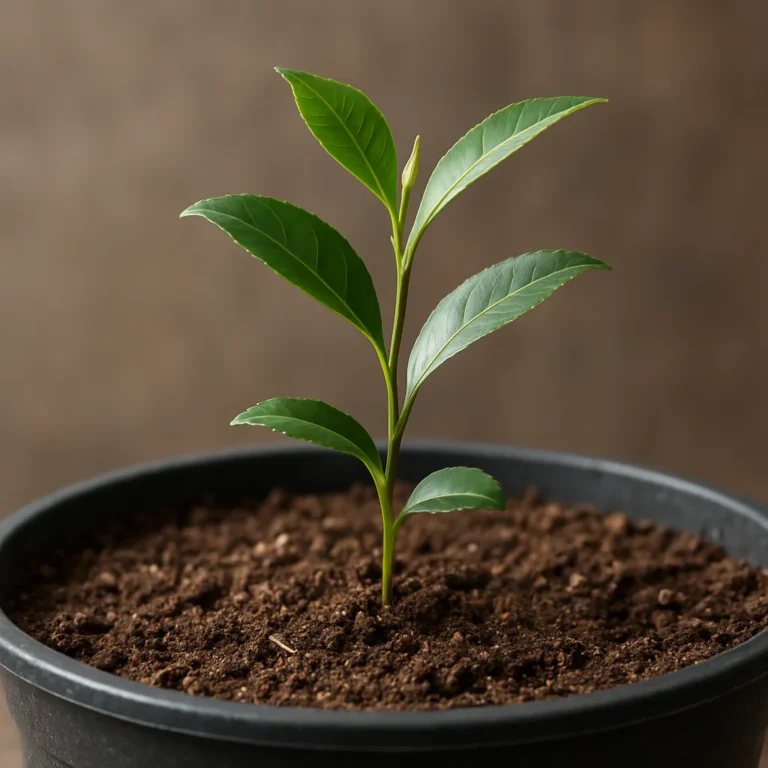
6. Monitoring Moisture and Root Development
Patience is a virtue!
- Check the moss ball every 2-3 weeks. If it looks dry, inject water into the ball using a syringe.
- Rooting Time: For tea plants, this usually takes 6 to 10 weeks.
- You will know it’s ready when you see thick, white roots filling the moss ball and pressing against the plastic.
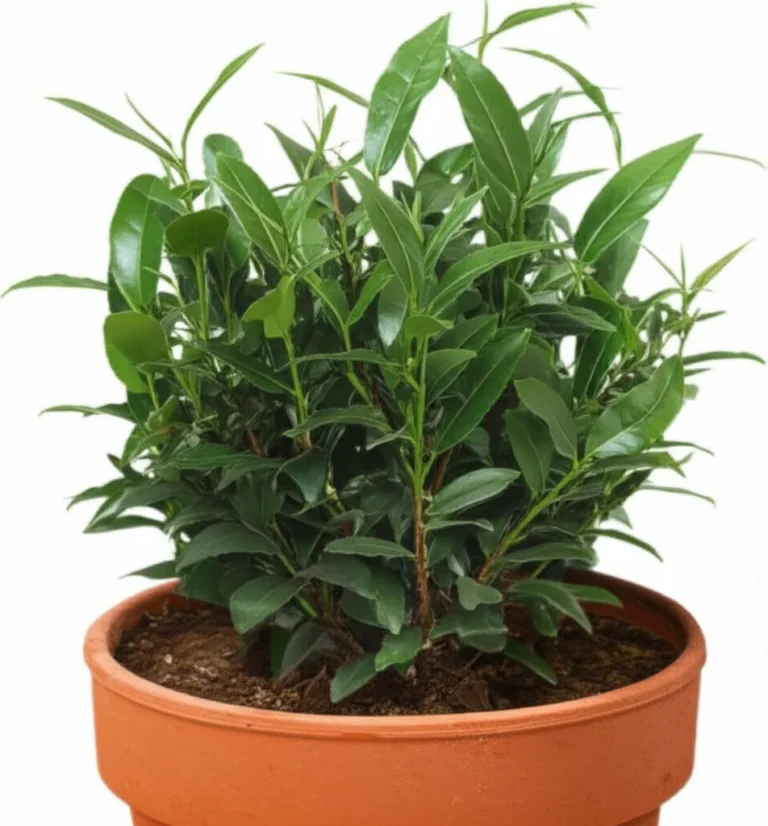
7. Severing and Poting Your New Tea Clone
Once the roots are visible and plentiful:
- Cut the branch just below the root ball.
- Carefully remove the plastic (and foil if used).
- Plant immediately in a pot with a well-draining tea soil mix (see our Organic Farming Techniques category for the perfect recipe).
- Keep the new plant in high humidity and indirect light for a few weeks to aclimate.
🌿 Troubleshooting Common Air Layering Mistakes with Tea Camellias
Even the best tea growers make mistakes. Here’s how to fix the most common issues.
The “Black Rot” Scenario
Symptom: The moss ball turns black and smells foul.
Cause: Too much water or poor drainage.
Fix: Unfortunately, the plant is likely dead. Next time, squeeze the moss more thoroughly before wrapping.
The “No Roots” Dilemma
Symptom: It’s been 3 months, and no roots are visible.
Cause: The wound healed over, or the temperature was too low.
Fix: Check the seal. If the moss is still moist, you might need to wait longer. If the wound has healed, you may need to re-cut and try again.
The “Foliage Drop” Panic
Symptom: The leaves on the layered branch turn yellow and fall off.
Cause: The branch is starving because the roots aren’t formed yet.
Fix: Don’t panic! As long as the stem is green, it can recover. Ensure the moss stays moist. If the branch dies, you can try again on a different branch.
🌳 Air Layering vs. Cutings: Which Tea Propagation Method Wins?
We get asked this all the time: “Should I take cutings or air layer?” Let’s break it down.
| Feature | Air Layering | Stem Cutings |
|---|---|---|
| Success Rate | High (80-90%) | Moderate (40-60%) |
| Time to Roots | 6-10 weeks | 4-8 weeks |
| Plant Size | Immediate large plant | Starts small |
| Difficulty | Moderate | High (requires humidity dome) |
| Risk to Mother Plant | Low (branch stays attached) | High (cuting may die) |
| Best For | Cloning specific, mature branches | Mass propagation |
The Verdict: If you want to clone a specific, high-performing tea bush and ensure it survives, air layering is the winner. If you need hundreds of plants for a commercial farm, cutings are more efficient.
🍵 Best Tea Varieties for Air Layering: From Assam to Darjeling
Not all tea plants are created equal. While Camellia sinensis var. sinensis (Chinese small-leaf) and Camellia sinensis var. assamica (Assam large-leaf) both respond well to air layering, some varieties are more stubborn than others.
- Assam Varieties: These are vigorous growers and root relatively easily. They are great for beginners.
- Chinese Varieties: Slightly more delicate but still very responsive.
- Rare Clones: If you have a rare, heirloom clone that produces the perfect flavor profile, air layering is the only way to guarantee the new plant is an exact genetic copy.
For more on growing specific varieties, check out our Green Tea Cultivation section.
🕰️ Timing is Everything: When to Air Layer Your Tea Bushes
Timing is the secret sauce.
- Spring (Late): When the new growth has hardened off slightly but is still active. This is the sweet spot.
- Early Summer: Still effective, but the roots may take longer to form as the plant focuses on flowering or fruiting.
- Fall/Winter: Avoid this! The plant is dormant, and rooting will be extremely slow or non-existent.
🌡️ Post-Layering Care: Ensuring Your New Tea Plant Thrives
You’ve cut the branch and potted it. Now what?
- Humidity: Keep the new plant in a humidity dome or under a plastic tent for 1-2 weeks.
- Light: Place in bright, indirect light. Direct sun will scorch the tender new roots.
- Watering: Keep the soil consistently moist but not sogy.
- Hardening Off: Gradually reduce humidity over a week to aclimate the plant to normal air.
💡 Quick Tips and Facts (Recap)
Let’s recap the golden rules:
- Sap Flow Matters: Don’t layer two spots on the same line.
- Moisture is King: The moss must be damp, not wet.
- Patience Pays: Wait until you see thick white roots.
- Tools Matter: Sharp knives and good tape make all the difference.
🏆 Conclusion

Air layering is more than just a propagation technique; it’s a bridge between generations of tea growers. By mastering this method, you ensure that the unique flavors and characteristics of your favorite tea bushes live on forever.
The Verdict: If you are serious about cultivating your own tea garden, air layering is the most reliable method for cloning specific Camellia sinensis varieties. While it requires patience and precision, the reward of a fully rooted, genetically identical tea plant is unmatched.
Our Recommendation: Start with a healthy Assam variety in late spring. Use Lambert Sphagnum Moss and Hormex Rooting Hormone. Follow the 7-step guide above, and you’ll be drinking your own homegrown tea in less than six months!
Remember, the journey of a thousand miles begins with a single step—or in this case, a single cut. Happy growing!
🔗 Recommended Links
Ready to start your tea propagation journey? Here are the top products and resources we recommend:
- 👉 Shop Sphagnum Moss on: Amazon | Walmart
- 👉 Shop Rooting Hormone on: Amazon | Gardener’s Supply Company
- 👉 Shop Pruning Shears on: Amazon | ARS Official
- Book: The Tea Tree: Camellia sinensis on Amazon
❓ FAQ

How long does it take for an air layered tea plant to root?
Typically, it takes 6 to 10 weeks for Camellia sinensis to develop a robust root system. However, this can vary based on temperature, humidity, and the specific variety. Warmer temperatures (70-80°F) generally speed up the process.
Read more about “How Do I Propagate Tea Plants? 🌱 9 Expert Methods Revealed (2026)”
What is the best time of year to air layer a Camellia sinensis?
The best time is late spring to early summer. This is when the plant is actively growing, and the sap flow is strong, providing the necessary hormones for root initiation. Avoid winter when the plant is dormant.
Read more about “💧 Water & Feed Tea Plants: The 12-Step Guide (2026)”
Can you air layer tea plants indoors?
Yes! Air layering works perfectly indoors, provided you have adequate light. Just ensure the plant is healthy and the room temperature is consistent. Indoor air can be drier, so check the moss ball more frequently to ensure it stays moist.
Read more about “🌱 How to Care for Newly Propagated Tea Plants: 10 Essential Steps (2026)”
What soil mix works best for air layering cutings?
For the initial poting of your new tea plant, use a well-draining, acidic mix. A blend of peat moss, perlite, and pine bark works wonders. Avoid heavy garden soil, which can suffocate the new roots. For more details, visit our Organic Farming Techniques page.
Read more about “🌱 Can I Propagate Tea Plants from Cutings? The Ultimate 7-Step Guide (2026)”
Why did my air layer fail?
Common reasons include:
- Drying out: The seal wasn’t airtight.
- Roting: The moss was too wet.
- Healing over: The wound wasn’t scraped clean.
- Timing: Attempted during dormancy.
Read more about “🌱 10 Common Tea Propagation Problems & Fixes (2026)”
📚 Reference Links
- Texas A&M AgriLife Extension: Air Layering For Difficult-To-Root Plants
- Bonsai Empire Forum: Air Layering Fukien Tea Discussion
- Growing Teas™: How do I propagate tea plants?
- Growing Teas™: Green Tea Cultivation
- Growing Teas™: Organic Farming Techniques