Support our educational content for free when you purchase through links on our site. Learn more
🌱 How to Care for Newly Propagated Tea Plants: 10 Essential Steps (2026)
So, you’ve taken the leap and successfully propagated your very own Camellia sinensis. Congratulations! But now comes the real test: keeping that tiny, fragile sprout alive long enough to brew your first cup. Many new growers panic when the leaves drop or turn yellow, wondering if they’ve already doomed their tea garden. Don’t worry; we’ve been there. In fact, our team at Growing Teas™ once lost an entire batch of seedlings because we thought “more water” meant “happier plants,” only to learn the hard way that tea roots hate wet feet.
The good news? With the right care, your newly propagated tea plant can thrive for decades, eventually yielding enough leaves for your daily ritual. This guide covers everything from the critical first 48 hours of watering to the art of hardening off your seedlings against the harsh outdoors. We’ll even reveal the one specific soil mix that guarantees aeration and the secret trick to preventing those dreaded yellow leaves. By the end of this article, you’ll know exactly how to transform a fragile sprout into a robust, harvest-ready bush.
Key Takeaways
- Patience is Paramount: Germination and rooting can take 1 to 3 months; do not panic if growth seems slow initially.
- Acidic Soil is Non-Negotiable: Maintain a soil pH between 4.5 and 6.0 using specialized mixes for azaleas or rhodendrons.
- Water with Precision: Keep the soil damp like a wrung-out sponge, never sogy, to prevent fatal root rot.
- Light Matters: Provide bright, indirect light for seedlings, gradually introducing them to morning sun as they mature.
- Hardening Off is Crucial: Never move indoor seedlings directly outdoors; a 1-2 week transition prevents sunburn and shock.
Table of Contents
- ⚡️ Quick Tips and Facts
- 🌱 From Seed to Sip: A Brief History of Propagating Camellia sinensis
- 1. Selecting the Perfect Propagation Method: Seeds vs. Cutings vs. Layering
- 2. Preparing Your Soil Mix: The Secret to Drainage and Aeration
- 3. The Art of Germinating Tea Seeds: Soaking, Scarification, and Patience
- 4. Planting Your Sprouts: Depth, Spacing, and Pot Selection
- 5. Watering Wisdom: Keeping Roots Moist Without Drowning Them
- 6. Light and Temperature: Mimicking the Misty Mountains of Assam
- 7. Feding Your Fledglings: Organic Fertilizers and Nutrient Needs
- 8. Pruning and Training: Shaping Your Bush for Future Harvests
- 9. Pest and Disease Defense: Keeping Aphids, Mites, and Fungi at Bay
- 10. Hardening Off: Transitioning Indoor Seedlings to the Great Outdoors
- 1. Troubleshooting Common Propagation Pitfalls and Yellow Leaves
- 🍵 Conclusion: Your Journey to Homegrown Tea Begins Now
- 🔗 Recommended Links
- ❓ FAQ: Your Burning Questions About New Tea Plants Answered
- 📚 Reference Links
⚡️ Quick Tips and Facts
Welcome to the Growing Teas™ family! If you’re reading this, you’ve likely just taken the plunge into the magical world of growing your own Camellia sinensis. But before we dive into the nitty-gritty of soil pH and humidity domes, let’s hit the fast track.
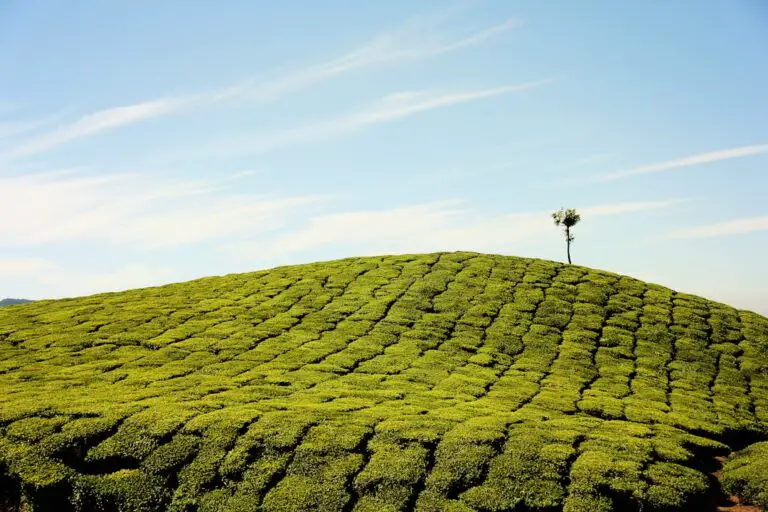
Did you know that a tea plant can live for over 10 years? Yes, you could be sipping tea from a bush your great-grandchildren will inherit! 🌳☕️ However, the journey from a tiny sprout to a harvestable bush is a marathon, not a sprint.
Here are the golden rules for your new babies:
- Patience is Key: Germination can take anywhere from 1 to 3 months. Don’t panic if you don’t see green immediately!
- Acid is Good: Tea plants are acidophiles. They crave soil with a pH between 4.5 and 6.0. If your soil is too alkaline, your leaves will turn yellow (chlorosis) faster than a lemon in a hurricane. 🍋
- Water Wisdom: The soil should feel like a wrung-out sponge. Damp, but never sogy. Overwatering is the #1 killer of new tea plants.
- Light Love: They love bright, indirect light. Direct scorching sun will fry those tender leaves, but total darkness will starve them.
If you are wondering about the best way to start, we have a dedicated guide on How do I propagate tea plants? that breaks down the seed vs. cutting debate in detail.
| Feature | Seed Propagation | Cutting Propagation |
|---|---|---|
| Genetic Consistency | ❌ Variable (like human siblings) | ✅ Exact clone of mother plant |
| Time to Harvest | Slower (3-5 years) | Faster (2-3 years) |
| Difficulty | Moderate (requires patience) | Moderate (requires humidity control) |
| Root System | Deep taproot | Fibrous, shallow root system |
| Best For | Experimenters, breeding | Commercial growers, specific flavor profiles |
🌱 From Seed to Sip: A Brief History of Propagating Camellia sinensis

You might think growing tea is a modern hobby, but humans have been propagating this magical plant for millennia. The story begins in the misty mountains of Yunnan, China, and the foothills of the Himalayas.
Historically, tea was propagated almost exclusively by seed. Ancient monks and farmers would scatter seeds or plant them in rows, hoping for the best. The result? A garden of diverse plants, each with slightly different flavor profiles, leaf shapes, and hardiness. It was a game of genetic roulette! 🎲
Fast forward to the 19th century in Assam, India. The British East India Company needed a reliable, high-yield crop. They discovered that vegetative propagation (using cutings) could clone the best “mother bushes.” This revolutionized the industry, ensuring that every cup of Assam tea tasted exactly like the last.
Why does this matter to you?
If you grow from seed, your plant might produce a unique flavor profile you’ve never tasted before! It’s a fun experiment. If you grow from cutings, you get a guaranteed clone of a specific variety (like Camellia sinensis var. sinensis for delicate green teas or var. assamica for robust black teas).
“In vegetative propagation, all the traits of mother bush are transferred to the offspring.” — The World Agriculture
Whether you choose the ancient seed method or the modern cloning technique, understanding this history helps you appreciate the genetic diversity in your garden.
1. Selecting the Perfect Propagation Method: Seeds vs. Cutings vs. Layering
So, how do you want to start your tea journey? Let’s break down the three main methods. We at Growing Teas™ have tried them all, and each has its own personality.
🌰 Method 1: Seed Propagation (The Adventure)
This is the method for the patience-filled gardener.
- Pros: You get a deep taproot (great for drought resistance), and the process is fascinating to watch. Plus, you might discover a new flavor variant!
- Cons: It takes longer to harvest, and the plant might not taste exactly like the tea you bought in the store.
- Best For: Home gardeners who love the process of germination.
✂️ Method 2: Cutings (The Clone)
This is the method for the precision gardener.
- Pros: You get an exact genetic copy of a high-quality mother plant. Faster establishment and harvest.
- Cons: Requires high humidity and specific timing. No taproot (shallow roots mean they need more frequent watering).
- Best For: Growers who want a specific flavor profile or are growing in containers.
🌿 Method 3: Layering (The Lazy Genius)
As seen in our featured video (check out the layering technique at #featured-video), this is a fantastic middle ground.
- How it works: You bend a low branch to the ground, bury a section of it, and let it root while still attached to the mother plant.
- Pros: High success rate, no need for humidity domes, and the new plant is already established.
- Cons: You can only produce one or two new plants per season per branch.
- Best For: Gardeners with established bushes who want to expand their patch.
Which one should you choose?
If you bought a bag of seeds, you’re doing Method 1. If you snipped a branch from a friend’s bush, you’re doing Method 2. If you have a bush in your garden and want more, try Method 3.
2. Preparing Your Soil Mix: The Secret to Drainage and Aeration
Here is a secret that many beginners miss: Tea plants hate wet feet. 🚫🦶
In their native habitat, tea grows on the slopes of mountains where water drains away instantly. If you plant them in heavy clay or standard poting soil, they will rot. You need a mix that mimics sandy loam with high organic matter.
The Ideal Soil Recipe
We recommend a mix of:
- 50% Acidic Poting Mix: Look for mixes labeled for Azaleas, Camellias, or Rhodendrons.
- 25% Perlite or Pumice: For aeration.
- 25% Pine Bark Fines: To add acidity and structure.
Why Pine Bark?
Pine bark decomposes slowly, releasing tannins that lower the pH naturally. It also prevents the soil from compacting.
| Component | Function | Ratio |
|---|---|---|
| Acidic Poting Soil | Nutrient base, moisture retention | 50% |
| Perlite/Pumice | Drainage, aeration | 25% |
| Pine Bark Fines | Acidity, structure | 25% |
⚠️ Warning: Do not use garden soil! It is too heavy and likely has the wrong pH.
Pro Tip: If you are unsure about your soil pH, invest in a digital pH meter. Brands like Luster Leaf or Bluelab are favorites among our team.
👉 Shop pH Meters on:
- Amazon: Luster Leaf pH Meter | Bluelab pH Pen
- Brand Official: Bluelab Official
3. The Art of Germinating Tea Seeds: Soaking, Scarification, and Patience
You have your seeds. Now what? This is where the magic (and the waiting) begins.
Step 1: The Soak
Tea seeds have a hard shell. To speed up germination, we need to soften it.
- Soak your seeds in lukewarm water (not hot!) for 24 to 48 hours.
- Change the water daily to prevent mold.
- Discard any seeds that float. They are likely empty or dead. 🗑️
Step 2: Scarification (Optional but Recommended)
If the seeds are particularly hard, you can gently nick the shell with a file or sandpaper. Be careful not to damage the embryo inside! This is called scarification.
Step 3: The Planting
- Fill your pots with the soil mix from Section 2.
- Plant the seeds 1 inch deep.
- Water gently.
- Cover the pot with a clear plastic bag or a humidity dome to keep moisture in.
The Waiting Game
Now, the hardest part: Doing nothing.
- Timeline: Germination can take 1 to 3 months. Some sources say 2 weeks, but that’s rare. Don’t give up!
- Temperature: Keep them warm (around 70-80°F or 21-27°C). A heat mat can help.
“Once the emerging seedlings have two sets of true leaves, tea plant seed propagation has been completed and it’s time to transplant them into larger pots.” — Gardening Know How
What if they don’t sprout?
Sometimes, the seed is just dormant. Keep the soil moist and warm. If you see mold, remove the plastic cover for a few hours to let it dry out, then replace it.
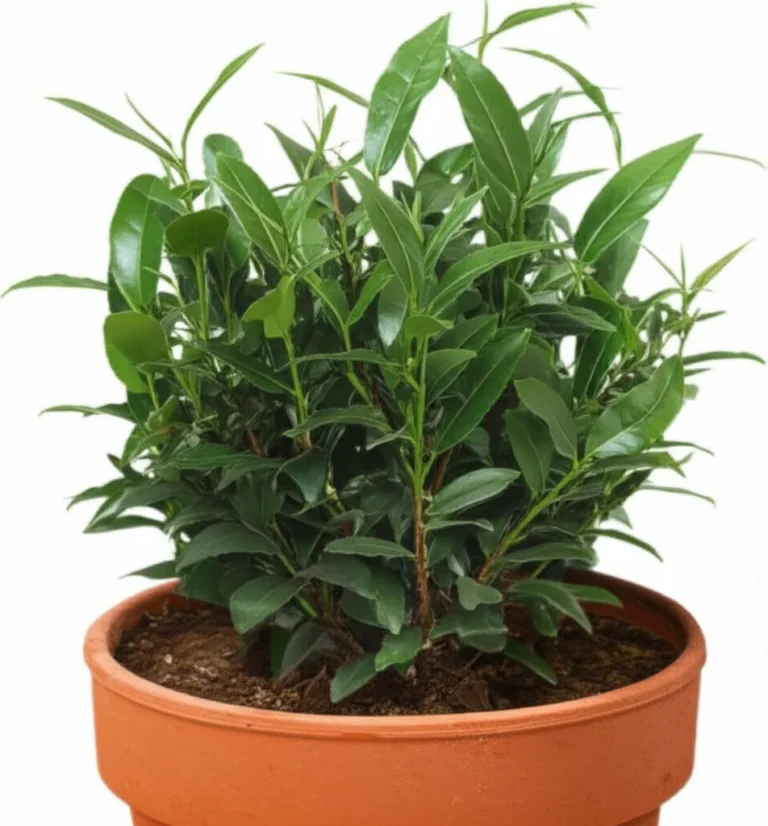
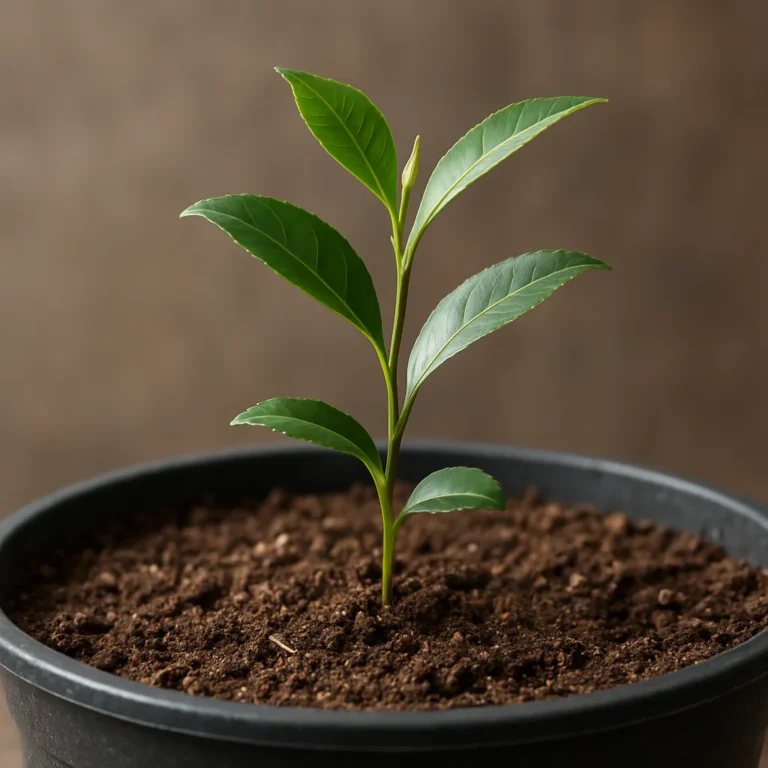
4. Planting Your Sprouts: Depth, Spacing, and Pot Selection
Once your seeds have popped their heads up (congrats! 🎉), the real care begins.
Transplanting Seedlings
When your seedlings have two sets of true leaves (not just the initial seed leaves), it’s time to move them to a slightly larger pot.
- Depth: Plant them at the same depth they were in the seedling tray.
- Pot Size: Start with a 4-inch pot. As they grow, move to 6-inch, then 10-inch.
- Drainage: Ensure every pot has holes in the bottom. No exceptions!
Spacing for the Future
If you are planting in the ground:
- Spacing: Space plants at least 15 feet (4.5 m) apart. Tea bushes get huge! They can reach 6 meters in height and 4.5 meters in width.
- Containers: If you live in a cooler climate (USDA zones 7-8), keep them in containers. This allows you to move them indoors during winter.
Why so much space?
Tea plants need air circulation to prevent fungal diseases. Crowded plants are stressed plants.
5. Watering Wisdom: Keeping Roots Moist Without Drowning Them
Watering is an art form. Too little, and the plant wilts. Too much, and the roots rot.
The Finger Test
Stick your finger 1 inch into the soil.
- If it feels dry: Water thoroughly until water runs out the bottom.
- If it feels damp: Wait.
- If it feels sogy: You’ve overwatered! Let it dry out immediately.
Humidity is Key
Newly propagated tea plants love high humidity (60-80%).
- Indors: Use a humidity tray (a tray filled with pebbles and water) under the pot.
- Outdoors: Mist the leaves in the morning.
⚠️ Critical Warning:
“At this stage, the water requirement of cutings is very low hence over-watering must be avoided.” — The World Agriculture
This is especially true for cutings which don’t have roots yet. They absorb water through their leaves! If the soil is too wet, the cutting will rot before it roots.
Recommended Tools:
- Misting Bottle: Amazon Search
- Humidity Tray: Etsy Search
6. Light and Temperature: Mimicking the Misty Mountains of Assam
Tea plants are native to the misty, shaded slopes of the Himalayas and Assam. They do not like the scorching miday sun of a desert.
Light Requirements
- Seedlings: Need bright, indirect light. A north-facing window is perfect.
- Mature Plants: Can handle morning sun and afternoon shade.
- Indors: If you don’t have a bright window, use a grow light. LED grow lights like the Spider Farmer or Mars Hydro are excellent.
👉 Shop Grow Lights on:
- Amazon: Spider Farmer Grow Light | Mars Hydro Grow Light
- Brand Official: Spider Farmer | Mars Hydro
Temperature Zones
- Ideal Range: 60-85°F (15-29°C).
- Winter: Tea plants can tolerate light frost (down to 20°F or -6°C) if they are hardy varieties, but they prefer to stay above 40°F (4°C).
- Hardening Off: If moving indoors to outdoors, do it gradually over 1-2 weeks.
7. Feding Your Fledglings: Organic Fertilizers and Nutrient Needs
Your baby tea plants are hungry, but they are also sensitive.
When to Feed?
- Seds: Do not fertilize until the plant has at least 4-5 true leaves.
- Cutings: Wait until you see new growth (signs of rooting).
What to Feed?
Tea plants are heavy feeders of nitrogen but need a balanced diet.
- Organic Options: Fish emulsion, blood meal, or compost tea.
- Synthetic Options: A balanced NPK (2:1:2) fertilizer is ideal.
Fertilization Schedule:
- Spring/Summer: Feed every 4-6 weeks.
- Fall/Winter: Stop fertilizing. The plant is resting.
“Apply NPK (2:1:2) mixture mixed with dry soil at a 1:9 ratio around the collar.” — The World Agriculture
Pro Tip: Always water the plant before applying fertilizer to prevent root burn.
👉 Shop Organic Fertilizers on:
- Amazon: Fish Emulsion Fertilizer | Blood Meal
- Brand Official: Espoma Organic
8. Pruning and Training: Shaping Your Bush for Future Harvests
Pruning isn’t just about looks; it’s about yield.
The First Prune
When your plant reaches 12 inches (30 cm) in height, it’s time for the first “toping.”
- Cut off the top 2-3 inches.
- This encourages the plant to branch out and become bushy, not legy.
Ongoing Maintenance
- Shape: Aim for a broad, flat top. This allows light to reach all leaves.
- Harvesting: Once the plant is mature (2-3 years), you can harvest the top two leaves and a bud. This is the standard for high-quality tea.
Why prune?
Pruning stimulates axillary buds to grow, creating more branches and more leaves to harvest.
9. Pest and Disease Defense: Keeping Aphids, Mites, and Fungi at Bay
Even the healthiest plants can get sick. Here are the usual suspects.
Common Pests
- Aphids: Small green or black bugs on the undersides of leaves.
Fix: Spray with nem oil or a strong jet of water. - Spider Mites: Tiny red dots that cause stipling on leaves.
Fix: Increase humidity and use insecticidal soap. - Scale: Hard, shell-like bumps on stems.
Fix: Scrape them off manually or use horticultural oil.
Common Diseases
- Blister Blight: Caused by overcast, misty weather. Leaves develop blisters.
Fix: Improve air circulation and avoid overhead watering. - Root Rot: Caused by overwatering.
Fix: Improve drainage and reduce watering.
Prevention is better than cure!
- Inspect your plants weekly.
- Keep the area clean of fallen leaves.
- Ensure good air circulation.
👉 Shop Pest Control on:
- Amazon: Nem Oil | Insecticidal Soap
- Brand Official: Bonide Products
10. Hardening Off: Transitioning Indoor Seedlings to the Great Outdoors
If you started your plants indoors, you cannot just throw them outside on a sunny day. They will get sunburned and die.
The Hardening Off Process (1-2 Weeks)
- Days 1-3: Place the plant in a shady, sheltered spot outside for 2-3 hours. Bring it back inside.
- Days 4-7: Increase time outside to 4-6 hours. Add a little more sun.
- Days 8-14: Leave them out all day, but bring them in at night if temperatures drop below 50°F (10°C).
- Day 15+: They are ready to stay outside permanently!
Why is this important?
Hardening off thickens the leaf cuticle and strengthens the stem, preparing the plant for the harsh realities of the outdoors.
1. Troubleshooting Common Propagation Pitfalls and Yellow Leaves
Even with the best care, things can go wrong. Let’s solve the most common problems.
Problem: Yellow Leaves (Chlorosis)
- Cause: High pH (alkaline soil) or nitrogen deficiency.
- Solution: Test your soil pH. If it’s above 6.5, add sulfur or use an acidic fertilizer.
Problem: Brown Leaf Tips
- Cause: Low humidity or underwatering.
- Solution: Increase humidity with a tray or misting. Check your watering schedule.
Problem: Droping Leaves
- Cause: Overwatering (root rot) or underwatering.
- Solution: Check the soil moisture. If it’s sogy, stop watering. If it’s dry, water immediately.
Problem: No Growth
- Cause: Low light or cold temperatures.
- Solution: Move to a brighter spot and ensure the temperature is above 60°F.
Remember:
“Keep growing tea plants from seed under this light shade for another 2-3 months until they are about a foot (30.5 cm.) in height.” — Gardening Know How
If your plant is struggling, don’t panic. Tea plants are resilient. Adjust one variable at a time and watch for changes.
🍵 Conclusion: Your Journey to Homegrown Tea Begins Now

You’ve made it! From selecting your propagation method to troubleshooting yellow leaves, you now have the complete toolkit to care for your newly propagated tea plants.
Remember, growing tea is a marathon. It requires patience, observation, and a little bit of love. But the reward? Sipping a cup of tea from a plant you grew yourself? That is a feeling like no other. 🌿☕️
Whether you chose the adventurous seed route or the precise cuting method, your journey has just begun. In a few years, you’ll be harvesting your own leaves, blending your own teas, and sharing your homegrown brew with friends.
Ready to start?
Don’t wait for the “perfect” time. Grab your seeds, mix your soil, and get planting today!
🔗 Recommended Links
Essential Tools & Products:
- Acidic Poting Mix: Miracle-Gro for Acid Loving Plants | Espoma Organic Poting Mix
- pH Meter: Luster Leaf Digital pH Meter
- Grow Lights: Spider Farmer LED Grow Light
- Organic Fertilizer: Espoma Organic Tea Plant Food
- Nem Oil: Bonide Neem Oil
Books & Resources:
- “The Tea Plantation” by John H. B. Smith: Amazon Link
- “Tea: A History of the World’s Favorite Drink” by William H. Ukers: Amazon Link
Internal Links:
- Green Tea Cultivation
- Herbal Tea Planting
- Organic Farming Techniques
- Health Benefits of Tea
- DIY Tea Blending
❓ FAQ: Your Burning Questions About New Tea Plants Answered

How often should I water newly propagated tea plants?
Answer: There is no fixed schedule! Water only when the top inch of soil feels dry. For seedlings, this might be every 2-3 days. For cutings, it might be less frequent to avoid rot. Always check the soil first.
Read more about “How Do I Propagate Tea Plants? 🌱 9 Expert Methods Revealed (2026)”
What is the best soil mix for rooting tea cutings?
Answer: A mix of 50% acidic poting soil, 25% perlite, and 25% pine bark fines works best. The key is drainage and acidity (pH 4.5-5.5).
Read more about “🌱 Can I Propagate Tea Plants from Cutings? The Ultimate 7-Step Guide (2026)”
How long does it take for tea plant cutings to root?
Answer: Cutings typically take 4 to 8 weeks to root, depending on the temperature and humidity. Keep them warm (70-80°F) and humid.
Can I propagate tea plants from seeds or only cutings?
Answer: You can propagate from both! Seeds produce genetically diverse plants (great for experimentation), while cutings produce exact clones (great for consistent flavor).
Read more about “🌸 7 Tea Plant Pollination Methods to Skyrocket Seed Yields (2026)”
Why are my tea plant leaves turning yellow?
Answer: Yellow leaves usually indicate high soil pH (alkaline soil) or nitrogen deficiency. Test your soil and adjust with sulfur or acidic fertilizer.
Read more about “🌿 Ultimate Tea Plant Care & Maintenance Guide (2026)”
Can I grow tea plants indoors?
Answer: Yes! Tea plants can thrive indoors if they get bright, indirect light and high humidity. They are perfect for sunny windowsills or under grow lights.
Read more about “🌱 7 Steps to Clone Tea Plants: The Ultimate Guide (2026)”
How big do tea plants get?
Answer: In the ground, they can reach 20 feet (6 m) in height and 15 feet (4.5 m) in width. In containers, they can be pruned to stay smaller, around 3-5 feet.
Read more about “💧 How Often to Water Tea Plants: 10 Golden Rules (2026)”
📚 Reference Links
- Gardening Know How: Growing Tea from Seed
- The World Agriculture: Vegetative Propagation in Tea
- Young Mountain Tea: How to Grow Your Own Tea Plant
- USDA Plant Hardiness Zone Map: USDA.gov
- Royal Botanic Gardens, Kew: Camellia sinensis
- Growing Teas™: How do I propagate tea plants?