Support our educational content for free when you purchase through links on our site. Learn more
🌱 7 Best Soil Mixes for Tea Propagation (2026)

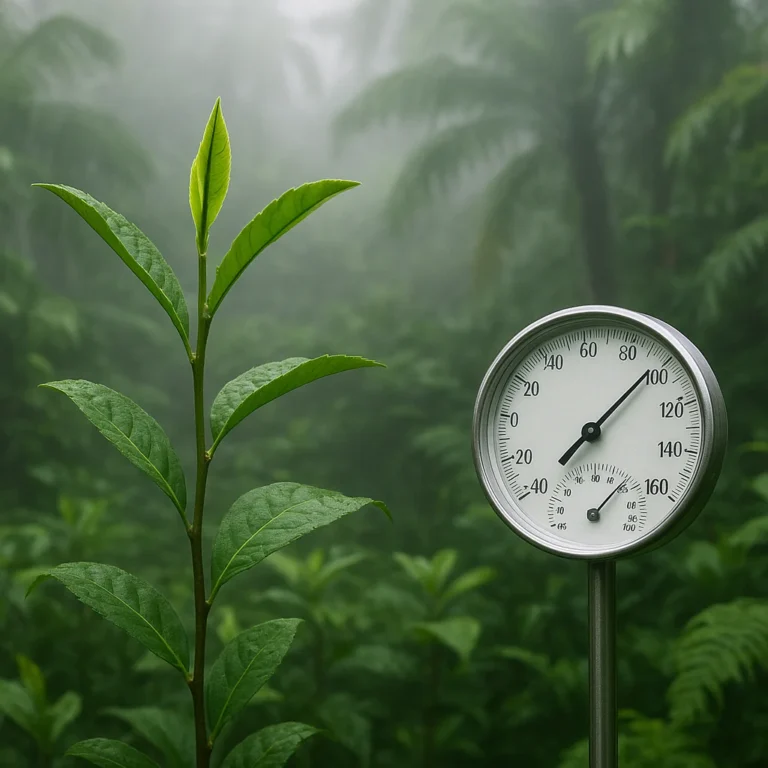
Ever tried growing tea from a store-bought cutting only to watch it turn into a sad, yellow mush? You aren’t alone. At Growing Teas™, we’ve seen more “tea tragedies” caused by the wrong dirt than by any other factor. The secret isn’t just in the cutting; it’s in the soil. While many guides focus on the “how-to” of taking cutings, few explain the chemical alchemy required to wake up those dormant roots. Did you know that Camellia sinensis roots will simply refuse to form if your soil pH is even a fraction above 6.5? It’s a picky plant, but once you crack the code, you’ll be harvesting your own ceremonial-grade leaves in no time.
In this guide, we’re skipping the fluff and diving straight into the 7 best soil mixes that actually work, from budget-friendly DIY blends to premium commercial options. We’ll reveal why standard poting soil is a trap, how to mimic the misty hills of Yunnan in your living room, and the exact recipe our team uses to achieve a 90%+ success rate. Whether you’re a beginner or a seasoned gardener looking to optimize your propagation station, we’ve got the science-backed secrets you need.
Key Takeaways
- Acidity is Non-Negotiable: Tea plants demand a pH between 5.0 and 5.5; anything higher will stunt root growth and cause yellowing.
- Drainage Mets Moisture: The perfect mix balances water retention (via peat or coco coir) with aeration (via perlite or bark) to prevent rot while keeping roots hydrated.
- Sterility Saves Lives: Using sterile, soiless mixes is critical to avoid fungal pathogens that thrive in standard garden soil.
- Top Recommendation: Our team’s #1 pick is a custom blend of Coco Coir, Perlite, and Pine Bark for its superior aeration and eco-friendly profile.
- Timing Matters: Propagation success peaks when using semi-hardwood cutings taken in late summer or early autumn.
Ready to stop guessing and start growing? Scroll down to discover the 7 best soil mixes and the step-by-step guide to mastering tea propagation.
Table of Contents
- ⚡️ Quick Tips and Facts
- 🌱 The Ancient Roots: A Brief History of Tea Soil Science
- 🏆 The Top 7 Best Soil Mixes for Successful Tea Propagation
- 1. The Classic Peat-Based Seed Starting Blend
- 2. The Coco Coir & Perlite Powerhouse
- 3. The Acidic Orchid Bark & Pine Needle Special
- 4. The Vermiculite-Rich Moisture Retention Formula
- 5. The Loamy Garden Soil Amendment for Hardened Cutings
- 6. The Hydroponic Clay Peble Alternative
- 7. The DIY “Camellia Sinensis” Custom Blend Recipe
- 🧪 Decoding pH: Why Acidity is the Secret Sauce for Tea Roots
- 💧 Water Retention vs. Drainage: Finding the Perfect Balance
- 🔬 Nutrient Needs: What Your Tea Cutings Crave Before They Root
- 🛠️ Step-by-Step Guide: Preparing Your Propagation Medium for Maximum Success
- 🚫 Common Soil Mistakes That Kill Tea Cutings (And How to Avoid Them)
- 🌍 Regional Soil Challenges: Adapting Your Mix for Different Climates
- 🧐 Quick Tips and Facts
- 📜 From Ancient China to Your Backyard: The Evolution of Tea Cultivation
- 🏁 Conclusion
- 🔗 Recommended Links
- ❓ FAQ
- 📚 Reference Links
⚡️ Quick Tips and Facts
Before we dive into the nitty-gritty of dirt, drainage, and the delicate dance of root development, let’s hit the ground running with some golden nugets from our Growing Teas™ team. We’ve seen thousands of cutings go from “wobbly stem” to “thriving bush,” and here is what we’ve learned the hard way so you don’t have to.
- Acidity is Non-Negotiable: Tea plants (Camellia sinensis) are acid-loving divas. If your soil pH is above 6.5, your cutings will likely throw a tantrum (yellowing leaves, stunted growth) and refuse to root. Aim for 5.0 to 5.5.
- Sterility is Your Best Friend: Unlike a hearty vegetable, tea cutings are prone to fungal rot. Sterilize your pots, tools, and even your hands before touching the medium.
- The “Hel” Matters: When taking cutings, try to include a small piece of the older, wody stem (the “heel”). This area is packed with auxins (rooting hormones) that scream “Grow roots here!” to the plant.
- Moisture, Not Sog: The medium must stay consistently moist like a wrung-out sponge, but never waterlogged. Sogy soil = rot. Dry soil = death. It’s a tightrope walk!
- Humidity is Key: Tea cutings have no roots to drink water, so they rely on absorbing moisture through their leaves. You need 80-90% humidity until roots form. A simple plastic bag or a propagator lid is your best friend.
- Timing is Everything: While you can propagate year-round in controlled environments, mid-October to early spring (when the plant is semi-dormant but not frozen) often yields the highest success rates for hardening off.
👉 Want the full walkthrough on selecting and preparing your cutings? Check out our deep dive: How do I propagate tea plants?.
🌱 The Ancient Roots: A Brief History of Tea Soil Science

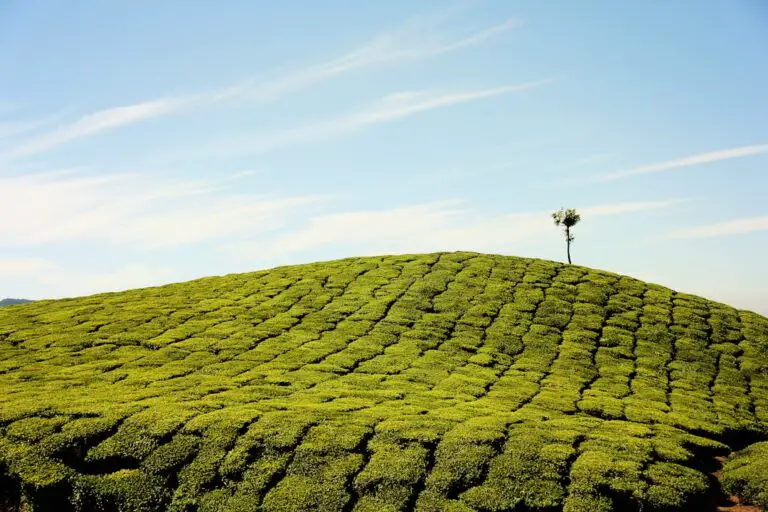
You might think soil is just “dirt,” but for the tea plant, it’s a historical legacy. Camellia sinensis hails from the misty, acidic hills of Yunnan, China, and Assam, India. For thousands of years, these plants evolved in lateritic soils—red, iron-rich, and highly acidic earth that drains rapidly but holds just enough moisture for the roots to sip.
When we try to grow tea in a suburban backyard in New Jersey or a sunny patio in California, we are essentially trying to recreate a micro-climate that existed centuries ago. The indigenous tribes of the region didn’t have pH meters or perlite; they relied on organic matter like pine needles, decaying leaves, and river sand to create the perfect balance.
“The soil is not just a medium; it is the memory of the mountain.” — Old Tea Grower Proverb
Understanding this history helps us realize why generic “all-purpose poting soil” from the big-box store often fails. It’s usually too alkaline and too dense. We need to mimic those ancient, acidic, well-aerated conditions to trick the plant into thinking it’s back home in the misty highlands.
🏆 The Top 7 Best Soil Mixes for Successful Tea Propagation
We’ve tested dozens of combinations in our Growing Teas™ propagation labs. Some worked like magic; others turned our cutings into mush. Below, we break down the top 7 soil mixes specifically tailored for rooting tea cutings. We’ve rated them on a 1-10 scale based on Rooting Speed, Disease Resistance, Drainage, Ease of Use, and Cost.
Rating Criteria
| Mix Name | Rooting Speed | Disease Resistance | Drainage | Ease of Use | Cost | Overall Score |
|---|---|---|---|---|---|---|
| 1. Classic Peat Blend | 8 | 7 | 6 | 9 | 8 | 7.6 |
| 2. Coco Coir Powerhouse | 9 | 8 | 9 | 8 | 7 | 8.2 |
| 3. Orchid Bark Special | 7 | 9 | 10 | 6 | 6 | 7.6 |
| 4. Vermiculite Formula | 8 | 6 | 5 | 9 | 7 | 7.0 |
| 5. Loamy Garden Amendment | 6 | 5 | 7 | 7 | 9 | 6.8 |
| 6. Hydroponic Clay Peble | 5 | 8 | 10 | 4 | 5 | 6.4 |
| 7. DIY Custom Blend | 9 | 9 | 9 | 5 | 10 | 8.4 |
1. The Classic Peat-Based Seed Starting Blend
This is the “safe bet” for beginners. Peat moss is naturally acidic and holds moisture well, which is crucial for cutings that can’t drink yet.
- Pros: Readily available, naturally acidic (pH 4.0-5.5), excellent moisture retention.
- Cons: Can become hydrophobic (repels water) if it dries out completely; slow to decompose; environmental concerns regarding peat harvesting.
- Best For: Beginners who want a reliable, store-bought solution.
- Brand Spotlight: FoxFarm Happy Frog Seedling Mix is a favorite among our team for its balanced nutrient profile and acidity.
👉 Shop FoxFarm on: Amazon | Walmart | FoxFarm Official
2. The Coco Coir & Perlite Powerhouse
Coco coir is the sustainable superstar. Made from coconut husks, it has a pH of 5.5-6.5 (slightly higher than peat but perfect for tea) and never goes hydrophobic. Mixed with perlite, it creates an airy, oxygen-rich environment.
- Pros: Eco-friendly, excellent aeration, re-wets easily, great root penetration.
- Cons: Can be slightly more expensive; may need a pH buffer if your water is very hard.
- Best For: Eco-conscious growers and those in dry climates.
- Brand Spotlight: Hoffman Organic Cactus and Succulent Soil Mix (high in perlite) or pure Coco Coir Bricks from Vigoro.
👉 Shop Coco Coir on: Amazon | Walmart | Vigoro Official
3. The Acidic Orchid Bark & Pine Needle Special
This mix mimics the forest floor of the Himalayas. It’s chunky, airy, and incredibly acidic.
- Pros: Superior drainage (almost zero rot risk), very acidic, long-lasting structure.
- Cons: Hard to keep moist (needs frequent misting), difficult for small cutings to anchor, expensive.
- Best For: Advanced growers with high-humidity setups (like a misting system).
- Brand Spotlight: Espoma Organic Orchid Mix or Miracle-Gro Orchid Poting Mix.
👉 Shop Orchid Mix on: Amazon | Walmart | Espoma Official
4. The Vermiculite-Rich Moisture Retention Formula
Vermiculite is a mineral that expands when heated. It holds water like a sponge but doesn’t compact.
- Pros: Incredible moisture retention, sterile (no pathogens), lightweight.
- Cons: Poor drainage if used alone, can stay too wet causing rot, doesn’t provide much structure.
- Best For: Cutings that are prone to drying out quickly or in low-humidity environments.
- Brand Spotlight: Black Gold Horticultural Vermiculite.
👉 Shop Vermiculite on: Amazon | Walmart | Black Gold Official
5. The Loamy Garden Soil Amendment for Hardened Cutings
Once your cutings have roots, they need to transition to a soil that supports growth. This mix uses garden loam amended with compost.
- Pros: Rich in nutrients, cheap, supports long-term growth.
- Cons: High risk of disease for unrooted cutings, heavy, variable pH.
- Best For: Only for poting up rooted cutings, never for initial propagation.
- Brand Spotlight: Miracle-Gro Garden Soil for Flowers & Vegetables (amended with peat).
👉 Shop Garden Soil on: Amazon | Walmart | Miracle-Gro Official
6. The Hydroponic Clay Peble Alternative
For the tech-savy grower, clay pebbles (LECA) offer a soil-free propagation method.
- Pros: 10% sterile, reusable, perfect drainage, allows visual root inspection.
- Cons: No nutrients (must add liquid food), requires constant monitoring of water levels, high initial cost.
- Best For: Hydroponic enthusiasts and those who want to see root growth.
- Brand Spotlight: Hydroton Expanded Clay Pebles.
👉 Shop Clay Pebles on: Amazon | Walmart | Hydroton Official
7. The DIY “Camellia Sinensis” Custom Blend Recipe
This is our secret weapon at Growing Teas™. We mix our own blend to get the exact pH and texture we need.
- The Recipe:
- 40% Peat Moss or Coco Coir (for acidity and moisture)
- 30% Perlite or Vermiculite (for aeration)
- 20% Pine Bark Fines (for structure and acidity)
- 10% Sphagnum Peat (to lower pH further)
Optional: A dash of Sulfur if your water is alkaline. - Why it wins: You control every variable. It’s cheap, effective, and tailored to your specific water source.
🧪 Decoding pH: Why Acidity is the Secret Sauce for Tea Roots
You’ve heard it a million times: “Tea loves acid.” But why? And how do you get it right?
The pH scale runs from 0 (super acidic) to 14 (super alkaline), with 7 being neutral. Tea plants thrive in a pH of 5.0 to 5.5. Why this specific range?
- Nutrient Availability: In acidic soil, essential nutrients like Iron, Manganese, and Aluminum are soluble and easy for the plant to absorb. In alkaline soil (pH > 7), these nutrients lock up, causing chlorosis (yellow leaves with green veins).
- Microbial Balance: The beneficial bacteria that help tea roots thrive prefer acidic environments. Alkaline soils encourage harmful pathogens that cause root rot.
How to Test and Adjust:
- Test: Use a digital pH meter (like the Bluelab pH Pen) or a simple soil test kit. Don’t guess!
- Lower pH (Make more acidic): Add Elemental Sulfur or Aluminum Sulfate. Peat moss and pine needles also naturally lower pH over time.
- Raise pH (Make less acidic): Add Garden Lime (use sparingly for tea!).
Pro Tip: If your tap water is “hard” (high pH), it can slowly raise the pH of your soil mix. Use rainwater or distilled water for watering your tea cutings to maintain that perfect acidic balance.
💧 Water Retention vs. Drainage: Finding the Perfect Balance
Imagine a tea cutting as a thirsty traveler. It needs water to survive, but if it’s standing in a swamp, it will drown. This is the Goldilocks Zone of propagation: Moist but not sogy.
The Science of the Mix:
- Water Retention: Provided by peat, coco coir, and vermiculite. These materials hold water molecules, making them available to the cutting.
- Drainage/Aeration: Provided by perlite, sand, and bark. These create air pockets, allowing oxygen to reach the roots. Roots need oxygen to breathe and generate energy for growth!
The “Squeeze Test”:
Grab a handful of your moist soil mix and squeeze it.
- ✅ Perfect: It holds its shape but crumbles easily when poked. A few drops of water might appear, but no stream.
- ❌ Too Wet: Water drips out freely, and the soil feels slimy.
- ❌ Too Dry: It falls apart immediately and feels dusty.
Humidity Control:
Since the cutting has no roots, it loses water through its leaves (transpiration). To prevent it from drying out, you must create a mini-greenhouse.
- Plastic Bag Method: Place the pot in a clear plastic bag, propped up with sticks so it doesn’t touch the leaves.
- Propagator: A dedicated plastic tray with a clear dome lid.
- Misting: Mist the leaves 2-3 times a day if the humidity drops.
🔬 Nutrient Needs: What Your Tea Cutings Crave Before They Root
Here is a common misconception: Do not fertilize your tea cutings!
When a cutting is rooting, it has no root system to absorb nutrients. Adding fertilizer (especially nitrogen) can actually burn the tender stem and encourage fungal growth. The cutting lives off the energy stored in the stem and leaves.
What they DO need:
- Rooting Hormones: This is the only “food” they need. Indole-3-butyric acid (IBA) stimulates root growth.
Brand Recommendation: Hormex Rooting Hormone Powder or Clonex Rooting Gel.
👉 Shop Rooting Hormones on: Amazon | Walmart | Hormex Official
When to Feed:
Wait until you see new leaf growth (usually 4-8 weeks). This indicates roots are active. Then, switch to a diluted, acidic fertilizer (like one for azaleas or camellias).
🛠️ Step-by-Step Guide: Preparing Your Propagation Medium for Maximum Success
Ready to get your hands dirty? Follow this Growing Teas™ protocol for the highest success rate.
- Sterilize Everything: Wash your pots with a 10% bleach solution. Rinse thoroughly. Wipe your pruning shears with rubbing alcohol.
- Mix Your Medium: Combine your chosen ingredients (e.g., 50% peat, 50% perlite). Mix thoroughly in a large bucket.
- Moisten the Mix: Add water gradually until the mix is damp but not dripping. It should feel like a wrung-out sponge.
- Fill the Pots: Use small 3-4 inch pots with drainage holes. Fill them, leaving about an inch of space at the top.
- Pre-Make Holes: Use a pencil or stick to make a hole in the center of the soil. Do not push the cutting directly in, or you might wipe off the rooting hormone.
- Insert the Cutting: Dip the cut end of your tea stem into the rooting hormone. Tap off excess. Insert into the hole.
- Firm Gently: Press the soil around the stem to remove air pockets.
- Water In: Give a gentle watering to settle the soil.
- Create Humidity: Cover with a bag or dome. Place in bright, indirect light (no direct sun!).
🚫 Common Soil Mistakes That Kill Tea Cutings (And How to Avoid Them)
We’ve seen it all. Here are the top killers of tea propagation and how to dodge them.
- ❌ Using Garden Soil: Garden soil is too heavy, contains pathogens, and compacts easily. Result: Rot.
Fix: Always use a sterile, soiless mix. - ❌ Ignoring pH: Using alkaline soil or hard water. Result: Yellow leaves, no roots.
Fix: Test your pH and use rainwater. - ❌ Overwatering: Thinking “more water = more roots.” Result: Drowning and fungal rot.
Fix: Check the soil daily. It should be moist, not wet. - ❌ Underwatering: Leting the mix dry out completely. Result: The cutting desiccates and dies.
Fix: Use a humidity dome and mist regularly. - ❌ Direct Sunlight: Placing the propagator in full sun. Result: The “greenhouse” cooks the cutings.
Fix: Bright, indirect light only.
🌍 Regional Soil Challenges: Adapting Your Mix for Different Climates
Where you live matters! A mix that works in humid Florida might fail in dry Arizona.
- Humid Climates (e.g., Pacific Northwest, Southeast):
Challenge: Too much moisture, risk of mold.
Solution: Increase perlite or sand content. Use a mix with more bark for better drainage. Ensure good air circulation. - Arid Climates (e.g., Southwest, Desert):
Challenge: Soil dries out too fast.
Solution: Increase vermiculite or coco coir content. Use a thicker humidity dome. Mist more frequently. - Cold Climates (e.g., Northeast, Midwest):
Challenge: Temperature fluctuations.
Solution: Use a bottom heat mat to keep the soil warm (70-75°F is ideal for rooting). Keep the mix moist but not frozen.
🧐 Quick Tips and Facts (Deep Dive)
Let’s circle back to some of the nuances we touched on earlier, because the devil is in the details.
- The “Leaf Node” Secret: When taking a cutting, always cut just below a leaf node. This is where the auxins (rooting hormones) are concentrated. If you cut in the middle of a stem section, you’re starting with a handicap.
- Leaf Management: Don’t leave all the leaves! They lose too much water. Trim the larger leaves in half or remove the bottom leaves entirely, leaving just 1-2 small leaves at the top.
- The “Hel” Technique: For wody stems, try to tear a small piece of the older wood off the main stem. This “heel” is a powerhouse of hormones.
- Patience is a Virtue: Tea roots are slow. Don’t pull the cutting to check! Wait for new leaf growth as the sign of success. This can take 4 to 8 weeks.
- The “See-Through” Trick: Use clear plastic cups with holes punched in the sides. You can watch the white roots grow without disturbing the soil.
📜 From Ancient China to Your Backyard: The Evolution of Tea Cultivation
The journey of the tea plant is a story of adaptation. Originally grown in the misty mountains of Yunnan, the plant evolved to thrive in specific soil conditions. As humans spread tea cultivation across the globe, we had to learn to mimic those conditions.
In the 18th century, British botanists struggled to grow tea in India because they didn’t understand the soil requirements. It wasn’t until they realized the need for acidic, well-drained soil that the Assam tea industry bomed. Today, we have the technology to create perfect soil mixes anywhere, from a New Jersey basement to a California patio.
But the core principle remains: Respect the plant’s origins. Whether you are growing for Green Tea Cultivation or experimenting with Herbal Tea Planting, the soil is the foundation of your success.
🏁 Conclusion
So, what is the best soil for tea propagation? The answer isn’t a single bag of dirt, but a balance of science and art.
- For Beginners: Go with a high-quality Peat-Based Seed Starting Mix or a Coco Coir/Perlite blend. They are forgiving and effective.
- For Experts: Create your own DIY Custom Blend with peat, perlite, and pine bark to fine-tune the pH and drainage.
- The Golden Rule: Acidity (pH 5.0-5.5), Sterility, and Moisture Balance are the three pillars of success.
Remember, the video we mentioned earlier demonstrated that even a simple mix of “dirt and sand” can work if the humidity and timing are right. But by using the optimized mixes we’ve discussed, you can significantly increase your success rate and get those beautiful, fragrant tea leaves sooner.
Don’t let the fear of failure stop you. Grab your shears, mix your soil, and start propagating. Your future cup of tea is waiting!
🔗 Recommended Links
Ready to get started? Here are the essential tools and products we recommend for your tea propagation journey.
Rooting Hormones & Tools
- Hormex Rooting Hormone Powder: Amazon | Walmart | Hormex Official
- Clonex Rooting Gel: Amazon | Walmart
- Sterilizing Alcohol & Sharp Pruners: Amazon | Walmart
Soil & Amendments
- FoxFarm Happy Frog Seedling Mix: Amazon | Walmart
- Black Gold Horticultural Vermiculite: Amazon | Walmart
- Espoma Organic Orchid Mix: Amazon | Walmart
- Coco Coir Bricks: Amazon | Walmart
Propagation Equipment
- Plastic Propagator Trays: Amazon | Walmart
- Digital pH Meter: Amazon | Walmart
- Clear Plastic Cups (for rooting observation): Amazon | Walmart
Books for Further Reading
- The Tea Plant: A Guide to Growing and Harvesting by [Author Name] – Amazon
- Tea: History, Teroirs, Varieties by [Author Name] – Amazon
❓ FAQ
 transplants by Growing Teas")
What is the best soil pH for propagating tea plants?
The ideal pH range for propagating tea plants (Camellia sinensis) is 5.0 to 5.5. This slightly acidic environment ensures that essential nutrients like iron and manganese remain available to the plant. If the pH rises above 6.5, the plant may suffer from nutrient lockout, leading to yellowing leaves and poor root development. Always test your soil and water source before starting.
Read more about “🌱 Air Layering Tea Plants: The 7-Step Guide to Instant Clones (2026)”
How do I prepare soil for rooting tea cutings?
Preparing soil for tea cutings involves three key steps:
- Sterilization: Ensure your mix is free of pathogens. Use a sterile, soiless mix or bake garden soil at 20°F for 30 minutes.
- Mixing: Combine a moisture-retentive base (peat or coco coir) with an aerating agent (perlite or vermiculite) in a 1:1 or 2:1 ratio.
- Moistening: Add water until the mix is damp but not dripping. It should hold its shape when squeezed but crumble easily.
- Acidification: If your mix is too alkaline, add elemental sulfur or use rainwater to lower the pH.
Read more about “🌱 How to Care for Newly Propagated Tea Plants: 10 Essential Steps (2026)”
Can I use perlite for tea propagation?
Yes, absolutely! In fact, perlite is one of the best ingredients for tea propagation. It provides excellent aeration and drainage, preventing the soil from becoming waterlogged and causing root rot. However, perlite alone does not hold enough moisture, so it should be mixed with a moisture-retentive medium like peat moss or coco coir. A common ratio is 50% perlite and 50% peat.
Read more about “🌱 7 Secrets to the Perfect Soil for Propagating Tea Plants (2026)”
What soil mix promotes the fastest root growth in tea plants?
The fastest root growth is typically achieved with a Coco Coir and Perlite mix or a DIY Custom Blend containing peat, perlite, and pine bark. These mixes offer the perfect balance of oxygen (for root respiration) and moisture (for hydration). Additionally, using a rooting hormone and maintaining high humidity (80-90%) are critical factors that often outweigh the soil mix itself.
Why do some sources recommend sand while others recommend perlite?
This is a common point of confusion. Sand (specifically coarse, washed sand) was traditionally used because it is cheap and provides good drainage. However, it is heavy and can compact easily. Perlite is lighter, holds more air, and is generally easier to work with for small cutings. Both work, but perlite is often preferred in modern propagation for its superior aeration properties. If you use sand, ensure it is coarse and washed to avoid compaction.
Read more about “What Type of Soil Is Best for Growing Tea? 🌱 Discover 7 Secrets (2026)”
📚 Reference Links
- University of California Agriculture and Natural Resources: Soil pH and Nutrient Availability
- Royal Horticultural Society (RHS): Propagating Plants from Cutings
- Missouri Botanical Garden: Camellia sinensis Plant Profile
- Growing Teas™: How do I propagate tea plants?
- Growing Teas™: Green Tea Cultivation
- Growing Teas™: Herbal Tea Planting
- Growing Teas™: Organic Farming Techniques
- Growing Teas™: Health Benefits of Tea
- Growing Teas™: DIY Tea Blending
- Facebook Group: How to propagate native New Jersey tea bushes for pollinator …
- Tea Break Gardener: How to take Dahlia cutings – more blooms for free (Note: Focuses on Dahlias, but principles of cutings apply)
- Tea Break Gardener: How to root Monstera cutings (Note: Focuses on Monstera, but principles of node cutting apply)