Support our educational content for free when you purchase through links on our site. Learn more
Harvesting Tea Leaves for Artisanal Tea: 10 Steps 🍃


Harvesting tea leaves for artisanal tea production starts with selecting healthy shoots at the right maturity, then handling them gently and processing them promptly. For many small batches, a bud and two young leaves make a useful starting point—but the best pluck depends on the tea you plan to make.
We’ve found that the basket can be the trickiest part: it’s easy to keep picking until it’s satisfyingly full, then realize you’ve mixed tender shoots with coarse leaves. A consistent harvest makes processing easier and gives you a clearer idea of what shaped the flavor in your cup.
Key Takeaways
- Match the plucking standard to the tea style. Bud plus two young leaves is a practical starting point, not a rule for every green, white, black, or olong tea.
- Pick healthy, dry shoots gently. Avoid crushing leaves, stripping the bush, or harvesting from a stressed plant.
- Keep each batch consistent. Separate harvests by date or maturity, and record the cultivar, weather, plucking method, and yield.
- Handle fresh leaves carefully. Keep them shaded and loosely packed, then begin the planned processing promptly.
- Choose your method with the trade-off in mind. Hand-plucking offers more selectivity; shears and machines save time but may collect more varied material.
Table of Contents
- ⚡️ Quick Tips and Facts
- 🍃 What Harvesting Tea Leaves for Artisanal Tea Production Means
- 🌱 Tea Plant Basics: Cultivars, Flushes, and Leaf Growth
- Camellia sinensis var. sinensis and var. assamica
- How tea cultivars influence flavor and harvest timing
- First flush, second flush, and seasonal growth
- 🕰️ A Brief History of Hand-Picked Tea and Craft Production
- 🧭 Planning a Small-Batch Tea Harvest
- Choosing the right site, season, and harvest window
- Weather, elevation, and the morning-plucking question
- Setting harvest goals for green, black, white, olong, and specialty teas
- 🧤 Tools, Hygiene, and Field Safety for Tea Plucking
- 🔎 How to Identify a Pluckable Tea Shoot
- The bud-and-leaf standard: bud plus one, two, or three leaves
- Tender shoots, mature leaves, and coarse plucking
- How to avoid damaged, diseased, or unsuitable leaves
- 🧺 1. Prepare the Tea Bushes and Harvest Area
- 🌿 2. Choose Your Plucking Standard and Target Shots
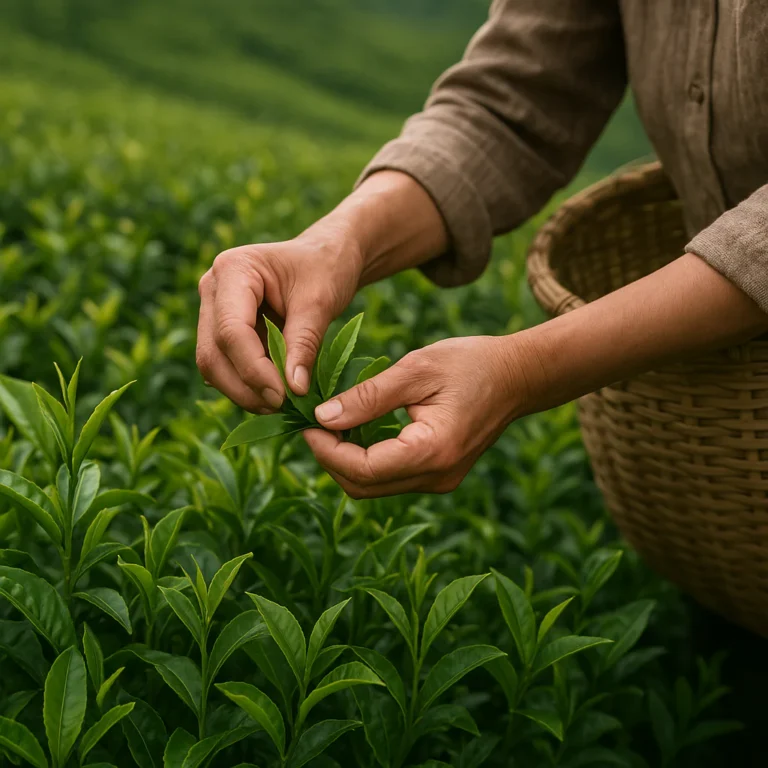
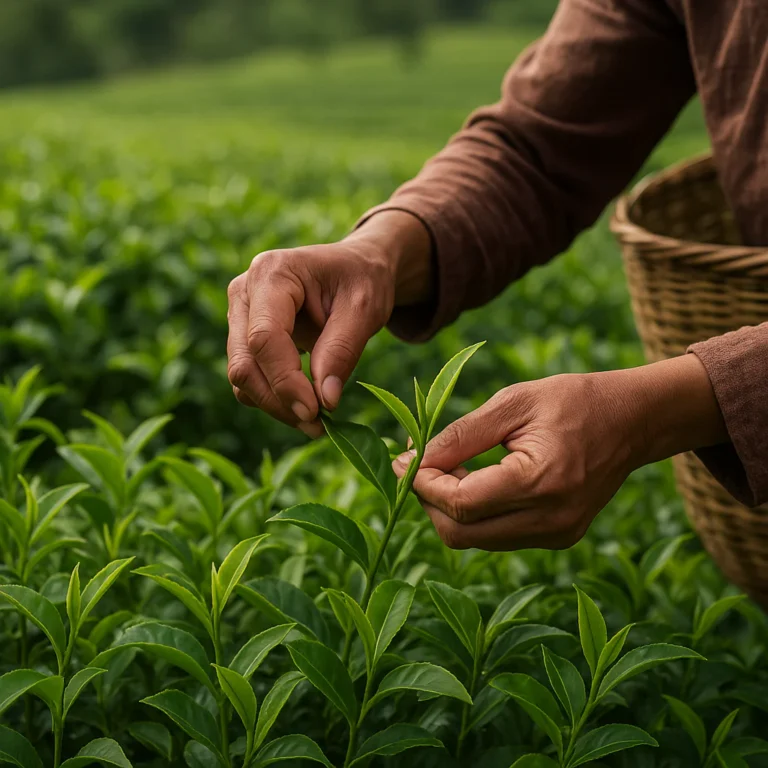
- 🤏 3. Hand-Pluck Tea Leaves Without Damaging the Bush
- ✂️ 4. Use Shears or a Tea Plucking Machine Responsibly
- 🧺 5. Collect and Handle Fresh Tea Leaves Gently
- 🧹 6. Sort, Grade, and Remove Stems or Defects
- ⚖️ 7. Weigh the Leaf and Record Harvest Details
- 🚚 8. Transport Fresh Leaf to the Tea Processing Area
- 🌬️ 9. Begin Withering or Cooling at the Right Time
- 📝 10. Review Quality and Improve the Next Plucking Round
- 🍵 Harvesting Tea Leaves for Different Artisanal Tea Styles
- White tea: selective buds and young leaves
- Green tea: uniform shoots for clean, fresh flavor
- Black tea: plucking standards for oxidation and body
- Oolong tea: balancing maturity, aroma, and leaf strength
- Matcha and tencha: shade-grown leaf considerations
- Pu-erh and other post-fermented teas: regional harvest choices
- 🧪 How Plucking Standard Shapes Tea Flavor and Quality
- Leaf maturity, amino acids, catechins, and bitterness
- Bud-to-leaf ratio, aroma, liquor color, and mouthfeel
- Why consistency matters in small-batch tea production
- 🌦️ Weather, Pests, and Harvest Challenges
- Plucking after rain, dew, heat, or frost
- Recognizing insect damage and common tea pests
- When to skip a harvest
- 🌳 Protecting Tea Bush Health and Future Yields
- Plucking tables, maintenance leaves, and recovery time
- Pruning, soil health, and sustainable tea farming
- Organic, regenerative, and biodiversity-friendly practices
- 📦 Fresh-Leaf Handling, Storage, and Traceability
- Preventing bruising, overheating, and unwanted oxidation
- Harvest logs, batch identification, and quality control
- How quickly should fresh tea leaves be processed?
- 🧮 Harvest Yield, Labor, and Small-Scale Production Planning
- ❌ Common Tea-Picking Mistakes and How to Fix Them
- ✅ Practical Tips for Better Artisanal Tea Harvests
- 🔗 Recommended Links
- ❓ FAQ
- 📚 Reference Links
- 🎉 Conclusion
Table of Contents
- ⚡️ Quick Tips and Facts
- 🍃 What Harvesting Tea Leaves for Artisanal Tea Production Means
- 🌱 Tea Plant Basics: Cultivars, Flushes, and Leaf Growth
- Camellia sinensis var. sinensis and var. assamica
- How tea cultivars influence flavor and harvest timing
- First flush, second flush, and seasonal growth
- 🕰️ A Brief History of Hand-Picked Tea and Craft Production
- 🧭 Planning a Small-Batch Tea Harvest
- Choosing the right site, season, and harvest window
- Weather, elevation, and the morning-plucking question
- Setting harvest goals for green, black, white, olong, and specialty teas
- 🧤 Tools, Hygiene, and Field Safety for Tea Plucking
- 🔎 How to Identify a Pluckable Tea Shoot
- The bud-and-leaf standard: bud plus one, two, or three leaves
- Tender shoots, mature leaves, and coarse plucking
- How to avoid damaged, diseased, or unsuitable leaves
- 🧺 1. Prepare the Tea Bushes and Harvest Area
- 🌿 2. Choose Your Plucking Standard and Target Shots
- 🤏 3. Hand-Pluck Tea Leaves Without Damaging the Bush
- ✂️ 4. Use Shears or a Tea Plucking Machine Responsibly
- 🧺 5. Collect and Handle Fresh Tea Leaves Gently
- 🧹 6. Sort, Grade, and Remove Stems or Defects
- ⚖️ 7. Weigh the Leaf and Record Harvest Details
- 🚚 8. Transport Fresh Leaf to the Tea Processing Area
- 🌬️ 9. Begin Withering or Cooling at the Right Time
- 📝 10. Review Quality and Improve the Next Plucking Round
- 🍵 Harvesting Tea Leaves for Different Artisanal Tea Styles
- White tea: selective buds and young leaves
- Green tea: uniform shoots for clean, fresh flavor
- Black tea: plucking standards for oxidation and body
- Oolong tea: balancing maturity, aroma, and leaf strength
- Matcha and tencha: shade-grown leaf considerations
- Pu-erh and other post-fermented teas: regional harvest choices
- 🧪 How Plucking Standard Shapes Tea Flavor and Quality
- Leaf maturity, amino acids, catechins, and bitterness
- Bud-to-leaf ratio, aroma, liquor color, and mouthfeel
- Why consistency matters in small-batch tea production
- 🌦️ Weather, Pests, and Harvest Challenges
- Plucking after rain, dew, heat, or frost
- Recognizing insect damage and common tea pests
- When to skip a harvest
- 🌳 Protecting Tea Bush Health and Future Yields
- Plucking tables, maintenance leaves, and recovery time
- Pruning, soil health, and sustainable tea farming
- Organic, regenerative, and biodiversity-friendly practices
- 📦 Fresh-Leaf Handling, Storage, and Traceability
- Preventing bruising, overheating, and unwanted oxidation
- Harvest logs, batch identification, and quality control
- How quickly should fresh tea leaves be processed?
- 🧮 Harvest Yield, Labor, and Small-Scale Production Planning
- ❌ Common Tea-Picking Mistakes and How to Fix Them
- ✅ Practical Tips for Better Artisanal Tea Harvests
- 🔗 Recommended Links
- ❓ FAQ
- 📚 Reference Links
- 🎉 Conclusion
⚡️ Quick Tips and Facts
If you’re wondering when and how to harvest tea leaves, here’s our field-ready answer: pick healthy, tender shoots; handle them gently; and get them to processing promptly. Those three habits matter more than fancy equipment.
| Harvest decision | A dependable starting point | Why it matters |
|---|---|---|
| What to pluck | A healthy bud with two young leaves | Balances tenderness, usable yield, and consistent processing |
| How to pluck | Selective hand-plucking for small batches | Lets you choose shoots and avoid woody material |
| When to harvest | During an active flush, once leaves are dry | Wet leaves bruise easily and can be harder to process consistently |
| How often | Follow growth, not a rigid calendar | Flush speed changes with cultivar, temperature, rain, and plant health |
| How to carry leaves | Use a clean, roomy basket or shallow tray | Deep, tight piles trap heat and crush tender shoots |
| What to do next | Sort and begin the planned process promptly | Fresh leaf continues changing after it leaves the bush |
Our quick rules of thumb:
- ✅ Pick shoots, not random individual leaves. A bud-and-two-leaf standard gives a repeatable starting point.
- ✅ Keep your hands light. Pinch or snap cleanly without crushing the shoot or stripping the bush bare.
- ✅ Use a consistent standard within each batch. Mixing very young buds with coarse, mature leaves makes processing and tasting less predictable.
- ❌ Don’t harvest every green thing in reach. Leave enough foliage and growing points for the plant to recover.
- ❌ Don’t pack fresh leaf tightly into a bag. Warm, bruised leaves can start changing before you intend them to.
- 🍵 Match the pluck to the tea style. Some olongs use more mature leaves than a delicate green tea; one standard does not suit every tea.
In our own small-batch trials, the most tempting mistake is also the easiest: picking just a little longer to fill the basket. That last handful can quietly add coarse leaves and stems. We’ll show you how to avoid that without turning harvest day into a botany exam.
For practical garden guidance, see our pages on Best Tea Picking Practices and Green Tea Cultivation. The Royal Horticultural Society’s tea-plant profile is also useful for understanding the shrub you’re asking to make another flush.
🍃 What Harvesting Tea Leaves for Artisanal Tea Production Means
Harvesting tea leaves for artisanal tea production is selecting and collecting fresh shoots to suit a particular tea style, then preserving their condition until processing begins. It is not simply “pick the top leaves and hope for the best.” The chosen shoot maturity, plucking method, season, and handling all influence the raw material a maker receives.
Tea comes from Camellia sinensis. The familiar types—green, white, black, olong, and pu-erh—are not separate plants. They are made from tea leaves that undergo different cultivation and processing choices. The FAO’s overview of tea production and the Smithsonian’s tea resources offer helpful background on the plant and its wide-ranging traditions.
Harvesting is the first processing decision
A plucker makes several decisions in the field:
- Which shoots are ready? A tender bud and young leaves are common targets, but leaf maturity can vary by tea style.
- How much of the shoot should be taken? A precise pluck supports uniformity; a broader one increases yield but may include tougher leaves.
- How will the leaves be removed? Hand-plucking is selective; shears and machines trade selectivity for speed.
- How will the harvest be handled? Bruising, compression, and delay may change the leaf before the maker is ready.
A peer-reviewed review of black-tea harvesting methods reports that hand-plucked material can be more selective and less mechanically damaged than shear- or machine-harvested material, while also emphasizing the trade-off between quality, yield, and cost (review on tea harvesting and quality). That is not a universal verdict against machines; it is a reminder that the tool changes the raw material.
Harvesting does not happen in isolation
The picking standard only makes sense alongside what comes next. Green tea may be heated soon after harvest to limit oxidation. Oolong relies on controlled withering and oxidation. White tea is often processed with comparatively gentle handling. The harvest must therefore fit the producer’s process, not just look tidy in a basket.
A useful way to think about it: harvesting is the opening move, not the whole game. A beautiful shoot can still produce a disappointing tea if it is crushed, left in a hot pile, or processed inconsistently.
🌱 Tea Plant Basics: Cultivars, Flushes, and Leaf Growth
Tea is a woody evergreen shrub, but for production it is often pruned and maintained at a convenient height so new shoots can be harvested. Those young shoots emerge in flushes: periods of active growth followed by slower growth or dormancy, depending on climate and cultivation.
For home growers, the basics of Green Tea Cultivation and general Herbal Tea Planting can help distinguish tea cultivation from growing herbs for an infusion. True tea comes from Camellia sinensis; mint, chamomile, and lemon balm may make delicious herbal infusions, but they are not tea leaves.
Camellia sinensis var. sinensis and var. assamica
Two broad botanical varieties are commonly discussed:
| Tea type | General traits | Growing context | Practical harvesting note |
|---|---|---|---|
| C. sinensis var. sinensis | Often smaller leaves and greater tolerance of cooler conditions | Common in many traditional Chinese and Japanese tea-growing contexts | Growth may be more seasonal in cool climates |
| C. sinensis var. assamica | Generally larger leaves and adaptation to warmer, humid conditions | Widely associated with Assam and other warm tea-growing regions | Vigorous growth can produce abundant flushes in suitable climates |
These are broad tendencies, not flavor guarantees. Cultivar, soil, elevation, shade, weather, pruning, and processing all matter. The Kew Plants of the World Online database is a dependable resource for botanical names and plant classification.
How tea cultivars influence flavor and harvest timing
A cultivar is a selected cultivated variety. It affects growth habit, leaf size, timing, resilience, and potential flavor character. For example, Japanese cultivar Okumidori is often associated with deep green color and a relatively sweet, mellow profile in matcha and other Japanese teas. Smith Teamaker’s Okumidori origin report describes a spring-harvest matcha from Kirishima, Kagoshima, made from shade-grown Okumidori.
That example is useful, but don’t treat a cultivar name as a flavor warranty. The same cultivar can taste different from one site or harvest to another. If you’re growing tea at home:
- Note the cultivar or nursery source, if known.
- Record the date and weather for each flush.
- Taste separate harvests before blending them.
- Avoid changing several variables at once; otherwise, you won’t know which change mattered.
Healthy soil also supports steady growth. Explore our guide to Fertilizers for Tea Plants, and use soil amendments based on a soil test rather than guesswork.
First flush, second flush, and seasonal growth
A flush is a wave of new shoot growth. In some climates, growers describe spring’s first flush, a later summer flush, and additional growth periods. The number and timing vary greatly by region.
| Growth condition | Common field effect | Possible artisanal implication |
|---|---|---|
| Cool, slower growth | Shots may develop more gradually | Often prized for distinctive aroma and concentration, but yield can be lower |
| Warm, wet, rapid growth | More vigorous leaf production | Greater harvest volume; shoots may mature quickly and require close monitoring |
| Drought or heat stress | Growth may slow or become uneven | Harvesting can further stress a plant; wait for recovery if shoots are poor |
| Shaded cultivation | Alters light exposure and leaf development | Often used for particular Japanese teas, including tencha |
A scientific review of tea quality notes that season and growing conditions affect chemical composition and sensory character; results vary across cultivars and regions (review). That explains why a calendar date alone is a poor harvest signal. Watch the shoots, not just the month.
🕰️ A Brief History of Hand-Picked Tea and Craft Production

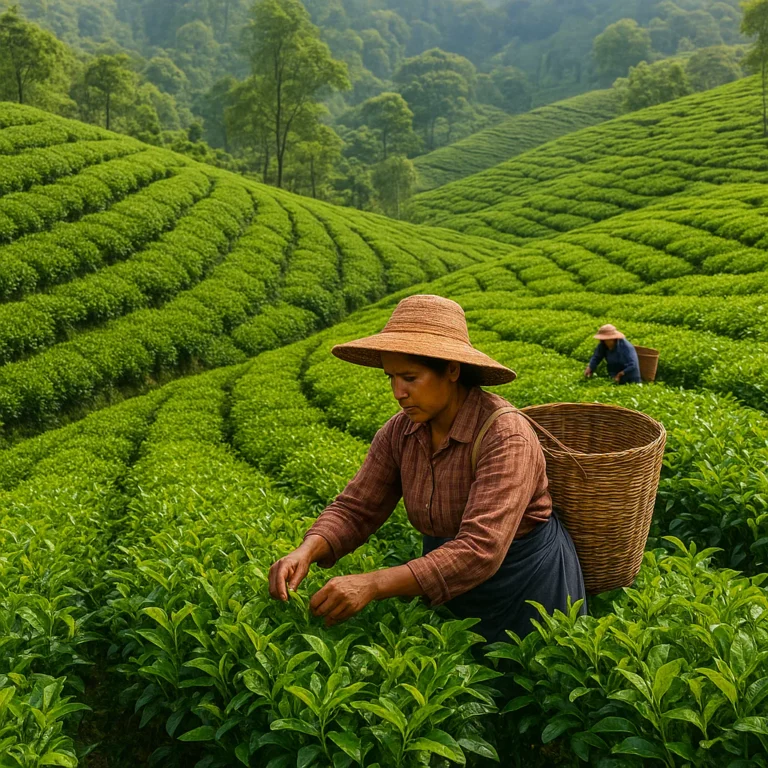
Tea has been cultivated and processed in many forms across Asia for centuries, with production methods developing around local plants, climates, tools, and tastes. Hand-plucking remains closely associated with selective, high-quality harvests because a skilled picker can choose shoots one by one. Mechanization later expanded the scale and speed of production, especially where labor availability and commercial volume made rapid harvesting essential.
Both approaches have a place. A small garden batch might reward careful hand selection; a large plantation may need mechanical harvesting to gather enough leaf in a narrow window. A scientific review comparing methods found quality differences in particular studies, but those results should be read in context: cultivar, field conditions, equipment, and processing also affect outcomes (peer-reviewed review).
The craft tradition is not frozen in the past, either. Producers combine hand selection, modern weighing and traceability, controlled withering, and precision heating. As Smith Teamaker’s report on Japanese matcha production describes, tencha may be sorted, dried, separated from stems, stored, and miled later. Some stems find another life in teas such as kukicha or hojicha. Good craft is not nostalgia; it is deliberate control of each step.
🧭 Planning a Small-Batch Tea Harvest
Before reaching for a basket, decide what you want to make. A harvest meant for green tea may call for young, fairly uniform shoots and quick heat treatment. A small olong experiment can use a different leaf maturity and a process involving withering and controlled oxidation.
Choosing the right site, season, and harvest window
Start with a healthy, established tea plant. Avoid taking a substantial harvest from a plant that is newly planted, drought-stressed, pest-damaged, or still recovering from pruning. Young plants need to build structure before repeated plucking.
A practical pre-harvest check:
- Look for multiple healthy shoots, not one isolated tender tip.
- Check that leaves are dry and free from visible disease or heavy pest damage.
- Make sure you can process the quantity you plan to collect.
- Decide your plucking standard and stick to it for the batch.
- Keep a clean, shallow container ready before picking begins.
For site and plant care, use the RHS growing guide for camellias alongside local growing advice. Tea plants appreciate suitable soil and conditions; a plant struggling in its site will not be rescued by perfect plucking technique.
Weather, elevation, and the morning-plucking question
There is no magic clock hour that guarantees better tea. Morning harvest can be convenient and may help avoid afternoon heat, but dry leaf condition and a prompt, gentle workflow matter more than a ritualized start time. Don’t harvest wet leaves just because the sun has not yet warmed the garden.
Elevation, shade, rainfall, temperature, and wind affect growth rates and leaf character. A research review notes that seasonal conditions can shift tea chemistry and sensory qualities, but its findings are not a universal recipe for every garden (review of tea quality factors).
| Weather or site condition | What we recommend |
|---|---|
| Dewy morning | Wait until leaves are dry if possible |
| Hot, bright afternoon | Harvest earlier or pause during peak heat |
| Recent heavy rain | Let plants dry; avoid muddy handling and wet-leaf piles |
| Cold snap or frost damage | Inspect new growth carefully and give the plant time to recover |
| Strong wind | Use a sheltered work area to reduce drying and leaf loss |
Setting harvest goals for green, black, white, olong, and specialty teas
Write down your intended tea before you harvest. “A little of everything” is charming in the garden and chaotic in a processing tray.
| Tea style | Common harvest direction | Main harvest priority |
|---|---|---|
| Green | Young, relatively uniform shoots | Consistent leaf and prompt heat treatment |
| White | Tender buds and young leaves, depending on style | Gentle handling and careful drying |
| Black | Often bud-and-leaf standards; exact pluck varies | Healthy, even shoots suitable for withering and oxidation |
| Oolong | May include more mature leaves than green tea | Leaf strength and suitable material for bruising and oxidation |
| Tencha/matcha | Shade-grown leaves for relevant Japanese styles | Appropriate cultivation and careful processing after harvest |
| Pu-erh | Regional traditions and producer specifications vary | Correct plant material, region, and processing knowledge |
One example from a tea grower’s perspective is Kyoto Obubu Tea Farms’ home olong-making guide. It notes that olong can use lower, more mature leaves than the familiar bud-and-two-leaf green-tea standard. That is a style-specific choice, not a rule that every olong needs older leaves.
🧤 Tools, Hygiene, and Field Safety for Tea Plucking
For a small harvest, you do not need a miniature tea factory. You do need clean hands, clean equipment, and a container that doesn’t squash the leaf.
| Tool or supply | Use | Practical guidance |
|---|---|---|
| Clean hands | Hand-plucking and sorting | Wash and dry before harvesting |
| Shallow basket or tray | Holding fresh leaf | Choose breathable, roomy storage over a packed plastic bag |
| Clean pruning snips | Removing damaged stems or pruning | Keep blades sharp and clean; avoid using them for indiscriminate plucking |
| Digital kitchen scale | Weighing each batch | Record fresh-leaf mass for repeatability |
| Notebook or phone log | Recording conditions | Include date, cultivar, weather, plucking standard, and destination tea |
| Labels | Identifying batches | Label before processing; mystery leaf is not an artisanal style |
| Gloves and eye protection | Pruning or clearing thorny growth nearby | Use when the task calls for them; don’t handle leaves with dirty gloves |
Clean tools matter, especially if you are also pruning or treating plants. The University of Minnesota Extension’s pruning guidance offers sound general principles for clean, controlled cutting. For food safety basics, see the FDA’s food-safety guidance.
Skip garden chemicals near harvest unless the product label explicitly allows the use and the required interval has passed. Follow local regulations and the label exactly. For plant nutrition, consult our tea fertilizer guide rather than applying a product by habit.
🔎 How to Identify a Pluckable Tea Shoot
A pluckable shoot is healthy, actively growing, and at the maturity your tea style requires. Look for the tip bud and the leaves below it. The youngest leaves are usually more tender; the lower leaves on a shoot tend to be larger and firmer.
The bud-and-leaf standard: bud plus one, two, or three leaves
Plucking standards describe how much of a new shoot is collected:
| Plucking standard | Typical material | General trade-off |
|---|---|---|
| Bud only | Unopened or just-opening tip bud | Highly selective, low yield, specialty use |
| Bud and one leaf | Bud plus the first young leaf | Tender material; lower volume |
| Bud and two leaves | Bud plus two young leaves | Common balance of tenderness and usable yield |
| Bud and three leaves | Bud plus three leaves | More leaf per shoot; lower leaves may be more mature |
| Coarser pluck | Several leaves or additional stem | Higher volume, but more variable maturity and texture |
A review of tea-harvesting research identifies bud-and-two-leaves as a commonly recommended balance for quality and productivity, while noting that standards depend on product and local practice (peer-reviewed source). Treat it as a starting standard, not an unbreakable law.
Tender shoots, mature leaves, and coarse plucking
For many delicate teas, the top of the shoot is the priority. For some olongs, a somewhat more mature leaf may better suit withering and oxidation. The Obubu guide explains this contrast from its own handmade olong experience: standard green-tea plucking often uses a bud and two leaves, while olong can use lower leaves (Kyoto Obubu Tea Farms).
That difference resolves a common point of confusion: there is no single “best” leaf maturity for all artisanal tea. The best choice is the one your process can handle and your target style calls for.
How to avoid damaged, diseased, or unsuitable leaves
Do not include leaves that are:
- Heavily chewed, spotted, moldy, or visibly diseased.
- Wet with rain or dew if you can wait for them to dry.
- Yellowing, woody, or unusually tough for your target tea.
- Covered in soil, bird droppings, or chemical residue.
- Mixed with unrelated plant material.
If you see a problem, pause and identify it rather than harvesting around it. Extension resources such as the University of California Integrated Pest Management program can help with plant pest identification, though local tea-growing conditions may differ.
🧺 1. Prepare the Tea Bushes and Harvest Area
- Choose a healthy plant. Avoid taking a crop from a plant that is newly established, stressed, or recovering from substantial pruning.
- Check the shoots. Confirm there is enough suitable growth for your intended batch.
- Set up a clean work area. Keep the basket, scale, labels, and notes within reach.
- Decide your plucking standard. For example: “bud plus two young leaves, no coarse stems.”
- Plan the next step. If you cannot process the leaf soon, collect less.
A small batch is easier to control than a heroic harvest that sits forgotten on the counter. We learned this the untidy way: a full basket feels triumphant until the kitchen turns into a leaf-storage negotiation. Harvest only what your processing setup can comfortably handle.
For garden planning and plant care, see Green Tea Cultivation and the RHS camellia growing guide.
🌿 2. Choose Your Plucking Standard and Target Shots
Before you pluck, identify one or two representative shoots and decide what counts as “in.” A bud and two leaves is a useful baseline for many small-batch experiments. If you’re making a specific style, adjust the target and record it.
A simple selection checklist
Pick a shoot when it is:
- Healthy and actively growing.
- At the desired number of leaves.
- Free of obvious disease or heavy insect damage.
- Easy to remove without tearing or stripping surrounding growth.
Keep the standard consistent across the batch. A handful of tiny buds mixed with lots of mature leaves can produce uneven processing. In research, differences in plucking maturity have been associated with changes in tea chemistry and sensory quality, but effects vary with cultivar and processing (review).
🤏 3. Hand-Pluck Tea Leaves Without Damaging the Bush
Hand-plucking lets you select shoots and avoid cutting indiscriminately through the bush. It is slower than mechanical harvesting, but that selectivity is exactly why many small producers prefer it.
A careful hand-plucking sequence
- Hold the shoot gently below the leaves you intend to collect.
- Use the thumb and forefinger to pinch or snap the tender shoot at the chosen point.
- Avoid crushing the bud. A firm yank can bruise leaves or tear a longer section from the branch.
- Place the shoot into the basket rather than throwing it into a deep pile.
- Leave adequate foliage and growing points on the plant.
- Move through the bush evenly. Don’t strip one patch while ignoring the rest.
The tea-harvesting review describes a traditional “tiger’s mouth” hand technique, using fingers to take the bud tip while avoiding crushing and scalding the shoot (source). The exact hand position may vary; the important part is gentle, controlled removal.
✅ Good: a cleanly removed shoot with leaves intact.
❌ Not so good: crushed leaf, torn bark, or bare branches left behind.
✂️ 4. Use Shears or a Tea Plucking Machine Responsibly
Shears can be useful for a garden hedge or a larger, evenly managed tea patch, but they are less selective than hand-plucking. They may collect a mix of shoot ages and can cut stems or leaves that you would otherwise leave on the bush.
Research comparing methods reports that hand-picked samples scored higher on some sensory and chemical measures in particular studies, while shear harvesting can reduce labor demands and increase productivity (peer-reviewed review). That is evidence of a trade-off, not proof that every machine-harvested tea is poor. Equipment, blade height, field management, and sorting all matter.
| Method | Strengths | Drawbacks | Best fit |
|---|---|---|---|
| Hand-plucking | Selective; low mechanical damage when done well | Slow and labor-intensive | Small batches and premium selection |
| Hand shears | Faster than individual plucking | Less selective; can include coarse leaf | Home bushes and modest gardens |
| Mechanical harvester | High productivity at scale | Requires field setup and skilled operation | Commercial production with suitable terrain |
If using shears at home, cut only the intended new growth and sort the harvest afterward. Don’t shear deeply into old wood or treat a tea bush like a hedge that can be scalped without consequence. For more on responsible selection, see Best Tea Picking Practices.
🧺 5. Collect and Handle Fresh Tea Leaves Gently
Fresh leaves are delicate. Place them loosely in a clean basket, tray, or other container that gives them room. Avoid compressing them under tools, setting heavy items on top, or leaving them in a hot vehicle.
What we do in a small-batch garden harvest:
- Keep the container shaded.
- Make several smaller trips rather than filling one deep, heavy pile.
- Separate batches by date, cultivar, or intended tea style.
- Remove foreign material as soon as you notice it, without repeatedly squeezing the leaves.
A producer’s description of matcha production illustrates how careful handling continues after picking: fresh leaves may be graded, steamed, dried, sorted, and stored as tencha before milling (Smith Teamaker). Your kitchen process will be simpler, but the principle is the same: protect the leaf until the next deliberate step.
🧹 6. Sort, Grade, and Remove Stems or Defects
Spread the harvest in a shallow layer and sort it under good light. Remove insects, foreign leaves, visibly damaged material, and stems that do not fit your chosen standard.
A practical sorting table
| Check | Keep | Remove or separate |
|---|---|---|
| Leaf health | Clean, intact shoots | Moldy, diseased, or heavily damaged leaves |
| Maturity | Shots consistent with the planned tea | Very coarse or unusually immature material |
| Plant identity | Confirmed Camellia sinensis | Unknown leaves or garden debris |
| Stem content | Small stems appropriate for your style | Woody stems or branches |
| Batch identity | Same harvest and processing plan | Material from a separate date or cultivar |
Sorting is not wasted effort. It makes the batch more uniform and helps you learn from the result. In commercial tencha production, stems and veins may be separated from leaf material; byproducts can be used for other teas such as kukicha or hojicha, as described in Smith Teamaker’s matcha report. At home, you can keep suitable stems separate and experiment rather than discarding useful plant material automatically.
⚖️ 7. Weigh the Leaf and Record Harvest Details
A scale turns “I picked a handful” into information you can use next time. Record the fresh-leaf mass before processing and the dried-tea yield afterward.
Simple harvest log
| Record | Example entry |
|---|---|
| Date and time | Spring morning; leaves dry |
| Plant or cultivar | Garden tea plant; cultivar unknown |
| Weather | Cool, overcast, no rain during harvest |
| Plucking standard | Bud plus two leaves |
| Method | Hand-plucked |
| Fresh-leaf weight | Record your measured amount |
| Processing plan | Green-tea trial |
| Finished result | Aroma, liquor color, taste, texture |
Over several harvests, this log may reveal useful patterns: perhaps one plant grows more quickly after rain, or an early flush suits your preferred green-tea process. The FAO’s tea resources provide broader context on production systems; your own notes add the local detail that general guides cannot.
🚚 8. Transport Fresh Leaf to the Tea Processing Area
Move the leaf in a shallow, breathable container, protected from direct sun and wind. Don’t seal warm leaves in an airtight bag or leave them piled in a car. If processing takes place in another room, keep the trip short and avoid repeated transfers.
For very small home batches, the easiest solution is to set up your processing station before picking. That way, the leaves go from bush to work surface without an extended tour of the house. It sounds obvious; it is also the step most likely to be skipped when the garden is full of tempting shoots.
🌬️ 9. Begin Withering or Cooling at the Right Time
What happens after picking depends on the tea style. Green tea is commonly heated early in processing to limit oxidation. Oolong and black tea processes use withering and oxidation in different ways. White tea is often handled gently and dried with fewer interventions.
A video overview of artisanal olong production, linked here as the featured video, describes a workflow involving brief sun withering, longer indoor withering, leaf disruption, fixation, shaping, and firing. Its account is one production perspective, not a single standard for every olong producer.
For a hands-on home example, Kyoto Obubu Tea Farms describes sun-drying, bruising, pan-firing, rolling, and drying in its guide to processing your own olong. The techniques differ because olong styles vary widely. Do not copy a processing temperature or duration blindly without considering leaf quantity, equipment, and moisture.
📝 10. Review Quality and Improve the Next Plucking Round
Once the tea is processed, taste it and write down what you notice. Try to distinguish harvest issues from processing issues: a grassy cup might reflect leaf maturity, heating, drying, or several factors at once.
A simple tasting review
- Dry leaf: color, shape, aroma, and visible stem content.
- Wet leaf: softness, uniformity, and aroma after infusion.
- Liquor: color, clarity, body, sweetness, bitterness, and astringency.
- Aftertaste: clean, drying, sweet, grassy, floral, or otherwise.
- Next adjustment: change one variable at a time.
Obubu’s home olong write-up is refreshingly honest: the author says making tea by hand was accessible, while acknowledging that whether the result tasted good was “a different matter” (Kyoto Obubu Tea Farms). That is the right spirit for a first batch. Your first harvest is partly tea and partly a very fragrant experiment.
🍵 Harvesting Tea Leaves for Different Artisanal Tea Styles
The right harvest depends on how you intend to process the leaf. A young, uniform shoot is a strong starting point for many green teas, while olong styles may call for more mature leaves. Local traditions and maker preferences vary.
White tea: selective buds and young leaves
White tea styles often use buds, young leaves, or a combination, then rely on careful withering and drying. Handle the material gently and avoid crushing it. The precise pluck varies by style and producer; “white tea” does not mean every batch must contain only buds.
Green tea: uniform shoots for clean, fresh flavor
For a small-batch green tea, choose healthy shoots of similar maturity and plan to heat them promptly after harvest. Green-tea processing uses heat to limit oxidation; the method and timing vary by tradition and equipment. Our Green Tea Cultivation resources can help with growing conditions as well as harvest planning.
Black tea: plucking standards for oxidation and body
Black-tea producers use different standards, but young shoots are commonly valued for their quality potential. A peer-reviewed review discusses bud-and-two-leaf plucking as a practical quality-and-productivity balance, while showing that hand, shear, and machine harvests can produce different results (review).
For a home batch, keep the pluck reasonably consistent and avoid woody material. Uniform raw leaf makes it easier to judge withering and oxidation rather than wondering whether the basket contained three different harvests.
Oolong tea: balancing maturity, aroma, and leaf strength
Oolong covers a broad range of oxidation and style. In Kyoto Obubu Tea Farms’ home guide, the author uses lower leaves than the usual green-tea bud-and-two-leaf pick, then sun-dries, bruises, heats, rolls, and dries them (Obubu guide).
The featured video’s account describes a more elaborate production line with indoor withering, mechanical disruption, fixation, repeated shaping, and final firing. Both examples show why olong harvest choices cannot be reduced to one universal plucking rule. Choose the leaf maturity that suits your intended style and equipment.
Matcha and tencha: shade-grown leaf considerations
Matcha begins with specially cultivated leaf processed into tencha, then miled into powder. Shading is used in some matcha production to influence leaf development, color, and flavor. In Smith Teamaker’s Okumidori report, spring-harvest leaves from Kirishima are processed through steaming, drying, sorting, and storage before milling (origin report).
This is specialized production. Home growers can experiment with shading, but matcha quality depends on more than harvesting: cultivar, shade management, processing, stem separation, storage, and milling all matter.
Pu-erh and other post-fermented teas: regional harvest choices
Pu-erh and other post-fermented teas are tied to particular regions, local plant material, and processing traditions. Harvest decisions should be informed by those traditions, not assumed from generic garden advice. The Tea Association of the USA offers general tea information; for regional styles, consult producers and sources specializing in the relevant origin.
🧪 How Plucking Standard Shapes Tea Flavor and Quality
Plucking standard influences the raw material available to the tea maker. The leaf’s maturity, bud-to-leaf ratio, stem content, and degree of damage can all affect how it withers, oxidizes, heats, and dries.
Leaf maturity, amino acids, catechins, and bitterness
Tea leaves contain many compounds that contribute to flavor, aroma, color, and mouthfeel. These include catechins, amino acids, caffeine, and other components. Their levels change with plant genetics, leaf age, season, environment, and processing.
A scientific review of black-tea harvesting describes associations between shoot maturity and chemical or sensory measures, while also showing that study results vary by conditions (peer-reviewed review). That variation matters: a finding from one region or cultivar is not a guaranteed prediction for your backyard plant.
For a useful introduction to tea’s composition and potential health topics, see our Health Benefits of Tea category. Health claims should be interpreted carefully; the National Center for Complementary and Integrative Health summarizes what is and is not established about tea and health.
Bud-to-leaf ratio, aroma, liquor color, and mouthfeel
A batch with many buds may look attractive, but visual bud count alone does not guarantee a better cup. Leaf maturity, growing conditions, and processing determine whether the final tea is balanced, fragrant, sweet, bitter, or astringent.
The review of harvesting methods reports higher scores for hand-picked material on some measures in particular comparisons, including selected sensory and chemical measures; it also notes the productivity advantages of mechanized methods (study review). The practical takeaway is not “hand-picked always wins.” It is: selective harvesting gives you more control over what enters the batch.
Why consistency matters in small-batch tea production
If one half of your harvest is tender and the other half is coarse, the pieces may respond differently during processing. Keep batches separate by harvest date and plucking standard. That way, when a tea tastes better, you can identify what might have helped.
| Consistency habit | Benefit |
|---|---|
| Same plucking standard per batch | More uniform raw material |
| Separate harvest dates | Easier comparison across flushes |
| Record weather and cultivar | Better interpretation of flavor differences |
| Weigh fresh and finished leaf | More useful yield tracking |
| Change one variable at a time | Clearer learning from each trial |
🌦️ Weather, Pests, and Harvest Challenges
Field conditions can turn a good plucking plan into a poor harvest. Weather affects shoot growth and handling; pests and disease can damage leaf quality; and stress can make it wiser to wait.
Plucking after rain, dew, heat, or frost
Wet leaf can be harder to handle and may be more prone to damage in a compressed pile. Let the plant dry when practical. In hot weather, keep the harvest shaded and avoid leaving fresh leaves in a warm container. After frost, inspect new growth for damage rather than harvesting by schedule.
The National Weather Service can help you check local conditions, but your tea bush is the final judge. If new shoots look wilted, scorched, or damaged, give them time.
Recognizing insect damage and common tea pests
Look for chewed edges, stipling, curled leaves, webing, sticky residue, or unusual spots. Not every blemish indicates a serious problem, but heavily damaged leaves should not go into a premium small batch.
Use integrated pest management: identify the cause, monitor the plant, and choose the least disruptive effective response. The University of California IPM program offers identification and management resources, though recommendations should be adapted to your location and local rules.
When to skip a harvest
Skip or postpone harvesting if:
- The plant is drought-stressed, wilted, or recovering from damage.
- Most shoots are too coarse, too small, or visibly unhealthy.
- Leaves are soaked and there is no need to rush.
- You do not have time or equipment to process the amount you intend to pick.
- Recent garden treatments make the leaves unsuitable for harvest under label directions.
A smaller, cleaner batch beats a large, compromised one. That’s not timid gardening; it’s good quality control.
🌳 Protecting Tea Bush Health and Future Yields
A tea bush is not a vending machine for fresh shoots. Repeated harvests remove growth the plant needs, so careful plucking must leave enough foliage and structure for recovery.
Plucking tables, maintenance leaves, and recovery time
Commercial tea fields often maintain a plucking surface, or “plucking table,” so new shoots are accessible and harvests can be managed consistently. Home growers may not need a formal table, but the same principle applies: harvest selectively and avoid stripping the bush.
Leave healthy leaves and growing points below the harvest. If a young plant has only a few branches, take little or no leaf until it has established a stronger framework. Plant age, climate, and vigor all affect how much harvesting it can tolerate.
Pruning, soil health, and sustainable tea farming
Pruning can shape the bush and encourage new growth, but timing and severity matter. Avoid heavy pruning immediately before expecting a useful harvest. General shrub-pruning principles are available from University of Minnesota Extension, while tea-specific needs depend on local growing conditions.
Healthy soil supports healthier plants. Use amendments based on soil conditions and follow our Fertilizers for Tea Plants guidance. More fertilizer is not automatically better; excessive or poorly timed nutrients can create weak or imbalanced growth.
Organic, regenerative, and biodiversity-friendly practices
A resilient tea garden benefits from soil cover, diverse planting, thoughtful water use, and regular observation. Avoid broad, unnecessary pesticide use, and preserve beneficial insects where possible. Organic certification is a regulated system, not simply a gardening style; check the USDA National Organic Program for U.S. standards.
Growing companion plants can support garden diversity, but ensure they do not compete excessively with young tea plants. Our Herbal Tea Planting category can help you plan a garden that produces both true tea and herbal infusions.
📦 Fresh-Leaf Handling, Storage, and Traceability
Fresh leaf is perishable in the practical sense: its condition changes after picking, and heat, moisture, pressure, and delay can make handling less predictable. Plan the harvest around the next processing step.
Preventing bruising, overheating, and unwanted oxidation
- Use shallow containers with room for air to move.
- Keep the harvest away from direct sun and hot surfaces.
- Avoid tight bags and deep piles.
- Handle leaves gently, especially if you want to delay oxidation.
- Process or begin the intended withering promptly.
For green tea, heating is commonly used early to limit oxidation. For olong and black tea, controlled changes during withering and oxidation are part of the intended process. The Smith Teamaker matcha report describes rapid steaming in tencha production, while Obubu’s home olong account uses withering and bruising before heating (Obubu). Different tea styles, different goals.
Harvest logs, batch identification, and quality control
Label every batch as soon as it is collected. Include the plant or cultivar, date, plucking method, standard, and intended tea. If you combine leaves from separate plants or dates, write that down too.
This kind of traceability is useful even in a home garden. If one batch tastes floral and another grassy, your notes help you compare season, weather, maturity, and processing rather than relying on memory alone.
How quickly should fresh tea leaves be processed?
There is no single universal deadline because processing goals differ. Start the planned process as soon as you reasonably can, especially if the leaves are warm, bruised, or piled. If you are deliberately withering leaves for olong or black tea, begin that controlled step promptly and monitor the leaves rather than leaving them unattended.
Do not assume refrigeration is a universal fix. Cold storage may slow some changes but can also create condensation or handling issues. For a small harvest, the most reliable method is to pick only what you can process in the planned session.
🧮 Harvest Yield, Labor, and Small-Scale Production Planning
Hand-plucking gives you more control, but it takes time. Shears speed collection, but sorting may take longer and the resulting leaf can be less uniform. The right method depends on your batch size, available labor, garden layout, and quality goal.
| Production choice | Potential advantage | Possible cost |
|---|---|---|
| Selective hand-plucking | Better control over maturity and leaf condition | More time per batch |
| Shearing | Faster collection from a manageable bush | More mixed maturity and extra sorting |
| Frequent selective harvests | Can keep shoots relatively young | Requires close monitoring and may stress plants if overdone |
| Longer intervals | More leaf available per picking | Greater chance of coarse or uneven material |
A peer-reviewed review discusses examples of different harvest intervals and their effects, but findings vary by region and study; they are not a schedule for every garden (source). Let plant growth and recovery determine frequency. Record the interval, inspect the bush, and adjust.
For planning, track:
- Time spent picking and sorting.
- Fresh-leaf weight.
- Dried-tea yield.
- Percentage of material rejected.
- Plant recovery and quality of the next flush.
❌ Common Tea-Picking Mistakes and How to Fix Them
| Mistake | Why it causes trouble | Better approach |
|---|---|---|
| Picking by calendar alone | Flush timing varies with weather and cultivar | Inspect shoots and plant condition |
| Mixing tender and coarse shoots | Uneven raw material processes inconsistently | Set one plucking standard per batch |
| Crushing leaves into a bag | Compression and heat can change leaf condition | Use a shallow, roomy container |
| Harvesting a stressed plant | Removes growth when the plant needs recovery | Wait for healthy new shoots |
| Taking too much from a young bush | Can weaken future structure and growth | Harvest lightly or let the plant establish |
| Using shears without sorting | Adds coarse leaf, stems, and uneven shoots | Sort carefully after cutting |
| Leaving picked leaf in the sun | Heat and drying can become uncontrolled | Move it to a shaded processing area |
| Expecting a cultivar name to guarantee flavor | Environment and processing still matter | Record conditions and taste each batch |
The most expensive mistake is usually not a tool choice; it’s skipping the notes. Without a record, each harvest becomes a fresh mystery. Keep a simple log and future-you will thank present-you over a cup of tea.
✅ Practical Tips for Better Artisanal Tea Harvests
- Choose the tea style first. Then select the leaf maturity and handling method to suit it.
- Use bud plus two young leaves as a starting standard for many small-batch experiments, not a rule for every tea.
- Harvest only healthy, dry shoots.
- Keep leaf cool, shaded, and loose while you work.
- Pick selectively by hand when quality control matters more than speed.
- Use shears only when appropriate, then sort the leaf carefully.
- Leave enough foliage for recovery. Young plants need time to establish.
- Record cultivar, weather, date, plucking standard, and yield.
- Process a manageable quantity. A small successful batch teaches more than a large neglected one.
- Taste, take notes, and change one variable at a time.
For more garden-to-cup guidance, browse Best Tea Picking Practices, Green Tea Cultivation, and Fertilizers for Tea Plants.
🔗 Recommended Links
-
Tea-plant growing and harvesting
-
Artisanal tea-making examples
-
Useful small-batch tools
-
Tea books
-
The Story of Tea: A Cultural History and Drinking Guide on Amazon
❓ FAQ

How do you prune a tea plant to encourage new growth?
Prune tea plants to maintain a healthy shape and encourage manageable new shoots, but avoid cutting heavily into old wood without a clear reason. For a home plant, remove dead, damaged, or crossing branches with clean tools, and make any larger shaping cuts when local growing conditions allow the plant time to recover.
Tea is often maintained as a low, branching shrub in production, but pruning systems vary by region and purpose. For general shrub-pruning technique, see University of Minnesota Extension. If your plant is young or stressed, prune conservatively and allow it to build structure before harvesting heavily.
Read more about “✂️ Prune Tea Plants for More Healthy Leaves”
When is the best time to harvest tea leaves?
The best time is when the plant is actively producing healthy, tender shoots that match your intended tea style. Flush timing depends on climate, cultivar, growing conditions, and plant health, so inspect the shoots instead of relying on a fixed month.
Harvest when leaves are dry if possible, and avoid taking a substantial crop from a stressed plant. For more detail, see our guide to when and how to harvest tea leaves.
Read more about “When to Pick Tea Leaves for Best Quality 🍃”
When is the best time to harvest tea leaves for artisanal tea production?
Harvest during a healthy flush, once the shoots have reached the maturity your chosen process needs. Many makers use a bud-and-two-leaf standard as a practical starting point, but some olong styles use more mature leaves, and specialty teas can use more selective plucks.
The key is matching maturity to the process and harvesting consistently. A research review finds that season and plucking standard can affect tea composition and sensory quality, but the results vary across production conditions (peer-reviewed review).
Read more about “🍃 How to Harvest Tea Leaves: The Ultimate 2026 Guide”
Which tea leaves should you pick to make high-quality homemade tea?
For many small-batch teas, start with healthy shoots containing a bud and two young leaves. Avoid diseased, heavily damaged, wet, or woody material. If you’re making olong, a somewhat more mature leaf may suit your chosen style; Kyoto Obubu Tea Farms describes using lower leaves in its home olong guide.
Keep the batch uniform and process it promptly. High quality starts with healthy leaf, but it also depends on handling and processing.
How do you hand-pick tea leaves without damaging the tea plant?
Use your thumb and forefinger to pinch or snap the shoot cleanly at the point that matches your plucking standard. Hold the shoot gently, avoid crushing the bud, and leave healthy foliage and growing points on the bush. Move evenly through the plant rather than stripping one area bare.
A tea-harvesting review describes a careful “tiger’s mouth” technique for removing shoots while limiting damage (source). The exact grip matters less than a controlled, gentle removal.
Read more about “12 Tea Leaf Harvesting Techniques for Beginners 🍃”
How often can you harvest leaves from your own tea plants?
Harvest according to active growth and the plant’s recovery, not a fixed weekly schedule. Some commercial regions use short intervals during vigorous growth, but those practices depend on climate, cultivar, labor, and field management. They should not be applied automatically to a potted or young home plant.
Wait until the plant has produced a healthy flush and avoid repeatedly taking too much foliage. Record your harvest dates and check whether new shoots remain vigorous afterward. If growth slows or leaves look stressed, give the plant time to recover.
Read more about “How to Protect Tea Plants From Pests & Disease 🌿”
Can you make artisanal tea from tea leaves picked with shears?
Yes. Shears can provide useful material, especially for small gardens, but they are less selective than hand-plucking. Sort the harvest for maturity, stems, and damaged leaves before processing. Research comparing harvest methods reports quality differences in some studies, while recognizing that shearing and machines can improve productivity (review).
Should tea leaves be washed after harvesting?
Do not wash clean leaves as a routine step. Washing adds moisture and may bruise the leaf or disrupt the processing plan. If leaves are contaminated with soil or other material, it is usually better to reject the affected material rather than wash the whole batch. Always keep harvest tools and containers clean.
Read more about “How to Harvest and Process Tea at Home 🍃”
Can you harvest tea leaves after rain?
You can, but it is usually better to wait until the leaves are dry when conditions allow. Wet leaves can be harder to handle and may complicate withering or drying. If rain is unavoidable, keep the harvest loose and process it with close attention to excess moisture.
Read more about “6 Best Practices for Tea Leaf Cultivation & Harvest 🍃”
📚 Reference Links
- FAO: Tea markets and trade
- Kew Science: Plants of the World Online
- Royal Horticultural Society: Camellia growing guide
- Peer-reviewed review of tea harvesting methods and quality
- Smith Teamaker: Origin Report—Okumidori Matcha
- Kyoto Obubu Tea Farms: Processing your own olong
- University of Minnesota Extension: Pruning trees and shrubs
- University of California Integrated Pest Management
- USDA National Organic Program
- National Center for Complementary and Integrative Health: Tea