Support our educational content for free when you purchase through links on our site. Learn more
🌱 How Often to Fertilize Tea Plants: The 2026 Guide for Optimal Soil Health

To keep your Camellia sinensis thriving without burning its roots, you should fertilize mature tea plants 2 to 3 times a year during the growing season, while seedlings need a gentle feed every 4 to 6 weeks. If you are wondering how often should I fertilize my tea plants for optimal soil health, the answer lies in mimicking nature: stop feeding in winter, focus on spring and early summer, and always prioritize organic matter over quick chemical fixes.
We once watched a well-meaning grower dump a bag of synthetic nitrogen on a young bush, thinking “more is better.” Within a week, the leaves turned a sickly yellow, and the plant went into shock. It wasn’t starving; it was drowning in salts. Tea plants are actually quite modest eaters, preferring a slow, steady diet of organic nutrients that feed the soil microbes first.
Did you know that a single teaspoon of healthy garden soil contains more living organisms than there are people on Earth? Your tea plant relies on this microscopic workforce to unlock nutrients, which is why over-fertilizing can actually starve your plant by killing the very helpers it needs.
Key Takeaways
- Mature plants need feeding 2–3 times per year (Spring, Early Summer, optional Late Summer), while seedlings require light feeding every 4–6 weeks.
- Stop fertilizing completely in late autumn and winter to prevent weak growth that will die in the frost.
- Organic fertilizers are superior for long-term soil health, building a living ecosystem rather than just feeding the plant directly.
- Soil pH must stay between 4.5 and 6.0; if the soil is too alkaline, no amount of fertilizer will be absorbed.
- Always water the soil thoroughly before applying any fertilizer to prevent dangerous root burn.
Table of Contents
- ⚡️ Quick Tips and Facts
- 📜 A Brief History of Tea Plant Nutrition: From Ancient Roots to Modern Gardens
- 1. The Golden Rule: How Often to Fertilize Tea Plants by Growth Stage
- 2. Seasonal Rhythms: Adjusting Your Fertilizing Regimen Through the Year
- 3. Decoding the N-P-K Ratio: What Your Camellia sinensis Actually Craves
- 4. Organic vs. Synthetic: Choosing the Best Fertilizer for Soil Health
- 5. Micronutrients: The Unsung Heroes of Vibrant Tea Leaves
- 6. Application Mastery: Root Drenching vs. Foliar Feding Techniques
- 7. The Art of Timing: When to Fertilize for Maximum Absorption
- 8. Spoting the Red Flags: Recognizing Over-Fertilization Symptoms
- 9. The Recovery Plan: Fixing Salt Burn and Nutrient Toxicity
- 10. Soil pH and Tea Plants: The Acidic Balance You Can’t Ignore
- 1. Container vs. Ground: Special Fertilizing Needs for Potted Tea
- 12. Compost Tea and Liquid Feds: Boosting Microbial Life
- 13. Common Pitfalls: What New Growers Get Wrong About Tea Nutrition
- 14. Safety First: Handling Fertilizers Without Harming Yourself or Your Plant
- 15. Regional Nuances: Fertilizing Assam, Darjeling, and Ceylon Varieties
- 🌱 Conclusion
- 🔗 Recommended Links
- ❓ FAQ
- 📚 Reference Links
⚡️ Quick Tips and Facts
Before we dive into the nitty-gritty of fertilizer schedules, let’s hit the ground running with the absolute essentials. If you remember nothing else from this article, remember these golden nugets of wisdom from our tea fields:
- Less is More: Tea plants (Camellia sinensis) are not gluttons. They prefer a “grazing” diet over a “feast.” Over-fertilizing is the fastest way to kill your plant, not the slowest.
- The Acid Test: Tea plants hate alkaline soil. If your soil pH is above 6.5, no amount of fertilizer will help; the nutrients will just sit there, locked away. Always check your pH first! Learn more about the best soil for tea here.
- Seasonal Rhythm: Stop feeding in late autumn and winter. Your tea plant is sleeping, not eating. Feding it now is like trying to feed a hibernating bear—it will just get sick.
- The “Finger Test” Applies to Fertilizer Too: Never apply fertilizer to dry soil. Always water the plant thoroughly first to prevent root burn.
- Young vs. Old: Seedlings need a gentle, frequent touch. Mature bushes need a heavier, less frequent dose.
| Plant Stage | Frequency | Key Nutrient Focus |
|---|---|---|
| Seedling (0-6 months) | Every 4-6 weeks (Diluted) | Nitrogen (N) for leaf growth |
| Juvenile (6-18 months) | Every 6-8 weeks | Balanced N-P-K |
| Mature (18+ months) | 2-3 times per year (Spring/Summer) | Balanced, slightly higher N |
| Dormant (Winter) | STOP | None |
📜 A Brief History of Tea Plant Nutrition: From Ancient Roots to Modern Gardens

You might think the science of fertilizing tea is a modern invention, but the Chinese have been mastering this art for thousands of years. In ancient China, tea wasn’t just a drink; it was a ritual, and the soil was treated with the same reverence as the tea leaves themselves.
Early growers noticed that tea bushes thrived in the acidic, leaf-litter-rich soils of the mountainous regions. They didn’t have N-P-K charts back then; they had compost, manure, and ash. They understood that the forest floor, covered in decaying leaves, created a slow-release buffet for the tea roots.
Fast forward to the 19th century, when tea cultivation exploded in India and Sri Lanka (Ceylon). The British colonial planters, eager for maximum yield, introduced synthetic fertilizers. This was a game-changer for production volume, but it often came at the cost of soil health. The soil became compacted, acidic to the point of toxicity, and reliant on chemical inputs.
Today, at Growing Teas™, we’ve come full circle. We blend the ancient wisdom of organic matter with modern soil science. We know that soil health isn’t just about the plant; it’s about the billions of microbes living in the dirt that actually make the nutrients available to the plant. As the video we love to reference on soil health suggests, keeping the soil covered and fed with organic matter is the secret to a resilient garden. Watch our featured video on building soil health.
1. The Golden Rule: How Often to Fertilize Tea Plants by Growth Stage
The question “How often?” doesn’t have a single answer. It depends entirely on where your plant is in its life cycle. Think of it like human nutrition: a baby needs milk every few hours, a teenager needs a massive meal once a day, and a senior citizen needs smaller, nutrient-dense meals.
Seedlings: The Delicate Start
When your Camellia sinensis is a tiny seedling, its root system is fragile. It’s exploring the world, and it needs a gentle nudge.
- Frequency: Every 4 to 6 weeks.
- Method: Use a half-strength liquid fertilizer. If the label says 1 tablespoon per gallon, use 1/2 tablespoon.
- Why? Young plants are sprinters. They need nitrogen to push out those first vibrant green leaves, but their roots can’t handle a heavy dose. Too much fertilizer will “burn” the tender roots, stunting growth or killing the plant.
Juvenile Plants: Finding Their Feet
Once your plant is about 6 to 18 months old, it’s establishing its structure. It’s growing taller and putting down deeper roots.
- Frequency: Every 6 to 8 weeks.
- Method: You can bump it up to full strength, but still monitor the plant’s reaction.
- Why? This is the transition phase. You want to encourage a strong root system without forcing the plant to put all its energy into leaves at the expense of roots.
Mature Bushes: The Steady Producer
Your tea plant is now a mature bush, ready to produce harvestable leaves. It has a robust root system and a defined shape.
- Frequency: 2 to 3 times per year.
First Feed: Early Spring (just as new buds break).
Second Feed: Early Summer (to support the flush).
Third Feed (Optional): Late Summer (only if the plant looks vigorous and the season is long). - Why? Mature plants don’t need constant feeding. They need a “boost” to start the season and a “top-up” to finish it. Over-feeding a mature bush leads to excessive, weak growth that is prone to disease.
Pro Tip: If you are growing tea in containers, you will need to fertilize more frequently than in-ground plants because the soil volume is limited, and nutrients wash out with every watering. Check your potted plants every 4-5 weeks during the growing season.
2. Seasonal Rhythms: Adjusting Your Fertilizing Regimen Through the Year
Nature has a rhythm, and your fertilizer schedule must dance to its tune. Ignoring the seasons is like wearing a winter coat in July—it just doesn’t make sense.
Spring: The Awakening
As the days get longer and temperatures rise, your tea plant wakes up. This is the most critical time for fertilization.
- Action: Apply a balanced fertilizer (like 10-10-10 or an organic equivalent) as soon as you see the first new buds swelling.
- Goal: Fuel the initial flush of growth. This is when you want the most tender, flavorful leaves.
- Caution: Don’t rush! If a late frost is predicted, wait. Fertilizing right before a frost can encourage tender growth that will get nipped by the cold.
Summer: The Growth Spurt
Summer is when the plant is in full swing. It’s photosynthesizing like crazy.
- Action: If you have a long growing season, a second application in early summer (June/July) can beneficial.
- Focus: Watch out for heat stress. If it’s a scorching summer, the plant might go into a semi-dormant state. In that case, skip the fertilizer and focus on watering.
- Tip: This is a great time to use compost tea for a gentle nutrient boost that won’t stress the plant in the heat.
Autumn: The Wind Down
As the days shorten and temperatures drop, the plant prepares for winter.
- Action: Stop fertilizing by late August or early September (depending on your climate).
- Why? You don’t want to encourage new growth right before winter. New growth is soft and susceptible to frost damage. The plant needs to harden off its existing wood.
- Exception: You can apply a layer of mulch or a very light application of slow-release organic matter to protect the roots, but avoid high-nitrogen fertilizers.
Winter: The Great Sleep
Your tea plant is dormant. It’s not growing; it’s resting.
- Action: Zero fertilizer.
- Why? Feding a dormant plant is a waste of money and a risk to the plant’s health. The roots aren’t active enough to absorb the nutrients, and the salts will just build up in the soil.
3. Decoding the N-P-K Ratio: What Your Camellia sinensis Actually Craves
You’ve probably seen those three numbers on fertilizer bags: N-P-K. But what do they actually mean for your tea plant? Let’s break it down.
- N (Nitrogen): The Leaf Maker. Nitrogen is responsible for that lush, dark green foliage we all love in tea plants. Since we grow tea for its leaves, nitrogen is our best friend. However, too much nitrogen can make the leaves taste bitter and reduce the plant’s disease resistance.
- P (Phosphorus): The Root & Bloom Booster. Phosphorus helps with root development and flowering. While we don’t necessarily want our tea plants to flower (flowers reduce leaf production), a healthy root system is non-negotiable.
- K (Potassium): The Health Shield. Potassium helps the plant regulate water, resist disease, and withstand stress (like heat or cold).
Recommended Ratios for Tea Plants
| Plant Goal | Ideal N-P-K Ratio | Why? |
|---|---|---|
| Leaf Production (General) | 3-1-2 or 4-1-2 | High Nitrogen for leaves, moderate Potassium for health, low Phosphorus. |
| Young Plants | 1-1-1 (Balanced) | Needs a bit of everything to build structure. |
| Flowering Control | Low P | High Phosphorus encourages flowers; keep it low to focus on leaves. |
| Stress Recovery | High K | Boosts disease resistance and water regulation. |
Our Recommendation: Look for fertilizers specifically labeled for Acid-Loving Plants (like Azaleas, Camellias, or Rhodendrons). These usually have a ratio like 10-10-10 or 12-6-6, which is perfect for tea. Avoid fertilizers with high Phosphorus (the middle number) unless you are trying to fix a specific deficiency.
Did you know? The “Guaranteed Analysis” on the bag tells you the percentage of each nutrient by weight. A 10-10-10 fertilizer contains 10% Nitrogen, 10% Phosphorus, and 10% Potassium.
4. Organic vs. Synthetic: Choosing the Best Fertilizer for Soil Health
This is the great debate in the tea growing world. Which one is better? The answer isn’t black and white; it depends on your goals.
Organic Fertilizers: The Slow Cook
Organic fertilizers come from natural sources like bone meal, blood meal, fish emulsion, and compost.
- Pros:
Soil Health: They feed the microbes in the soil, which in turn feed the plant. This builds a living, breathing soil ecosystem.
Safety: Very low risk of burning the plant. You can’t really “over-fertilize” with organic matter if you use it reasonably.
Long-term: Improves soil structure, water retention, and aeration over time. - Cons:
Slow Release: It takes time for the nutrients to break down. You won’t see results overnight.
Inconsistency: The nutrient content can vary from batch to batch.
Smell: Some organic fertilizers (like fish emulsion) can smell… distinct.
Synthetic Fertilizers: The Fast Food
Synthetic fertilizers are chemically manufactured to provide immediate nutrients.
- Pros:
Speed: You see results in days. Great for fixing a sudden deficiency.
Precision: You know exactly how much of each nutrient you are applying.
Cost: Generally cheaper per pound of nutrient. - Cons:
Burn Risk: High risk of root burn if applied incorrectly.
Soil Degradation: Long-term use can kill beneficial soil microbes and lead to soil compaction.
Leaching: Nutrients can wash away quickly, polluting groundwater.
Our Verdict
For the home grower who cares about optimal soil health, we strongly recommend organic fertilizers. They align with the natural cycle of the tea plant and build a resilient garden. If you need a quick fix, a small dose of synthetic is okay, but make organic your primary strategy.
👉 CHECK PRICE on:
- Espoma Organic Acid-Lover Plant Food: Amazon | Espoma Official
- Dr. Earth Organic Tea Tree Fertilizer: Amazon | Dr. Earth Official
5. Micronutrients: The Unsung Heroes of Vibrant Tea Leaves
While Nitrogen, Phosphorus, and Potassium are the stars of the show, the micronutrients are the supporting cast that make the performance perfect. Without them, your tea plant can suffer from hidden deficiencies that stunt growth or ruin flavor.
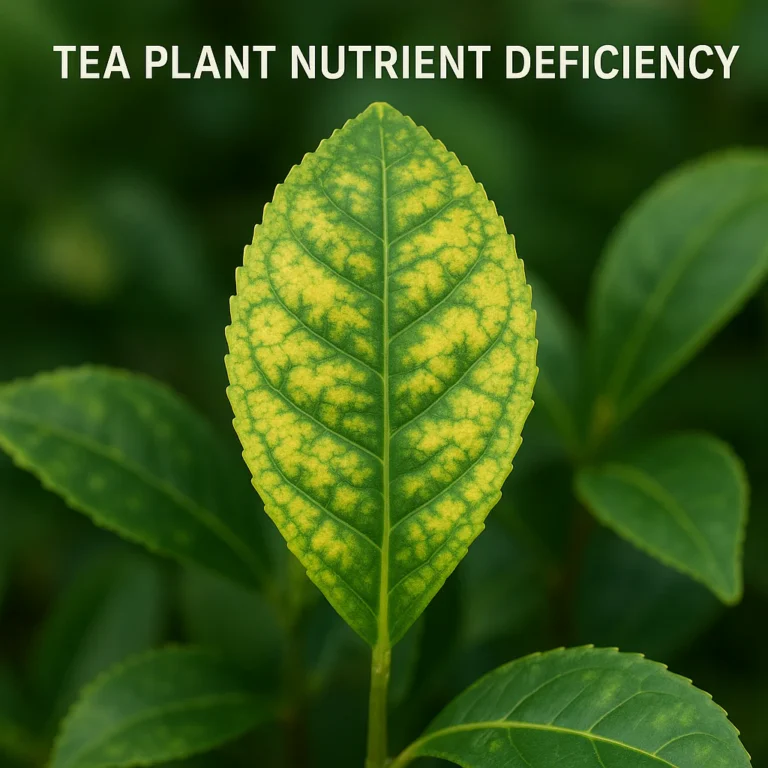
- Magnesium (Mg): Essential for chlorophyll production. If your leaves are turning yellow between the veins (chlorosis), you might be low on magnesium.
- Calcium (Ca): Strengthens cell walls. Helps the plant resist disease and stress.
- Iron (Fe): Crucial for young leaf development. Iron deficiency causes pale, yellow leaves with green veins.
- Manganese (Mn) & Zinc (Zn): Important for enzyme function and overall plant metabolism.
How to Get Them:
Most high-quality organic fertilizers contain a good mix of micronutrients. If you are using synthetic fertilizers, look for one that includes a “micronutrient blend.” Alternatively, you can use Epsom salts (Magnesium Sulfate) as a foliar spray for a quick magnesium boost.
Fun Fact: The flavor profile of your tea is heavily influenced by the soil’s mineral content. A tea grown in soil rich in specific micronutrients can have a more complex and nuanced taste!
6. Application Mastery: Root Drenching vs. Foliar Feding Techniques
You’ve picked your fertilizer. Now, how do you get it to the plant? There are two main methods, and knowing when to use which is key.
Root Drenching: The Standard Approach
This is the most common method. You apply the fertilizer to the soil, and the roots absorb it.
- Best For: Regular feeding, long-term nutrition, and slow-release fertilizers.
- How-To:
- Water the plant thoroughly first (crucial step!).
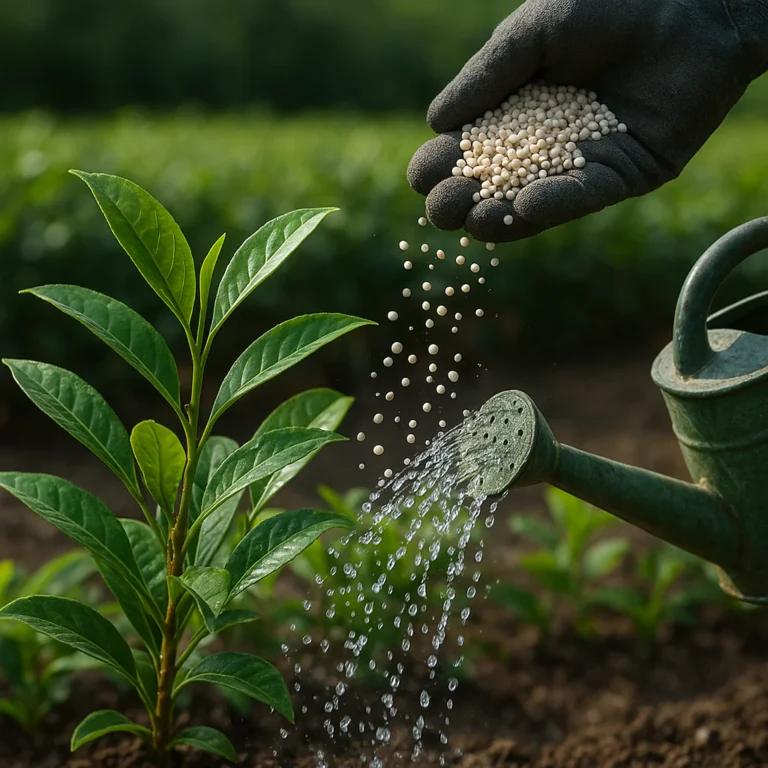
- Apply the fertilizer solution or granules around the drip line of the plant (the edge of the canopy), not right against the stem.
- Water again to help the nutrients penetrate the soil.
- Why the Drip Line? That’s where the “feder roots” are located. The main trunk roots are structural; the feeder roots do the eating.
Foliar Feding: The Quick Fix
This involves spraying a diluted fertilizer solution directly onto the leaves.
- Best For: Correcting immediate deficiencies (like yellowing leaves) or giving a quick boost during stress.
- How-To:
- Mix the fertilizer at half-strength or less.
- Spray early in the morning or late in the evening to avoid sunburn.
- Cover both the tops and bottoms of the leaves.
- Pros: Nutrients are absorbed almost immediately.
- Cons: It doesn’t build soil health. It’s a temporary fix, not a long-term solution.
Warning: Never foliar feed during the heat of the day. The water droplets can act like magnifying glasses and burn the leaves!
7. The Art of Timing: When to Fertilize for Maximum Absorption
Timing isn’t just about the season; it’s about the time of day and the state of the soil.
- Moist Soil is a Must: Never apply fertilizer to dry soil. Dry soil acts like a sponge that sucks up the salts too quickly, causing root burn. Always water the plant 24 hours before fertilizing.
- Time of Day: Early morning is best. The plant is waking up and ready to absorb nutrients. Avoid fertilizing in the heat of the afternoon or at night (which can encourage fungal issues).
- Weather Watch: Don’t fertilize if heavy rain is forecasted immediately. You’ll just wash the nutrients away. Wait for a dry spell.
8. Spoting the Red Flags: Recognizing Over-Fertilization Symptoms
We’ve said it before, and we’ll say it again: Over-fertilizing is the enemy. How do you know if you’ve gone too far?
- Leaf Burn: The tips and edges of the leaves turn brown and crispy. This is the classic sign of salt buildup.
- Yellowing Leaves: Paradoxically, too much fertilizer can cause yellowing. The plant can’t absorb nutrients properly when the soil is too salty.
- White Crust: A white, crusty layer on the soil surface is a dead giveaway of salt accumulation.
- Wilting: If the plant looks wilted even though the soil is wet, the roots might be damaged by fertilizer burn.
- Stunted Growth: Instead of growing faster, the plant stops growing or produces small, weak leaves.
Quote from the experts: “Over-fertilizing is like crashing the afterparty—it’s just too much when the plant’s trying to chill.”
9. The Recovery Plan: Fixing Salt Burn and Nutrient Toxicity
Did you accidentally over-fertilize? Don’t panic! Here is the recovery protocol:
- Stop Immediately: Cease all fertilization.
- Flush the Soil: This is the most important step. Water the plant heavily with clean water. You want to run water through the soil for 10-15 minutes to leach out the excess salts. Do this every few days for a week.
- Remove Crust: If there’s a white crust on the soil, gently scrape it off and replace it with fresh soil.
- Prune: Trim away the most damaged leaves to help the plant focus its energy on recovery.
- Wait: Give the plant 3 to 4 weeks to recover before attempting to fertilize again.
For potted plants, if the damage is severe, you may need to repot with fresh, nutrient-free soil.
10. Soil pH and Tea Plants: The Acidic Balance You Can’t Ignore
You can fertilize your tea plant every day, but if the pH is wrong, the plant won’t eat a single bite. Tea plants are acid-loving plants. They thrive in a pH range of 4.5 to 6.0.
- The Problem: If your soil pH is above 6.5 (neutral or alkaline), nutrients like Iron and Manganese become “locked out.” The plant can’t access them, leading to chlorosis (yellowing leaves).
- The Solution: Test your soil pH regularly. If it’s too high, you can lower it by:
- Adding elemental sulfur.
- Using acidic mulch like pine needles or pine bark.
- Applying aluminum sulfate (use with caution).
- Using fertilizers specifically formulated for acid-loving plants.
Pro Tip: Rainwater is naturally slightly acidic. If you use tap water, it might be too alkaline. Leting tap water sit for 24 hours can help dissipate chlorine, but it won’t change the pH much. Consider using a pH test kit to monitor your water source.
1. Container vs. Ground: Special Fertilizing Needs for Potted Tea
Growing tea in a pot is like living in a studio apartment: space is limited, and resources run out fast.
- Frequency: Potted plants need fertilizer more often than in-ground plants. Because the soil volume is small, nutrients wash out with every watering.
- Type: Use a slow-release granular fertilizer mixed into the soil at planting time, supplemented with liquid fertilizer every 4-6 weeks.
- Leaching: Pots drain quickly, which is good for preventing root rot but bad for retaining nutrients. You need to be diligent about re-applying.
- Root Bound: If your tea plant is root-bound, it won’t absorb nutrients well. Repot it into a slightly larger container with fresh soil before fertilizing.
12. Compost Tea and Liquid Feds: Boosting Microbial Life
If you want to take your soil health to the next level, compost tea is your best friend. It’s a liquid extract of compost that is rich in beneficial microbes and nutrients.
- Benefits:
- Introduces beneficial bacteria and fungi to the soil.
- Provides a gentle, balanced feed.
- Improves soil structure and water retention.
- How to Make It:
- Fill a burlap sack with high-quality compost.
- Dunk it in a bucket of dechlorinated water.
- Add a spoonful of molasses (food for the microbes).
- Let it steep for 3-5 days, stirring occasionally to keep it oxygenated.
- Dilute 1:10 with water and apply to the soil or as a foliar spray.
Quote: “Your homemade brew might not smell pleasant but don’t worry…your plants will absolutely adore it!”
👉 CHECK PRICE on:
13. Common Pitfalls: What New Growers Get Wrong About Tea Nutrition
Let’s learn from the mistakes of others so you don’t have to make them yourself.
- Mistake 1: Fertilizing in Winter. This is the #1 mistake. Your plant is sleeping. Feding it now causes weak growth that will die in the frost.
- Mistake 2: Ignoring pH. Applying fertilizer to alkaline soil is a waste of money. Fix the pH first!
- Mistake 3: Using High-Phosphorus Fertilizers. Tea plants don’t need massive amounts of phosphorus. Too much can actually inhibit the uptake of other nutrients.
- Mistake 4: Fertilizing Dry Soil. This leads to root burn. Always water first.
- Mistake 5: Over-reliance on Synthetic Fertilizers. This kills the soil life. Mix in organic matter regularly.
14. Safety First: Handling Fertilizers Without Harming Yourself or Your Plant
Fertilizers are chemicals, and they should be treated with respect.
- Wear Gloves: Always wear gloves when handling granular or liquid fertilizers to protect your skin.
- Eye Protection: If you are mixing powders, wear safety glasses to prevent dust from getting in your eyes.
- Keep Away from Pets and Kids: Store fertilizers in a locked cabinet or high shelf.
- Read the Label: Follow the instructions on the package. More is not better.
- Ventilation: If you are mixing fertilizers indoors, ensure the area is well-ventilated.
15. Regional Nuances: Fertilizing Assam, Darjeling, and Ceylon Varieties
While the basic principles apply to all Camellia sinensis varieties, there are some nuances based on the origin.
- Assam: Grown in hot, humid climates with heavy rainfall. These plants are vigorous and may benefit from a slightly higher nitrogen feed during the long growing season. However, heavy rains can leach nutrients quickly, so frequent, light applications are better than heavy ones.
- Darjeling: Grown in cooler, mountainous regions. These plants have a shorter growing season. Focus on a strong spring feed to maximize the first flush, and stop early in the autumn to allow for dormancy.
- Ceylon: Grown in varied climates in Sri Lanka. These plants are generally hardy. A balanced approach works best, with adjustments based on local rainfall patterns.
Insight: The flavor profile of the tea is influenced by the teroir, including the soil nutrients. A well-nourished Assam plant produces a robust, malty tea, while a Darjeling plant needs a delicate balance to produce its famous muscatel flavor.
🌱 Conclusion

So, how often should you fertilize your tea plants? The answer is: It depends. But now you have the tools to figure it out.
- Young plants: Every 4-6 weeks with a gentle feed.
- Mature plants: 2-3 times a year, focused on spring and early summer.
- Winter: Stop completely.
- Method: Root drenching is the standard; foliar feeding is for quick fixes.
- Type: Organic is best for long-term soil health, but synthetics have their place for quick corrections.
- Key: Always check your soil pH and moisture before applying anything.
Remember, tea plants are resilient but sensitive. They don’t need a feast; they need a balanced diet. By following these guidelines, you’ll be rewarded with lush, healthy leaves and the most delicious homegrown tea you’ve ever tasted.
Final Thought: Don’t be afraid to experiment. Every garden is unique. Observe your plants, listen to what they tell you, and adjust your schedule accordingly. Happy growing!
🔗 Recommended Links
Here are some top-rated products and resources to help you on your tea growing journey:
- Espoma Organic Acid-Lover Plant Food: Amazon | Espoma Official
- Dr. Earth Organic Tea Tree Fertilizer: Amazon | Dr. Earth Official
- XLUX T10 Soil Moisture Meter: Amazon
- Compost Tea Brewing Kits: Amazon | Etsy
- Books: The Tea Plantation: A Guide to Growing Your Own Tea (Available on Amazon)
❓ FAQ

What is the best fertilizer for tea plants in acidic soil?
The best fertilizer for tea plants in acidic soil is one specifically formulated for acid-loving plants (like Azaleas, Camellias, and Rhodendrons). Look for an N-P-K ratio of around 10-10-10 or 12-6-6, with a higher emphasis on Nitrogen. Organic options like blood meal, bone meal, and fish emulsion are excellent choices as they also help maintain soil acidity.
Read more about “🌱 13 Essential Nutrients for Perfect Tea Soil (2026)”
How does fertilizing frequency change with the seasons for tea bushes?
Fertilizing frequency is highly seasonal. In spring, apply a balanced fertilizer to kickstart growth. In summer, you may apply a second dose if the plant is vigorous and the season is long. In autumn, stop fertilizing to allow the plant to harden off. In winter, do not fertilize at all as the plant is dormant.
Can over-fertilizing damage the flavor of my homegrown tea leaves?
Yes, absolutely. Over-fertilizing, especially with high Nitrogen, can lead to an excess of amino acids and a reduction in polyphenols, which can alter the flavor profile. It can make the tea taste bitter, astringent, or simply “flat.” Additionally, fertilizer burn can stress the plant, leading to off-flavors in the leaves.
Read more about “🌱 7 Best Fertilizers for Tea Plants (2026)”
What organic fertilizers are safe for maintaining tea plant soil health?
Safe organic fertilizers include compost, well-roted manure, blood meal (for nitrogen), bone meal (for phosphorus), kelp meal (for potassium and micronutrients), and compost tea. These materials feed the soil microbes, which in turn feed the plant, creating a sustainable cycle of health.
Read more about “🌱 7 Proven Ways to Stop Soil Erosion & Boost Tea Garden Quality (2026)”
📚 Reference Links
- Greg App: Tea Fertilizer Guide
- A Garden Diary: Compost Tea Feding Schedule
- Growing Teas™: What kind of soil is best for growing tea?
- Growing Teas™: Green Tea Cultivation
- Growing Teas™: Organic Farming Techniques
- Growing Teas™: Fertilizers for Tea Plants
- University of California Agriculture: Nutrient Management for Tea (General reference for nutrient management)
- Royal Botanic Gardens, Kew: Camellia sinensis Information